Engine Oil Cooler Hose/Pipe Replacement RWD
Removal Procedure
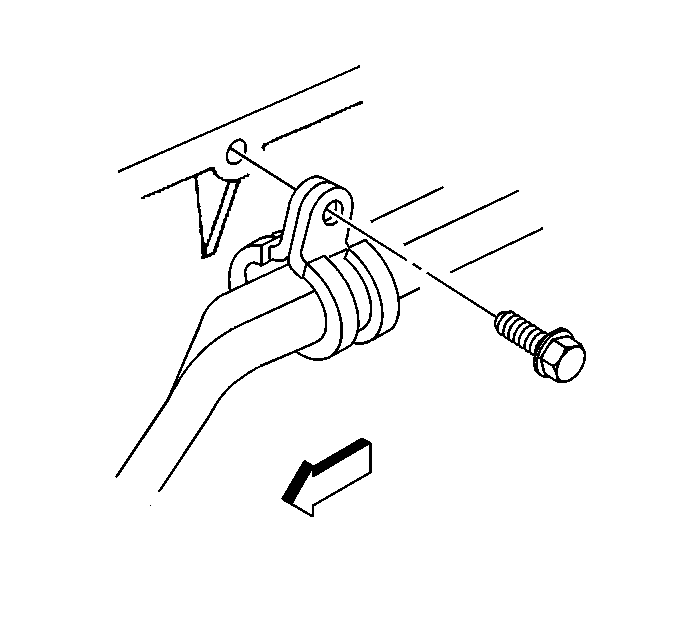
- Remove the engine oil cooler lines support clamp bolt.
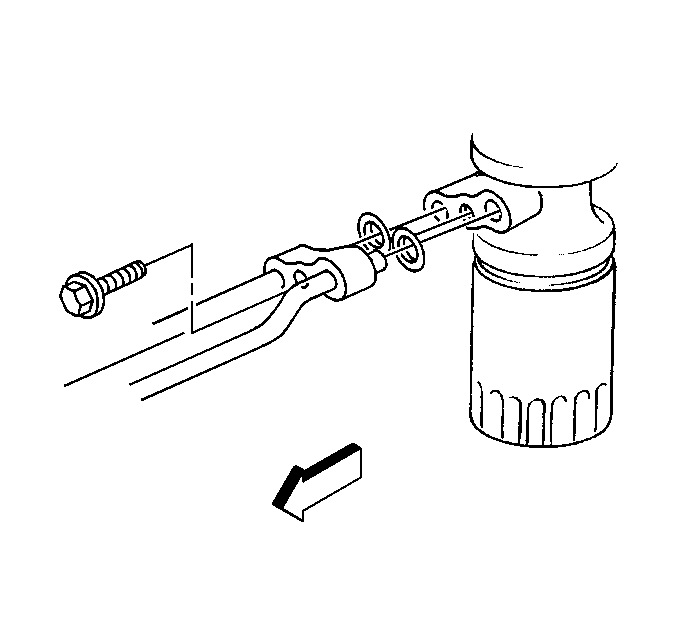
- Remove the bolt attaching the engine oil cooler lines to the oil filter adapter.
- Hold the cooler lines below the bottom of the radiator to drain the engine oil.
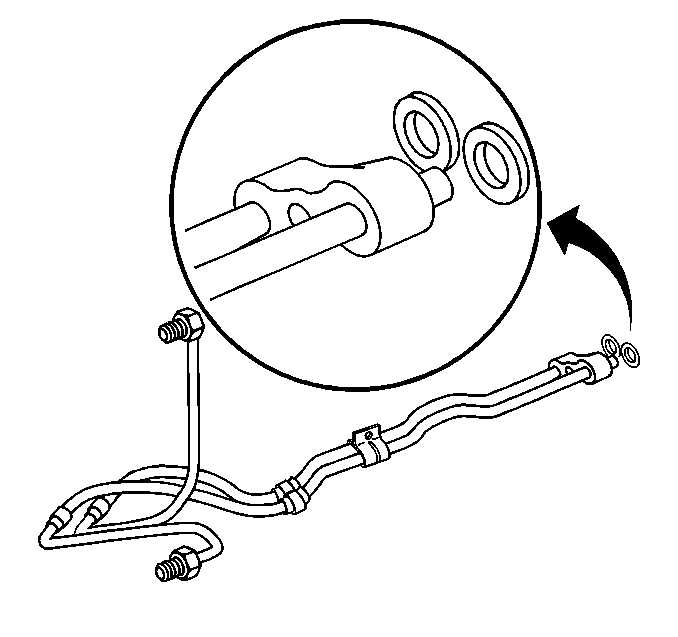
- Remove and discard the seals.
- Remove the engine oil cooler line retaining rings from the engine oil cooler line quick connectors at the radiator engine oil cooler inlet and outlet. Follow the next two steps for the proper retaining ring removal procedure.
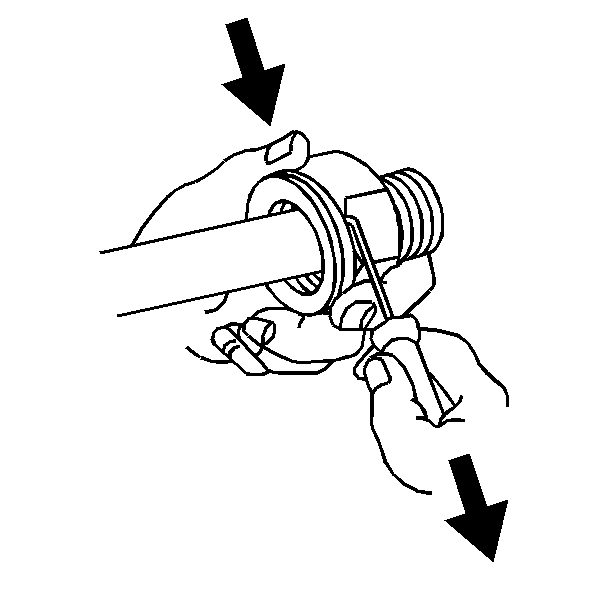
- Using a bent-tip screwdriver or equivalent, pull on one of the open ends of the retaining ring in order to rotate the retaining ring.
- Rotate the retaining ring around the quick connector until the retaining ring is out of position and can be completely removed.
- Remove the engine oil cooler lines from the quick connectors at the radiator engine oil cooler inlet and outlet.
- Clean all of the components in a suitable solvent, and dry them with compressed air.
- Inspect the fittings, the connectors, the cooler lines, and the cooler for damage, distortion, or restriction. Replace parts as necessary.
- Flush the engine oil cooler and engine oil cooler lines with the same type of engine oil normally circulating through the engine.
Important: Have a drain pan ready for the engine oil to drain into.
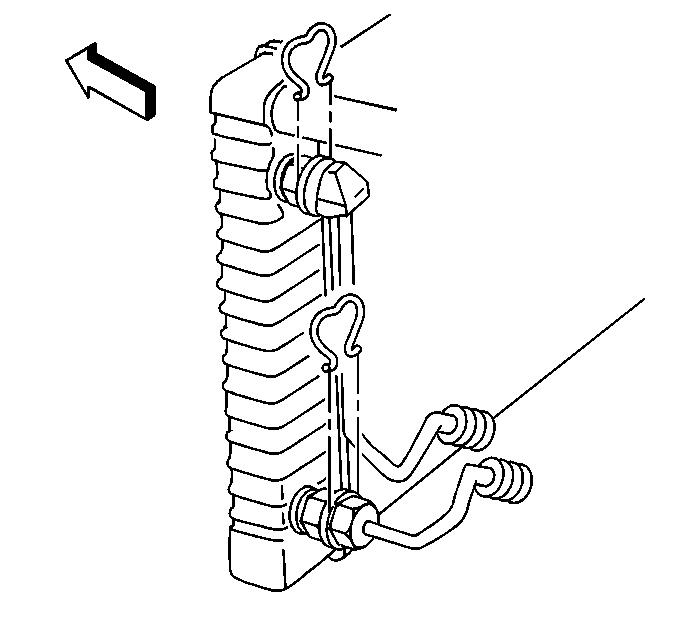
Discard the retaining rings.
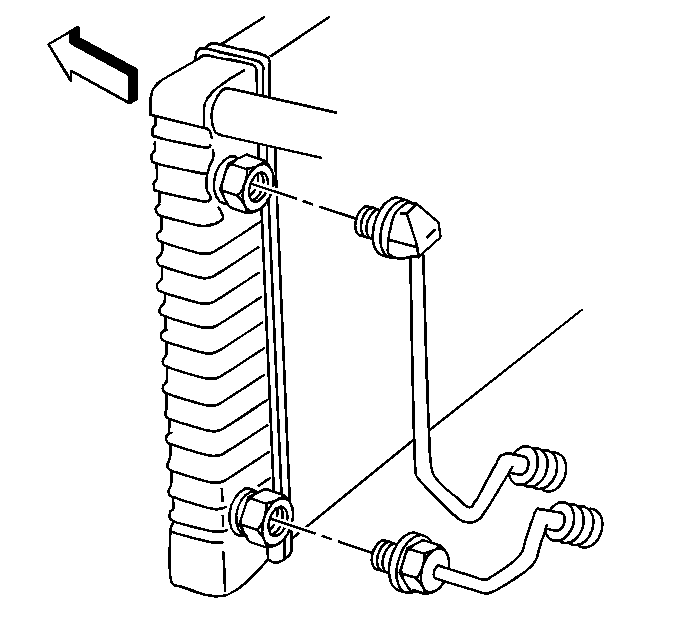
Pull the lines straight out from the connectors.
Installation Procedure
- Install new seals on the engine oil cooler lines at the engine oil filter adapter ends.
- Install the bolt attaching the engine oil cooler lines to the engine oil filter adapter.
- Install a new retaining ring (E-clip) into each quick connector at the radiator engine oil cooler by following the next three steps.
- Hook one of the open ends of the retaining ring in one of the slots in the quick connector.
- Rotate the retaining ring around the connector until the retaining ring is positioned with all three ears through the three slots.
- Ensure the three retaining ring ears can be seen from the inside of the connector and the retaining ring can move freely in the slots.
- Install the engine oil cooler lines into the quick connectors at the radiator engine oil cooler inlet and outlet until a click is heard or felt.
- Install the attaching clamp and the bolt.
- Inspect and fill the engine oil to the proper level.
- Start the engine and check for leaks.

Notice: Use the correct fastener in the correct location. Replacement fasteners must be the correct part number for that application. Fasteners requiring replacement or fasteners requiring the use of thread locking compound or sealant are identified in the service procedure. Do not use paints, lubricants, or corrosion inhibitors on fasteners or fastener joint surfaces unless specified. These coatings affect fastener torque and joint clamping force and may damage the fastener. Use the correct tightening sequence and specifications when installing fasteners in order to avoid damage to parts and systems.
Tighten
Tighten the bolt to 35 N·m (26 lb ft).
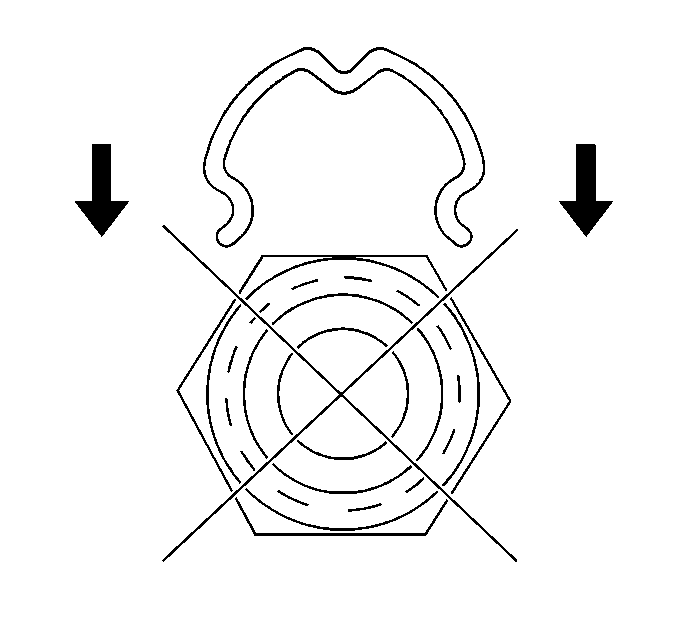
Important: When performing the following procedure, do not reuse the old retaining rings. Replace the old retaining rings with new ones.
Do not install the new retaining ring onto the fitting by pushing the retaining ring down over the fitting.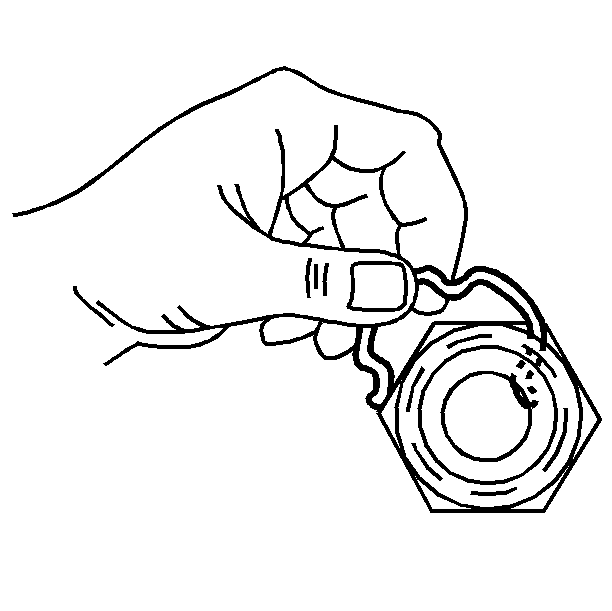
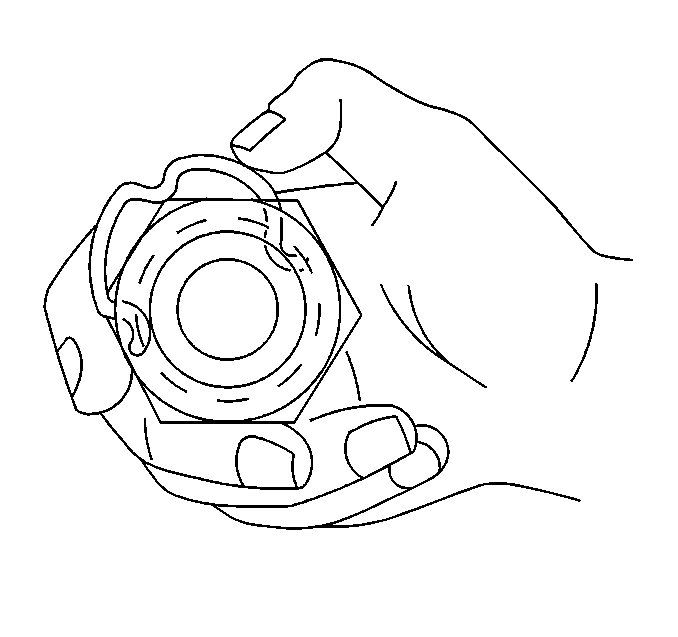
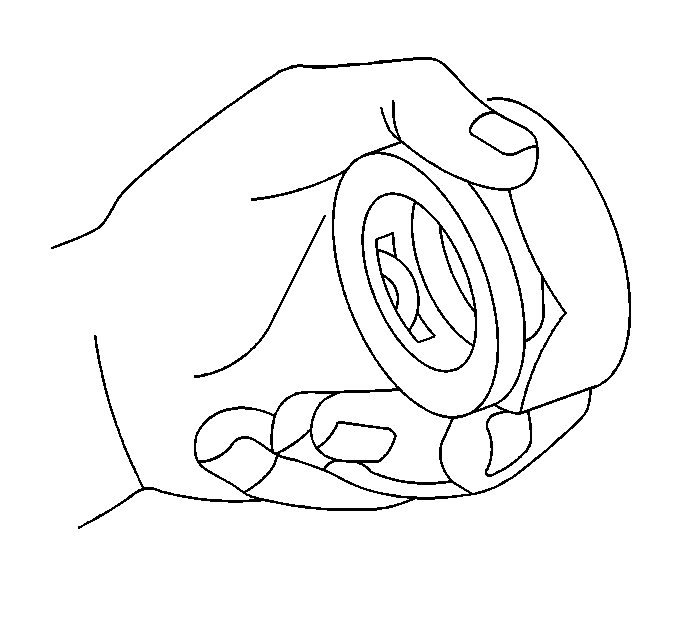

Pull back on the engine oil cooler lines to ensure a proper connection.

Tighten
Tighten the bolt to 10 N·m (89 lb in).
Engine Oil Cooler Hose/Pipe Replacement 4WD
Removal Procedure
- Remove the steering linkage shield. Refer to Steering Linkage Shield Replacement in Steering Linkage.
- Remove the bolt attaching the engine oil cooler lines to the remote (frame mounted) oil filter adapter.
- Remove and discard the seals.
- Remove the engine oil cooler line retaining rings from the engine oil cooler line quick connectors at the radiator engine oil cooler inlet and outlet. Follow the next two steps for the proper retaining ring removal procedure.
- Using a bent-tip screwdriver or equivalent, pull on one of the open ends of the retaining ring in order to rotate the retaining ring.
- Rotate the retaining ring around the quick connector until the retaining ring is out of position and can be completely removed.
- Remove the engine oil cooler lines from the quick connectors at the radiator engine oil cooler inlet and outlet.
- Remove the remote engine oil filter lines support clamp bolt.
- Remove the bolt attaching the remote engine oil filter lines to the remote (frame mounted) engine oil filter adapter.
- Hold the remote engine oil filter lines below the remote engine oil filter lines (engine mounted) adapter to drain the engine oil.
- Remove and discard the seals.
- Remove the bolt attaching the remote engine oil filter lines to the remote engine oil filter lines (engine mounted) adapter.
- Remove and discard the seals.
- Clean all of the components in a suitable solvent, and dry them with compressed air.
- Inspect the fittings, the connectors, the cooler lines, the cooler, the filter lines, and the remote filter adapter for damage, distortion, or restriction. Replace parts as necessary.
- Flush the engine oil cooler, the engine oil cooler lines, the remote engine oil filter adapter, and the remote engine oil filter lines with the same type of engine oil normally circulating through the engine.
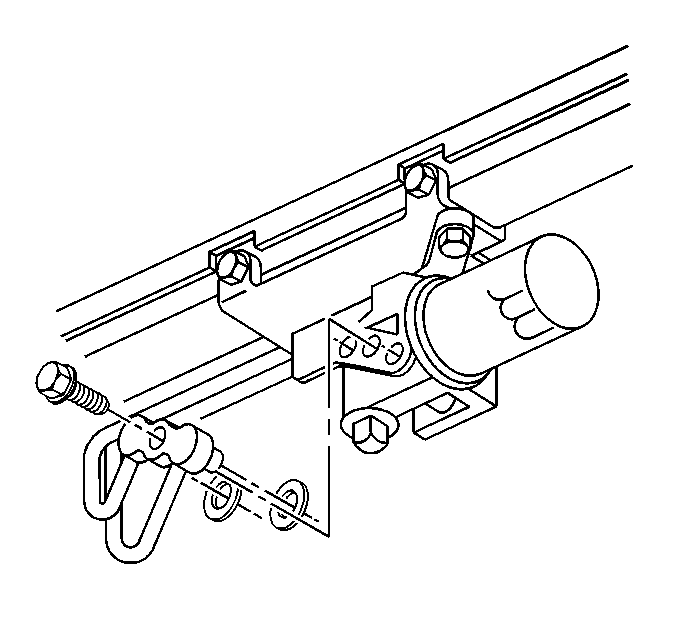
Important: Have a drain pan ready for the engine oil to drain into.
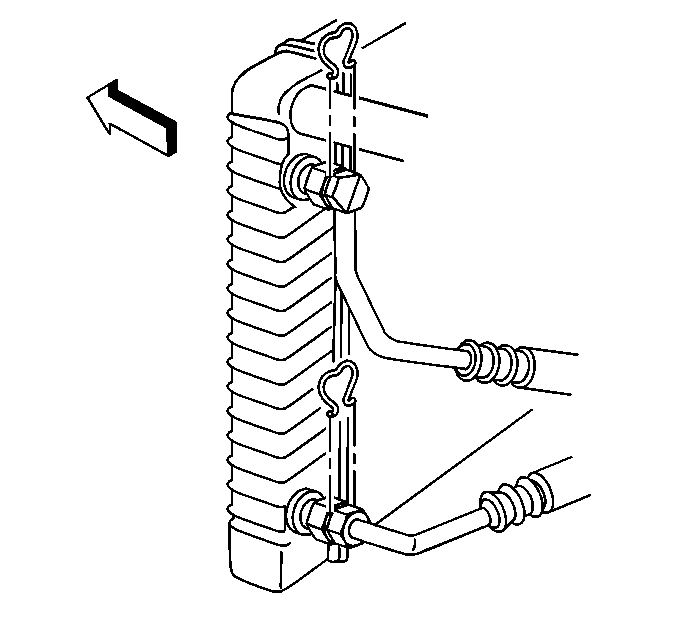

Discard the retaining rings.
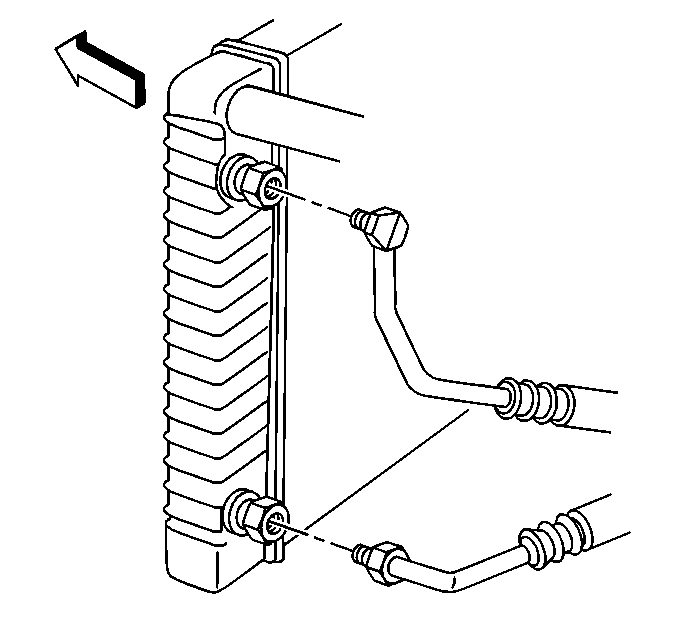
Pull the lines straight out from the connectors.

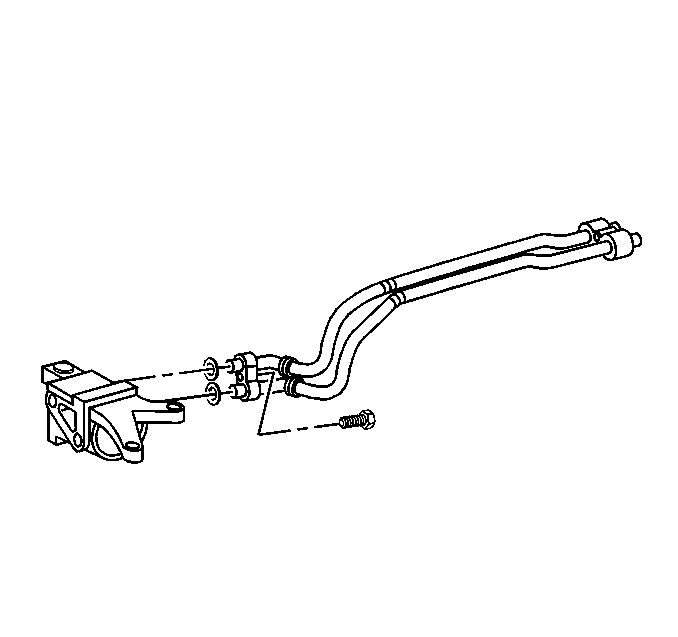
Important: Have a drain pan ready for the engine oil to drain into.
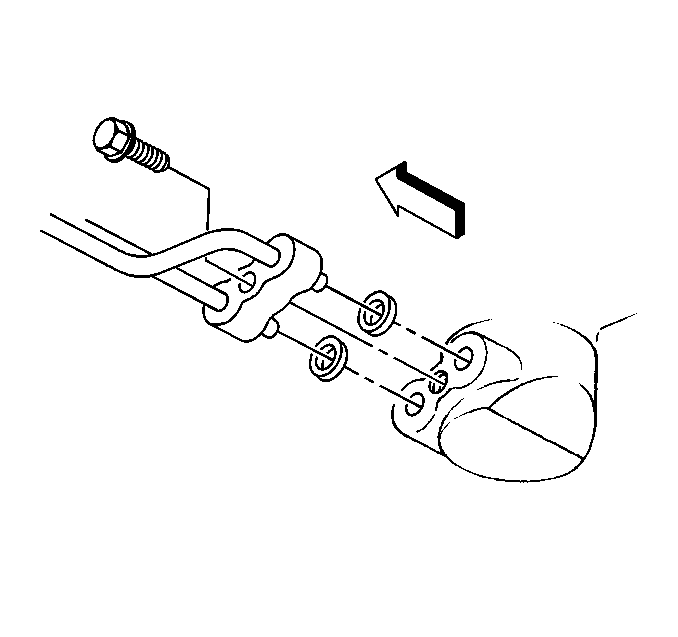
Installation Procedure
- Install new seals on both ends of each remote engine oil filter line.
- Install the bolt attaching the remote engine oil filter lines to the remote engine oil filter lines (engine mounted) adapter.
- Install the bolt attaching the remote engine oil filter lines to the remote (frame mounted) engine oil filter adapter.
- Install the remote engine oil filter lines support clamp bolt.
- Install new seals to the engine oil cooler lines at the remote (frame mounted) engine oil filter adapter.
- Install the bolt attaching the engine oil cooler lines to the remote (frame mounted) engine oil filter adapter.
- Install a new retaining ring (E-clip) into each quick connector at the radiator engine oil cooler inlet and outlet by following the next three steps.
- Hook one of the open ends of the retaining ring in one of the slots in the quick connector.
- Rotate the retaining ring around the connector until the retaining ring is positioned with all three ears through the three slots.
- Ensure the three retaining ring ears can be seen from the inside of the connector and the retaining ring can move freely in the slots.
- Install the engine oil cooler lines into the quick connectors at the radiator engine oil cooler inlet and outlet until a click is heard or felt.
- Inspect and fill the engine oil to the proper level.
- Start the engine and check for leaks.
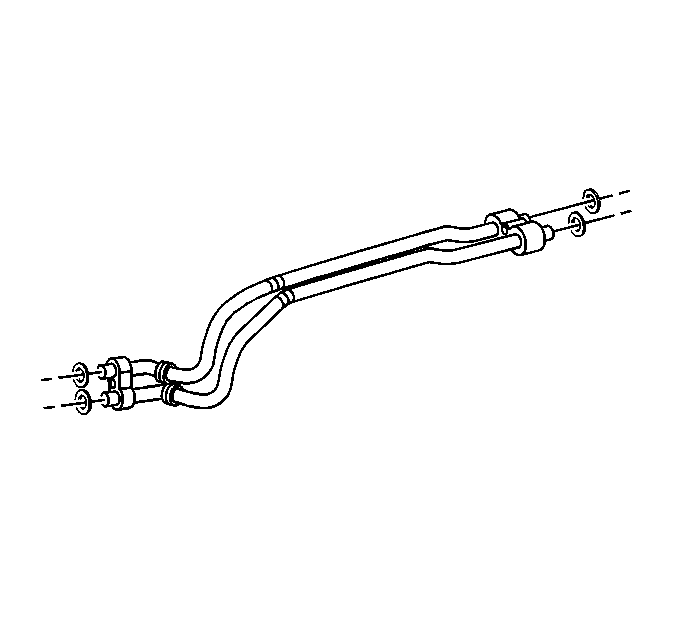

Notice: Use the correct fastener in the correct location. Replacement fasteners must be the correct part number for that application. Fasteners requiring replacement or fasteners requiring the use of thread locking compound or sealant are identified in the service procedure. Do not use paints, lubricants, or corrosion inhibitors on fasteners or fastener joint surfaces unless specified. These coatings affect fastener torque and joint clamping force and may damage the fastener. Use the correct tightening sequence and specifications when installing fasteners in order to avoid damage to parts and systems.
Tighten
Tighten the bolt to 35 N·m (26 lb ft).

Tighten
Tighten the bolt to 35 N·m (26 lb ft).

Tighten
Tighten the bolt to 10 N·m (89 lb in).

Tighten
Tighten the attaching bolt to 35 N·m (26 lb ft).

Important: When performing the following procedure, do not reuse the old retaining rings. Replace the old retaining rings with new ones.
Do not install the new retaining ring onto the connector by pushing the retaining ring down over the connector.


Pull back on the engine oil cooler lines to ensure a proper connection.
