Tools Required
J 43013 Fuel Injector Assembly Removal Tool
Removal Procedure
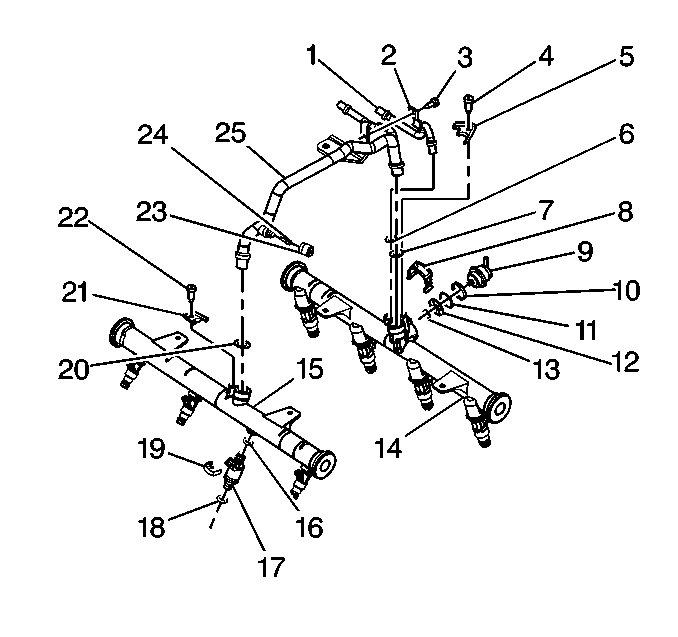
- Remove the fuel rail assembly. Refer to Fuel Injection Fuel Rail Assembly Replacement .
- Remove the injector retainer clip (19).
- Remove the injector from the fuel rail pad.
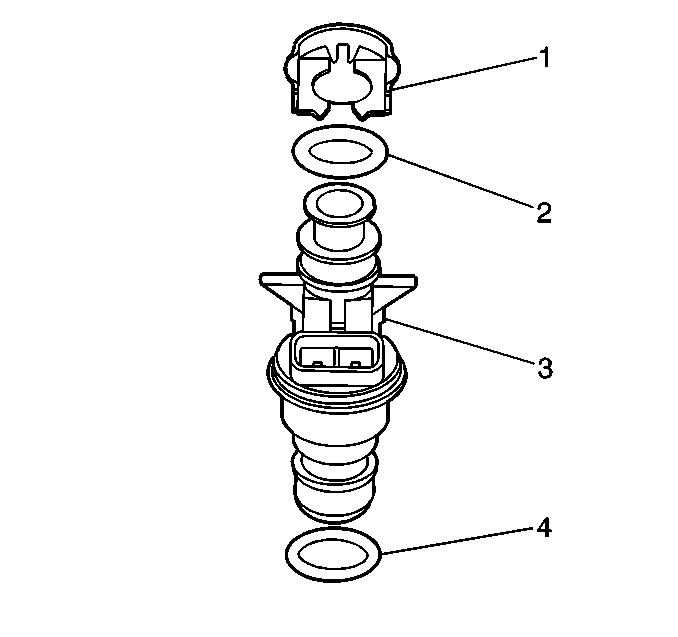
- Discard the injector retainer clip (1).
- Remove the injector O-ring seals (2, 4) from both ends of the injector. Discard the O-ring seals.
Notice: Use care in removing the fuel injectors in order to prevent damage to the fuel injector electrical connector pins or the fuel injector nozzles. Do not immerse the fuel injector in any type of cleaner. The fuel injector is an electrical component and may be damaged by this cleaning method.
Important: The engine oil may be contaminated with fuel if the fuel injectors are leaking.
Installation Procedure
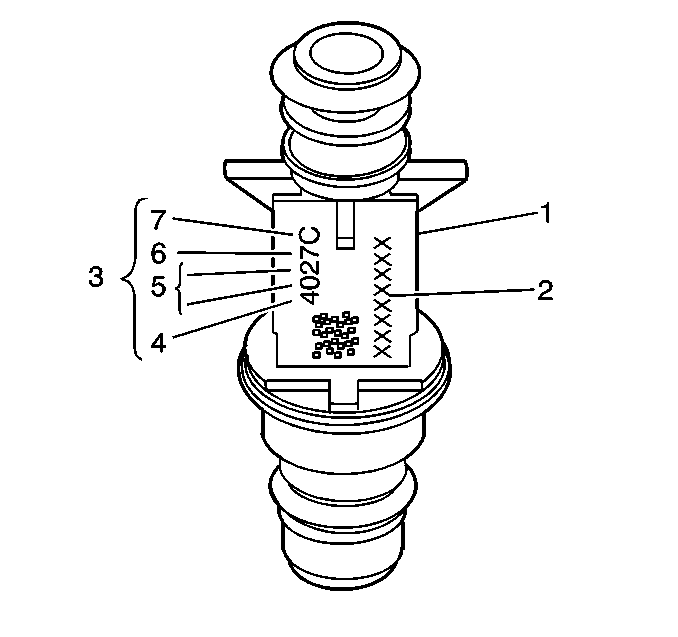
Important: When ordering new fuel injectors, be sure to order the correct injector for the application being serviced.
The fuel injector assembly (1) is stamped with a part number identification (2). A four-digit build date code (3) indicates the month (4), day (5), year (6), and the shift (7) that built the injector.
- Lubricate the new injector O-ring seals (2, 4) with clean engine oil.
- Install the new injector O-ring seals on the injector.
- Install a new retainer clip (1) on the injector.
- Push the fuel injector (17) into the fuel rail injector socket with the electrical connector facing outward. The retainer clip (19) locks on to a flange on the fuel rail injector socket.
- Install the fuel rail assembly. Refer to Fuel Injection Fuel Rail Assembly Replacement .
