Poor Carpet Fit (Install Floor Deadener)

| Subject: | Poor Carpet Fit (Install Floor Deadener) |
| Models: | 2004-2006 Chevrolet SSR |
This bulletin is being revised to add a measurement for cutting the floor deadener material and to increase the Labor Time. Please discard Corporate Bulletin Number 06-08-110-001 (Section 08 -- Body & Accessories).
Condition
Some customers may comment about the way the carpet fits in the following three areas:
| • | Carpet pulls out from under the left hand side of the console. |
| • | Carpet fit around the gauge package in front of the console. |
| • | Carpet fit on the floor next to the hinge pillar trim ( kick pad) . |
| • | Carpet fit on the floor in front of the seat left side next to the door seal. |
Correction
Install a carpet (floor deadener).
Important: The deadener kit is no longer available from GMSPO. It will be necessary to purchase the material locally.
- Fold the top down, but leave the filler panel up.
- Remove the garnish molding. Use a flat-bladed plastic tool to release the retainer.
- Remove the shifter knob by loosening the set screw and pulling upward.
- Remove the shifter bezel and electrical connector. Use a flat-bladed plastic tool to release the retainers.
- Remove the 7 mm screw that is under the bezel.
- Remove the 7 mm screw in the bottom of the console compartment.
- Remove the two upper 7 mm screws located near the body control module (BCM).
- If the vehicle is equipped with a gauge package, use a trim tool and pry up in order to release the gauge assembly. Disconnect the electrical connector and remove the gauge bracket.
- Move the drivers seat forward in order to gain access to the lower panel of the console. Pull the panel toward you to release the retainer.
- Move the console forward to release it from the two tabs and lift up from the rear and remove.
- Remove the gauge wiring harness from the shifter plate.
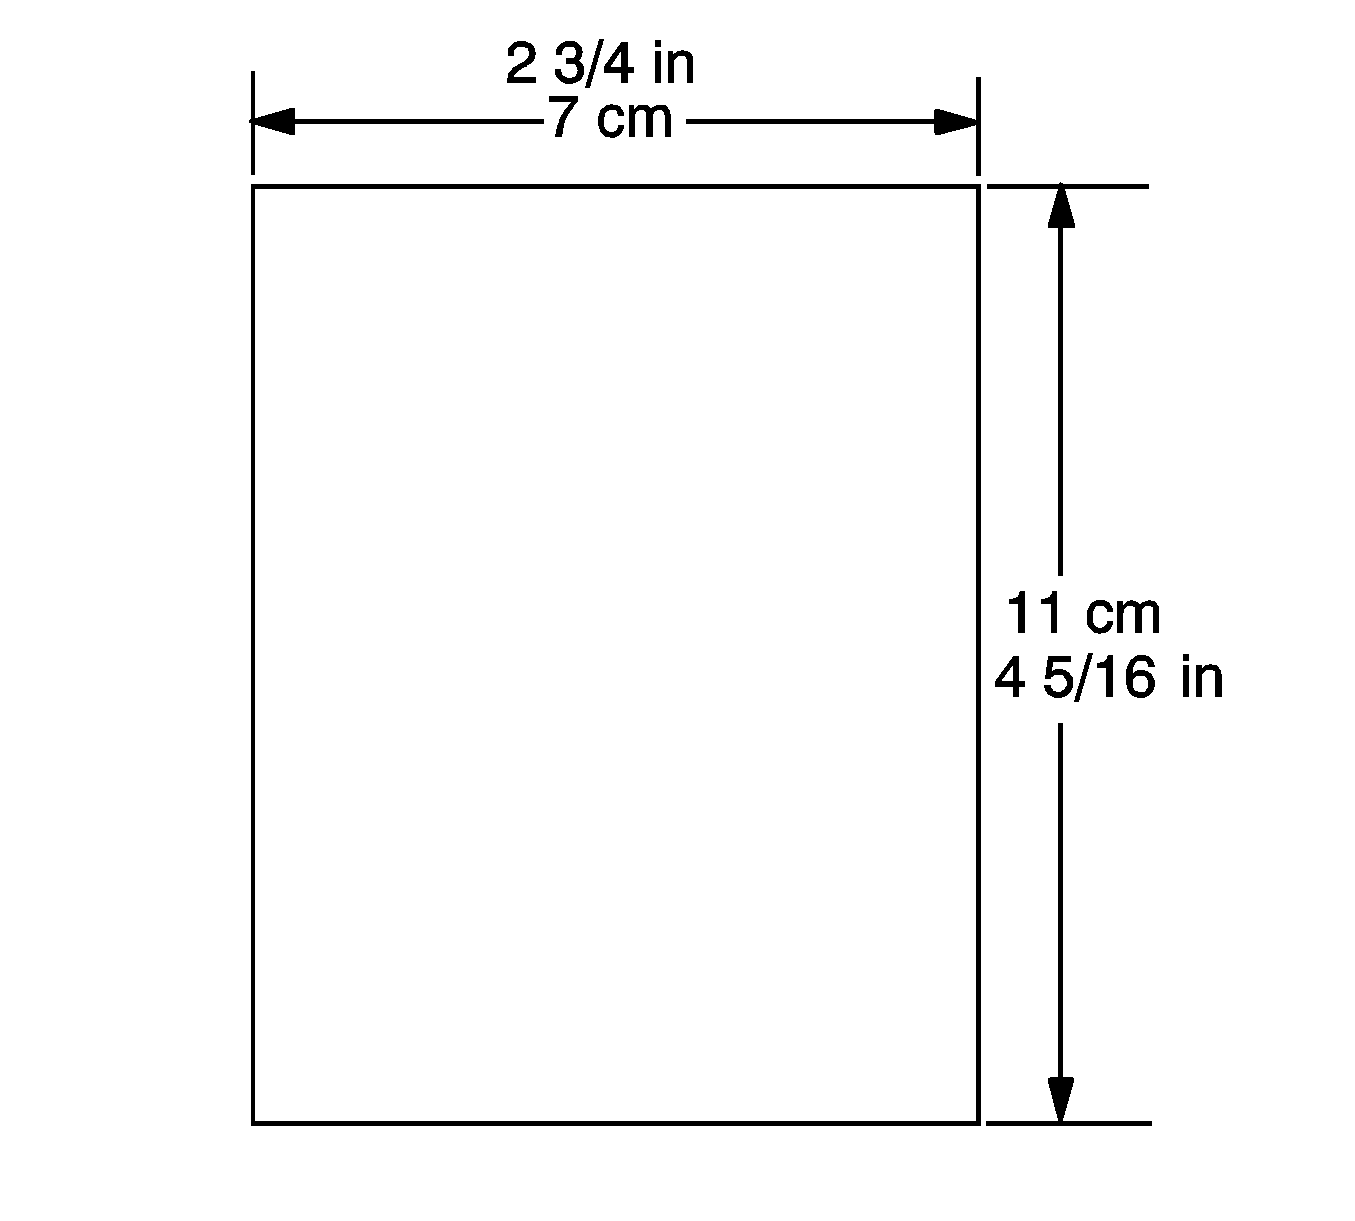
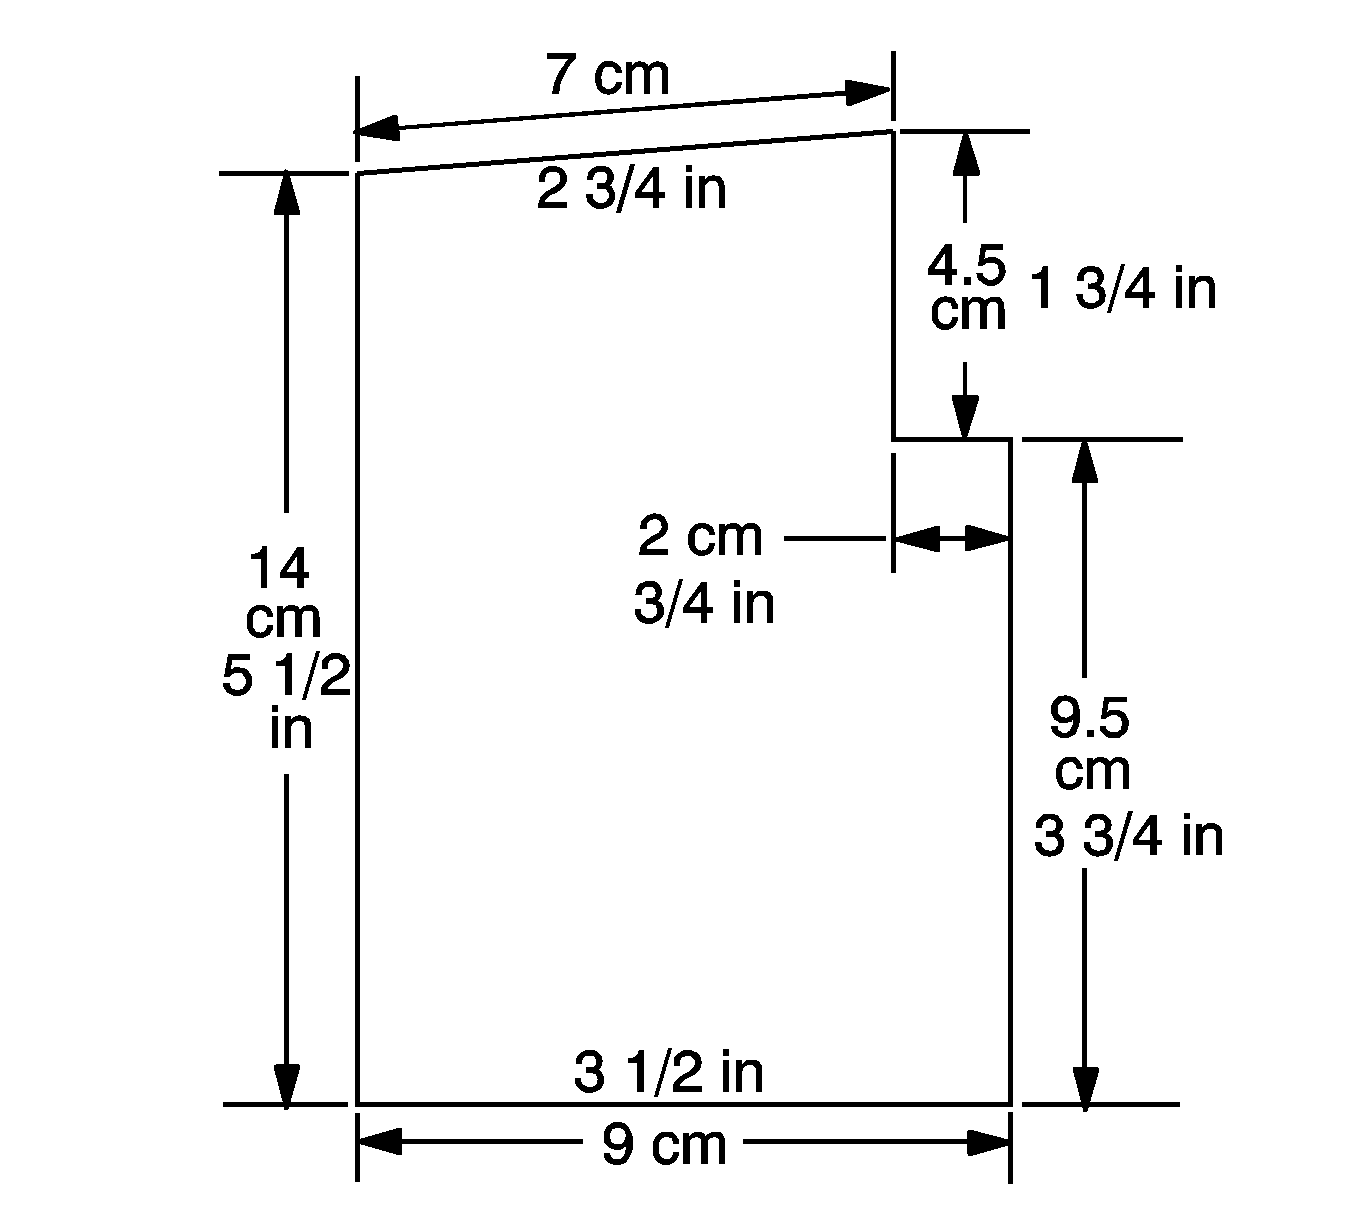
- Use the illustration with the measurements above to create the piece needed in step 13. It will be necessary to cut two pieces of deadener to gain the 20 mm (1 3/4 in) thickness needed.
- Install a 20 mm (1 3/4 in) shoddy pad between the carpet and the floor along the driver side of the gauges.
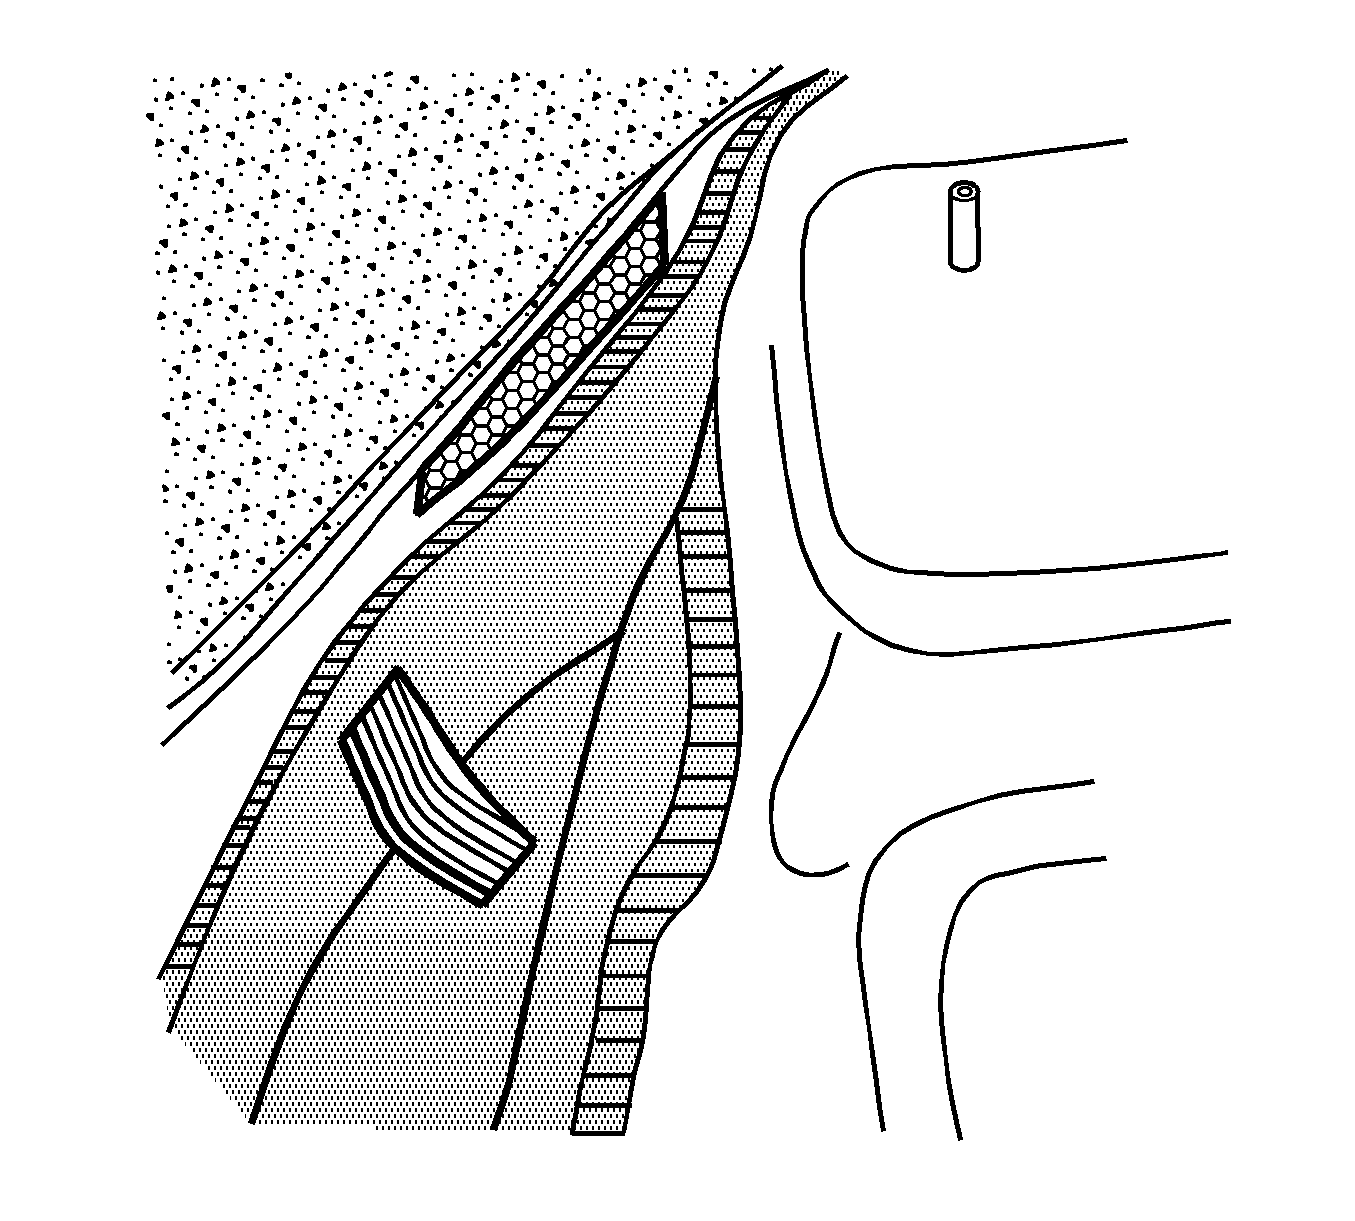
- Fold the carpet back and add one strip of 3M™ Dual Lock 153 mm (6 in) long to the carpet (horizontal) and the second strip of 3M™ Dual Lock 104 mm (4 in) long as seen in the illustration above.
- Tuck the carpet backing under the console bracket and attach the 3M™ Dual Lock to the top console bracket. Apply pressure to the carpet to attach the velcro to the transmission tunnel.
- Drill two 1/4 inch holes in the console bracket next to the carpet to secure the gauge wire harness.
- Install the console.
- Move the console rearward to engage to the front retaining tabs. It may be necessary to pull the left lower side panel of the console toward you in order to clear the wiring harness with the retainer.
- Push on the console side panel to secure the retainer.
- Install the two upper 7 mm screws, located near the BCM, and tighten.
- Install the screw in the console compartment and the screw under the shifter bezel.
- Install the shifter bezel and the electrical connector.
- Install the shifter knob.
- If vehicle is equipped with a gauge package, install the bracket and tighten the two nuts.
- Install the electrical connector and press down on the gauges to secure them to the bracket.
- Install the garnish molding.
- Remove the retainer and lift up on the front of the sill plate and remove the hinge pillar trim.
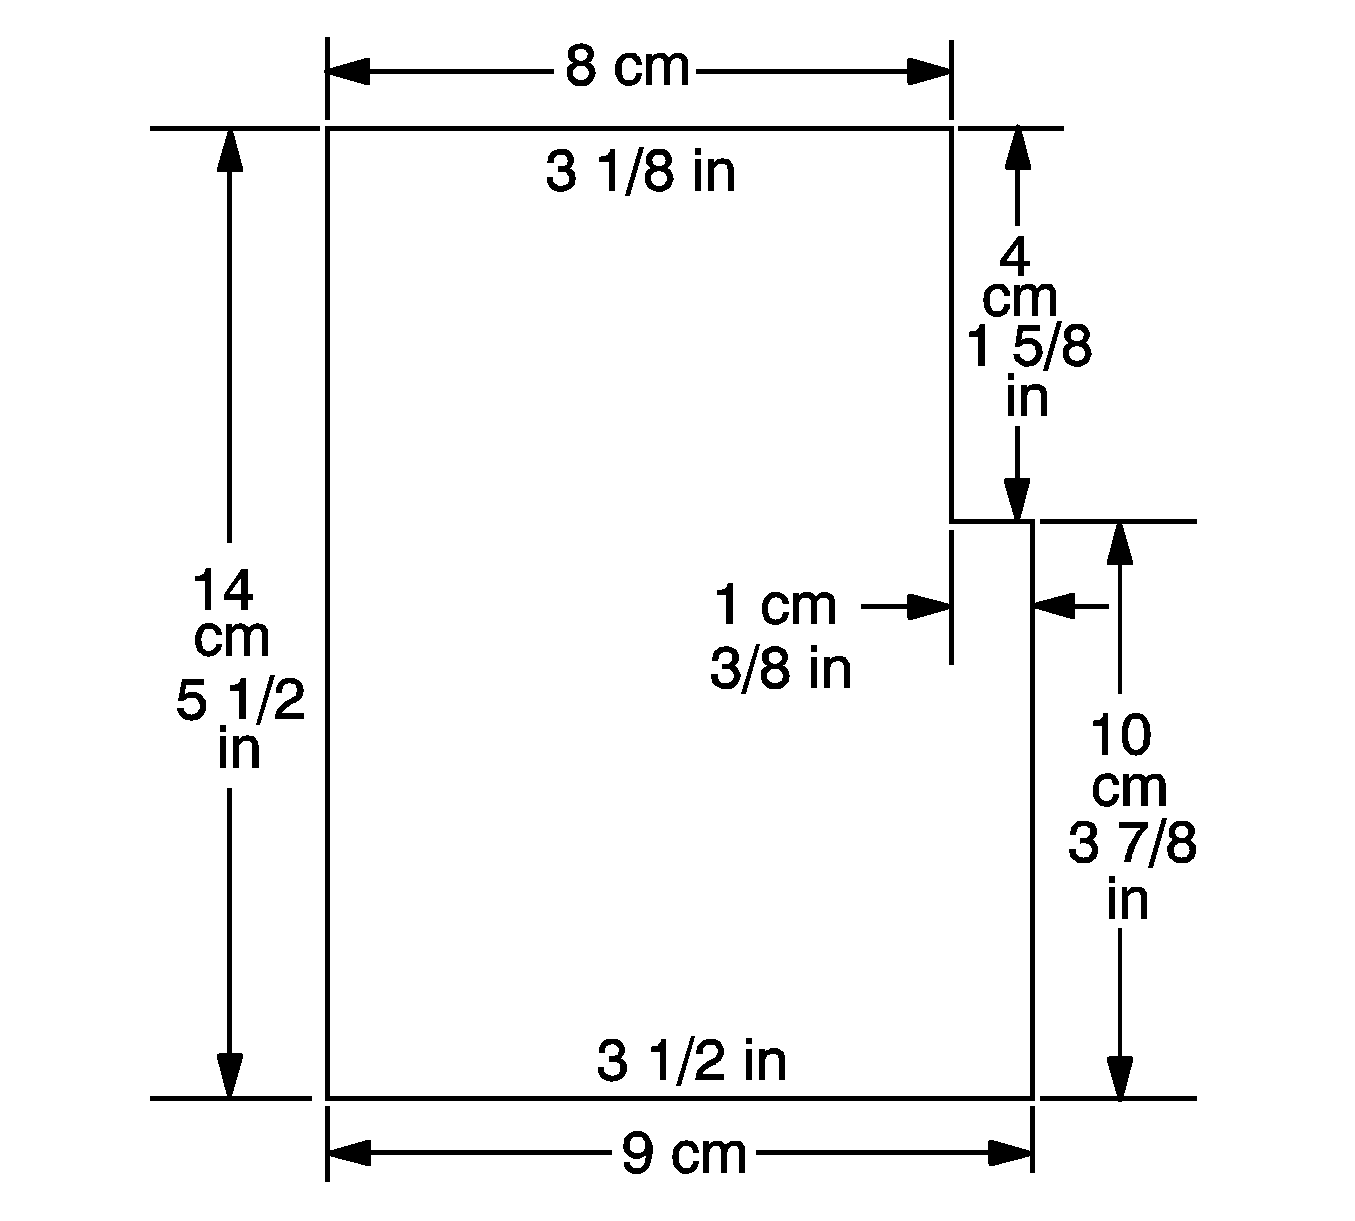
- Use the illustration above and measurements to cut out the pieces needed to make the repair on the driver side of the carpet.
- Install the 10 mm (0.39 in) shoddy patch between the carpet and the floor as seen in the illustration above.
- Use the illustration above and measurements to cut out the pieces need to make the repair on the driver side of the carpet. (Next to kick panel ).
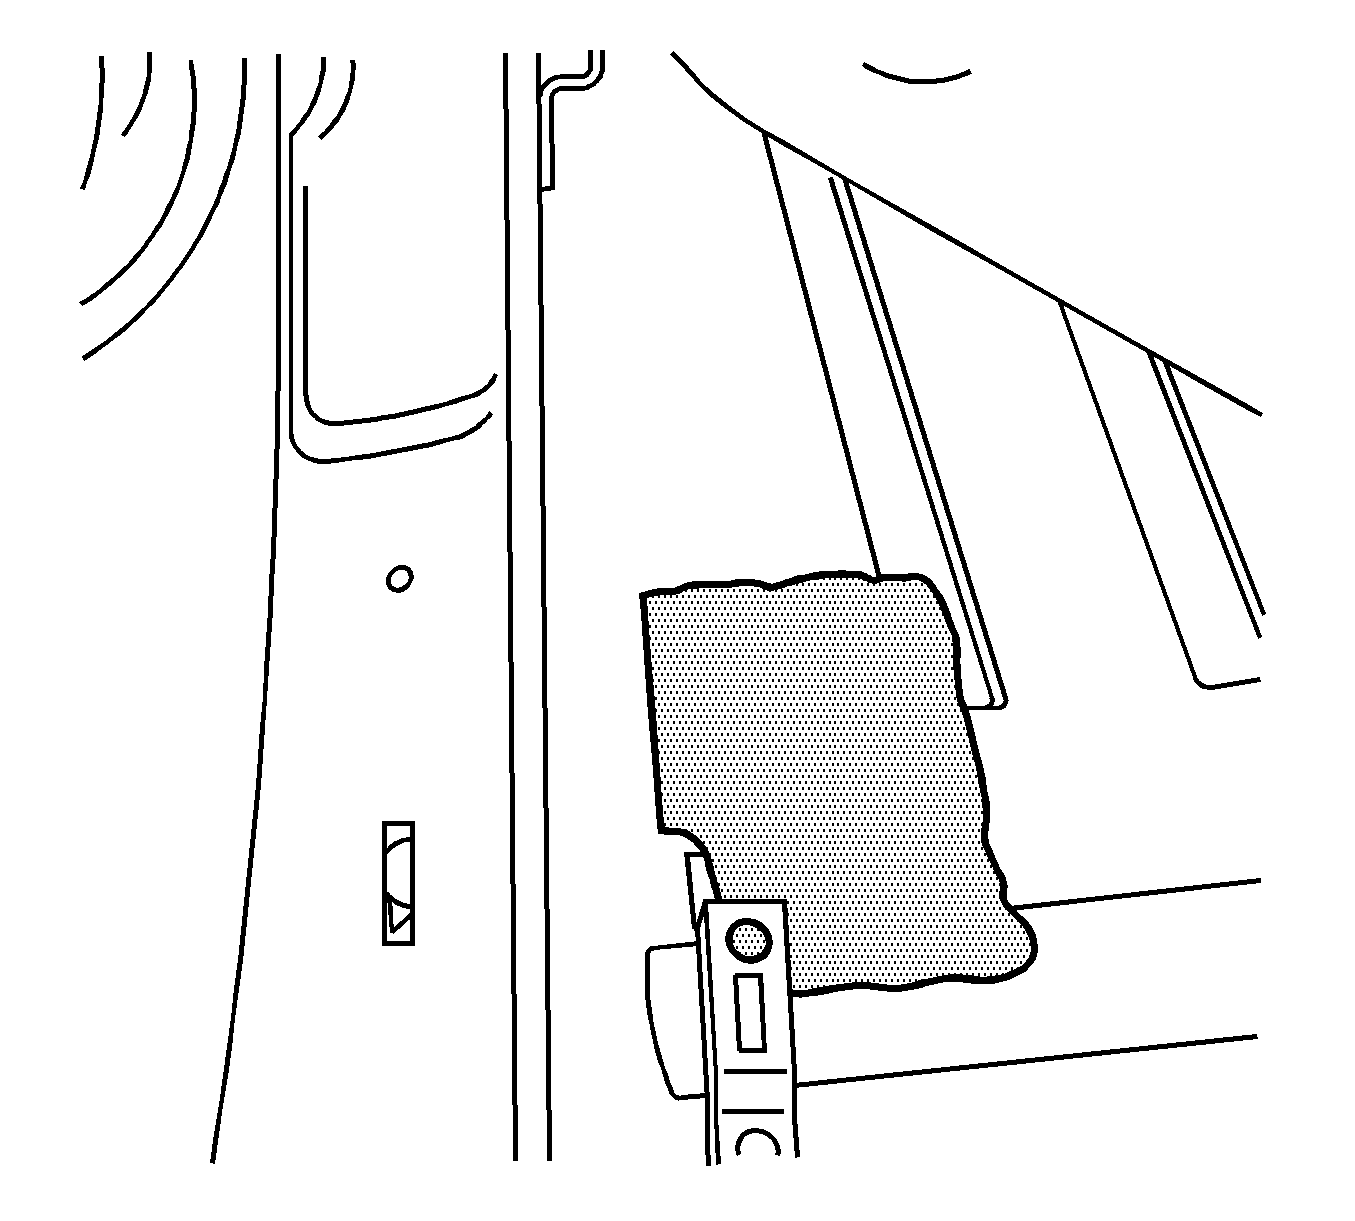
- Install the deadener between the floor and carpet next to the left side kick panel.
- Install the hinge pillar trim and sill plate.
- Close the roof.
Tighten
Tighten the screw to 2.5 N·m (22 lb in).
Tighten
Tighten the screws to 2.5 N·m (22 lb in).
Tighten
Tighten the nuts to 10 N·m ( 88 lb in).
Parts Information
Part Number | Description | Material Allowance |
|---|---|---|
40 ounce | Deadener* | $3.00 per Vehicle |
3M™ 06484 | 3M™ Dual Lock | $2.45 per Vehicle (U.S.) $2.75 per Vehicle (CA) |
*Purchase deadener material locally from automotive trim shop.
Warranty Information
For vehicles repaired under warranty, use:
Labor Operation | Description | Labor Time |
|---|---|---|
*C9746 | Install Deadener Floor Panel | 1.0 hr |
* This is a unique labor operation for bulletin use only. The number will not be published in the labor Time Guide. | ||
