For 1990-2009 cars only
Removal Procedure
- Relieve the fuel system pressure. Refer to Fuel Pressure Relief .
- Drain the fuel tank. Refer to Fuel Tank Draining .
- Remove the frame brace. Refer to Frame Brace Replacement in Frame and Underbody.
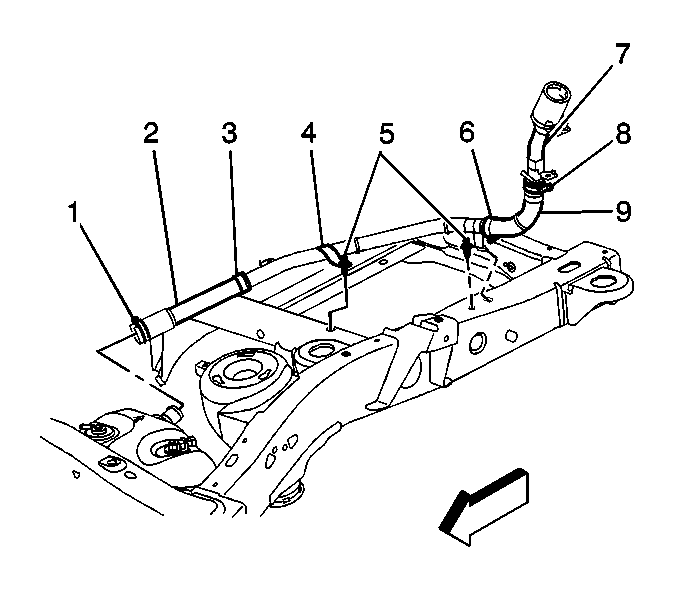
- Loosen the fuel hose clamp (1) at the fuel tank.
- Separate the fuel hose (2) from the fuel tank.
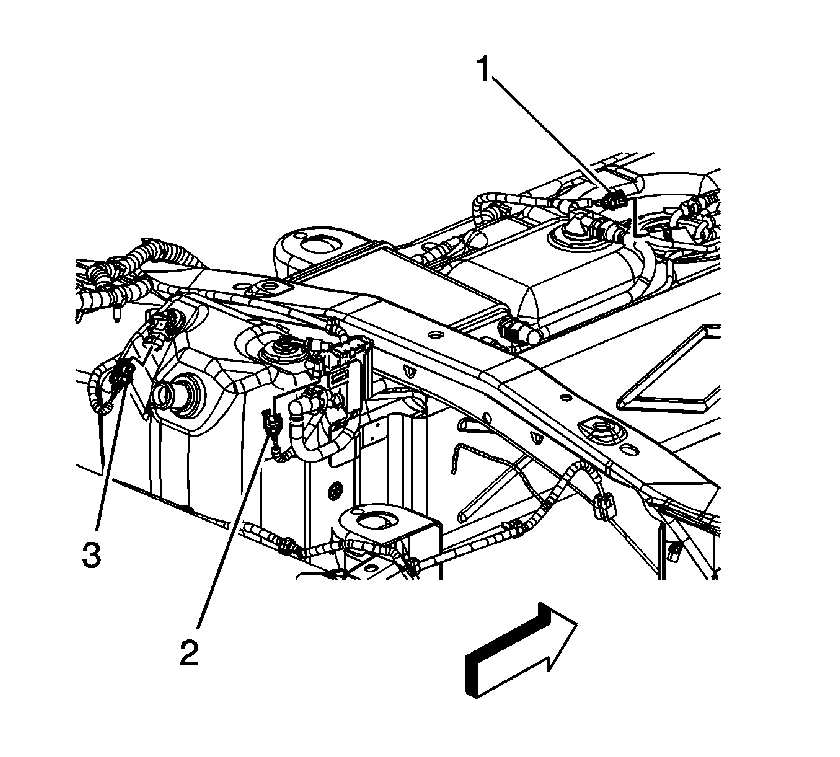
- Disconnect the fuel tank pressure sensor electrical connector (3).
- Disconnect the evaporative emission (EVAP) vent valve electrical connector (2).
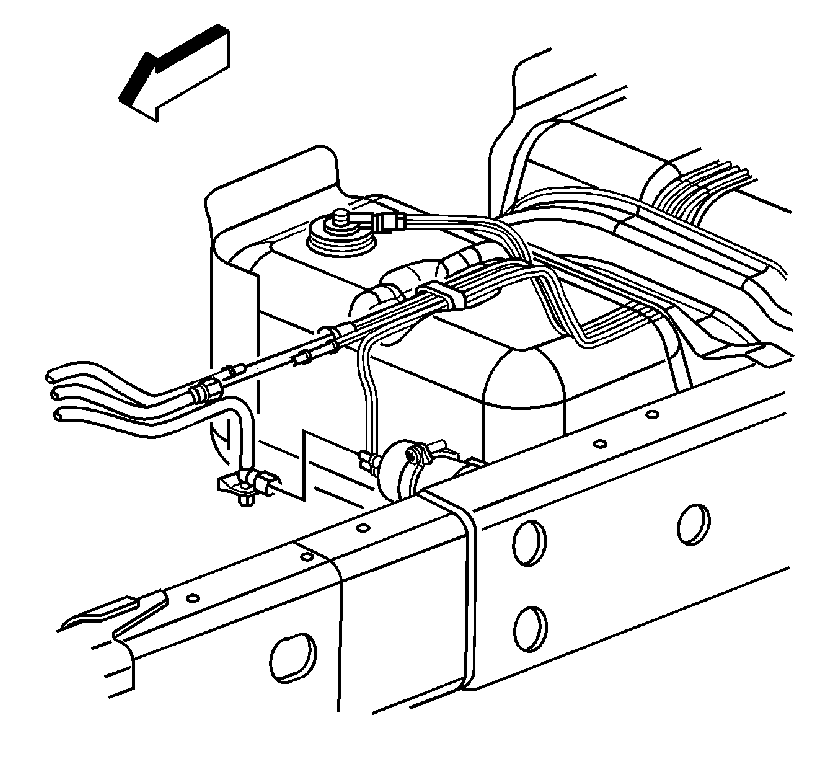
- Disconnect the fuel feed, return and EVAP pipes. Refer to Plastic Collar Quick Connect Fitting Service .
- Cap the fuel and EVAP pipes in order to prevent possible fuel system contamination.
- Remove propeller shaft. Refer to Propeller Shaft Replacement in Propeller Shaft.
- With the aid of an assistant, support the fuel tank.
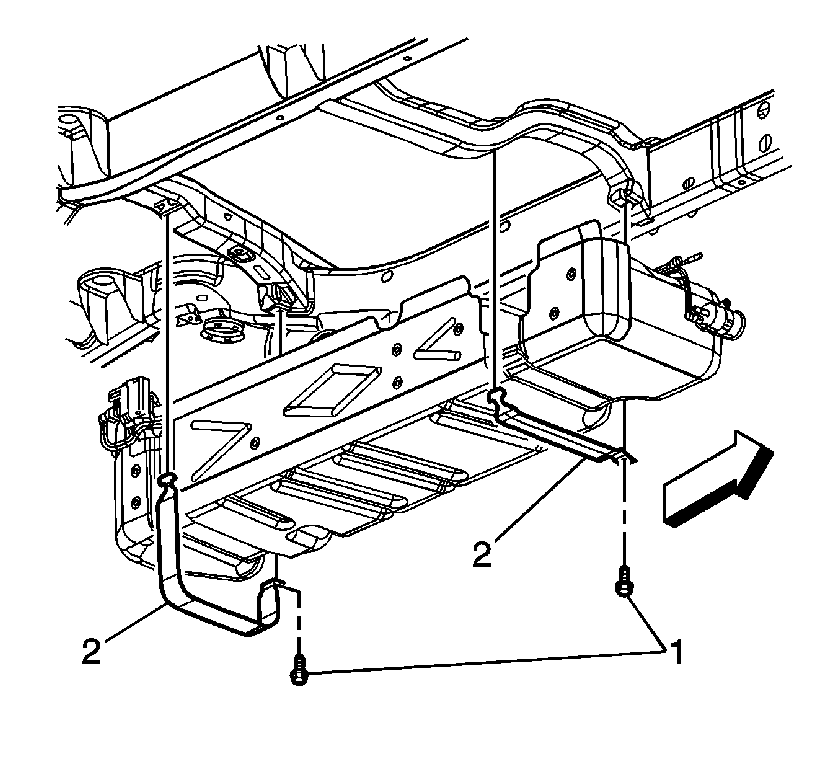
- Remove the fuel tank strap bolts (1).
- Remove the fuel tank straps (2).
- Carefully lower the fuel tank.
- Disconnect the fuel sender electrical connector (1).
- Remove the fuel tank.
- Place the fuel tank in a suitable work area.
- If the fuel tank is not being replaced, go to the Installation Procedure.

Disassembly Procedure
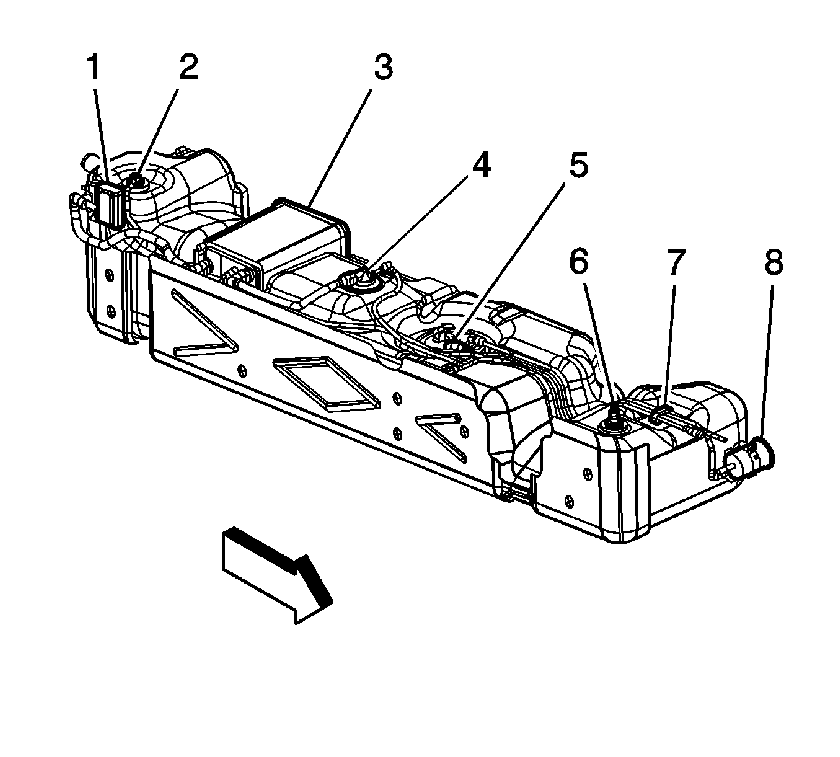
- Remove the EVAP vent valve (1). Refer to Evaporative Emission Canister Vent Solenoid Valve Replacement .
- Remove the fuel filter (8). Refer to Fuel Filter Replacement .
- Disconnect the fuel feed and return pipes from the fuel sender (5). Refer to Plastic Collar Quick Connect Fitting Service .
- Remove the fuel feed and return pipes from the retaining clip (7).
- Remove the EVAP vent valve pipe.
- Disconnect the EVAP vapor pipe from the fill limiter vent valve (4), and the front and rear rollover valves (2, 6). Refer to Plastic Collar Quick Connect Fitting Service .
- Remove the EVAP vapor pipes.
- Remove the fuel sender assembly (5) from the fuel tank. Refer to Fuel Sender Assembly Replacement .
- Remove the EVAP canister (3). Refer to Evaporative Emission Canister Replacement .
Assembly Procedure
- Install the EVAP canister (3). Refer to Evaporative Emission Canister Replacement .
- Install the fuel sender assembly (5) to the fuel tank. Refer to Fuel Sender Assembly Replacement .
- Connect the EVAP vapor pipe to the fill limiter vent valve (4) and the front and rear rollover valve (2, 6). Refer to Plastic Collar Quick Connect Fitting Service .
- Install the EVAP vent valve pipe.
- Connect the fuel feed and return pipes to the fuel sender (5). Refer to Plastic Collar Quick Connect Fitting Service .
- Install the fuel feed and return pipes to the retaining clip (7).
- Install the fuel filter (8). Refer to Fuel Filter Replacement .
- Install the EVAP vent valve (1). Refer to Evaporative Emission Canister Vent Solenoid Valve Replacement .

Installation Procedure
- With the aid of an assistant, position and support the fuel tank.
- Connect the fuel sender electrical connector (1).
- Install the fuel tank straps (2).
- Install the fuel tank strap bolts (1).
- Install the propeller shaft. Refer to Propeller Shaft Replacement in Propeller Shaft.
- Remove the caps from the fuel and EVAP pipes.
- Connect the fuel feed, return and EVAP pipes. Refer to Plastic Collar Quick Connect Fitting Service .
- Connect the fuel tank pressure sensor electrical connector (3).
- Connect the EVAP vent valve electrical connector (2).
- Connect the fuel hose (2) to the fuel tank.
- Lower the vehicle.
- Refill the fuel tank.
- Install the fuel fill cap.
- Connect the negative battery cable. Refer to Battery Negative Cable Disconnection and Connection in Engine Electrical.
- Inspect for leaks.
- Install the frame brace. Refer to Frame Brace Replacement in Frame and Underbody.
- Lower the vehicle.


Notice: Refer to Fastener Notice in the Preface section.
Tighten
Tighten the bolts to 32 N·m (24 lb
ft).


Tighten
Tighten the clamp (1) to 2.5 N·m
(22 lb in).
| 15.1. | Turn the ignition ON, with the engine OFF for 10 seconds. |
| 15.2. | Turn the ignition OFF for 10 seconds. |
| 15.3. | Turn the ignition ON, with the engine OFF. |
| 15.4. | Inspect for fuel leaks. |
