Tools Required
J 41798
Engine Lift Bracket
Removal Procedure
- Disconnect the negative battery cable. Refer to
Battery Negative Cable Disconnection and Connection
in Engine Electrical.
- Drain the engine oil.
- Drain the cooling system.
- Lower the vehicle.
- Remove the hood assembly. Refer to
Hood Replacement
in Body Front End.
- Remove the engine control module (ECM) and bracket. Refer to
Engine Control Module Replacement
in Engine Controls - 6.0L.
- Evacuate the air conditioning system. Refer to
Refrigerant Recovery and Recharging
in Heating, Ventilation and Air Conditioning.
- Remove the air cleaner assembly. Refer to
Air Cleaner Assembly Replacement
in Engine Controls - 6.0L
- Remove the upper tie bar. Refer to
Front End Upper Tie Bar Replacement
in Body Front End.
- Remove the radiator, A/C condenser, and cooling fan assembly. Refer to
Radiator Replacement
in Engine Cooling.
- Remove the accessory drive belt. Refer to
Drive Belt Replacement - Accessory
.
- Remove the A/C compressor. Refer to
Air Conditioning Compressor Replacement
in Heating, Ventilation and Air Conditioning.
- Remove the ground wire from the engine to the frame.
- Remove the radiator hoses.
- Remove the heater hoses.
- Remove the surge tank assembly. Refer to
Radiator Surge Tank Replacement
in Engine Cooling.
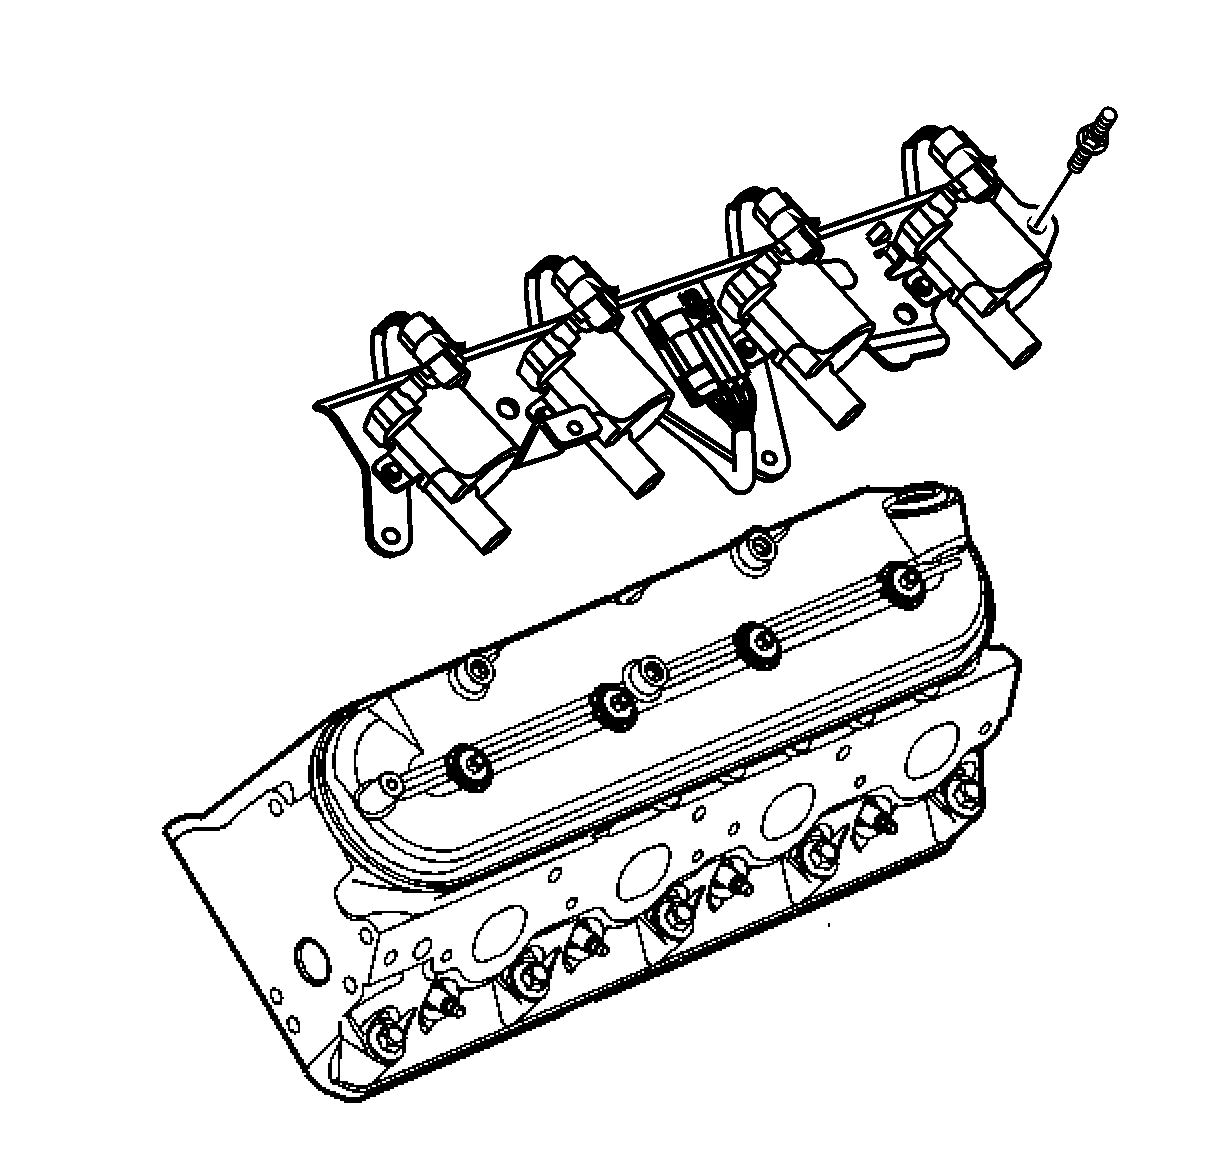
- Remove the ignition coils. Refer to
Ignition Coil Replacement
in Engine Controls - 6.0L.
- Remove the generator mounting bracket. Refer to
Generator Bracket Replacement
in Engine Electrical.
- Remove the intake manifold assembly. Refer to
Intake Manifold Replacement
.
- Remove the electrical connector for the oil pressure sensor.
- Relocate the engine wiring harness to the side and secure.
- Remove the exhaust manifolds.
- Remove the catalytic convertors. Refer to
Catalytic Converter Replacement
in Engine Exhaust.
- Remove the starter assembly. Refer to
Starter Motor Replacement
in Engine Electrical.
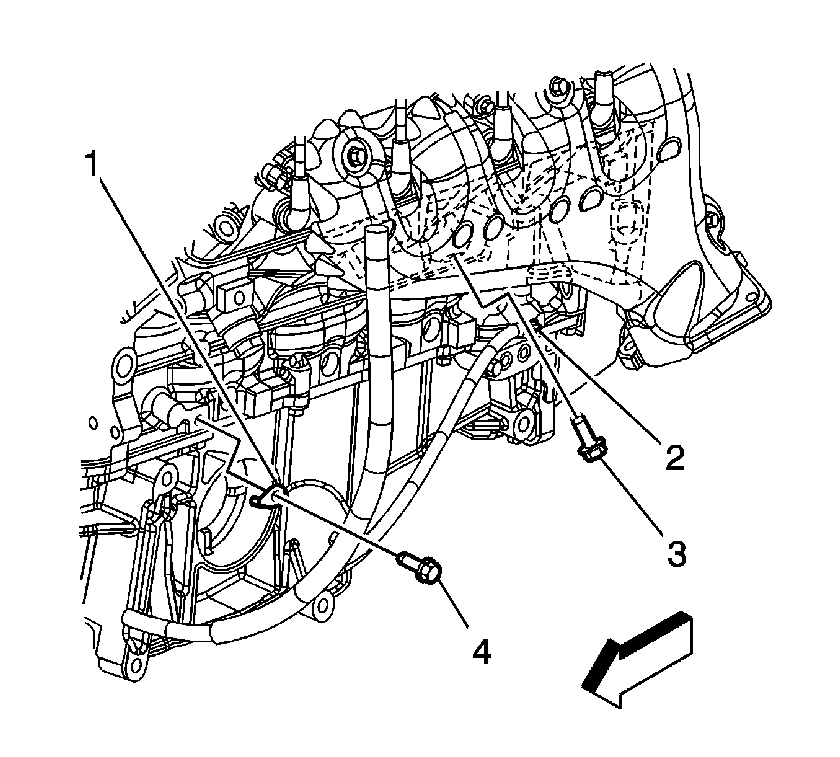
- Remove the ground wires (1, 2) and retaining bolts (3, 4) from the engine block.
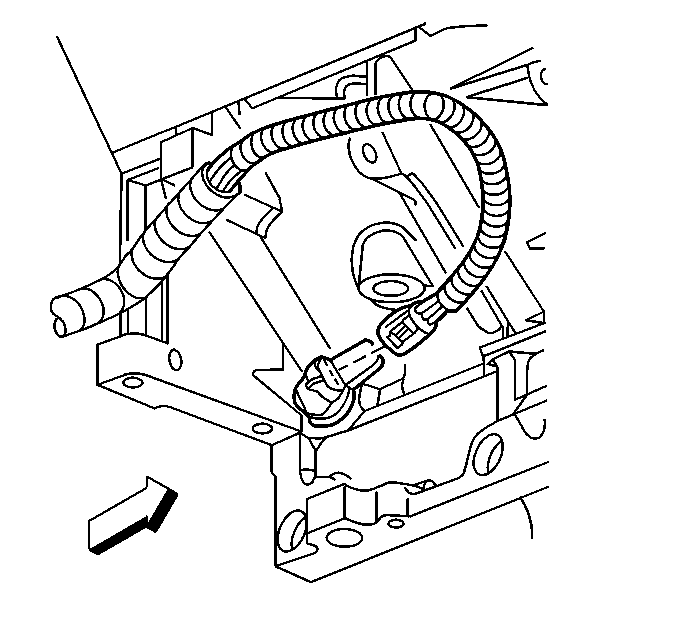
- Disconnect the electrical connector for the crankshaft position (CKP) sensor.
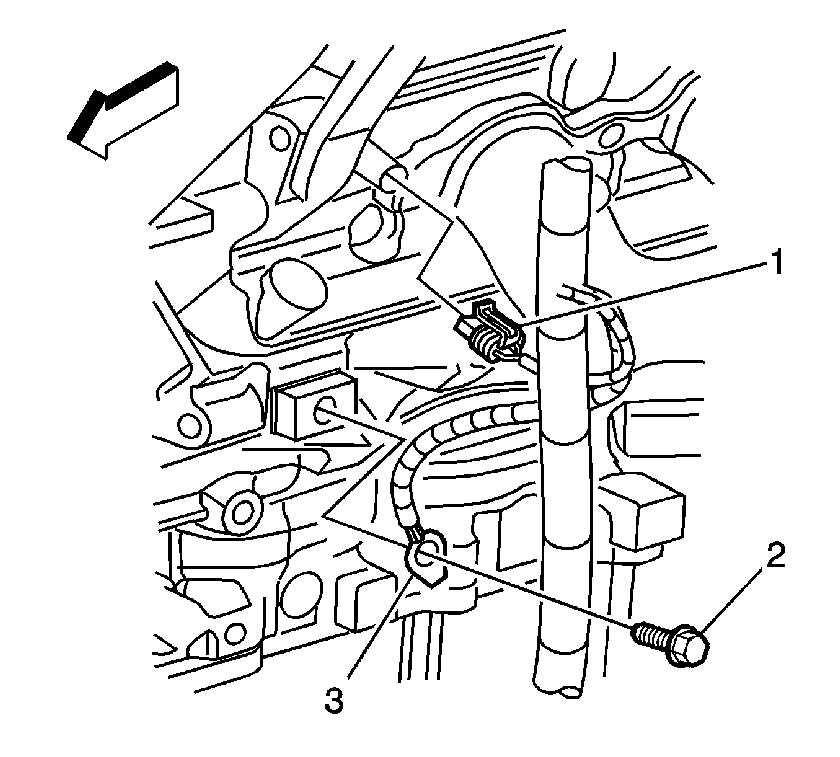
- Disconnect the engine coolant temperature (ECT) sensor (1).
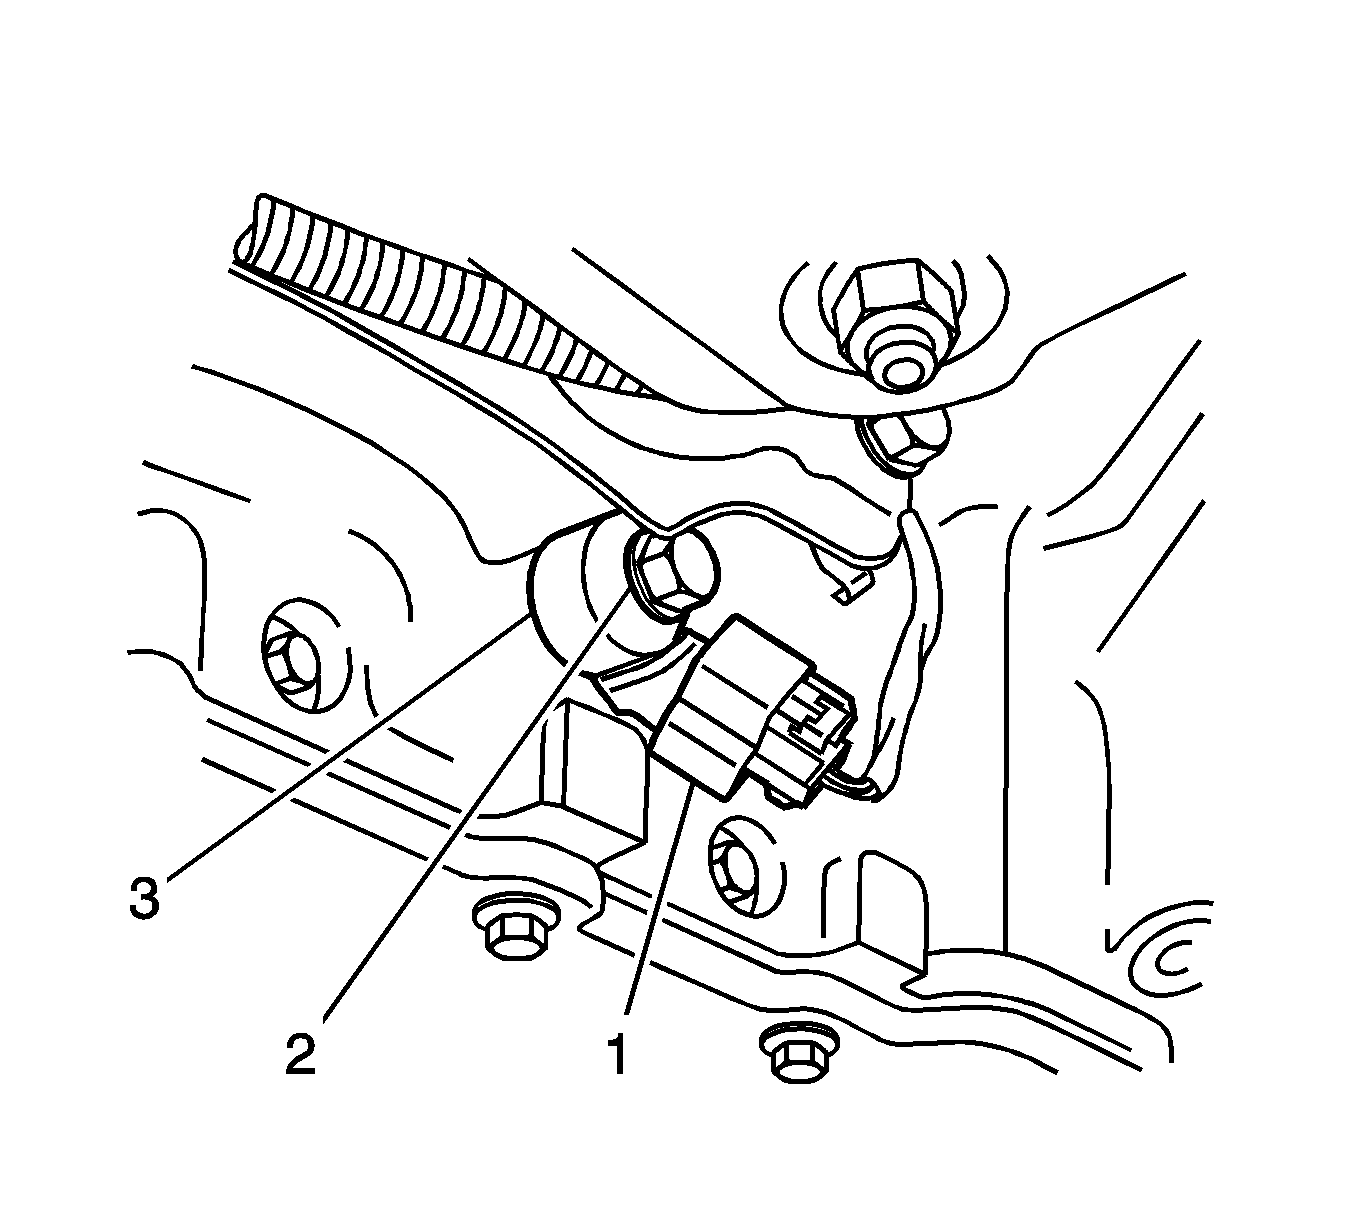
- Disconnect the electrical connector (1) for the left knock sensor (3).
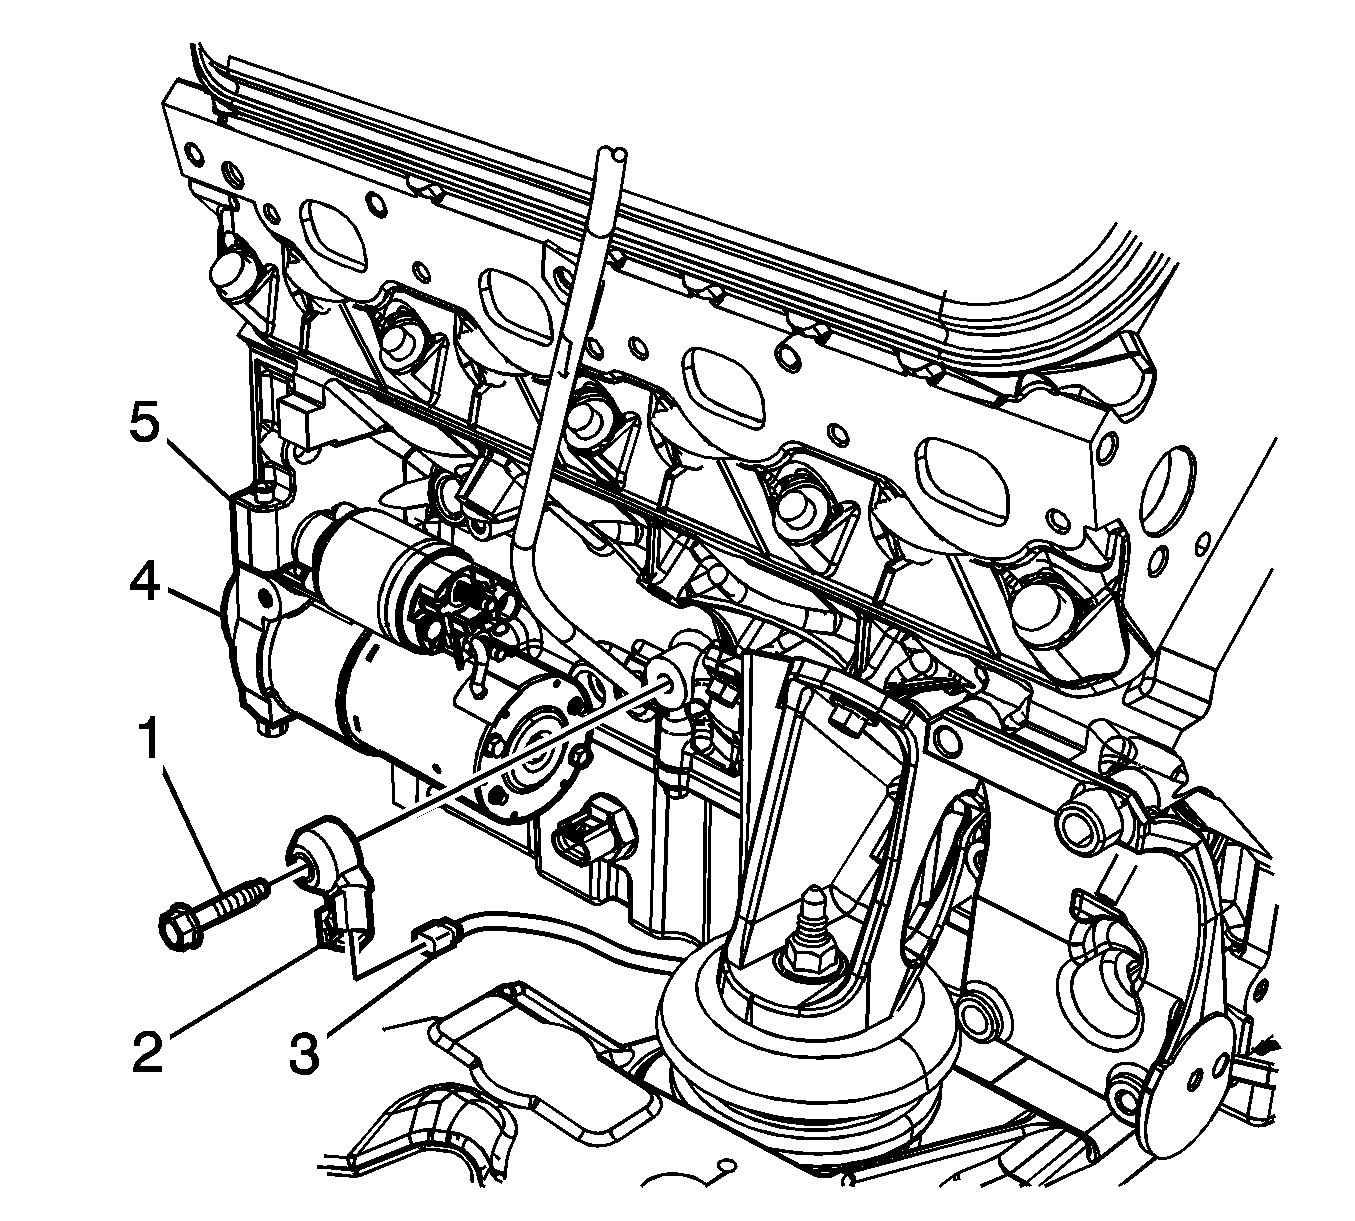
- Disconnect the electrical connector (3) for the right knock sensor (2).
- Disconnect the electrical connector for the camshaft sensor.
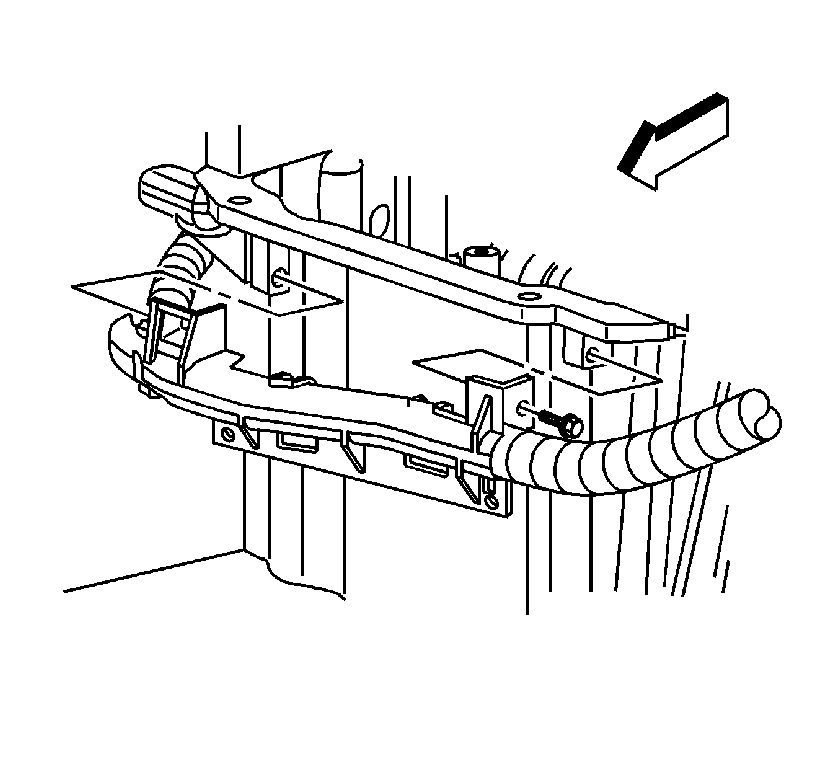
- Remove the wiring harness from the front of the engine.
- Remove the transmission assembly.
| • | For vehicles equipped with the 4L60-E automatic transmission, refer to
Transmission Replacement
in Automatic Transmission - 4L60-E/4L65-E. |
| • | For vehicles equipped with the Tremec 6-Speed transmission, refer to
Transmission Replacement
in Manual Transmission - Tremec 6-Speed . |
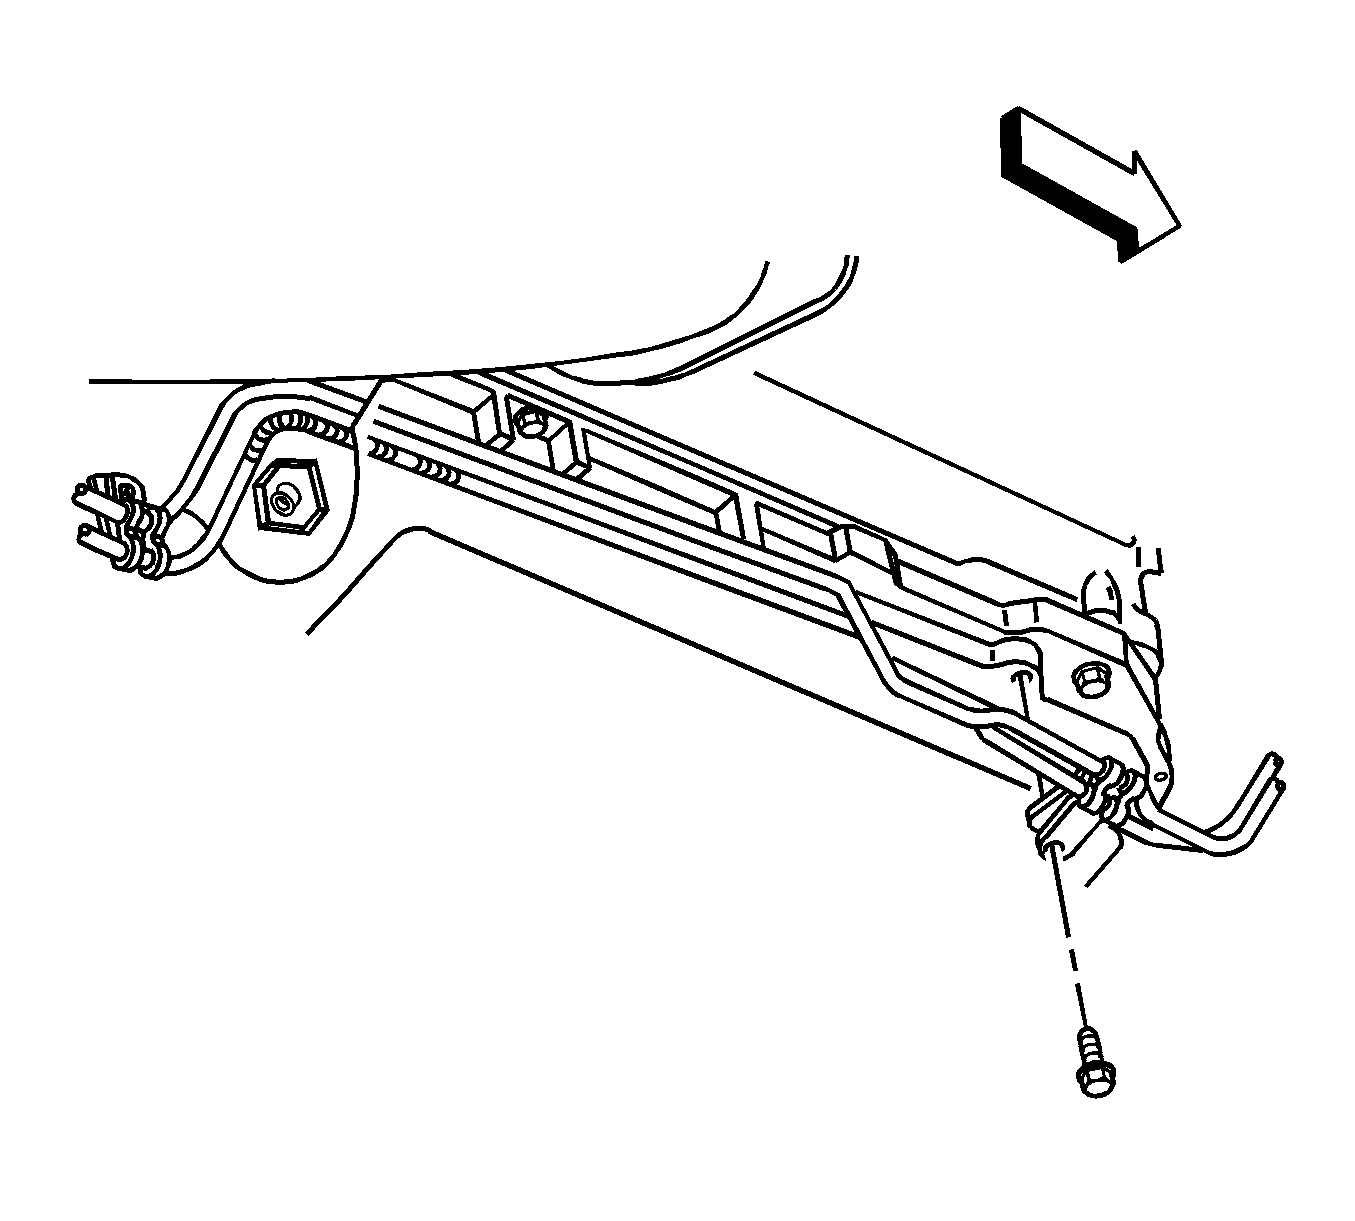
- Remove the transmission cooling lines in front the side of the engine, automatic
transmission only.
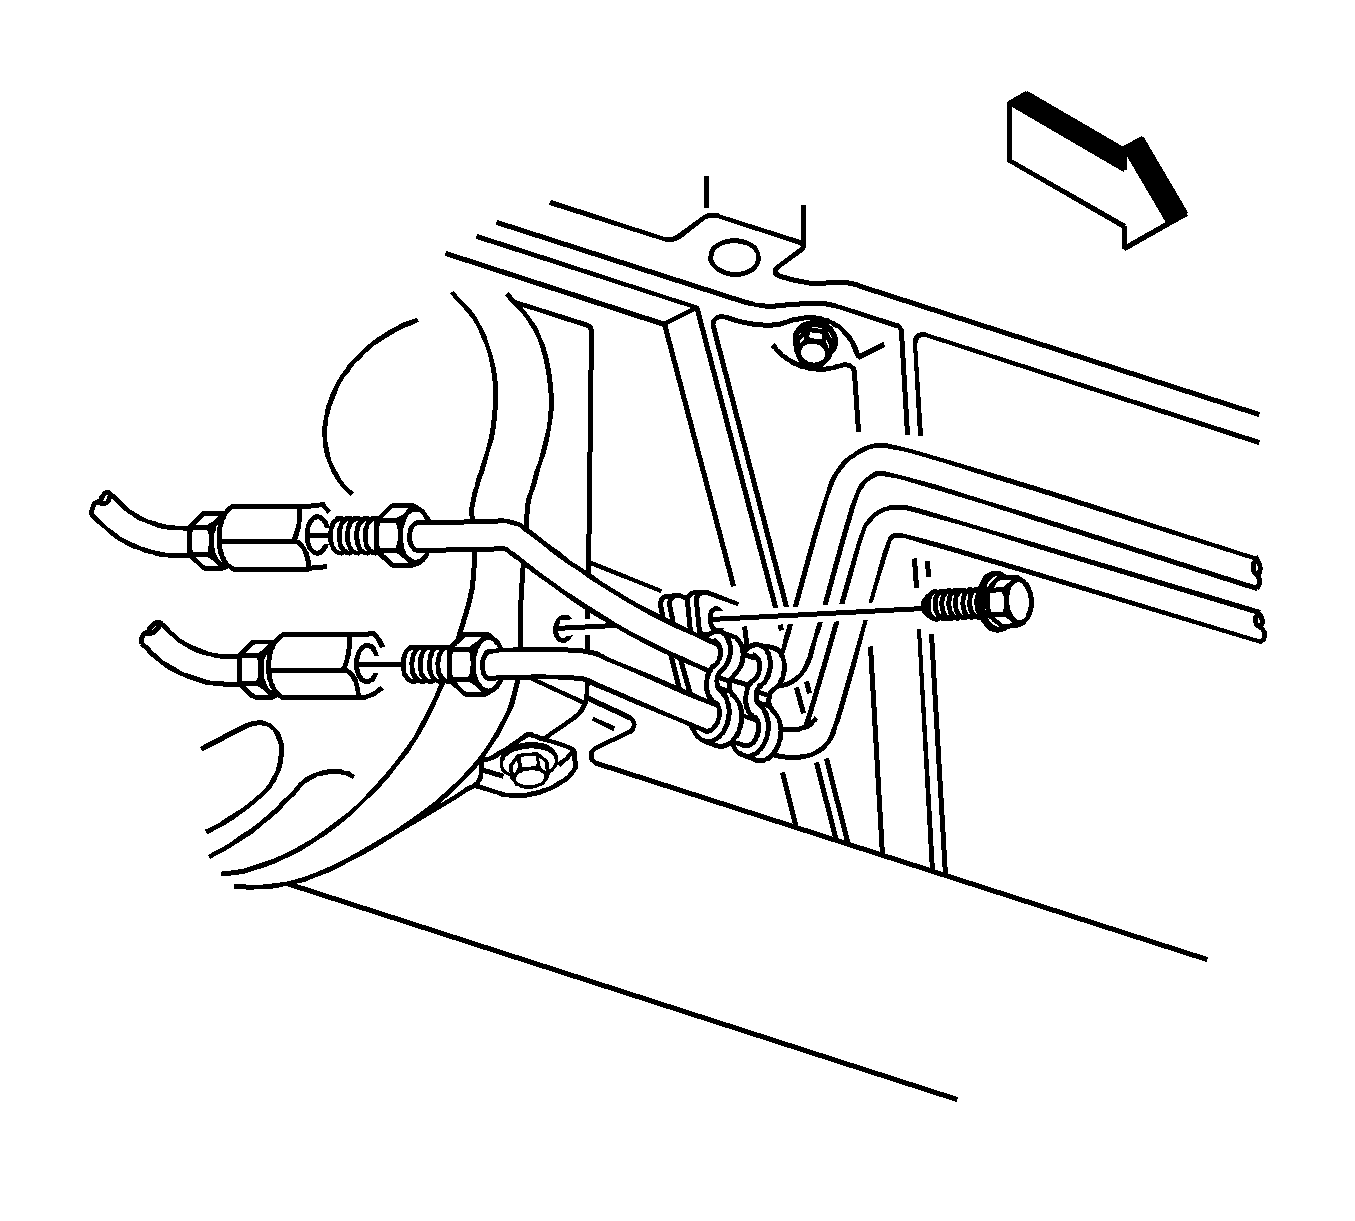
- Remove the transmission lines from the rear of the engine, automatic transmissions
only.
- Remove, relocate, and secure the wiring harness at the rear of the engine.
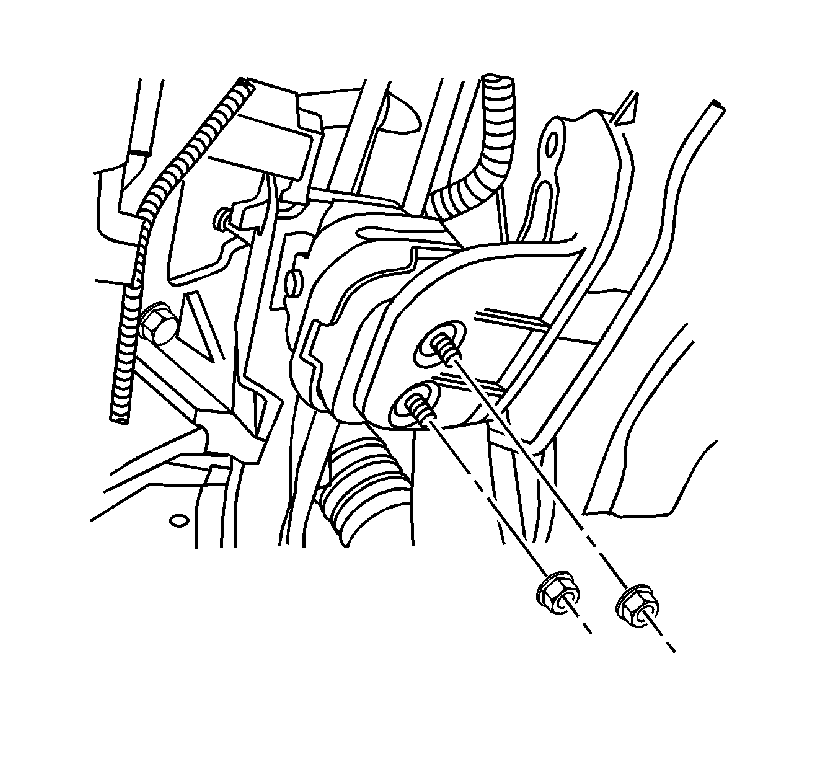
- Remove the left lower motor mounts retaining nuts.
- Lower the vehicle.
- Install the
J 41798
to the engine.
- Remove the right front shock. Refer to
Shock Absorber and Spring Assembly Replacement
in Front Suspension.
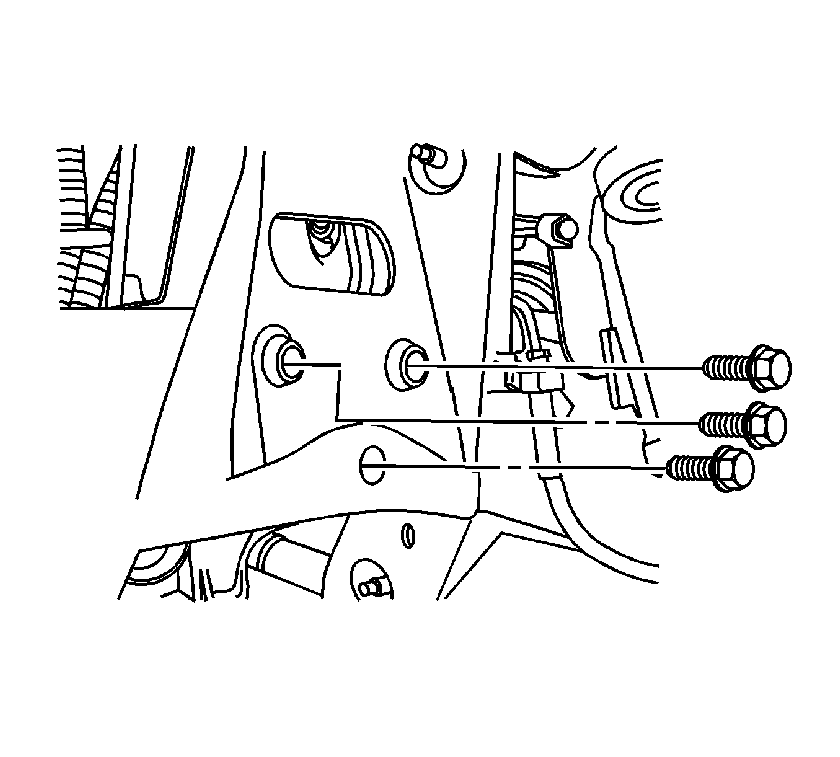
- Remove the motor mount to frame bolts.
- Using the appropriate engine hoist, remove the engine assembly from the vehicle.
- Install the engine assembly on the appropriate engine stand.
Installation Procedure
- Remove the engine from the engine stand.
- Position the engine in the vehicle.
Notice: Refer to Fastener Notice in the Preface section.

- Install the right motor mount to frame bolts.
Tighten
Tighten the right motor mount to frame bolts to 100 N·m (74 lb ft).
- Install the right shock module. Refer to
Shock Absorber and Spring Assembly Replacement
in Front Suspension.
- Remove the hoist.
- Remove the
J 41798
from the engine.
- Install the exhaust manifolds.
- Install the transmission assembly.
| • | For vehicles equipped with the 4L60-E automatic transmission, refer to
Transmission Replacement
in Automatic Transmission - 4L60-E/4L65-E. |
| • | For vehicles equipped with the Tremec 6-Speed transmission, refer to
Transmission Replacement
in Manual Transmission - Tremec 6-Speed. |

- Install the left lower motor mount retaining nuts.
Tighten
Tighten the left motor mount nuts to 50 N·m (37 lb ft).

- Remove the wiring harness from the front of the engine.
Tighten
Tighten the bolts to 12 N·m (106 lb in).
- Reconnect the electrical connector for the camshaft sensor.

- Reconnect the CKP sensor.

- Reconnect the electrical connector (3) for the right knock sensor (2).
- Install the starter assembly (4).

- Reconnect the electrical connector (1) for the left knock sensor (3).

- Install the ground terminal bolt (2).
Tighten
Tighten the bolts to 25 N·m (18 lb ft).
- Reconnect the ECT sensor (1).

- Install the ground wires (1, 2) and retaining bolts (3, 4) to the engine block.
Tighten
Tighten the bolts to 25 N·m (18 lb ft).

- Install the transmission cooling lines in the front side of the engine, automatic
transmission only.
Tighten
Tighten the bolts to 25 N·m (18 lb ft).

- Install the transmission lines from the rear of the engine, automatic transmissions
only.
Tighten
Tighten the bolts to 25 N·m (18 lb ft).
- Install the catalytic convertors. Refer to
Catalytic Converter Replacement
in Engine Exhaust.
- Install the A/C compressor. Refer to
Air Conditioning Compressor Replacement
in Heating, Ventilation and Air Conditioning.
- Lower the vehicle.
- Connect the oil pressure sensor.
- Install the intake manifold. Refer to
Intake Manifold Replacement
.
- Position the engine wiring harness on the engine.
- Install the generator mounting bracket. Refer to
Generator Bracket Replacement
in Engine Electrical.
- Install the ignition coils. Refer to
Ignition Coil Replacement
in Engine Controls - 6.0L.
- Install the surge tank. Refer to
Radiator Surge Tank Replacement
in Engine Cooling.
- Install the heater hoses.
- Install the accessory drive belt. Refer to
Drive Belt Replacement - Accessory
.
- Install the radiator, A/C condenser, and cooling fan assembly. Refer to
Radiator Replacement
in Engine Cooling.
- Install the upper tie bar. Refer to
Front End Upper Tie Bar Replacement
in Body Front End.
- Install the radiator hoses.
- Install the air cleaner assembly. Refer to
Air Cleaner Assembly Replacement
in Engine Controls - 6.0L.
- Raise the vehicle.
- Reconnect the negative battery cable. Refer to
Battery Negative Cable Disconnection and Connection
in Engine Electrical.
- Fill the cooling system. Refer to
Cooling System Draining and Filling
in Engine Cooling.
- Fill the engine with motor oil. Refer to
Draining Fluids and Oil Filter Removal
.
- Recharge the A/C system. Refer to
Refrigerant Recovery and Recharging
in Heating, Ventilation and Air Conditioning.
- Install the hood assembly. Refer to
Hood Replacement
in Body Front End.


