For 1990-2009 cars only
Removal Procedure
- Open the convertible top.
- Disconnect the negative battery cable. Refer to Battery Negative Cable Disconnection and Connection .
- Remove the rear upper garnish molding. Refer to Rear Upper Garnish Molding Replacement .
- Loosen and move the floor console forward to reveal the BCM electrical connectors. Refer to Console Replacement .
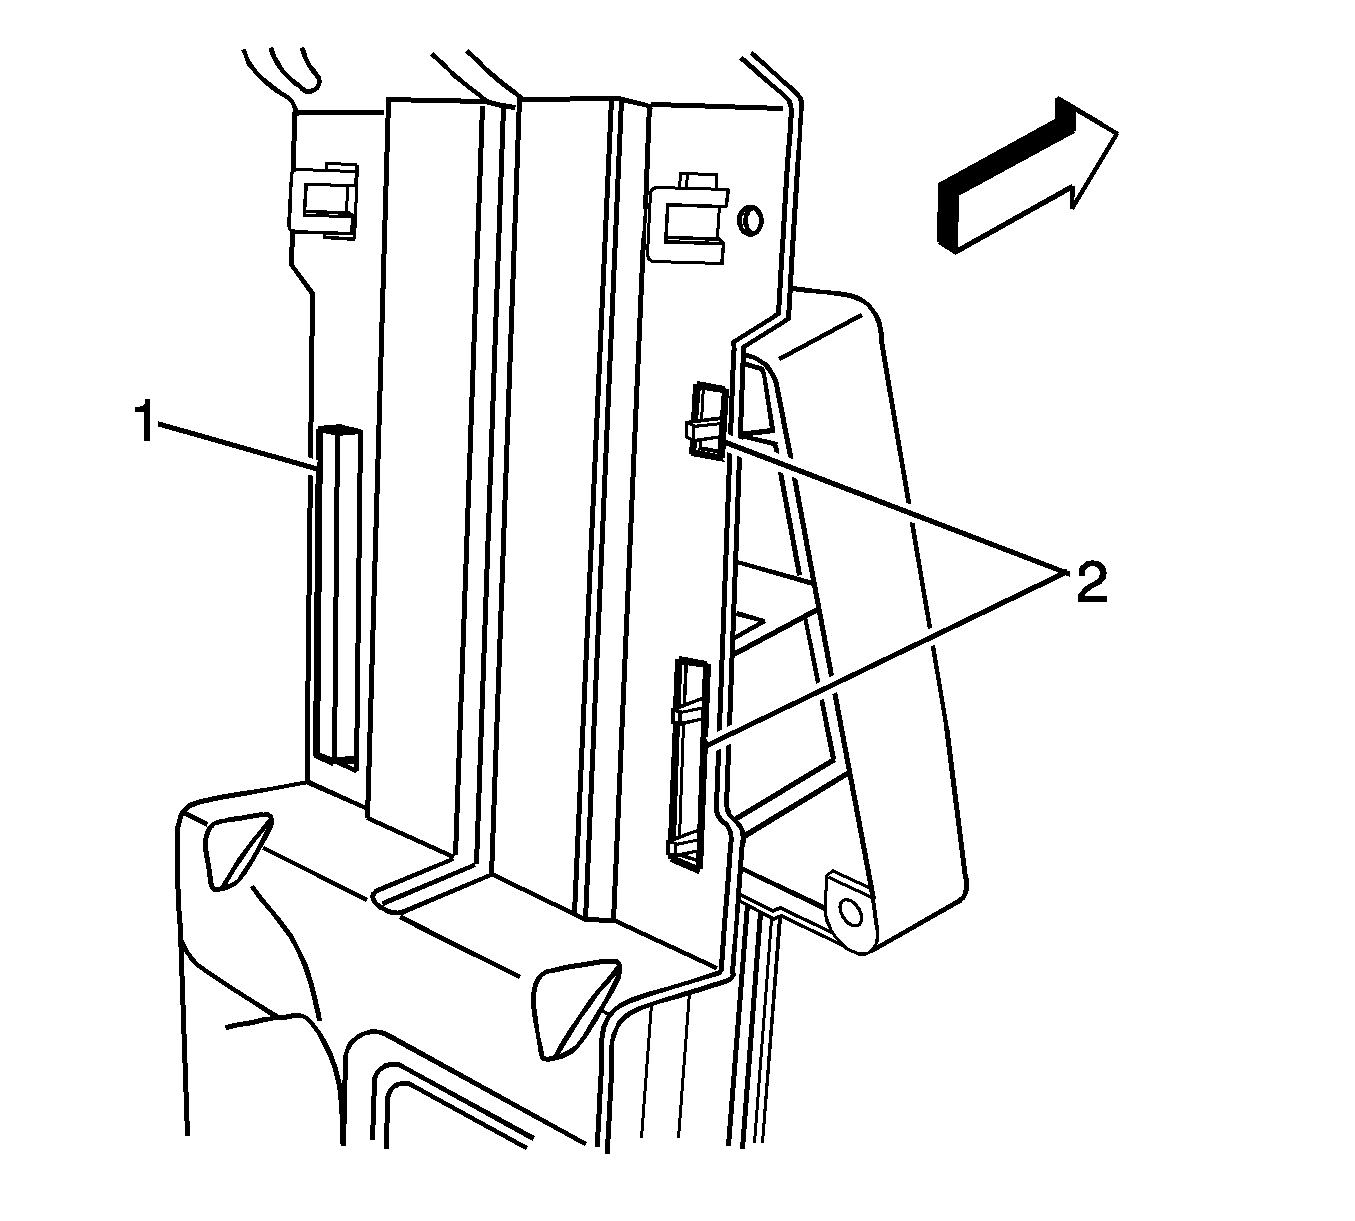
- Release the tabs (2) retaining the BCM mounting bracket to the console bracket.
- Release the tab (1) retaining the BCM mounting bracket to the console bracket.
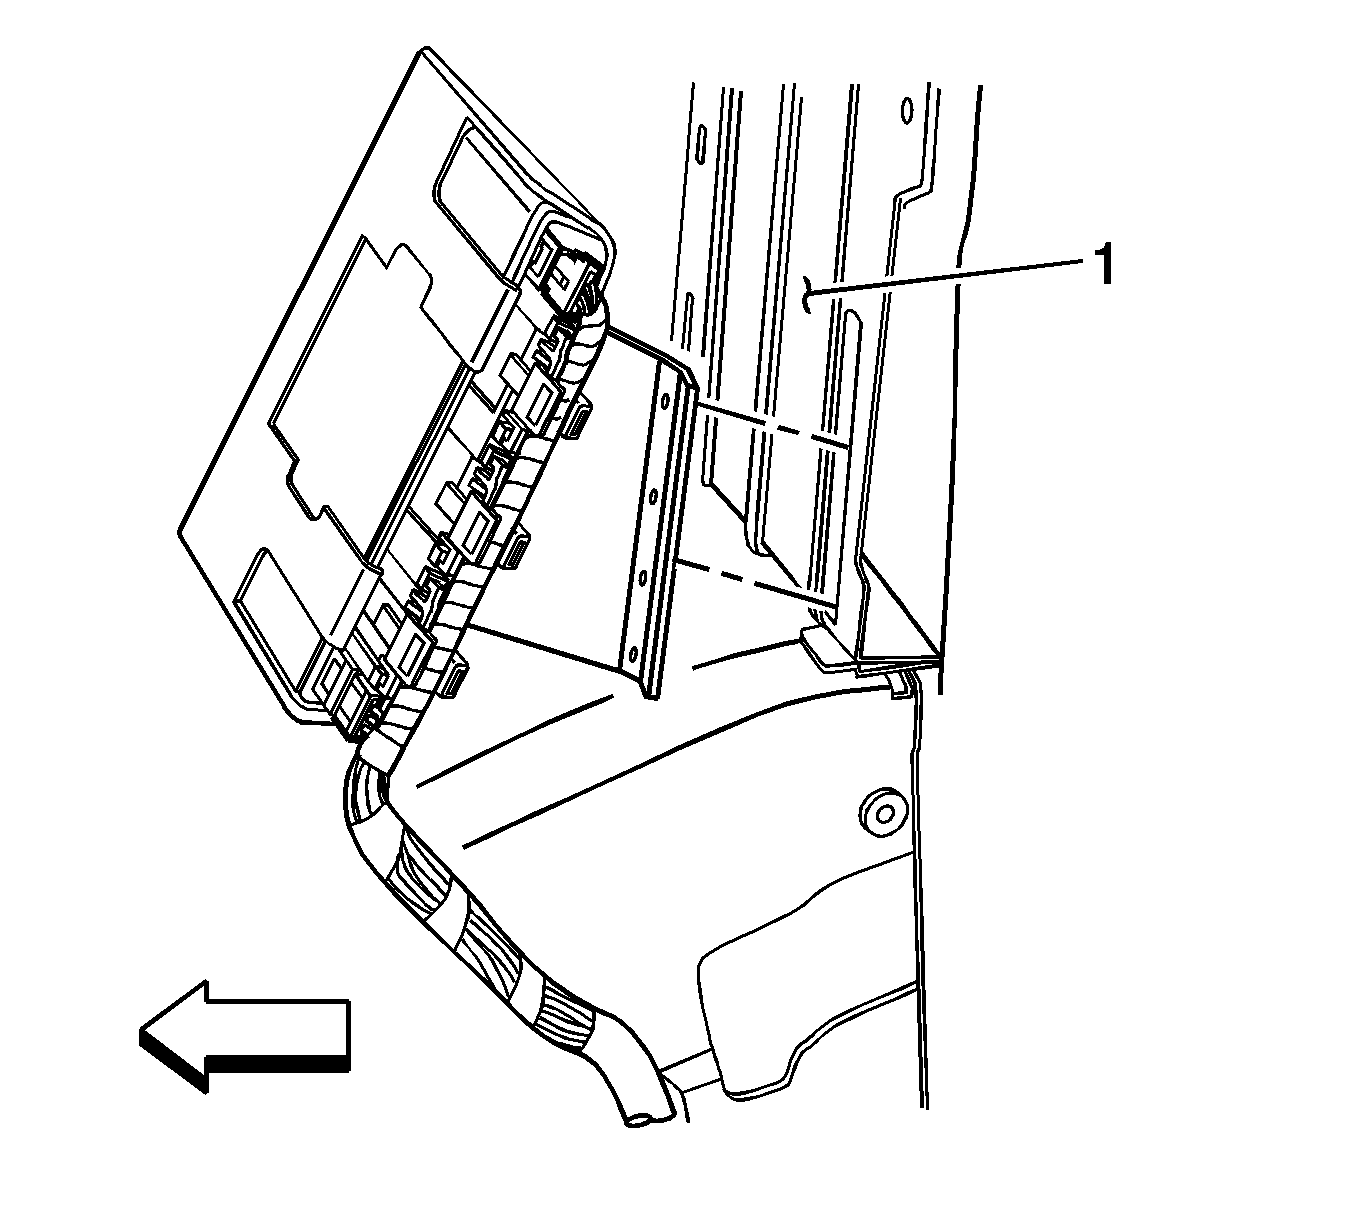
- Remove the BCM and bracket assembly from the console bracket (1).
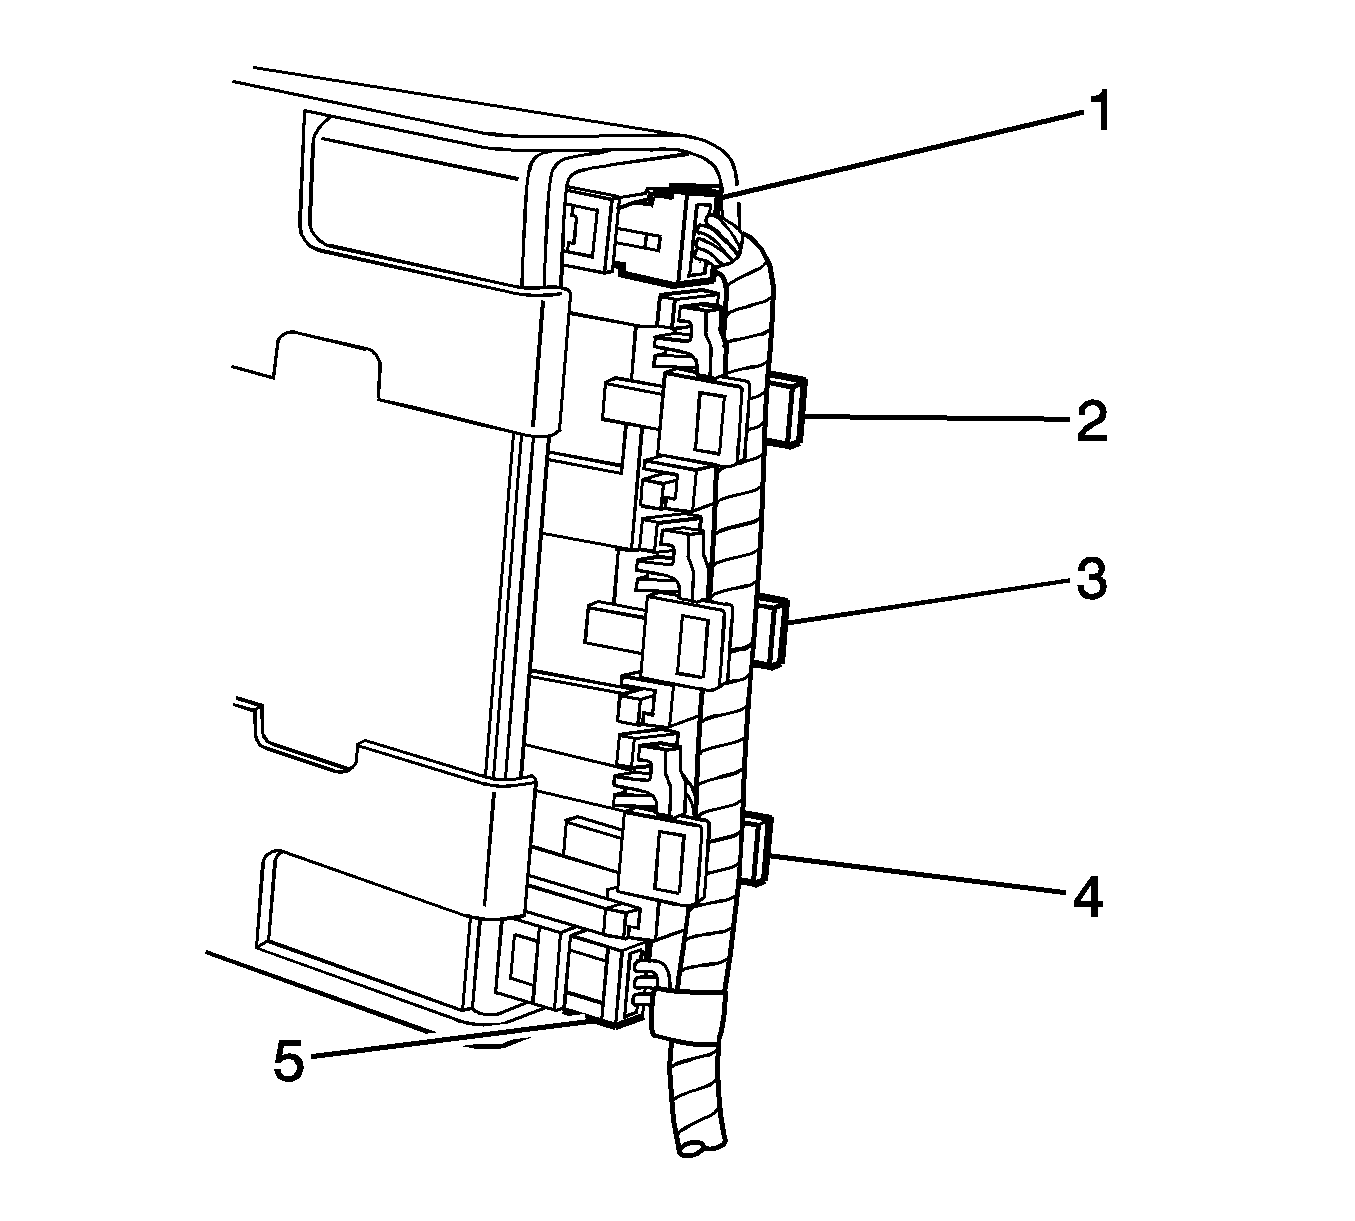
- Disconnect the gray connector (2) from the BCM.
- Disconnect the white connector (1) from the BCM.
- Disconnect the black connector (5) from the BCM.
- Disconnect the blue connector (4) from the BCM.
- Disconnect the brown connector (3) from the BCM.
- Remove the BCM from the vehicle.
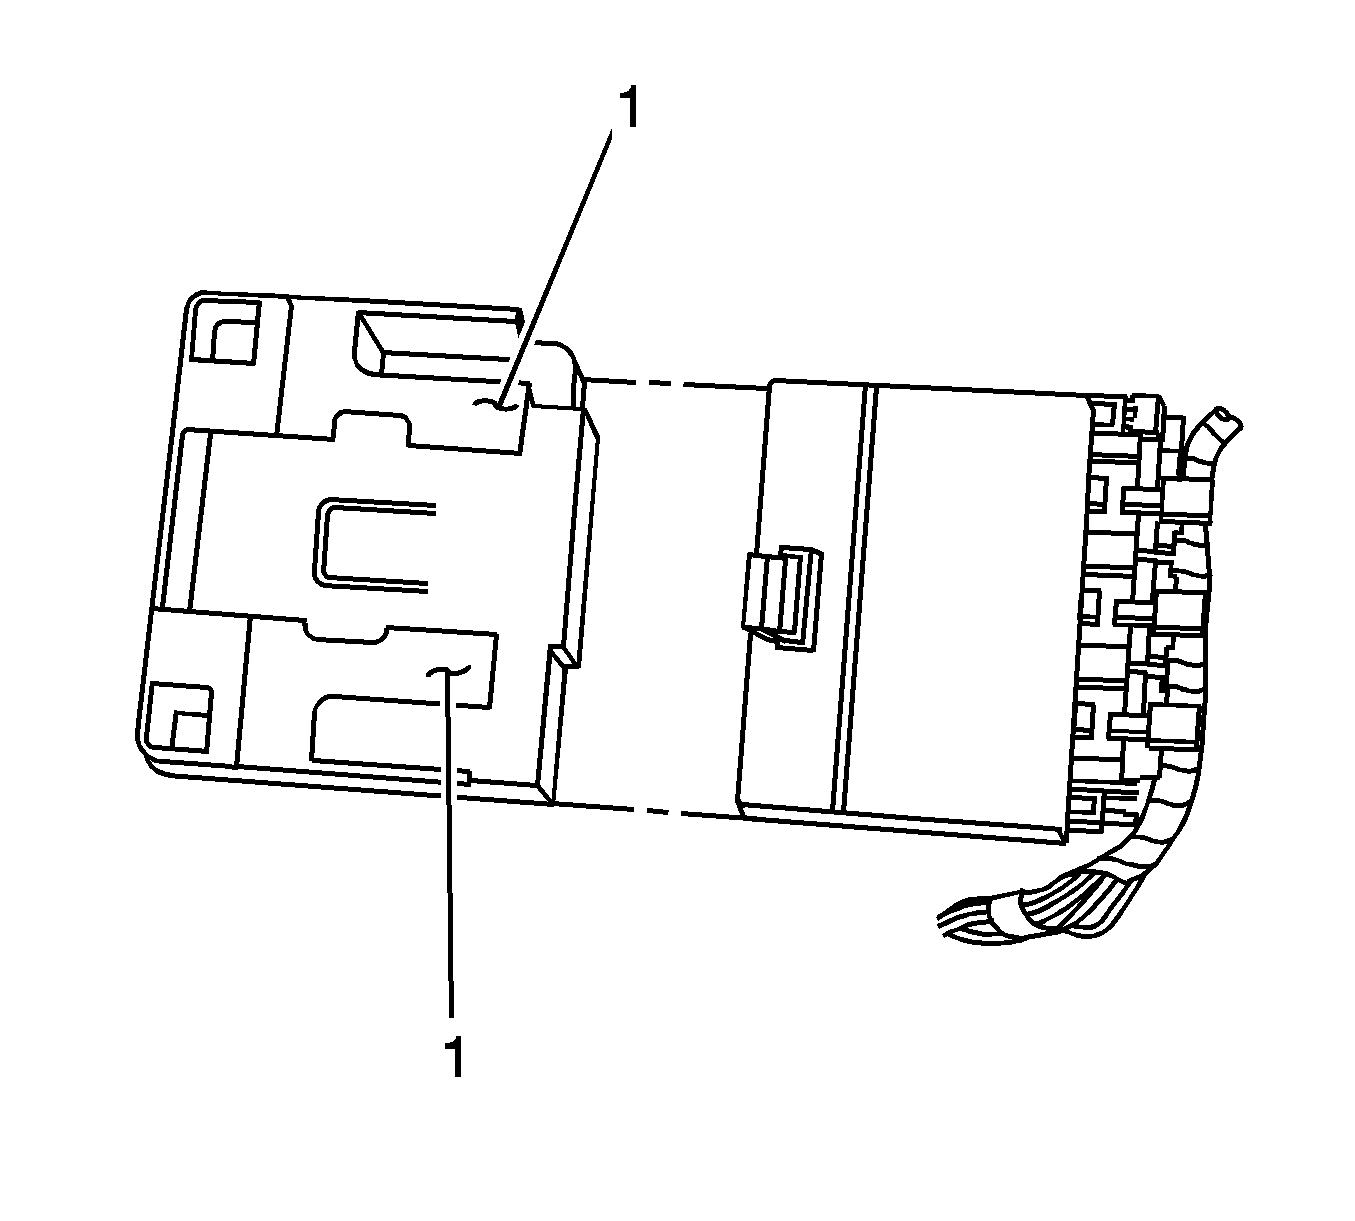
- If replacing the BCM, release the retaining tabs (1) and remove the mounting bracket from the BCM.
Important:
• The ignition switch should be in the OFF position when connecting or disconnecting the connectors to the body control module (BCM). • Always disconnect the gray connector FIRST, the white connector SECOND, the black connector THIRD, the blue connector FORTH, and the brown electrical connector LAST. • Always connect the brown electrical connector FIRST, the blue connector SECOND, the black connector THIRD, the white connector FORTH, and the gray connector LAST. • Do not open the BCM housing. The module does not have any serviceable components. The module may be replaced only as an assembly.
Caution: Refer to Battery Disconnect Caution in the Preface section.
Installation Procedure
- If replacing the BCM, install the mounting bracket on the BCM. Ensure the retaining tabs (1) are fully seated.
- Connect the brown connector (3) to the BCM.
- Connect the blue connector (4) to the BCM.
- Connect the black connector (5) to the BCM.
- Connect the white connector (1) to the BCM.
- Connect the gray connector (2) to the BCM.
- Position the BCM and bracket assembly to the console bracket (1).
- Install the tab (1) retaining the BCM mounting bracket to the console bracket.
- Install the tabs (2) retaining the BCM mounting bracket to the console bracket.
- Install the floor console . Refer to Console Replacement .
- Install the rear upper garnish molding. Refer to Rear Upper Garnish Molding Replacement .
- Connect the negative battery cable. Refer to Battery Negative Cable Disconnection and Connection .
- If installing a replacement BCM, program the BCM. Refer to Body Control Module (BCM) Programming/RPO Configuration .
- Close the convertible top.
- Refer to Control Module References for programming and setup information.
