Your vehicle has a tire inflator kit. There is no jack or spare tire. The kit uses a liquid tire sealant and air to seal small punctures in the tread area of the tire. Be sure to read and follow all the tire inflator kit instructions. The kit includes the following:
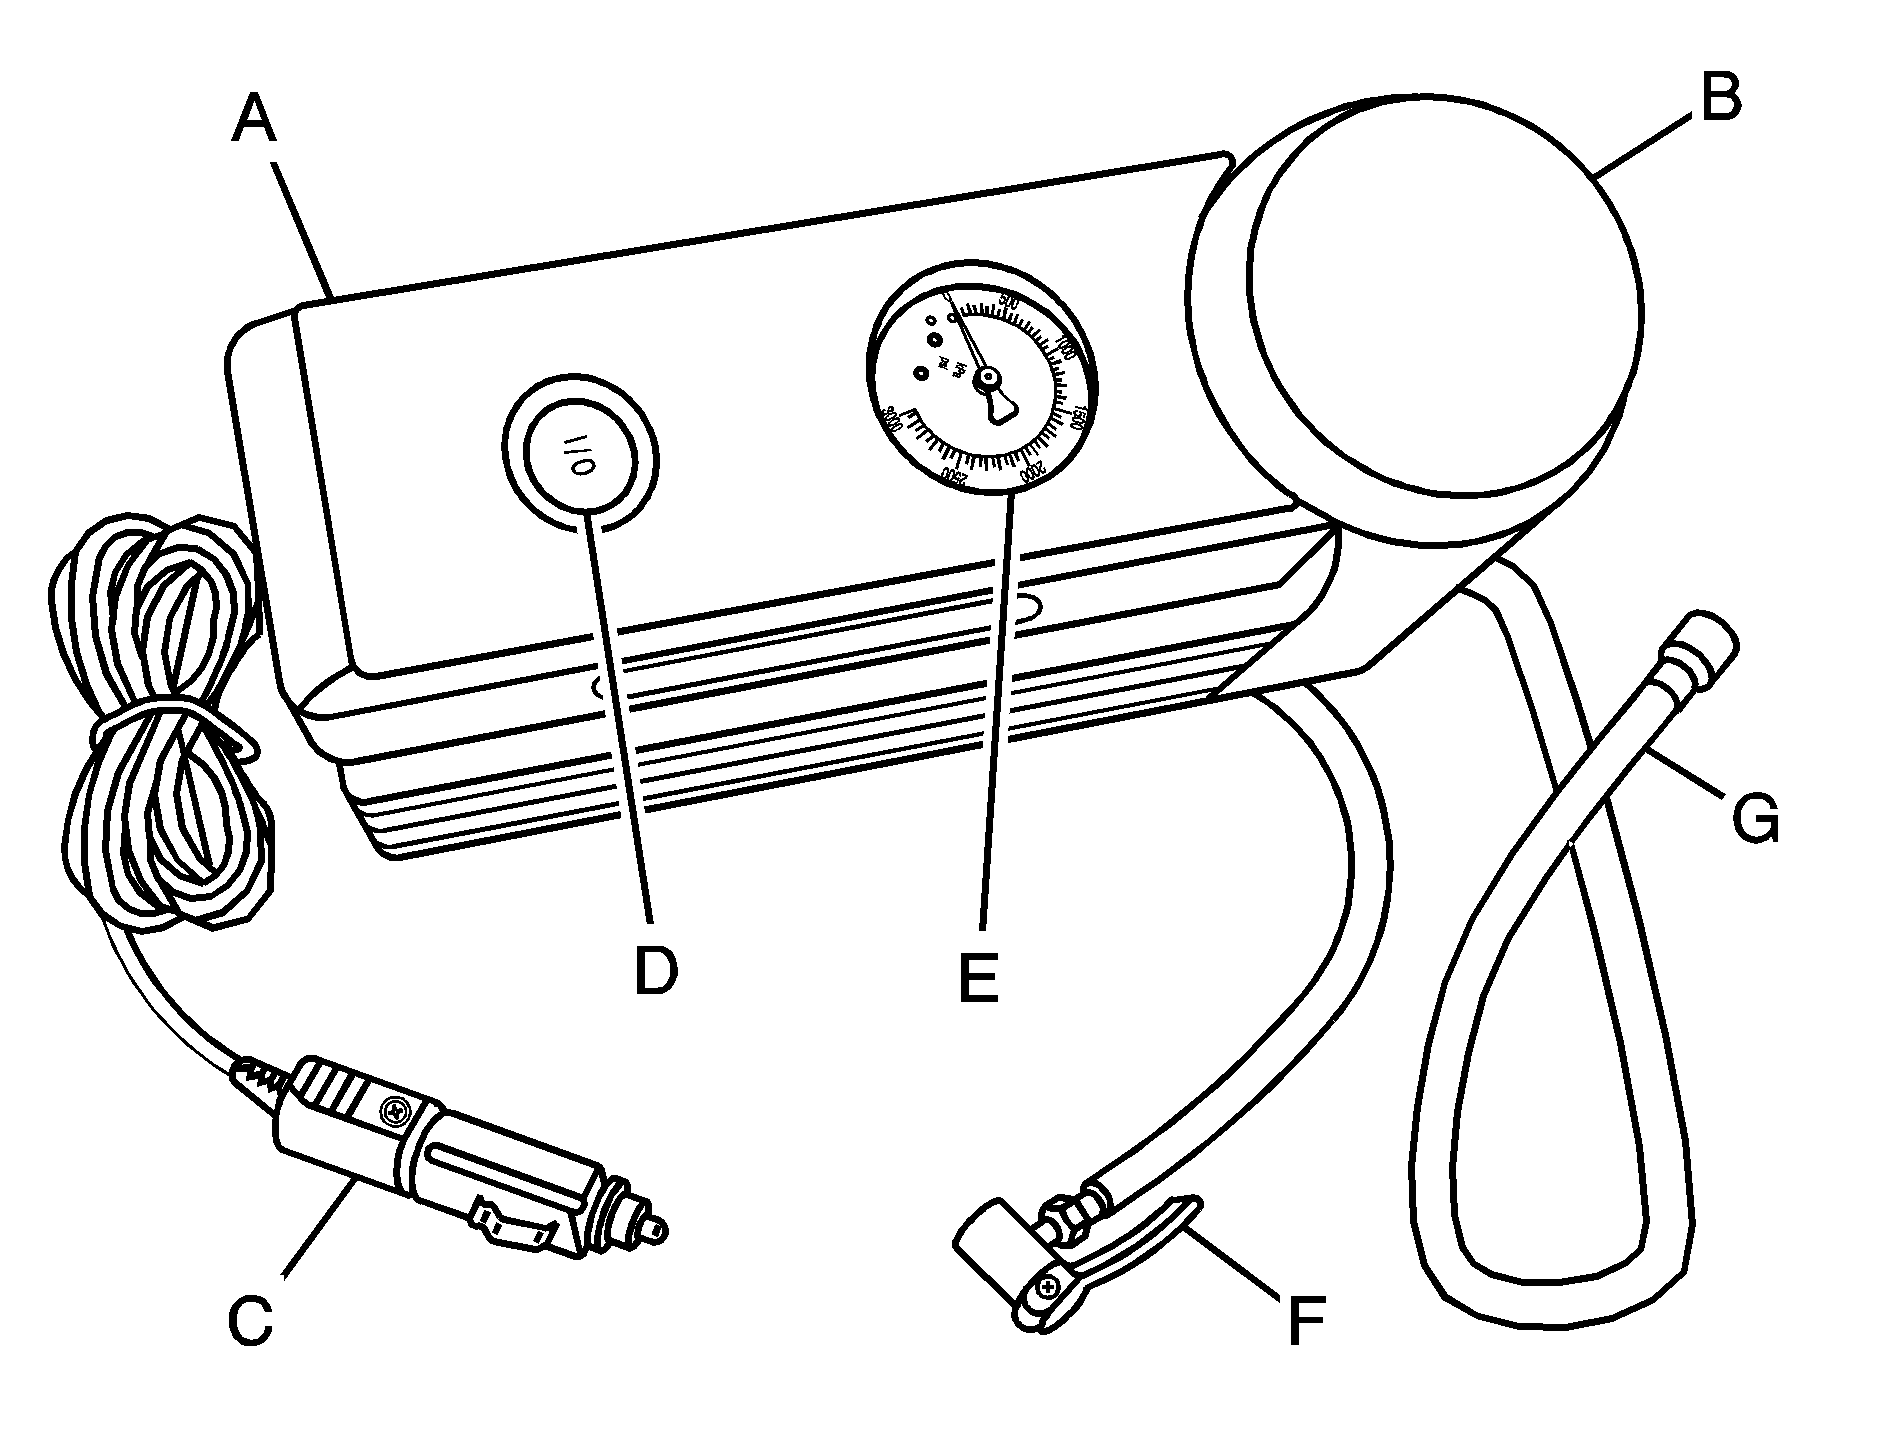
Air Compressor
Tire Sealant Canister
Air Compressor Accessory Plug
On/Off Switch
Air Pressure Gage
Air Compressor Inflator Hose
Sealant Filling Hose
If the flat tire is due to a slow leak caused by a nail or other similar road hazard, the tire inflator kit may be used to temporarily repair the damaged tire.
After temporarily repairing a tire with the tire inflator kit, take your vehicle to an authorized GM dealer to have the tire inspected and repaired.
Accessing the Tire Inflator Kit
To access the tire inflator kit, do the following:
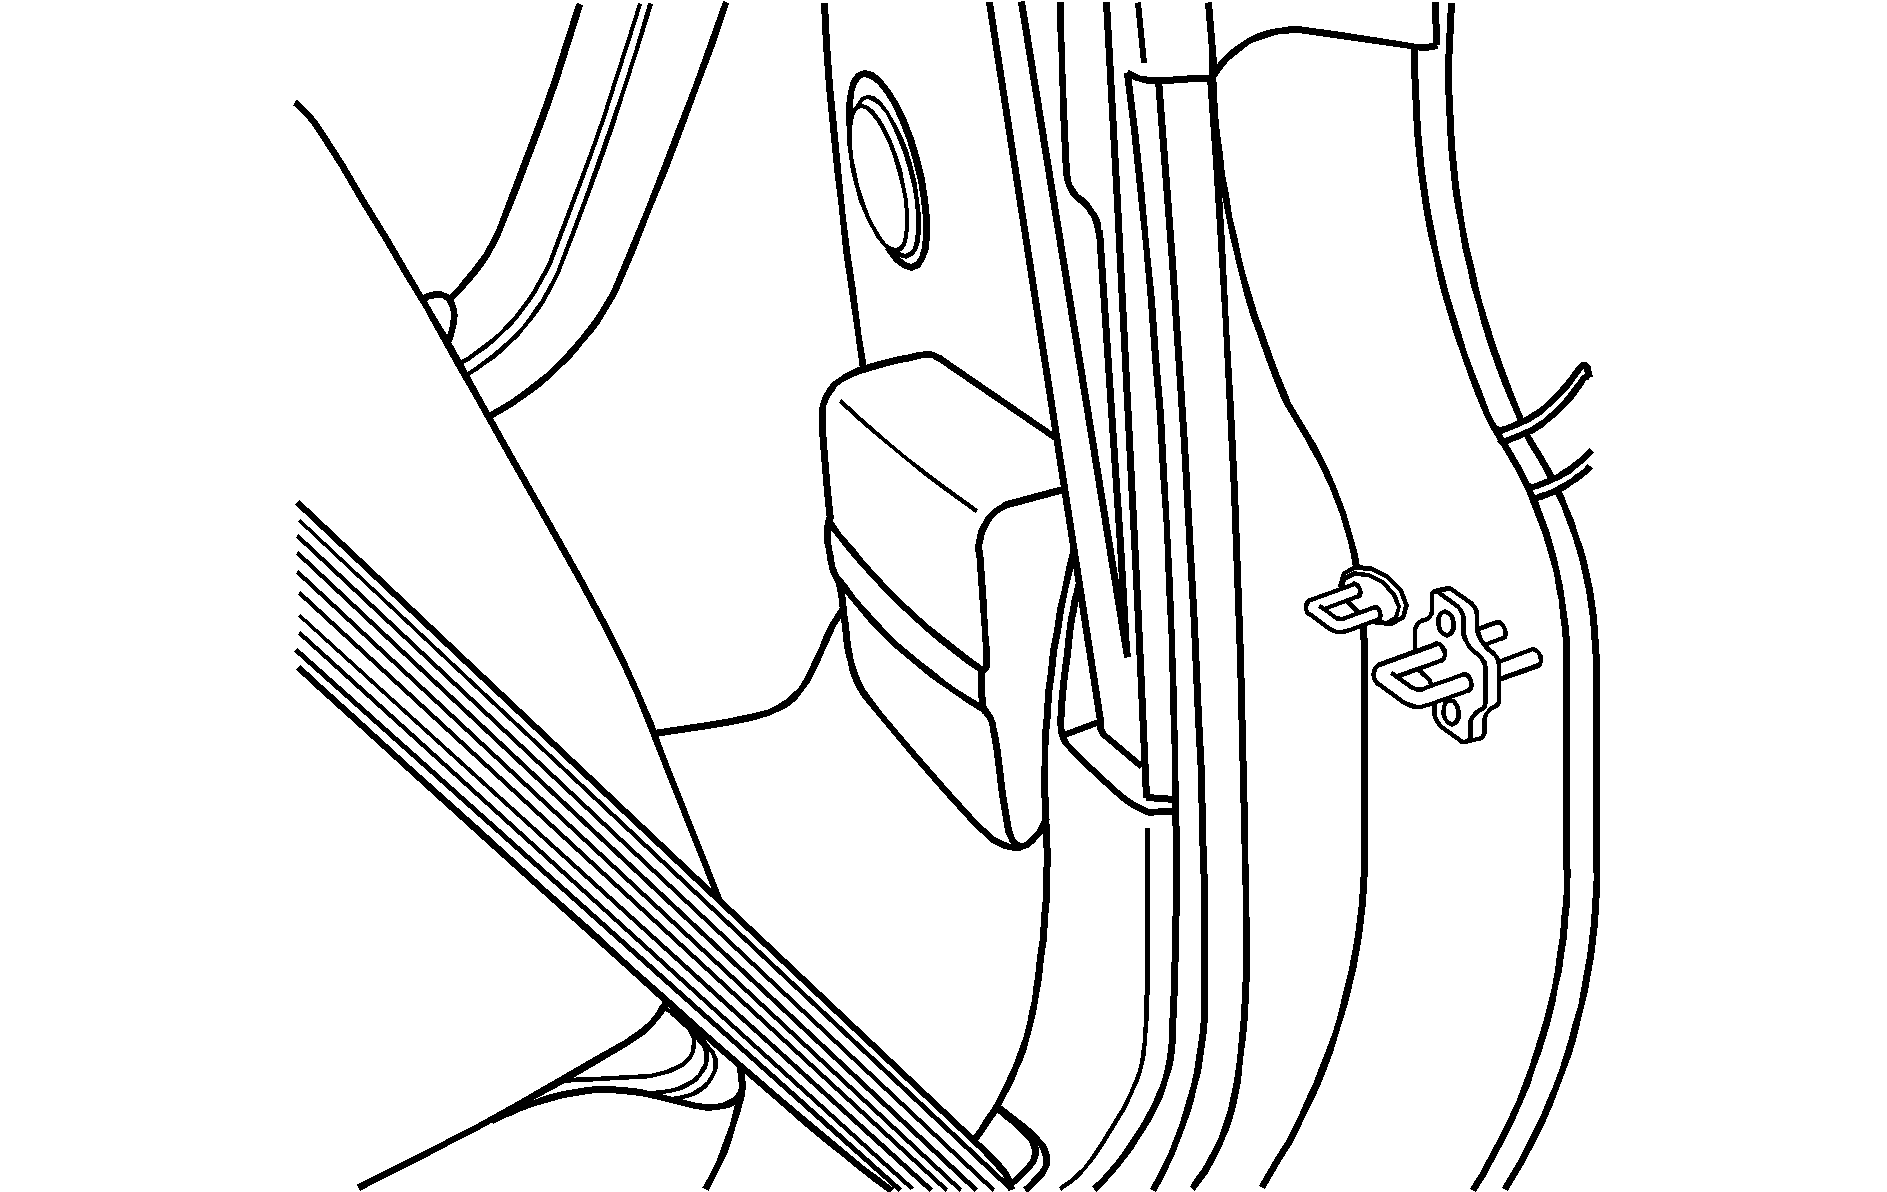
- Locate the tire inflator kit, which is on the driver's side of the vehicle, behind the seat back.
- Remove the tire inflator kit cover by loosening the two screw fasteners.
Tire Sealant
The kit contains a liquid sealant that when injected into a flat tire, may temporarily repair nail holes or cuts in the tread area of the tire. The tire sealant cannot repair tire damage caused while driving on a flat tire or a tire that has had a "blow out" or a tire that has punctures in the sidewall areas. The tire sealant solution can be used only once on a single tire.
Check the tire sealant expiration date on the sealant canister. The sealant may not be as effective beyond the expiration date. If needed, see your GM dealer for a replacement canister.
After temporarily repairing a tire using the tire sealant, take your vehicle to an authorized GM dealer to have the tire inspected and repaired.
Using the Tire Inflator Kit
To use the tire inflator kit, do the following:
- Place the inflator kit on the ground and unwrap the sealant filling hose from the compressor.
- Remove the air compressor accessory plug from the unit. To do this, pull the top portion of the wrapped cord out first, then the bottom, then unsnap the plug. Do not insert the plug into an accessory outlet yet.
- Remove the valve stem cap from the flat tire by turning it counterclockwise.
- Attach the sealant filling hose (A) onto the tire valve stem. Turn it clockwise until it is tight.
- Plug the air compressor accessory plug (C) into an accessory power outlet in the vehicle. See Accessory Power Outlet(s) for more information.
- Start the vehicle. See Starting the Engine for more information. The vehicle must be running while using the air compressor.
- Move the inflator kit switch to the I (on) position.
- Make sure there is a proper connection between the tire valve stem and the sealant filling hose by looking at the air pressure gage. If there is not a pressure reading while the compressor is running, the connection between the inflator kit and the tire is bad.
- Inflate the tire up to the recommended inflation pressure, found on the Tire and Loading Information label located on the vehicle's center pillar (B-pillar) below the vehicle's door latch, using the air pressure gage on the top of the unit as a guide.
- Move the inflator kit switch to the O (off) position once the correct tire pressure is obtained.
- Turn off the engine.
- Unplug the air compressor accessory plug from the accessory power outlet in the vehicle.
- Disconnect the sealant filling hose from the tire valve stem, by turning it counterclockwise, and replace the tire valve stem cap.
- Wrap the sealant filling hose around the air compressor channel to stow it in its original location.
- Stow the air compressor accessory plug back in the air compressor. To do this, wrap the air compressor accessory plug, snap in the plug, and then push in the bottom and then the top of the wrapped air compressor accessory plug.
- Place it in a highly visible location such as the inside of the upper left corner of the windshield or to the face of the radio/clock.
- Return the equipment to the proper storage location behind the driver's seatback.
- Immediately drive the vehicle 5 miles (8 km) to distribute the sealant evenly in the tire. Stop at a safe location and check the tire pressure. Refer to Steps 1 through 8 under "Using the Air Compressor without Sealant" next in this section. If the tire pressure has fallen more than 10 psi (68 kPa) below the recommended inflation pressure, stop driving the vehicle. The tire is too damaged for the sealant to work. See Roadside Assistance Program .
- Dispose of the sealant canister at a local GM dealer or in accordance with your local state codes and practices.
- After temporarily repairing a tire with the emergency flat tire repair kit, take your vehicle to an authorized GM dealer to have the tire inspected and repaired.
If an object, such as a nail, has penetrated the tire, do not remove it.
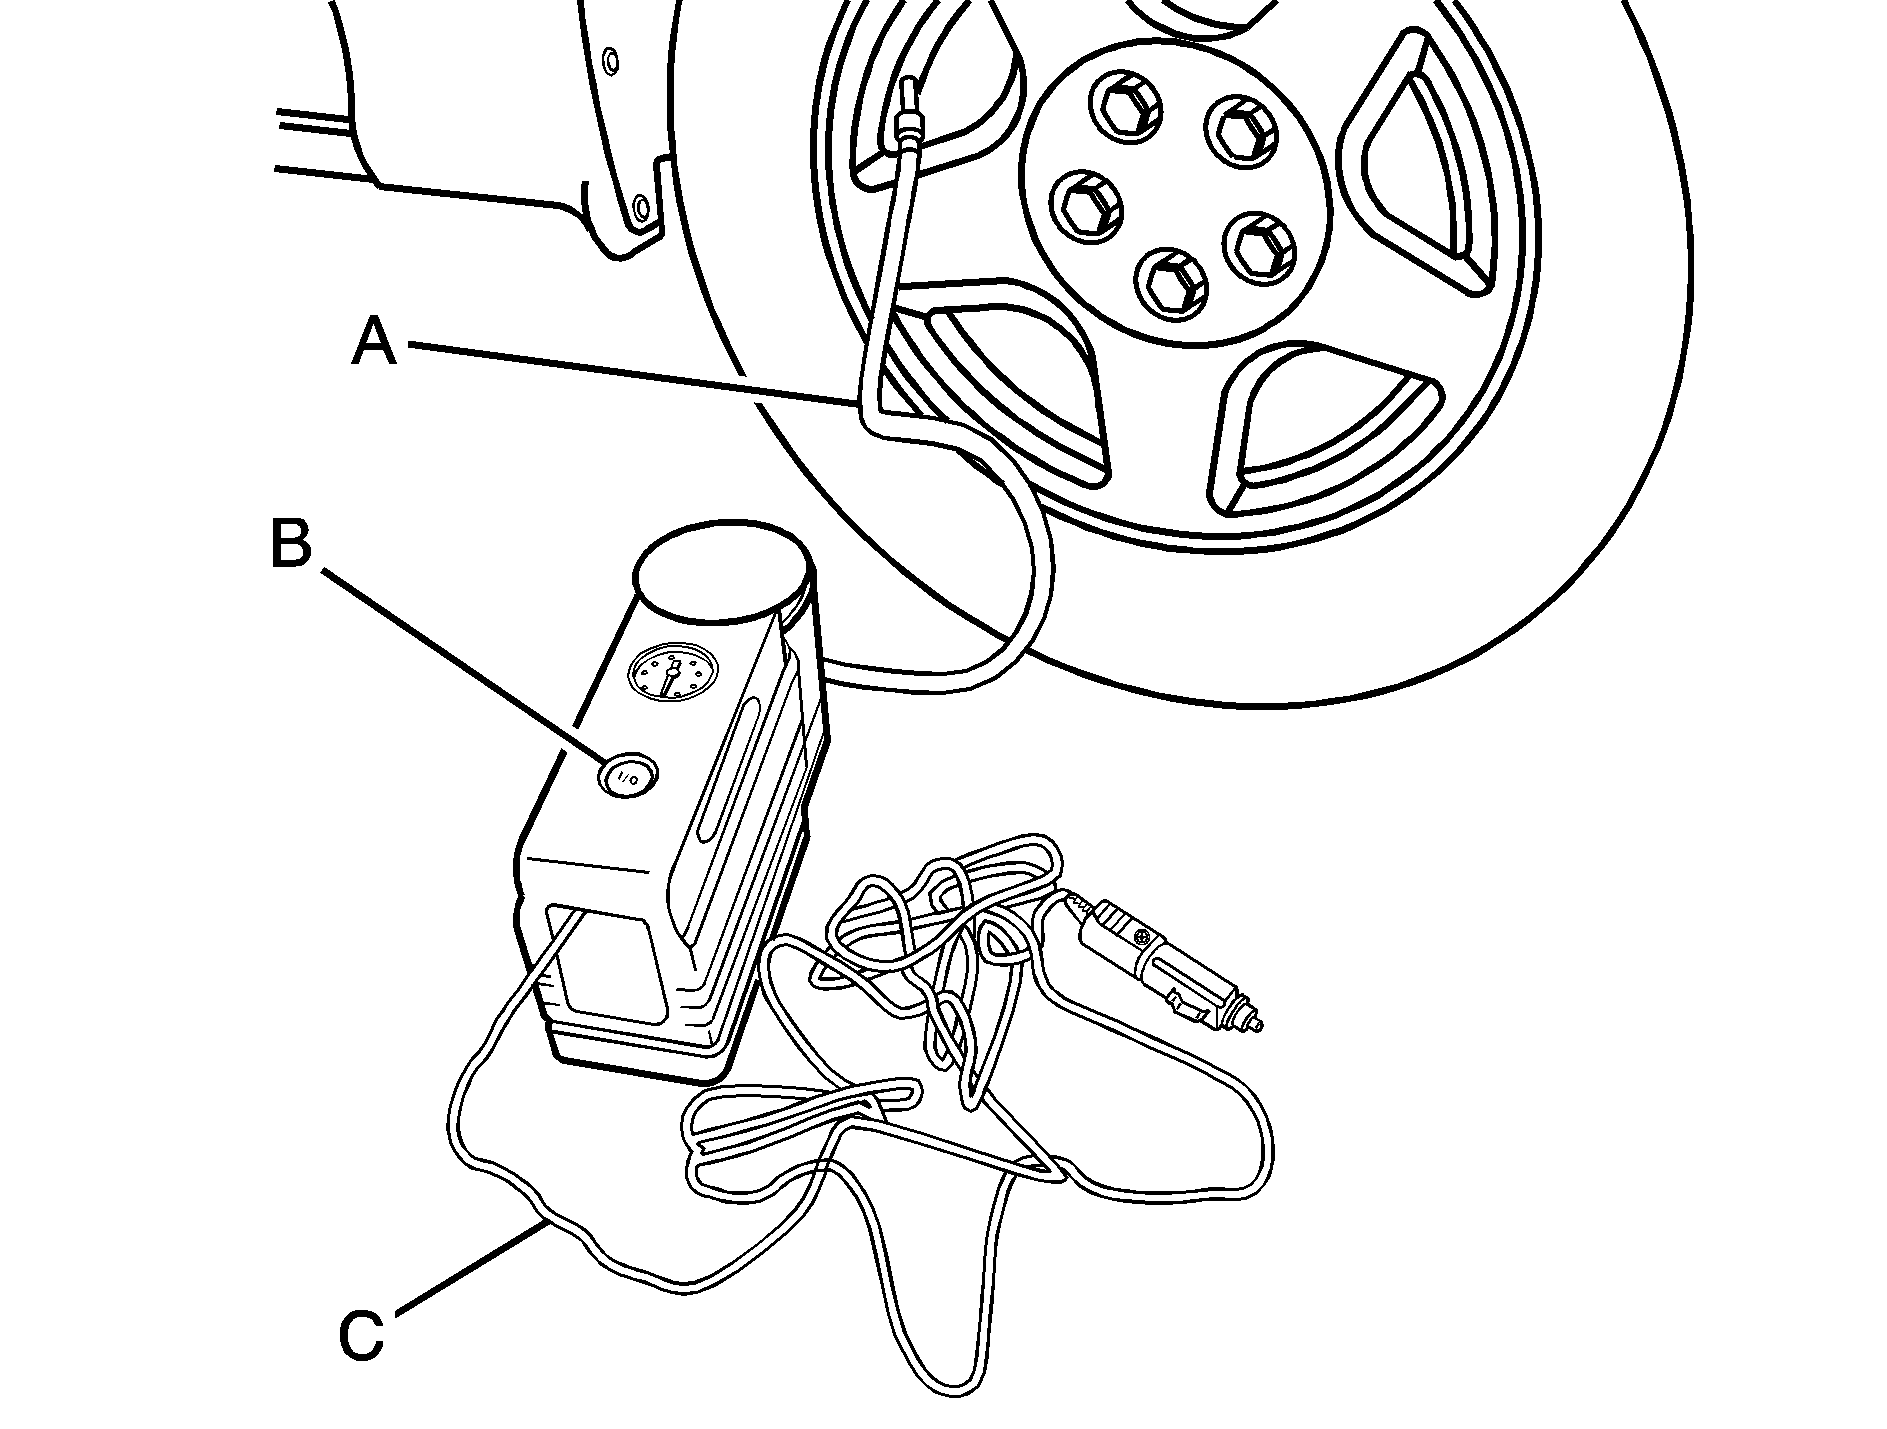
Make sure the inflator kit on/off switch (B) is in the O (off) position.
Caution: Idling the engine in a closed-in place or with the climate control system off can cause deadly carbon monoxide (CO). See Engine Exhaust .
Caution: Overinflation could cause the tire to rupture, and you or others could be injured. Be sure to read the inflator instructions, and inflate the tire to its recommended pressure. Do not exceed 36 psi (248 kPa).
The inflator kit will force sealant and air into the tire. Sealant may leak from the puncture hole until the vehicle is driven and the hole has sealed.
Check the attachment between the sealant filling hose and the tire valve stem.
The pressure gage reading is slightly high while the compressor is on. Turn the compressor off to get an accurate pressure reading.
Notice: If the recommended pressure cannot be reached after approximately 25 minutes, the vehicle should not be driven. The tire is too severely damaged and the tire sealant and compressor kit cannot inflate the tire. Remove the air compressor accessory plug from the accessory power outlet and unscrew the sealant/air hose from the tire valve or tire pressure monitoring sensor valve. See Roadside Assistance Program .
Be careful when handling the tire inflator components as they may be hot after usage.
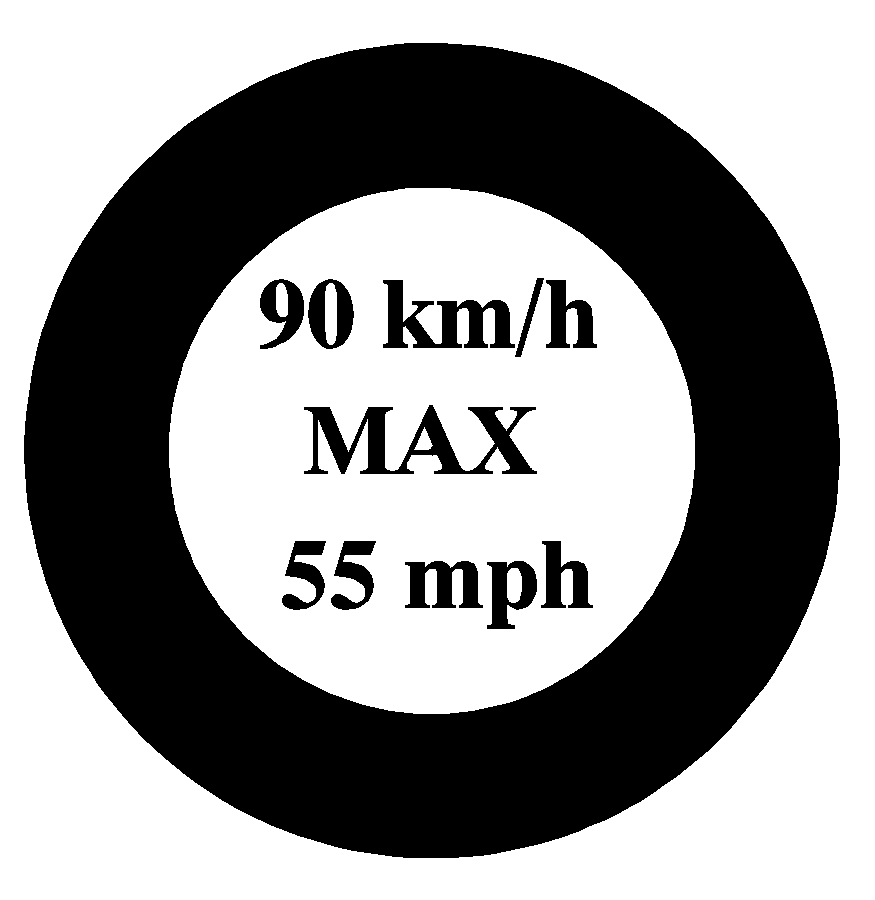
If the flat tire was able to inflate to the recommended inflation pressure, remove the maximum speed label from the sealant canister.
The maximum speed label reminds you to drive cautiously and not to exceed 55 mph (90 km/h) until you have the damaged tire inspected and repaired.
Caution: Storing the tire sealant and compressor kit or other equipment in the passenger compartment of the vehicle could cause injury. In a sudden stop or collision, loose equipment could strike someone. Store the tire sealant and compressor kit in its original location.
If the tire pressure has not dropped more than 10 psi (68 kPa) from the recommended inflation pressure, you can inflate the tire back up to the recommended inflation pressure.
After using the sealant canister, replace it with a new canister from a GM dealer.
Using the Air Compressor without Sealant
To use the air compressor by itself to inflate a tire, do the following:
- Remove the air compressor accessory plug from the air compressor.
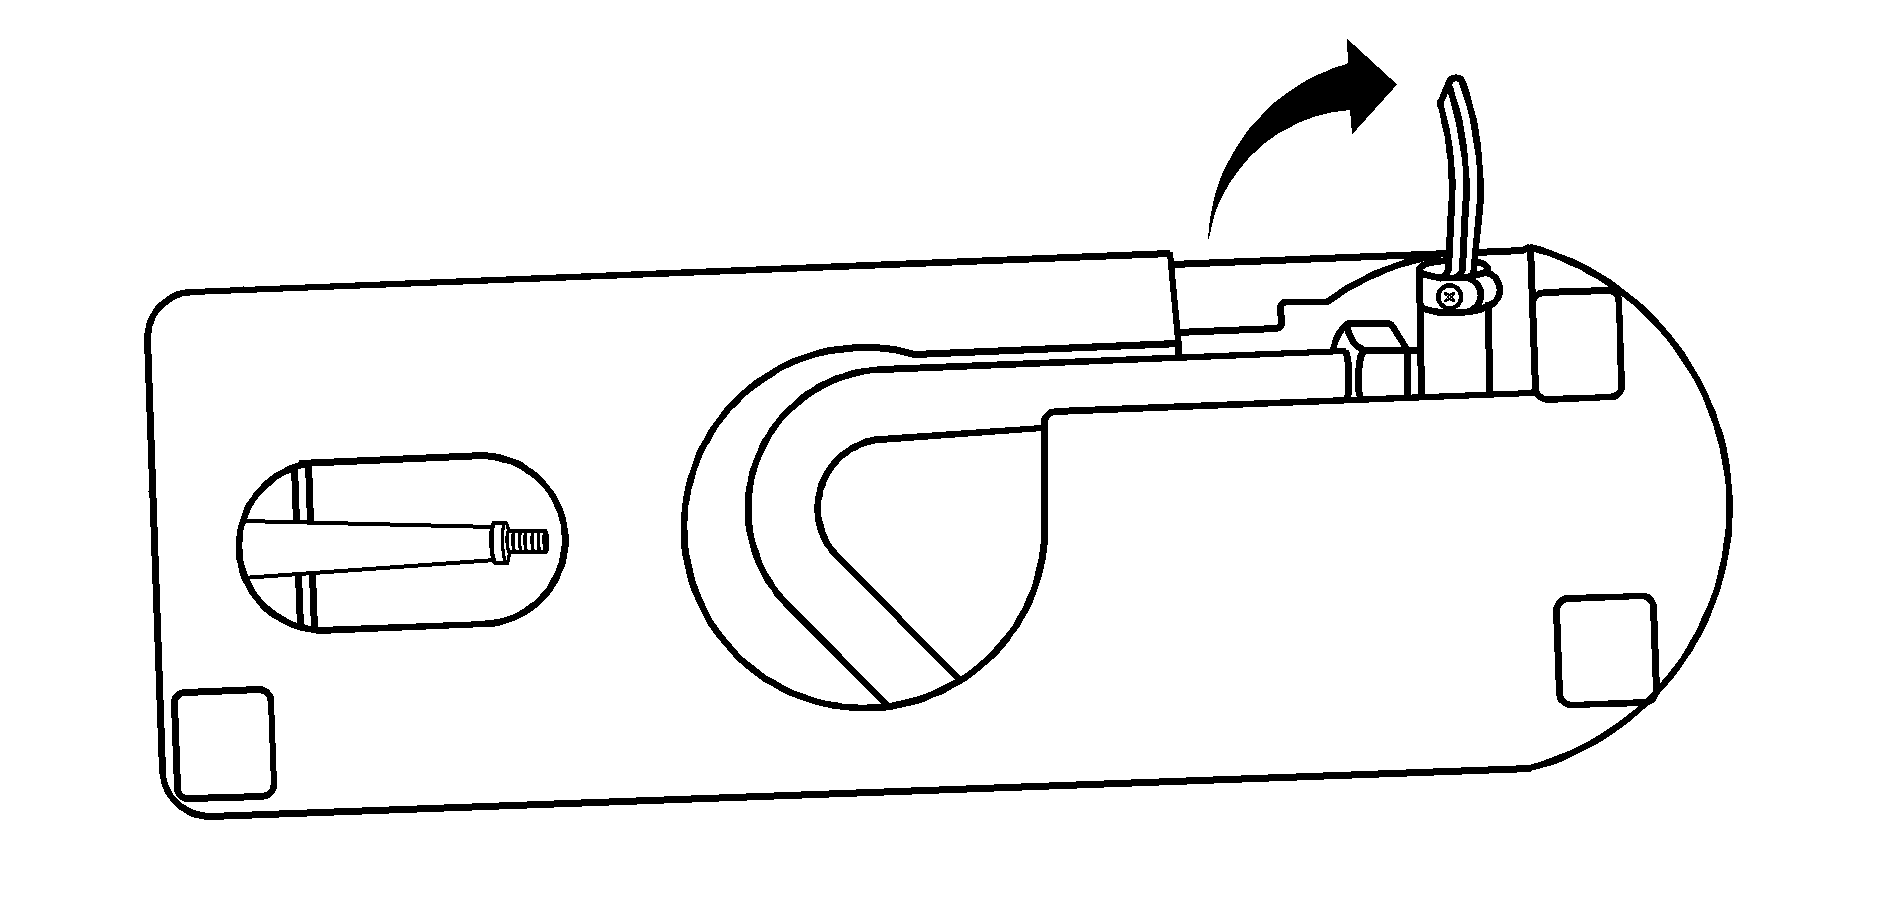
- Unlock the air compressor hose from the sealant canister by pulling up on the lever.
- Pull the air compressor inflator hose from the sealant canister.
- Push the air compressor inflator hose onto the tire valve stem and push the lever down to secure in place.
- Plug the air compressor accessory plug into an accessory power outlet in the vehicle. See Accessory Power Outlet(s) for more information.
- Start the vehicle. See Starting the Engine for more information. The vehicle must be running while using the air compressor.
- Move the inflator kit switch to the I (on) position.
- Make sure there is a proper connection between the tire valve stem and the air compressor hose by looking at the air pressure gage. If there is not a pressure reading while the compressor is running, the connection between the inflator kit and the tire is bad.
- Inflate the tire up to the recommended inflation pressure using the air pressure gage on the top of the unit as a guide.
- Turn off the air compressor by moving the switch to the O (off) position.
- Disconnect the compressor inflator hose and wrap the hose in the bottom of the inflator kit.
- Place the equipment in the original location behind the driver's seatback.
Caution: Idling the engine in a closed-in place or with the climate control system off can cause deadly carbon monoxide (CO). See Engine Exhaust .
Caution: Overinflation could cause the tire to rupture, and you or others could be injured. Be sure to read the inflator instructions, and inflate the tire to its recommended pressure. Do not exceed 36 psi (248 kPa).
Check the attachment between the air compressor hose and the tire valve stem.
Caution: Storing the tire sealant and compressor kit or other equipment in the passenger compartment of the vehicle could cause injury. In a sudden stop or collision, loose equipment could strike someone. Store the tire sealant and compressor kit in its original location.
Removal and Installation of the Sealant Canister
To remove the sealant canister, do the following:
- Unlock the air compressor inflator hose from the sealant canister by pulling the lever up.
- Disconnect the air compressor inflator hose from the sealant canister.
- Unwrap the sealant filling hose from the compressor.
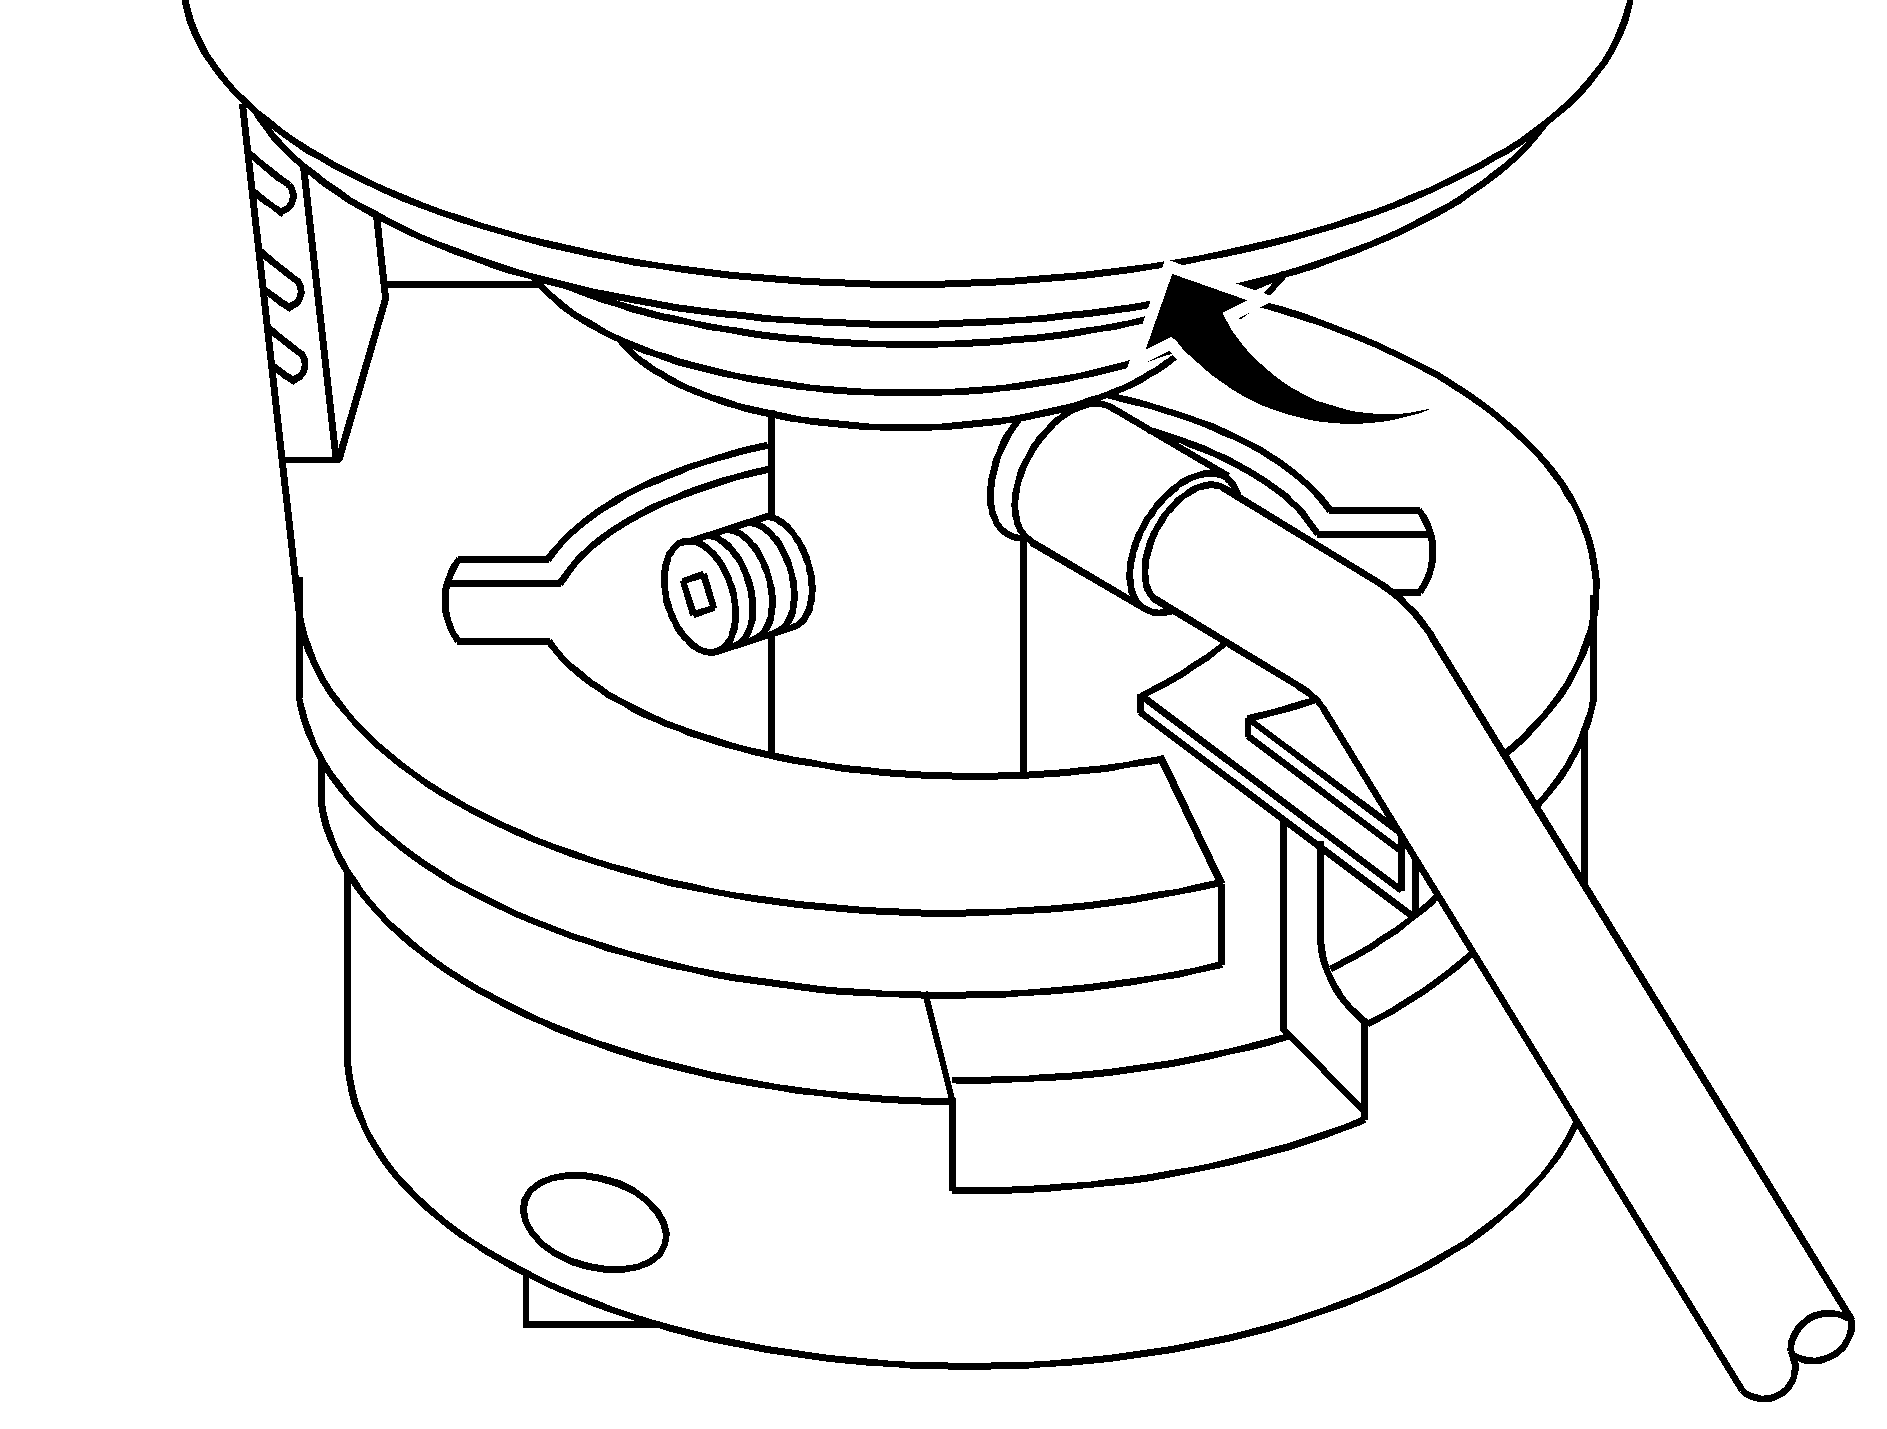
- Turn the sealant canister so the inflator filling hose is aligned with the slot in the air compressor.
- Lift the sealant canister from the air compressor and replace with a new sealant canister. See your GM dealer for more information.

To install a new sealant canister, do the following:
- Align the sealant filling hose with the slot in the air compressor.
- Push the sealant canister down and rotate it clockwise.
- Wrap the sealant filling hose around the air compressor channel to stow it in its original location.
- Push the air compressor inflator hose onto the sealant canister inlet and push the lever down.
