Callout
| Component Name
|
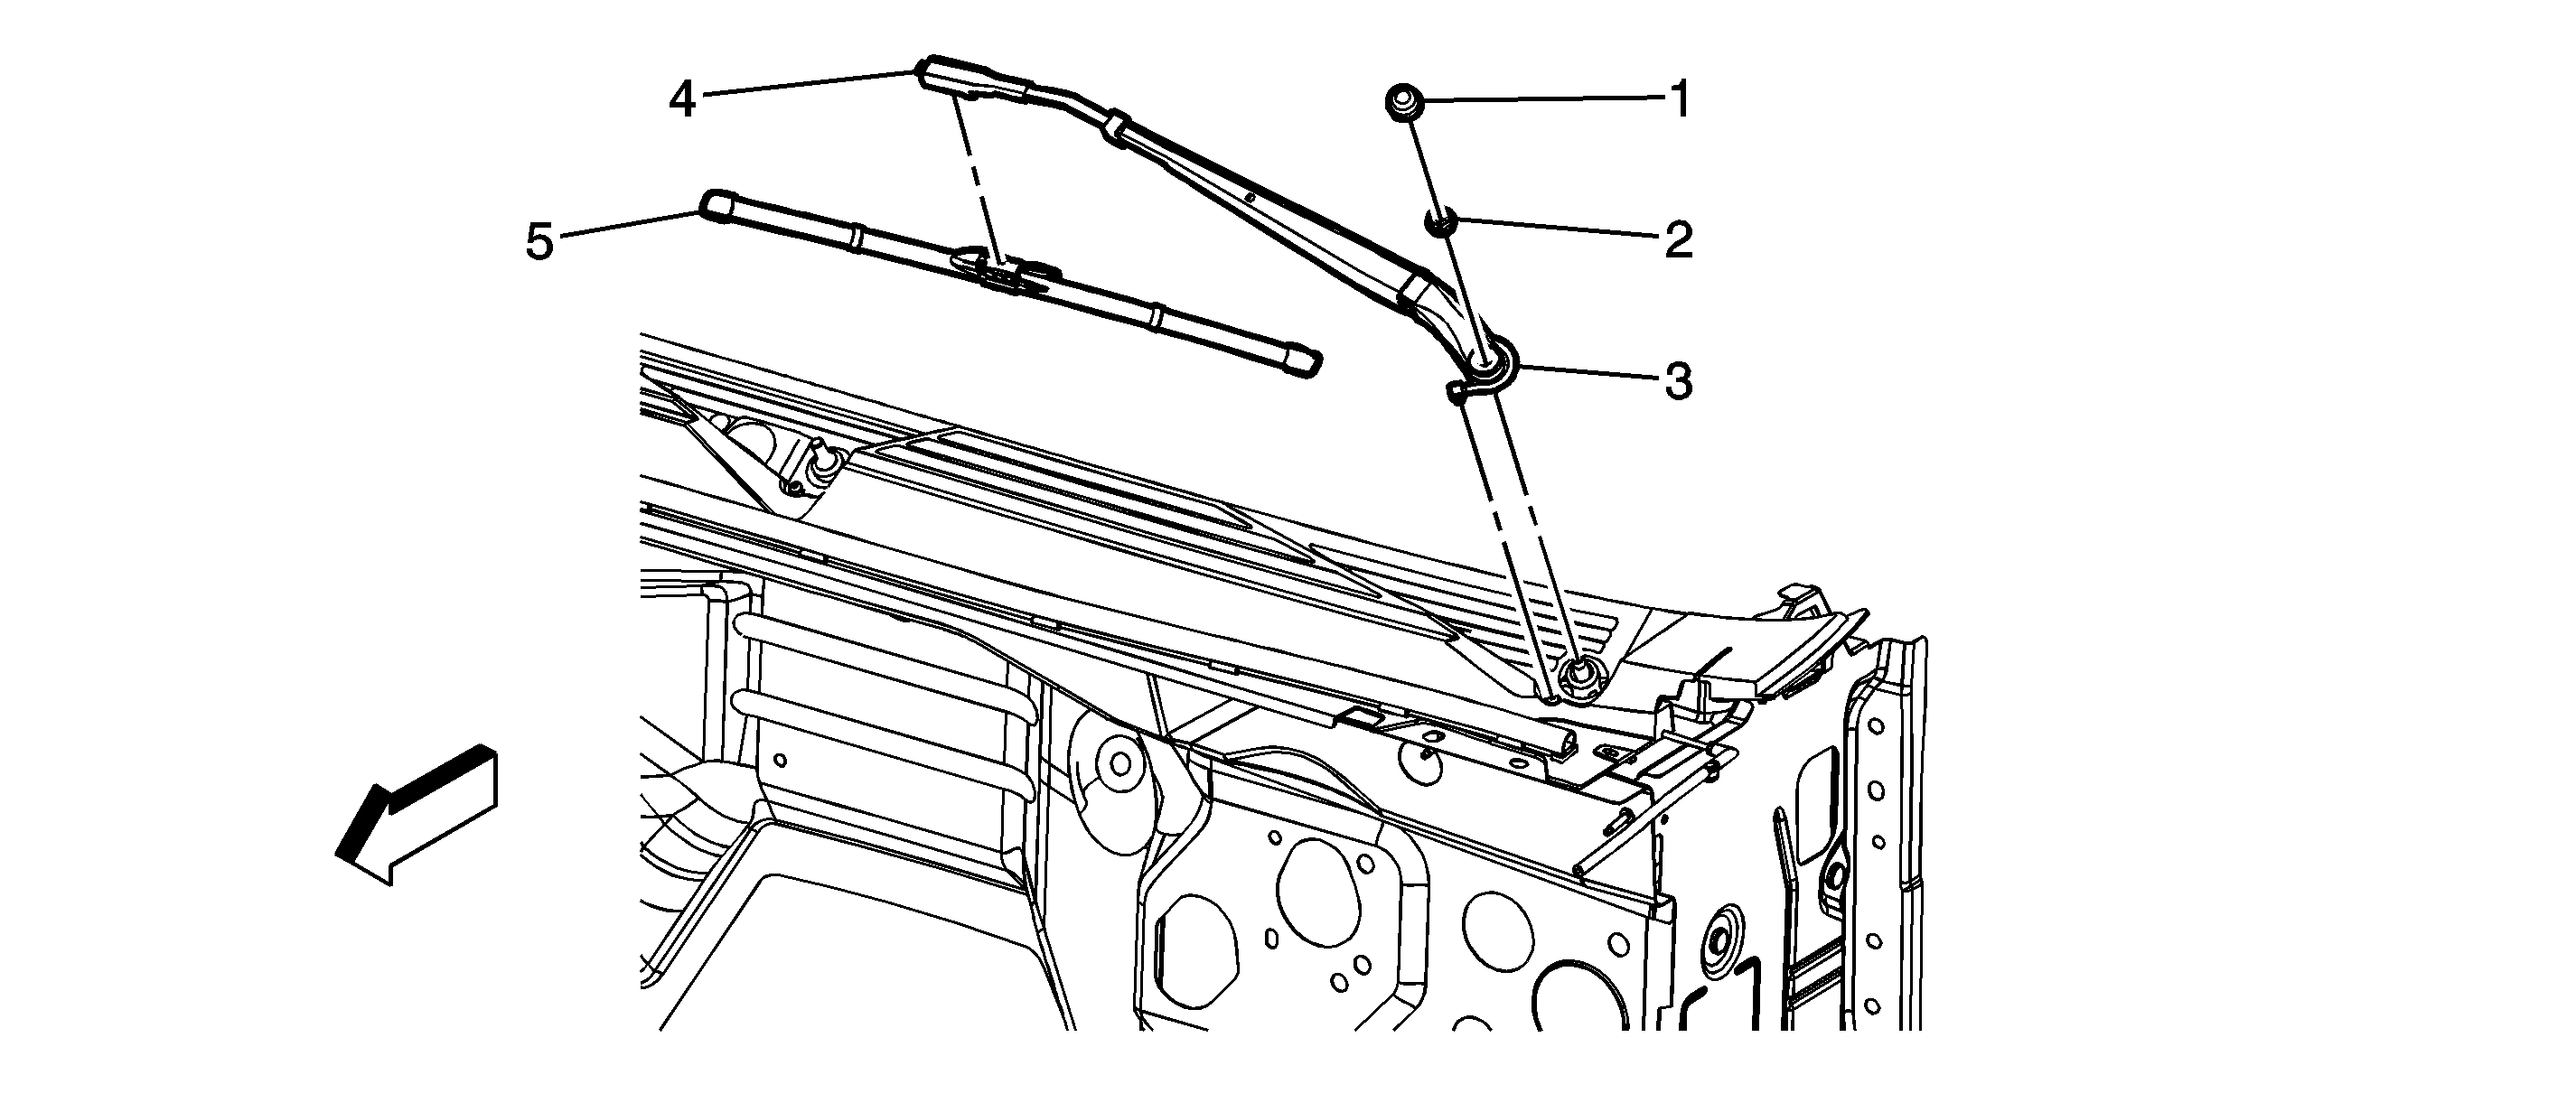
Preliminary ProcedureOpen the hood in order to access and remove the wiper arm assembly.
|
1
| Windshield Washer Arm Finish Cap
Tip
Use a small flat-bladed tool to remove the finish cap. |
2
| Windshield Washer Arm Nut
Notice: Refer to Fastener Notice in the Preface section.
Tip
Hold the wiper blade to the vertical black bar target mark located at the lower center portion of the windshield.
Tighten
30 N·m (22 lb ft) |
3
| Windshield Washer Arm Hose
Tip
Rotate the hose clockwise around the end of the washer wiper arm upon installation. |
4
| Windshield Washer Arm Assembly
Tip
Use the
J 39637
. Special ToolsJ 39637
Wiper Arm Puller
|
5
| Windshield Washer Blade Assembly
Tip
Pinch the 2 outer tabs on the arm, rotate the blade rearward and slide the blade forward to release the wiper blade from the wiper arm assembly. |
Callout
| Component Name
|
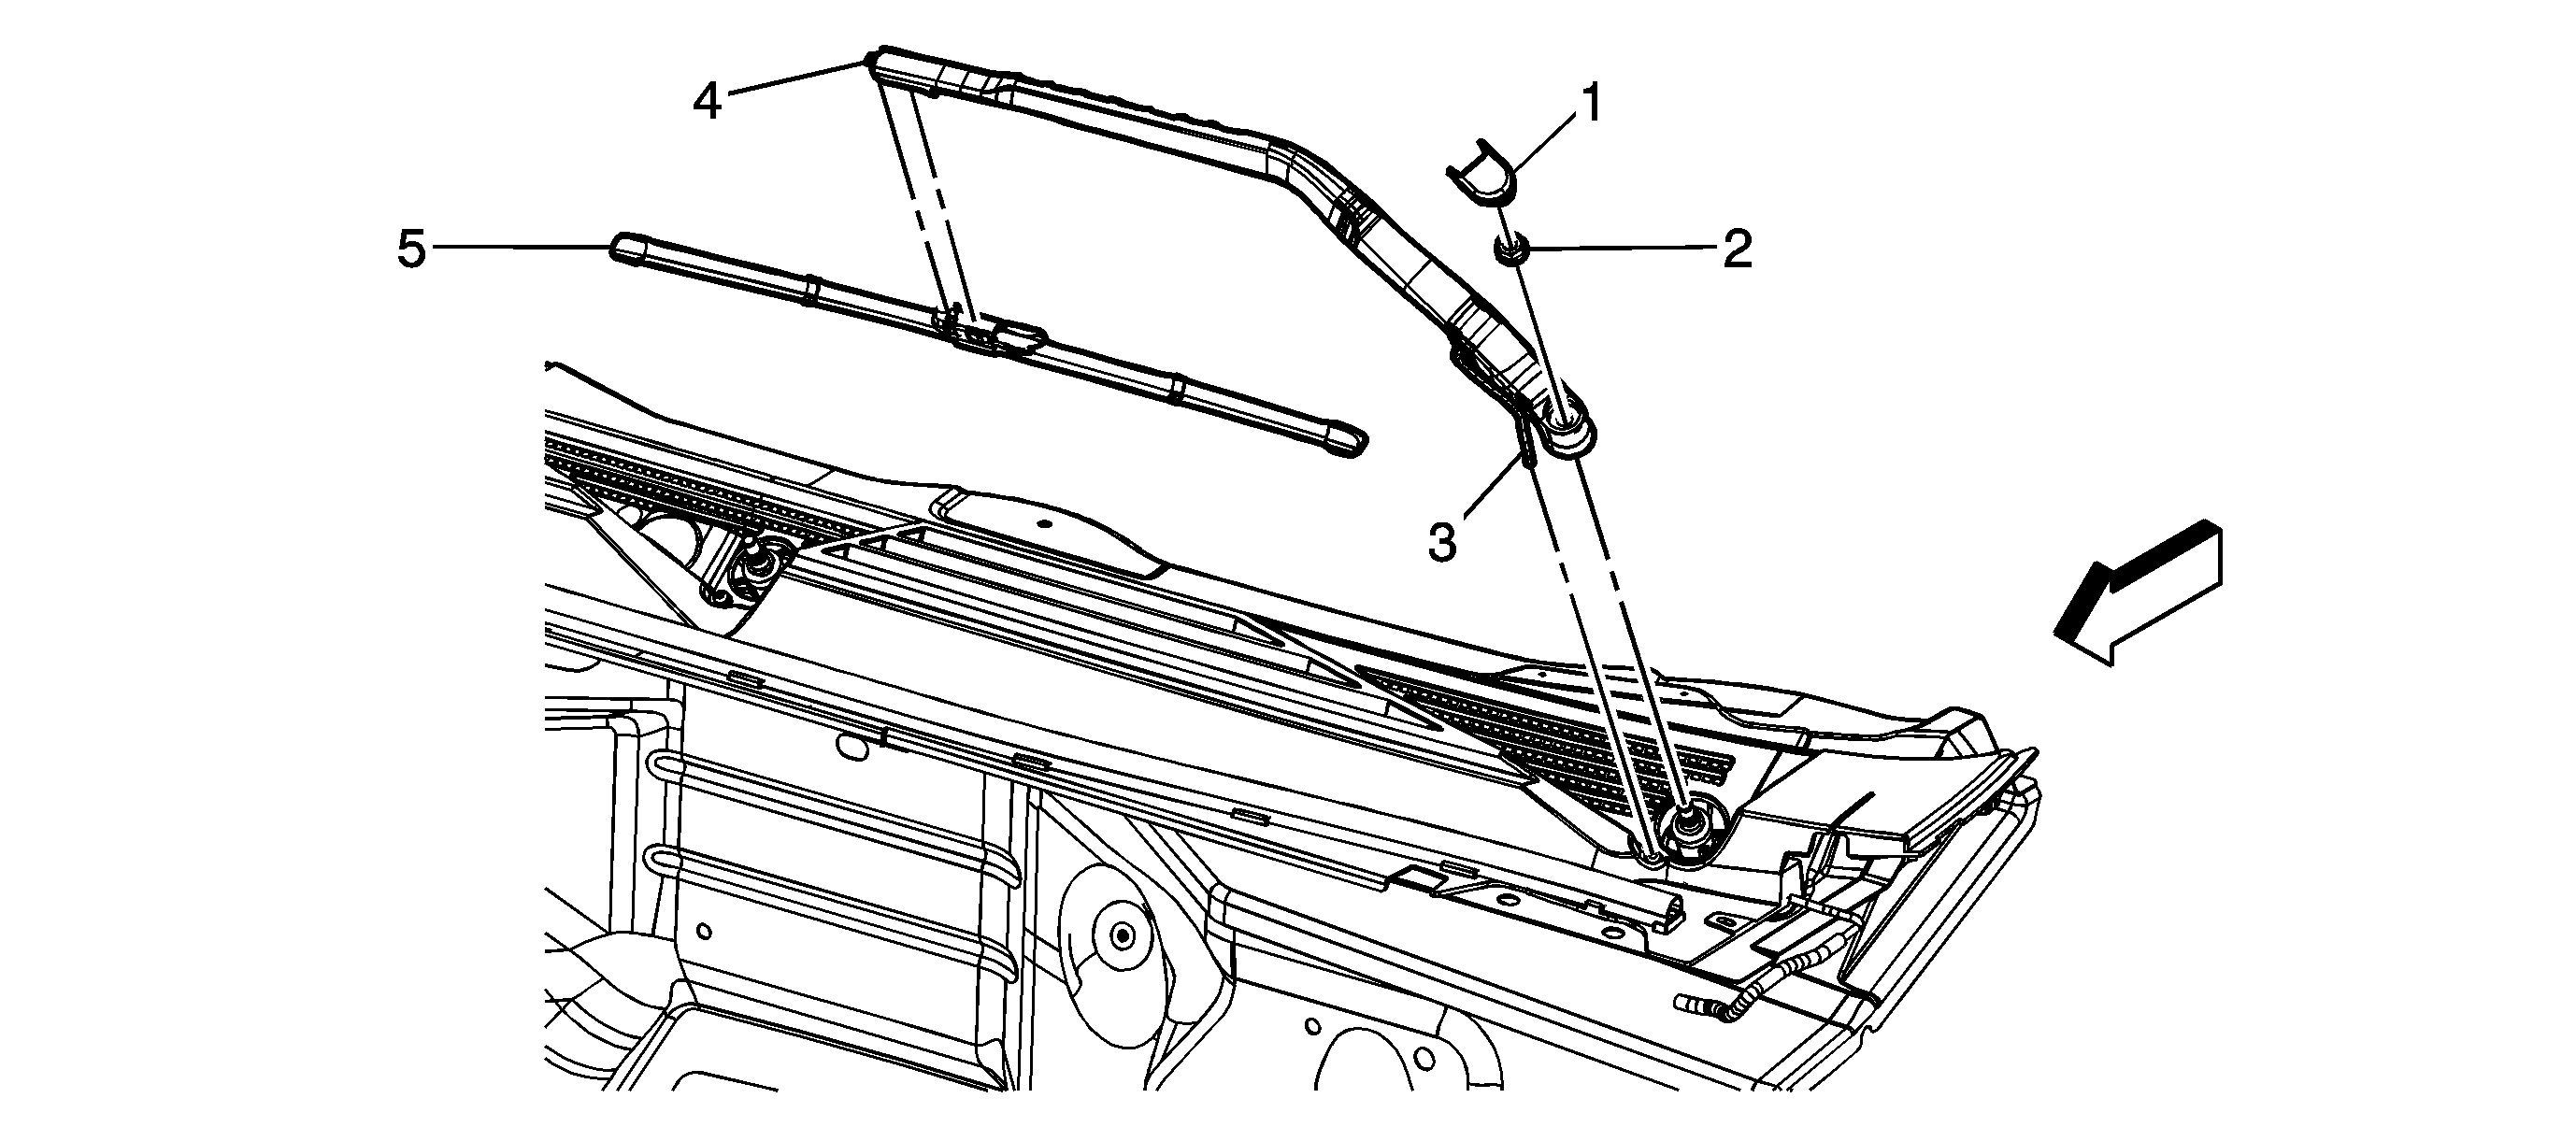
Preliminary ProcedureOpen the hood in order to access and remove the wiper arm assembly.
|
1
| Windshield Washer Arm Finish Cover
Tip
Use a small flat-bladed tool to remove the finish cover. |
2
| Windshield Washer Arm Nut
Notice: Refer to Fastener Notice in the Preface section.
Procedure
- Hold the wiper blade tip to the vertical black target mark located at the lower portion of the windshield.
- Hold the wiper arm in position and torque the nut.
- Perform a wet wipe and re-check the alignment, adjust if needed.
Tighten
30 N·m (22 lb ft) |
3
| Windshield Washer Arm Hose
Tip
Disconnect the washer hose from the air inlet grille panel connection. |
4
| Windshield Washer Arm Assembly
Tip
Use the
J 39637
Wiper Arm Remover Tool. |
5
| Windshield Washer Blade Assembly
Procedure
Pinch the 2 outer tabs on the arm, rotate the blade rearward and slide the blade forward to release the wiper blade from the wiper arm assembly. |


