Use the following pictures and instructions to remove the flat tire and raise the vehicle.
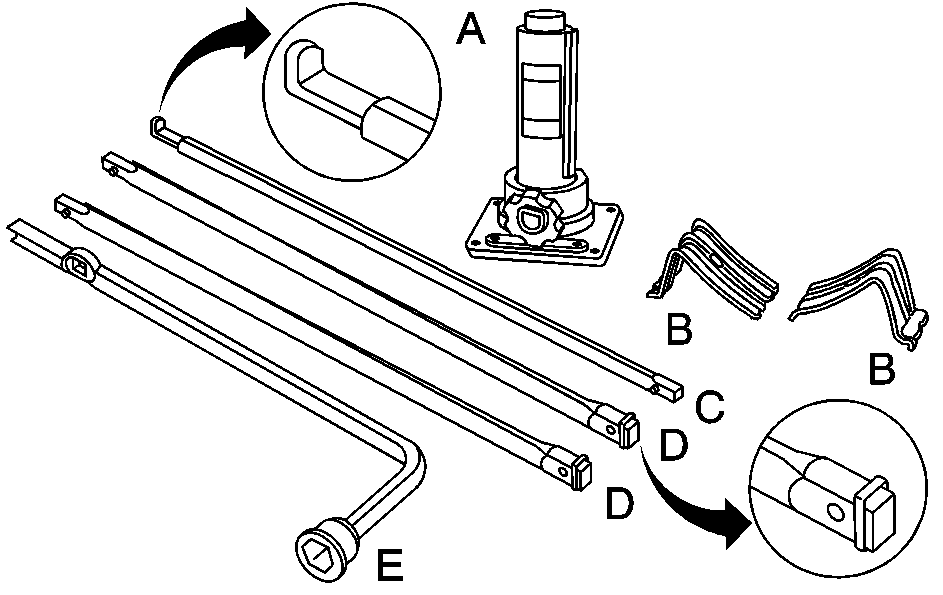
The tools you will be using include the jack (A), the wheel blocks (B), the jack handle (C), the jack handle extensions (D), and the wheel wrench (E).
- Do a safety check before proceeding. See Changing a Flat Tire for more information.
- If the vehicle has a center cap with wheel nut caps, the wheel nut caps are designed to stay with the center cap after they are loosened. Remove the entire center cap.
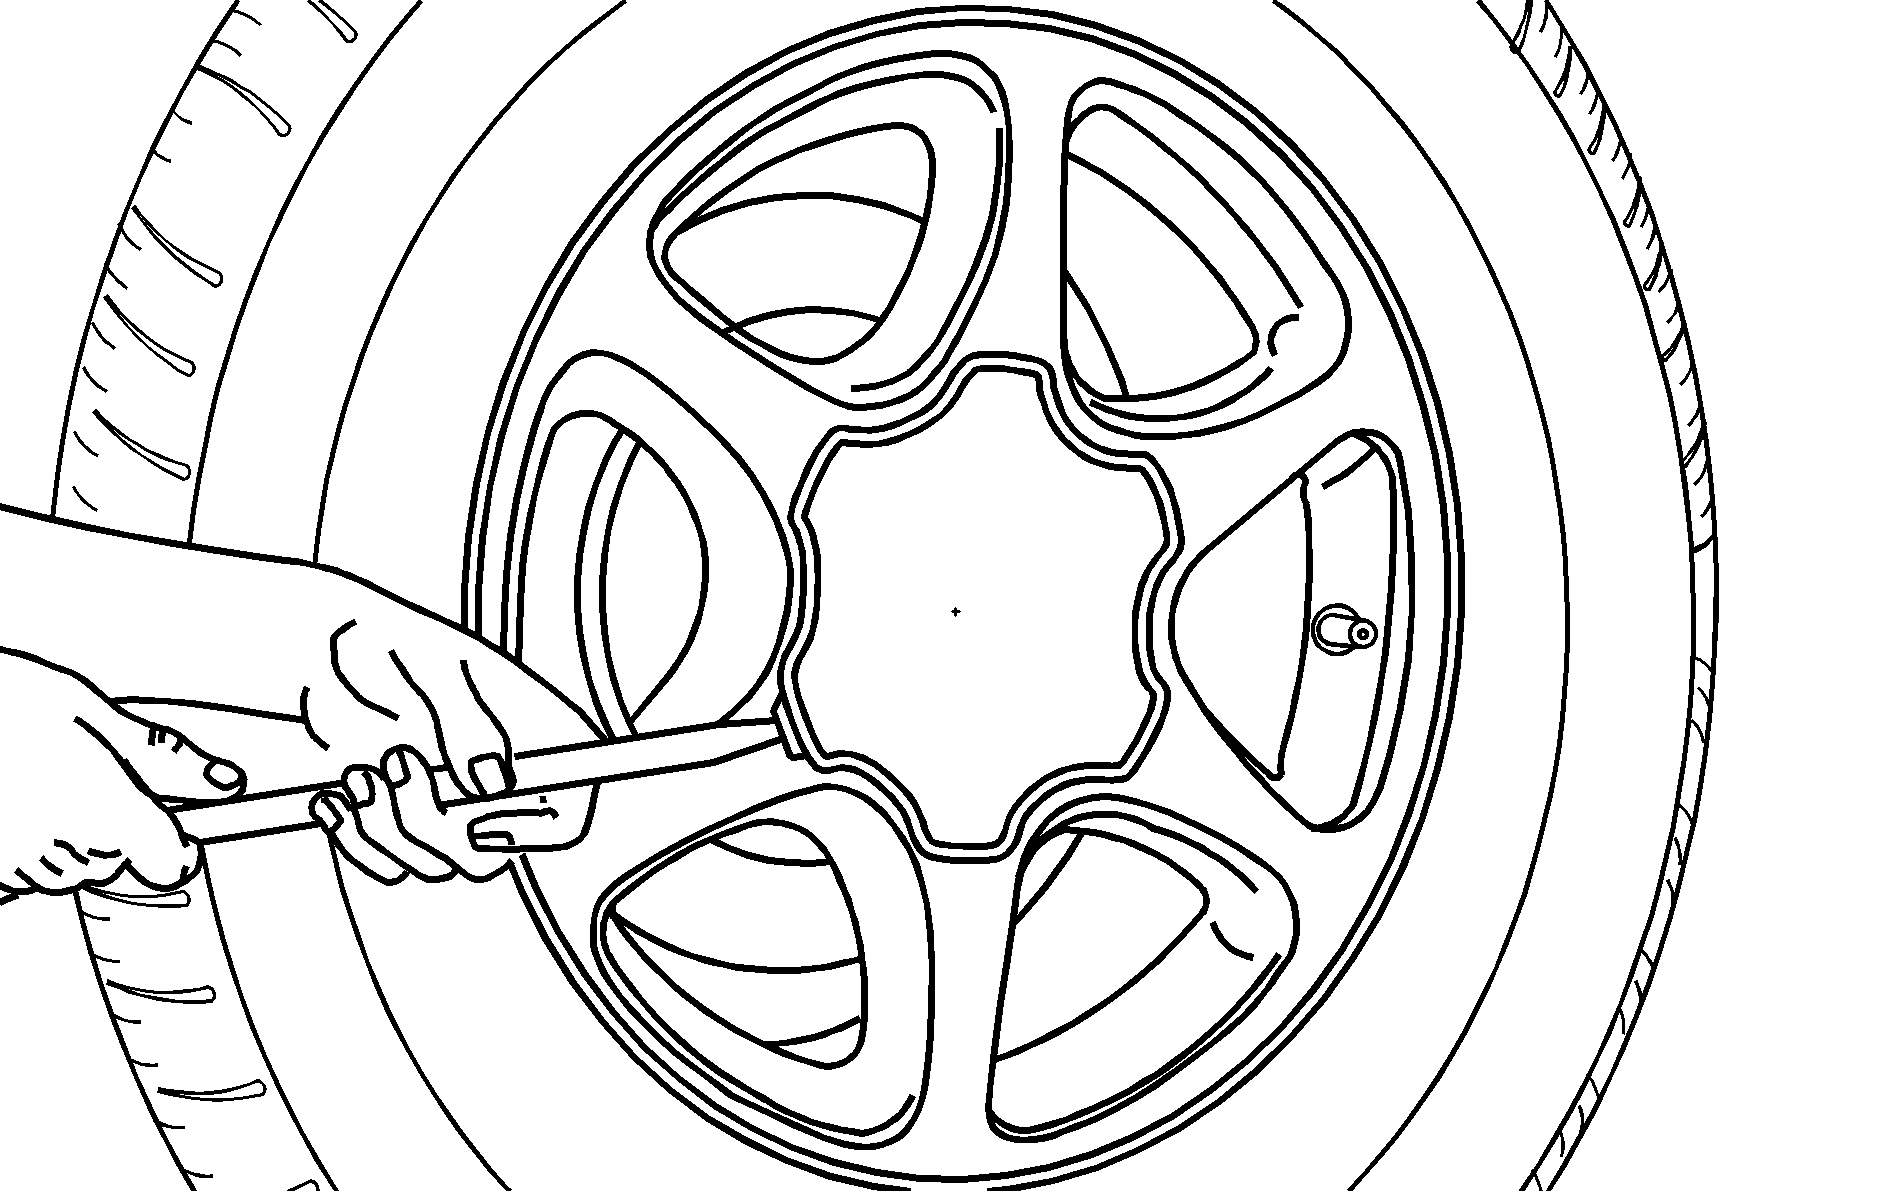
- If the wheel has a smooth center cap, place the chisel end of the wheel wrench in the slot on the wheel, and gently pry it out.
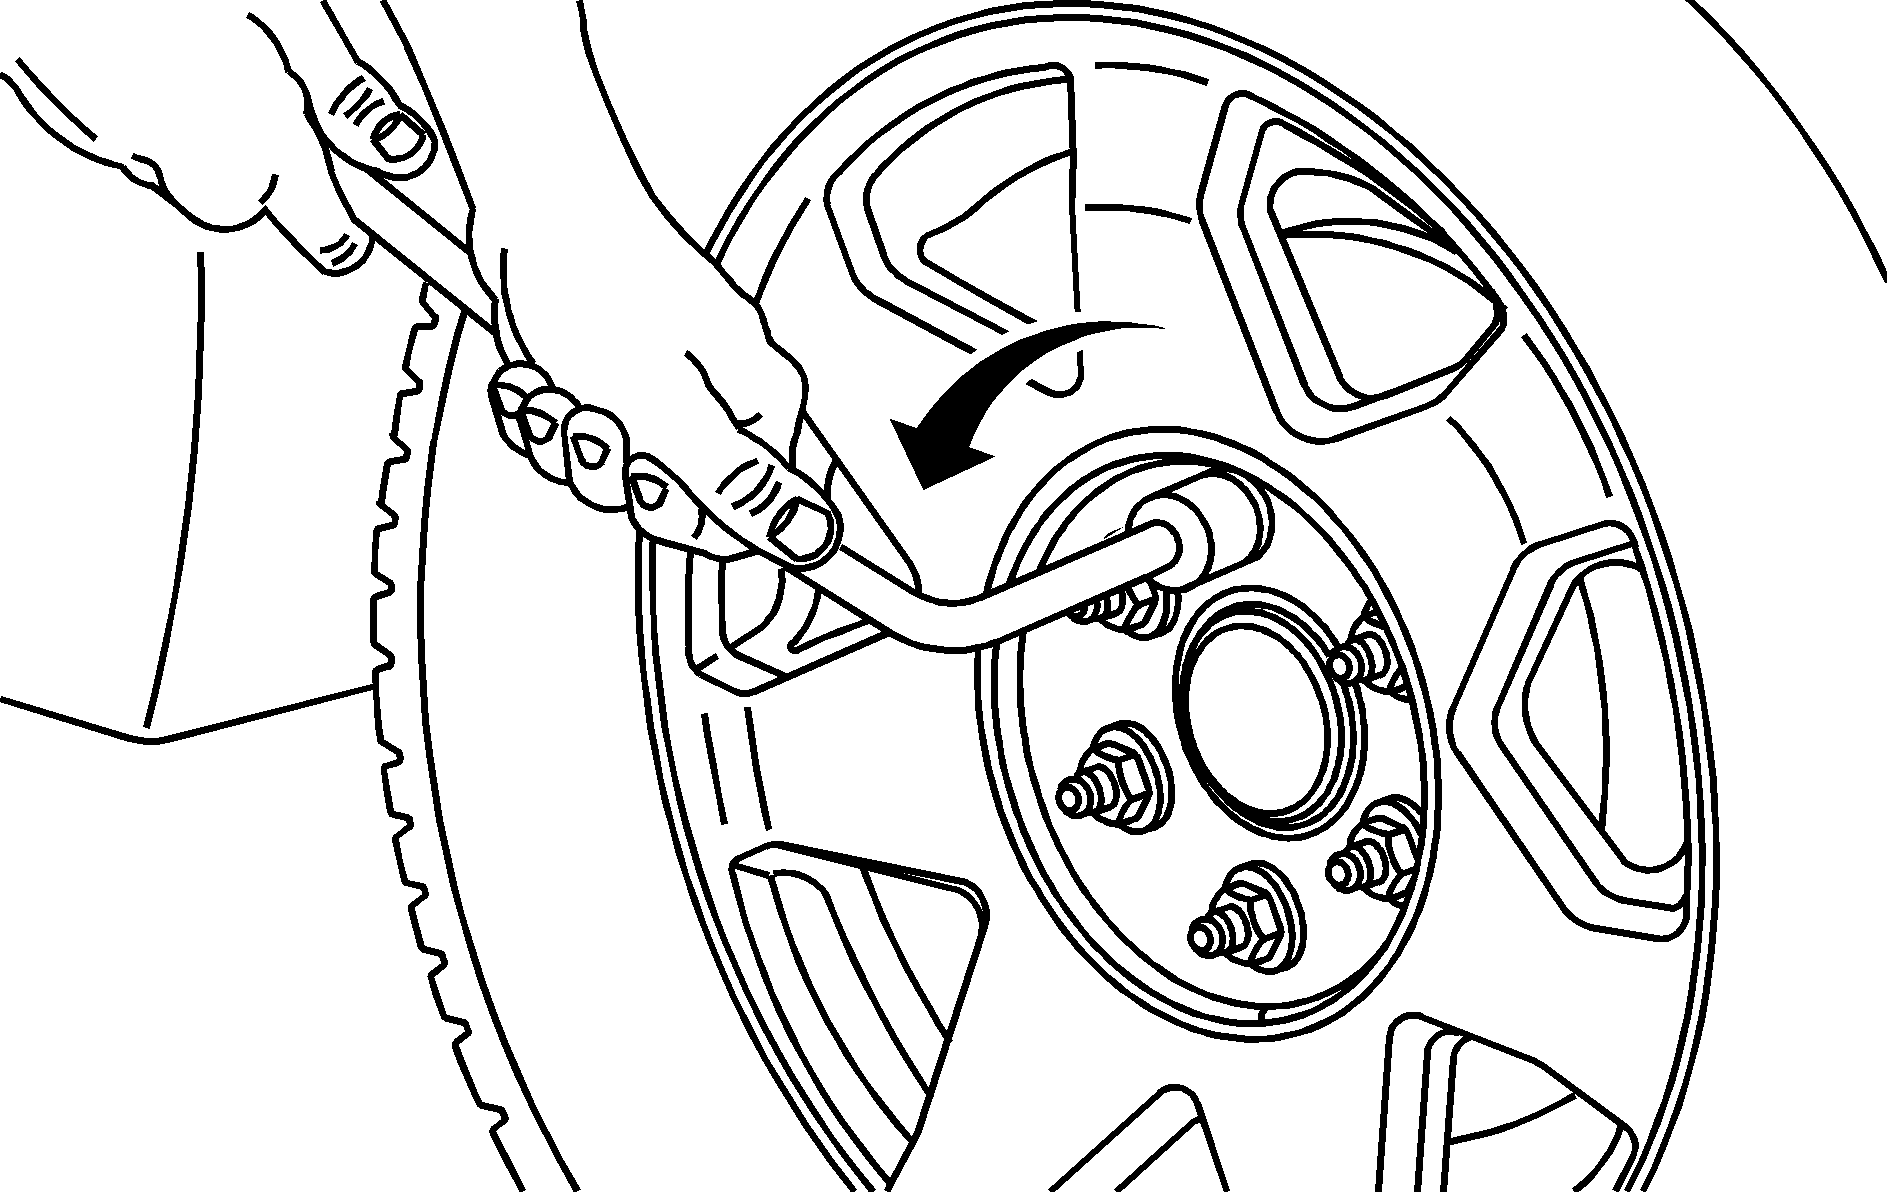
- Use the wheel wrench and turn it counterclockwise to loosen the wheel nuts. Do not remove the wheel nuts yet.
- Position the jack under the vehicle as shown. If the flat tire is on the front of the vehicle (1500 Model vehicles), position the jack under the bracket attached to the vehicle's frame, behind the flat tire. If the flat tire is on the front of the vehicle (all other models), position the jack on the frame behind the flat tire.
- If the flat tire is on the rear, for 1500 models position the jack under the rear axle about 2 inches (5 cm) inboard of the shock absorber bracket; for all other models, position the jack under the rear axle between the spring anchor and the shock absorber bracket.
- Turn the wheel wrench clockwise to raise the vehicle. Raise the vehicle far enough off the ground so there is enough room for the spare tire to fit under the wheel well.
- Install the spare tire.
- Put the wheel nuts back on with the rounded end of the nuts toward the wheel.
- Tighten each wheel nut by hand. Then use the wheel wrench to tighten the nuts until the wheel is held against the hub.
- Turn the wheel wrench counterclockwise to lower the vehicle. Lower the jack completely.
- Tighten the nuts firmly in a crisscross sequence as shown by turning the wheel wrench clockwise.
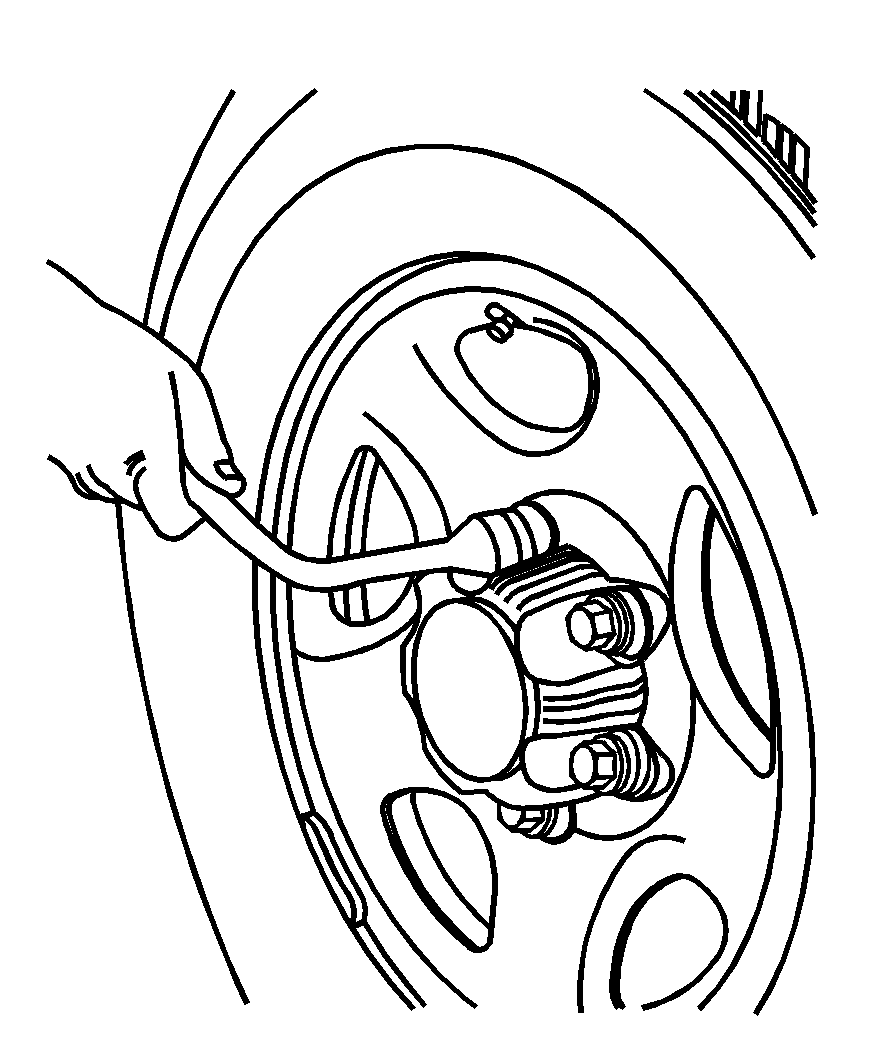
If your vehicle has wheel nut caps, loosen them by turning the wheel wrench counterclockwise.
Front Position - 1500 Models
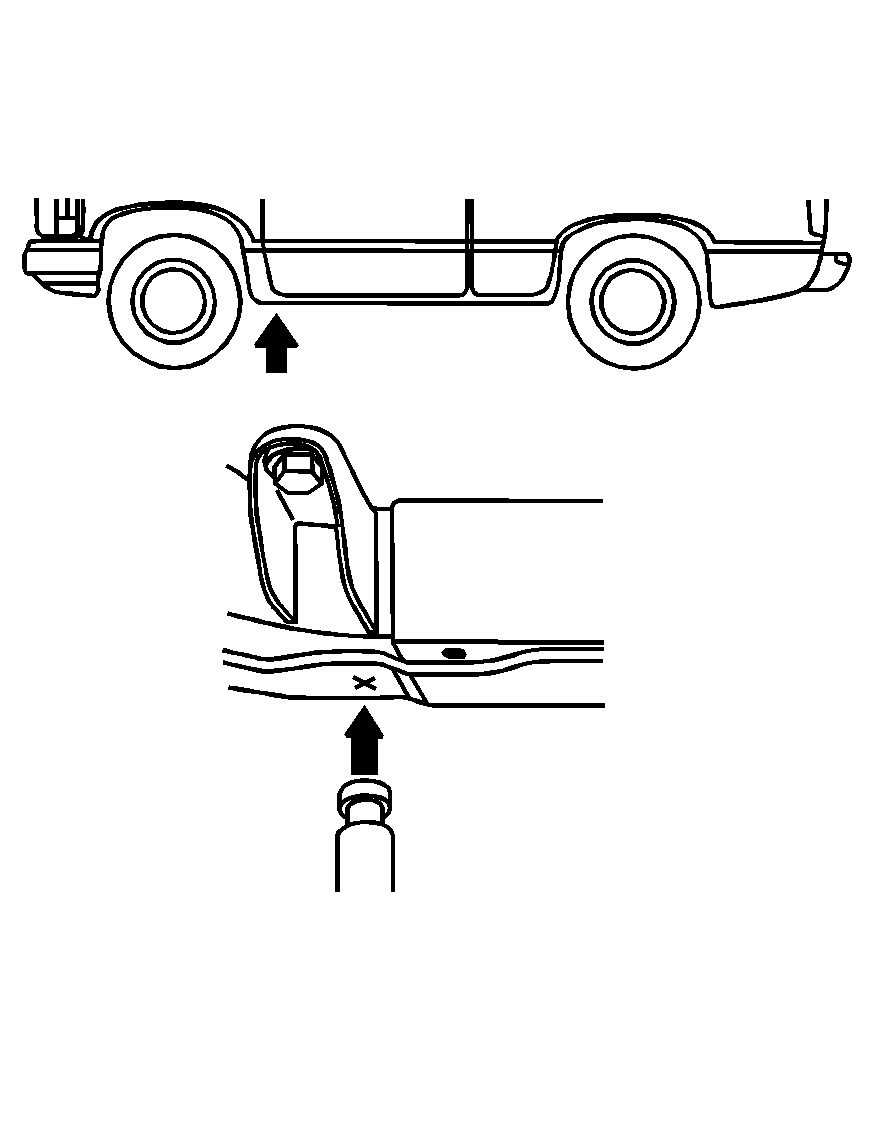
Front Position - All Other Models
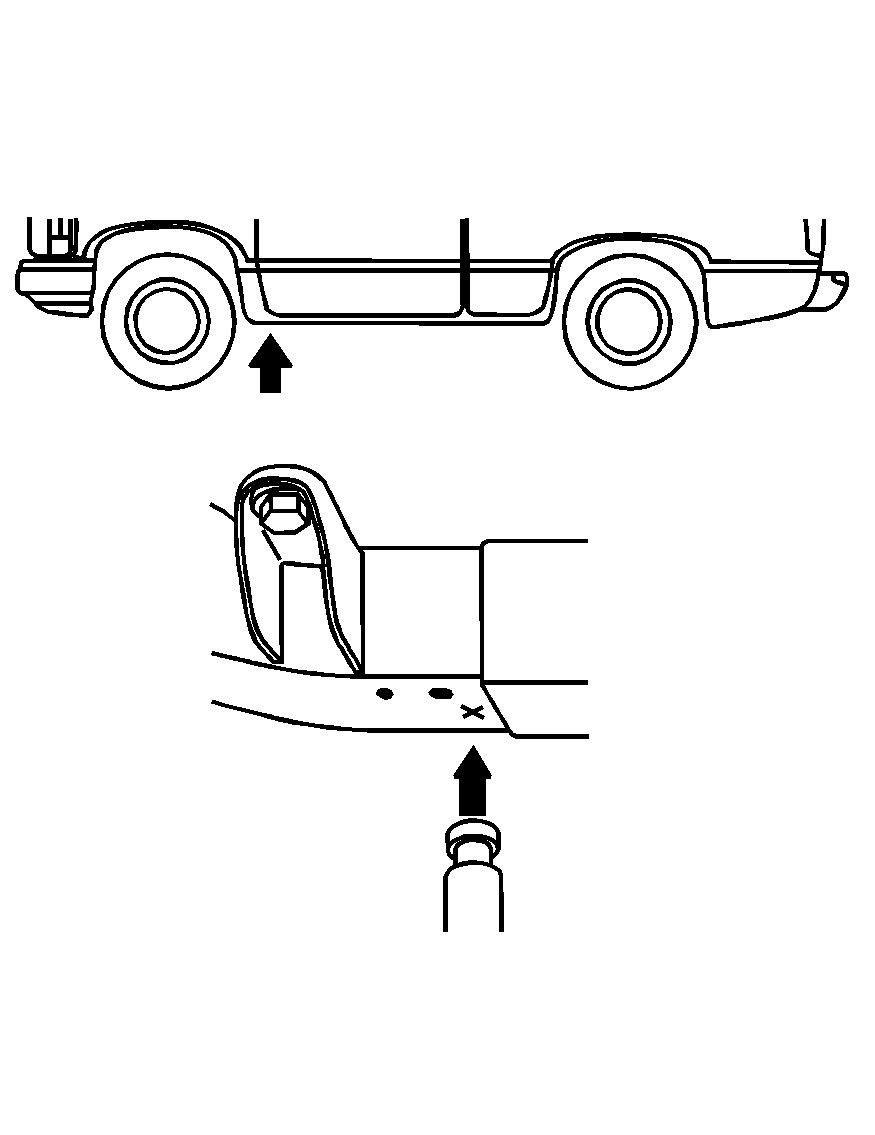
Rear Position - 1500 Models
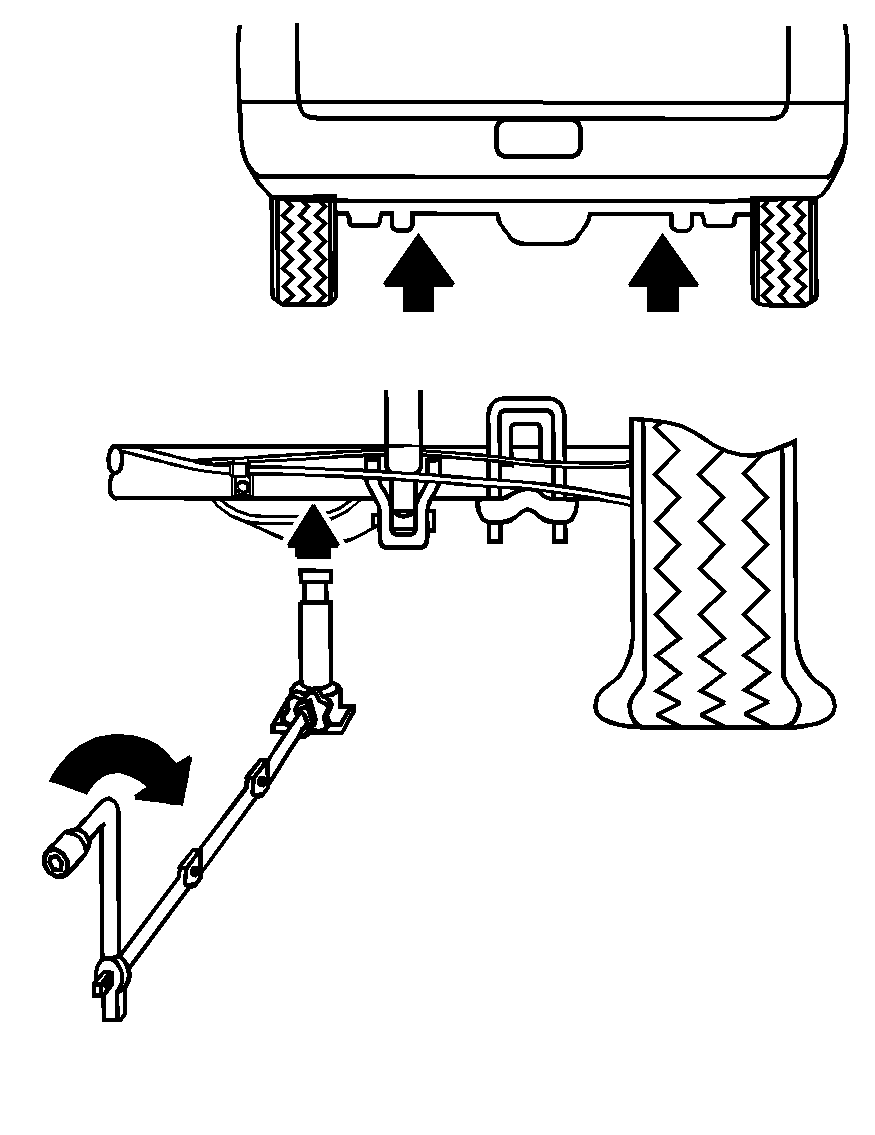
Rear Position - All Other Models
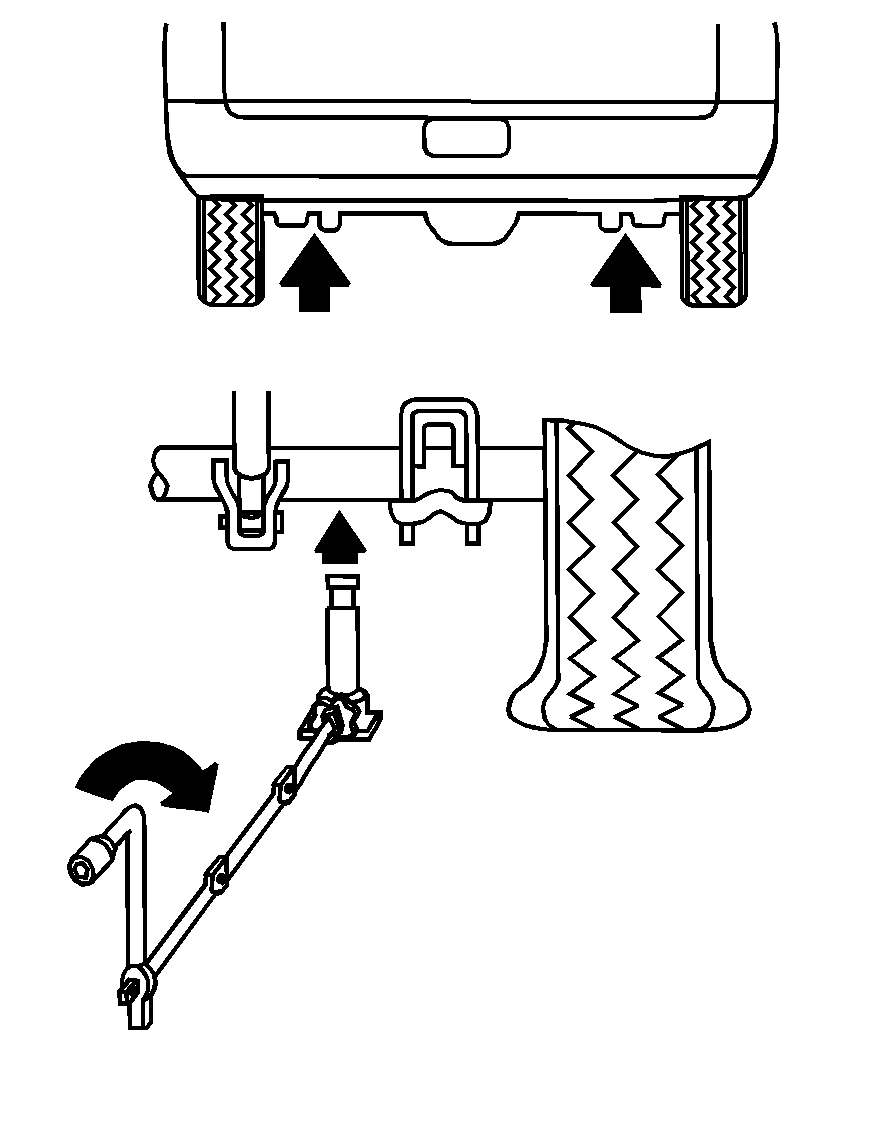
If you have added a snow plow to the front of your vehicle, lower the snow plow fully before raising the vehicle.
Make sure that the jack head is positioned so that the rear axle is resting securely between the grooves that are on the jack head.
Caution: Getting under a vehicle when it is jacked up is dangerous. If the vehicle slips off the jack, you could be badly injured or killed. Never get under a vehicle when it is supported only by a jack.
Caution: Raising your vehicle with the jack improperly positioned can damage the vehicle and even make the vehicle fall. To help avoid personal injury and vehicle damage, be sure to fit the jack lift head into the proper location before raising the vehicle.
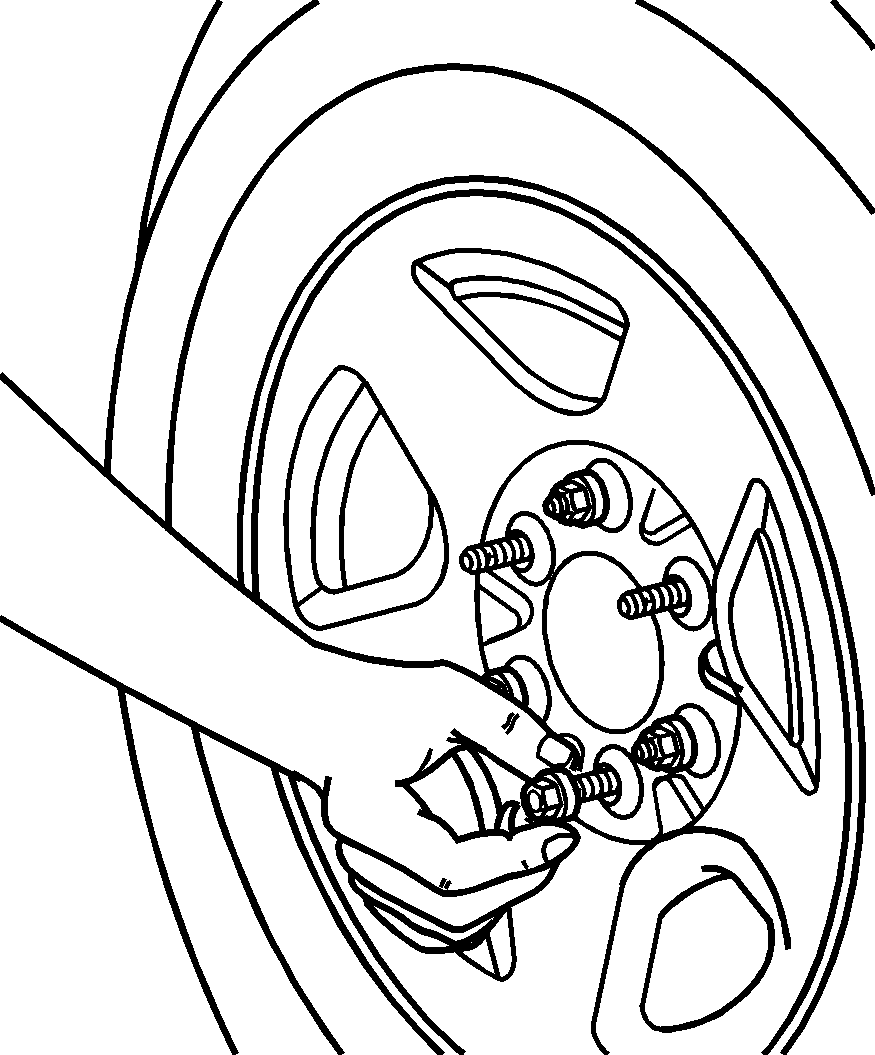
Remove all the wheel nuts and take off the flat tire.
Caution: Rust or dirt on a wheel, or on the parts to which it is fastened, can make wheel nuts become loose after time. The wheel could come off and cause an accident. When changing a wheel, remove any rust or dirt from places where the wheel attaches to the vehicle. In an emergency, use a cloth or a paper towel to do this; but be sure to use a scraper or wire brush later, if needed, to get all the rust or dirt off. See Changing a Flat Tire .
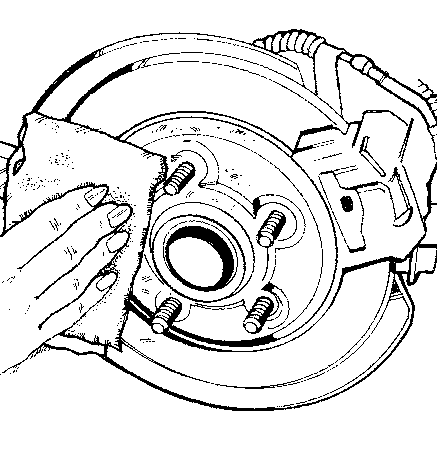
Remove any rust or dirt from the wheel bolts, mounting surfaces, and spare wheel.
Caution: Never use oil or grease on bolts or nuts because the nuts might come loose. The vehicle's wheel could fall off, causing a crash.
Caution: If wheel studs are damaged, they can break. If all the studs on a wheel broke, the wheel could come off and cause a crash. If any stud is damaged because of a loose-running wheel, it could be that all of the studs are damaged. To be sure, replace all studs on the wheel. If the stud holes in a wheel have become larger, the wheel could collapse in operation. Replace any wheel if its stud holes have become larger or distorted in any way. Inspect hubs and hub-piloted wheels for damage. Because of loose running wheels, piloting pad damage may occur and require replacement of the entire hub, for proper centering of the wheels. When replacing studs, hubs, wheel nuts or wheels, be sure to use GM original equipment parts.
Caution: Wheel nuts that are improperly or incorrectly tightened can cause the wheels to become loose or come off. The wheel nuts should be tightened with a torque wrench to the proper torque specification after replacing. Follow the torque specification supplied by the aftermarket manufacturer when using accessory locking wheel nuts. See Capacities and Specifications for original equipment wheel nut torque specifications.
Notice: Improperly tightened wheel nuts can lead to brake pulsation and rotor damage. To avoid expensive brake repairs, evenly tighten the wheel nuts in the proper sequence and to the proper torque specification. See Capacities and Specifications for the wheel nut torque specification.
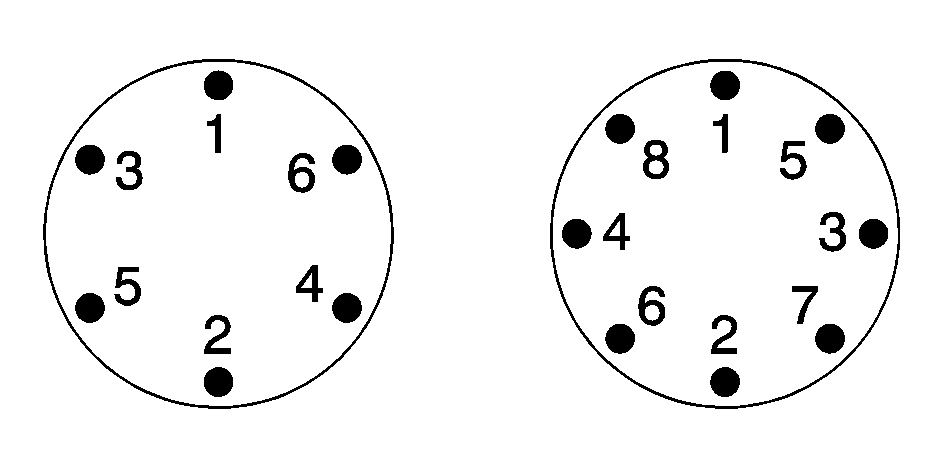
Have a technician check the wheel nut tightness of all wheels with a torque wrench after the first 100 miles (160 km) and then 1,000 miles (1600 km) after that. Repeat this service whenever you have a tire removed or serviced. See Capacities and Specifications for more information.
When you reinstall the regular wheel and tire, you must also reinstall either the center cap, or bolt-on hub cap, depending on what your vehicle is equipped with. For center caps, place the cap on the wheel and tap it into place until it seats flush with the wheel. The cap only goes on one way. Be sure to line up the tab on the center cap with the indentation on the wheel. For bolt-on hub caps, align the plastic nut caps with the wheel nuts and then tighten by hand. Then use the wheel wrench to tighten.
