Generator Bracket Replacement 4.8L, 5.3L, 6.0L, and 6.2L
Removal Procedure
- Remove the generator. Refer to Generator Replacement .
- Remove the power steering pump. Refer to Power Steering Pump Replacement .
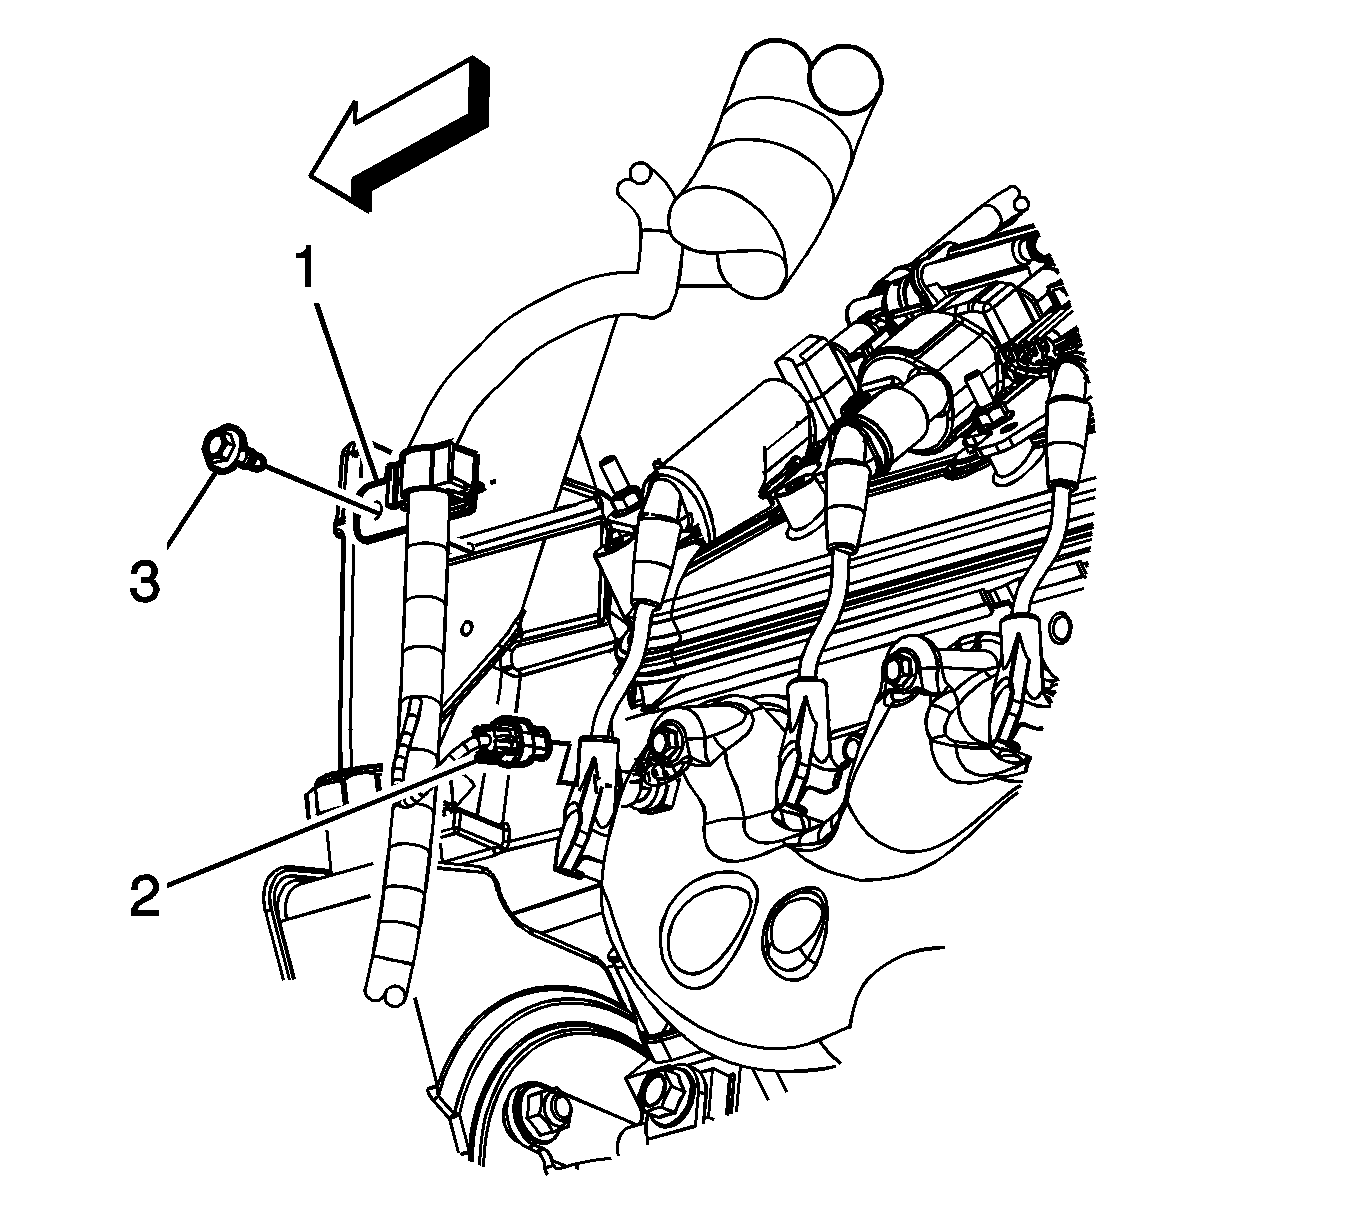
- Remove the engine wiring harness clip bolt (3) are reposition the clip (1) away from the generator bracket.
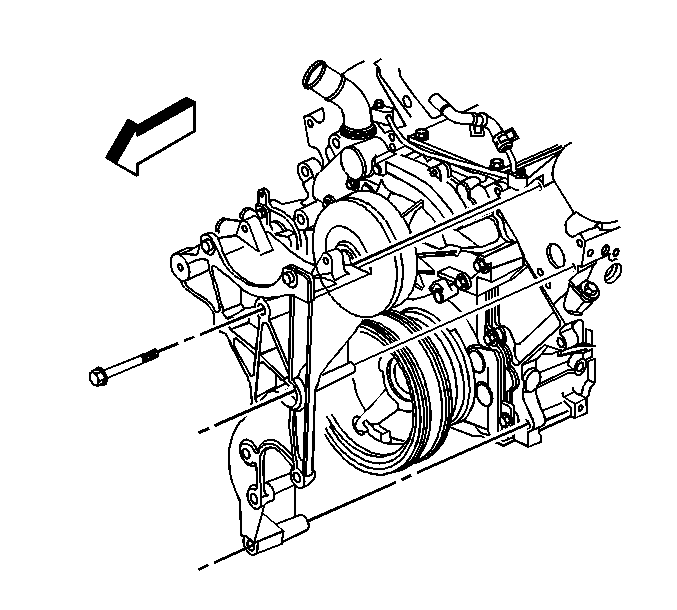
- Remove the generator bracket bolts.
- Remove the generator bracket.
Installation Procedure
- Position the generator bracket to the engine.
- Install the generator bracket bolts.
- Position the engine wiring harness clip (1) to the generator bracket and install the engine harness clip bolt (3).
- Install the power steering pump. Refer to Power Steering Pump Replacement .
- Install the generator. Refer to Generator Replacement .

Notice: Refer to Fastener Notice in the Preface section.
Tighten
Tighten the bolts to 50 N·m (37 lb ft).

Tighten
Tighten the bolt to 9 N·m (80 lb in).
Generator Bracket Replacement 4.3L
Removal Procedure
- Remove the generator. Refer to Generator Replacement .
- Remove the drive belt tensioner. Refer to Drive Belt Tensioner Replacement .
- Remove the drive belt idler pulley. Refer to Drive Belt Idler Pulley Replacement - Right Side .
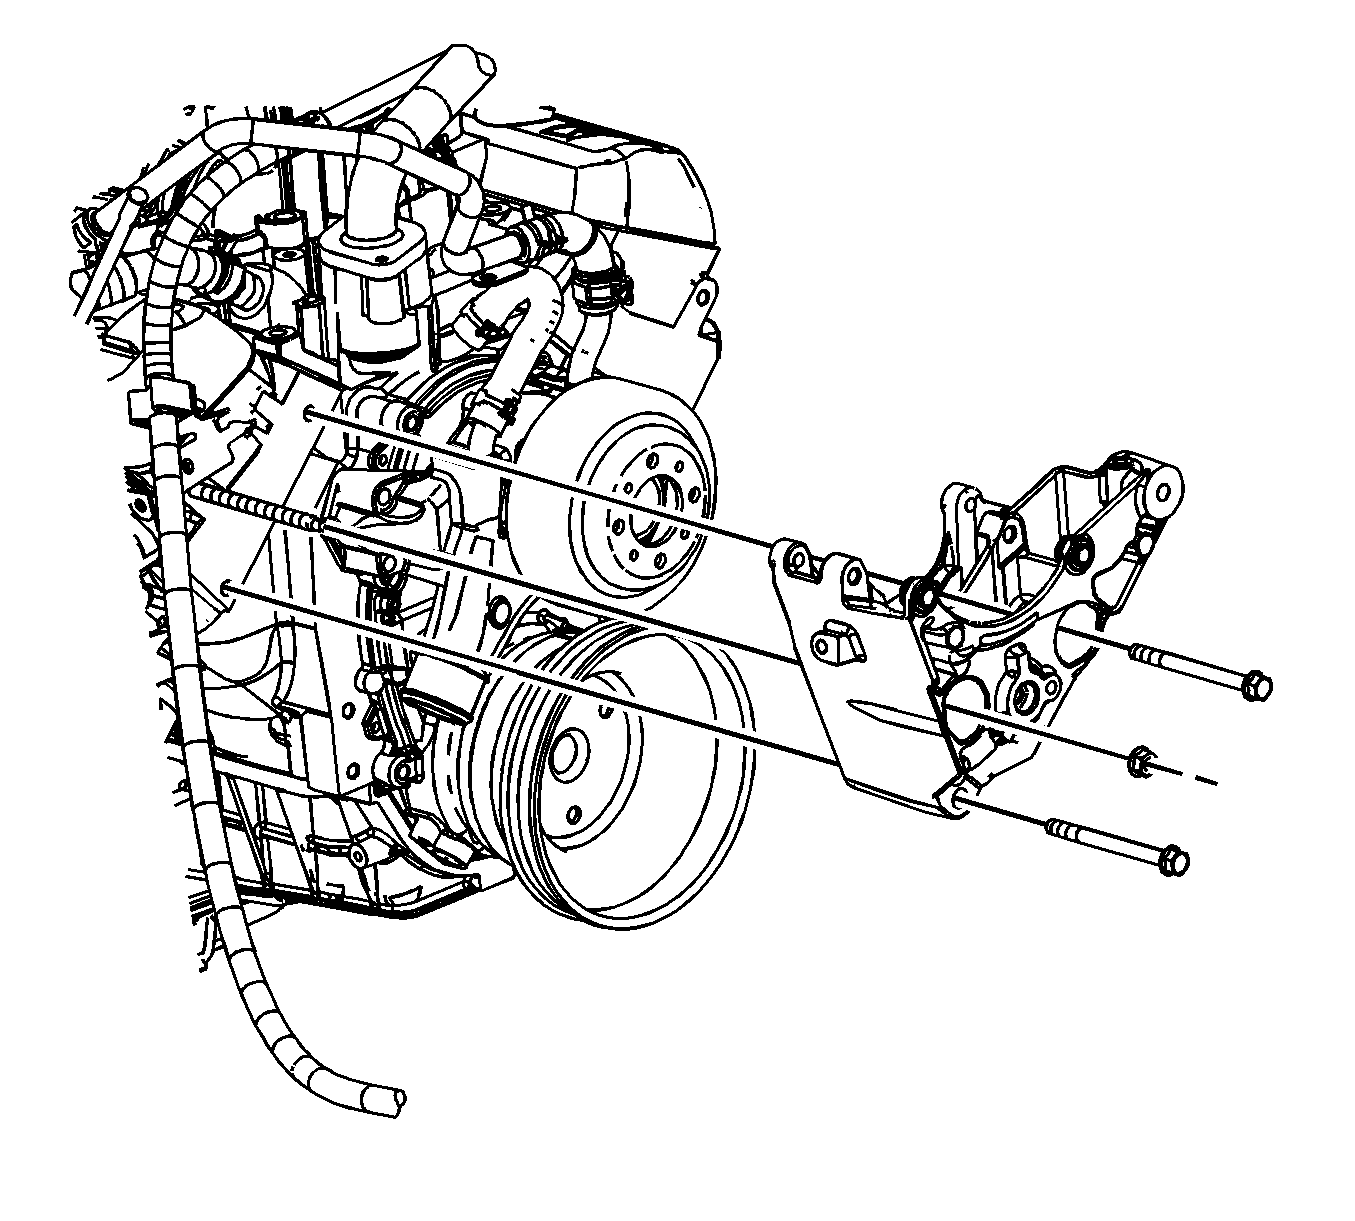
- Remove the generator bracket bolts and nut.
- Remove the generator bracket.
Installation Procedure
- Install the generator bracket onto the stud.
- Install the generator bracket bolts and nut.
- Install the drive belt idler pulley. Refer to Drive Belt Idler Pulley Replacement - Right Side .
- Install the drive belt tensioner. Refer to Drive Belt Tensioner Replacement .
- Install the generator. Refer to Generator Replacement .

Notice: Refer to Fastener Notice in the Preface section.
Tighten
Tighten the bolts/nut to 41 N·m (30 lb ft).
Generator Bracket Replacement 6.6L
Removal Procedure
Caution: Unless directed otherwise, the ignition and start switch must be in the OFF or LOCK position, and all electrical loads must be OFF before servicing any electrical component. Disconnect the negative battery cable to prevent an electrical spark should a tool or equipment come in contact with an exposed electrical terminal. Failure to follow these precautions may result in personal injury and/or damage to the vehicle or its components.
- Disconnect the negative battery cable. Refer to Battery Negative Cable Disconnection and Connection .
- Remove the fan assembly. Refer to fan replacement Fan Replacement .
- Remove the intake air heater. Refer to Intake Air Heater Replacement .
- Remove the generator. Refer to Generator Replacement .
- Remove the drive belt tensioner. Refer to Drive Belt Tensioner Replacement .
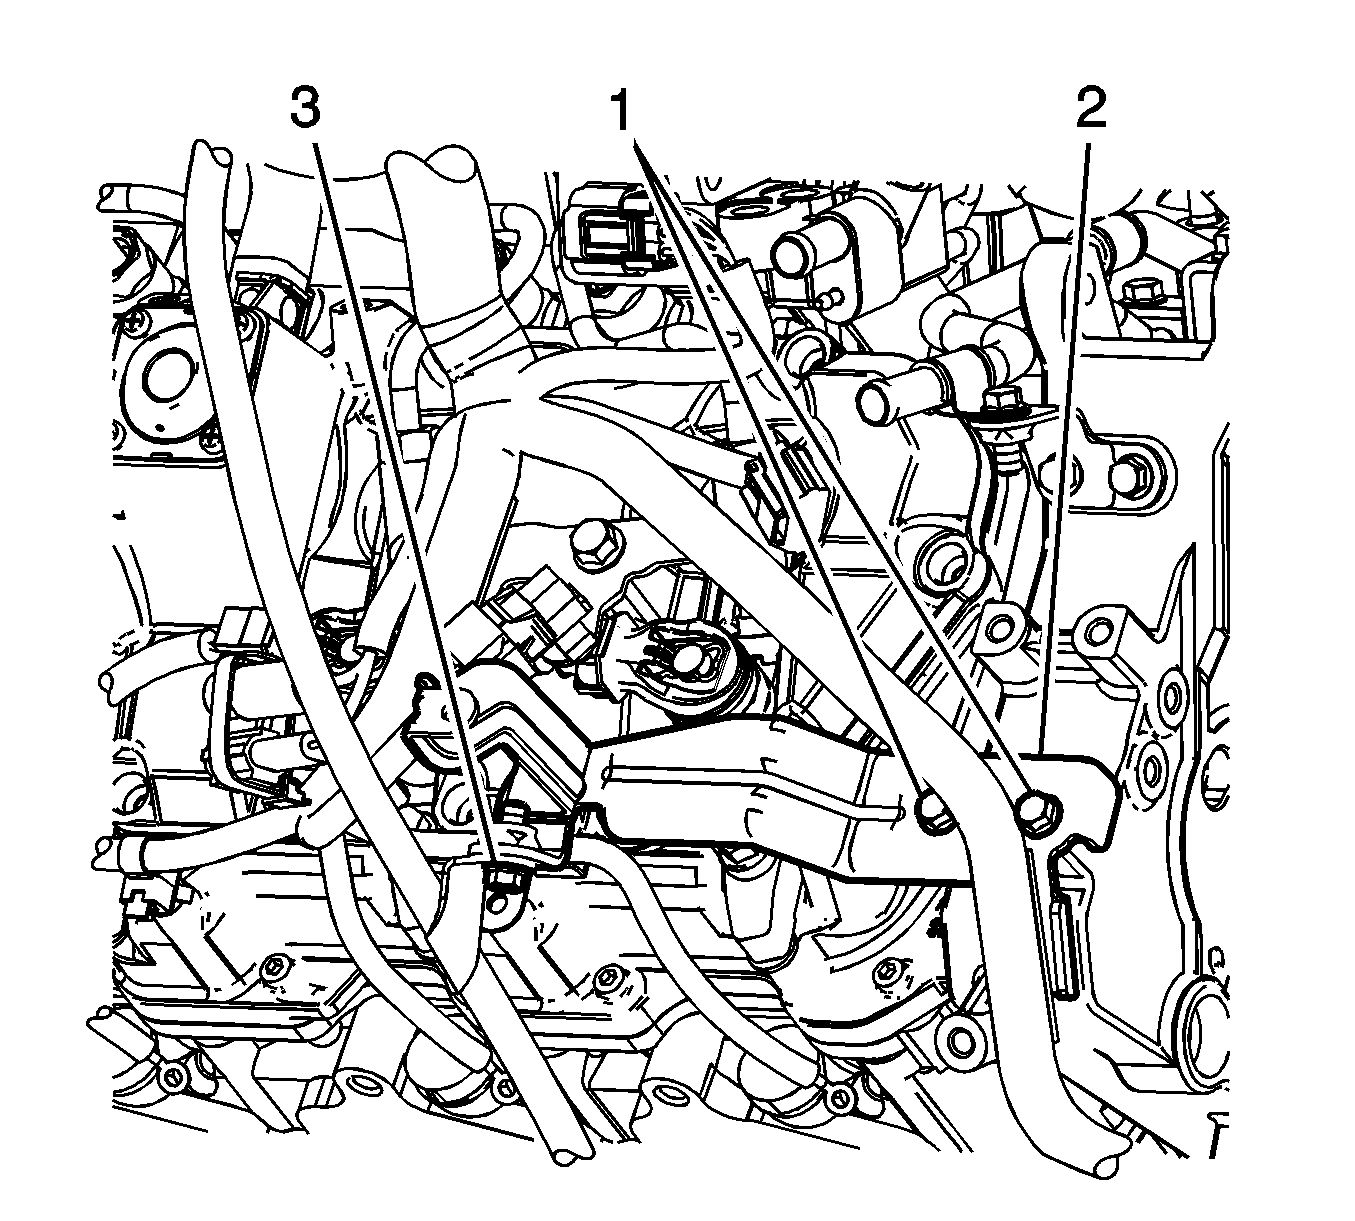
- Remove the engine wiring harness clip from the oil level indicator tube bracket (2).
- Remove the oil level indicator tube bolt (3).
- Remove the oil level indicator tube bracket bolts (1).
- Remove the oil level indicator tube bracket (2).
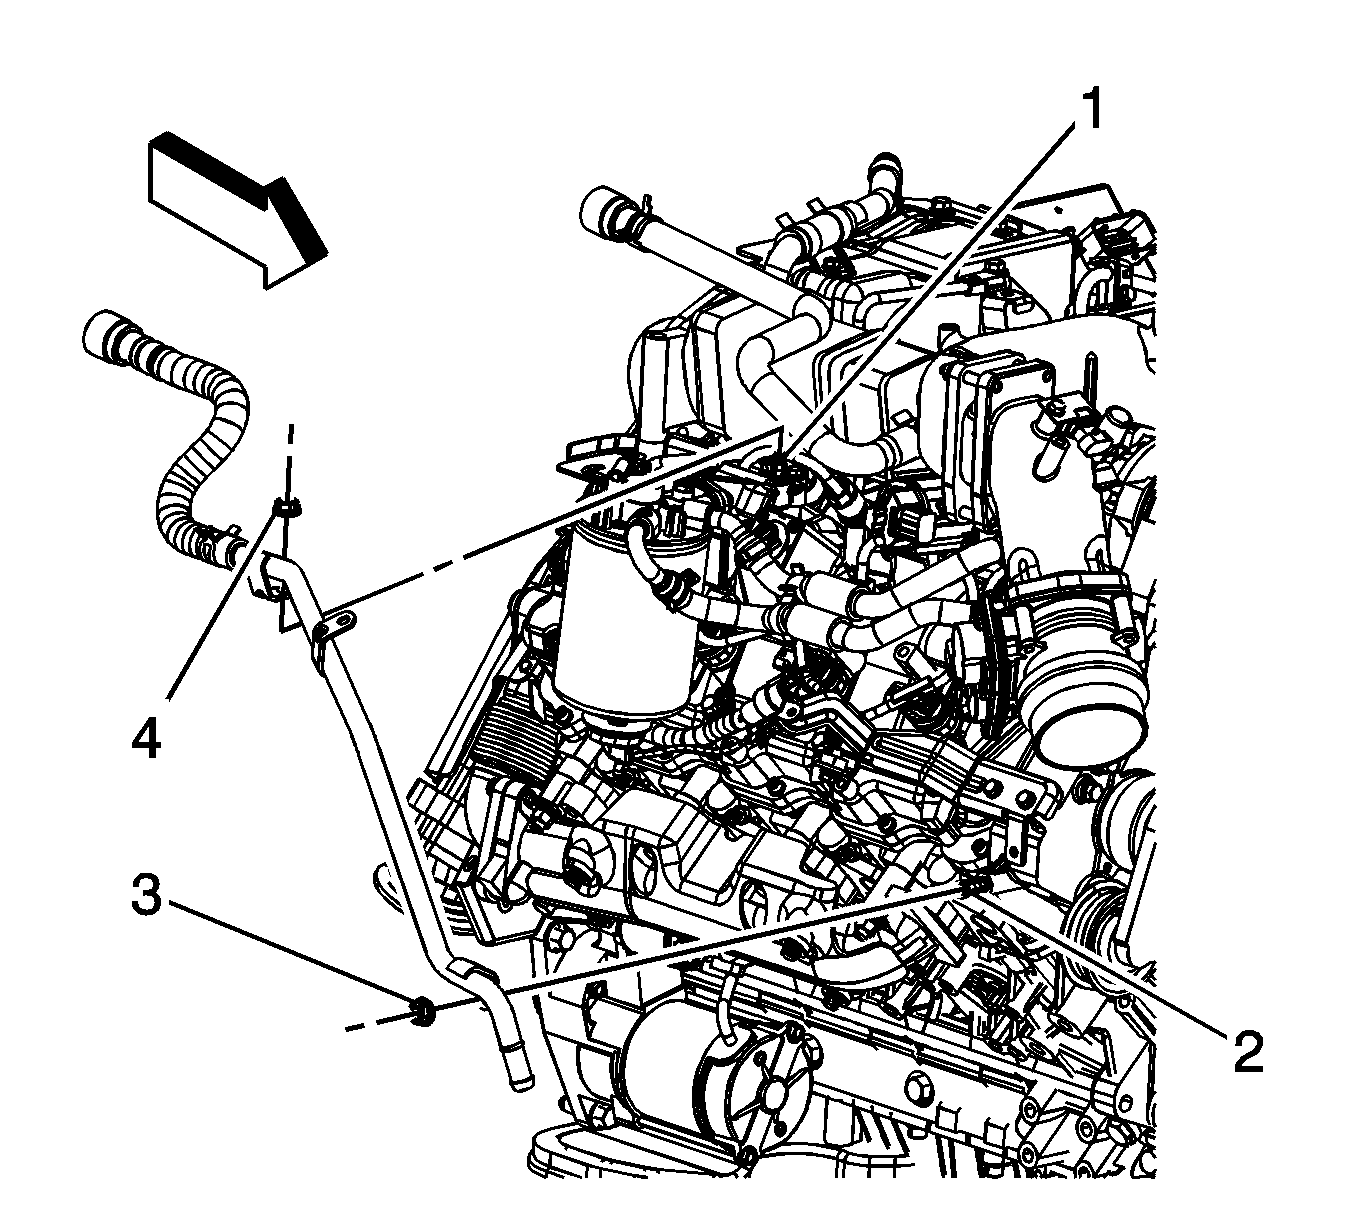
- Remove the heater inlet hose bracket nut (4) from the fuel filter adapter stud (1).
- Remove the heater inlet hose bracket nut (3) from the generator bracket stud (2).
- Reposition the heater inlet hose/pipe for clearance.
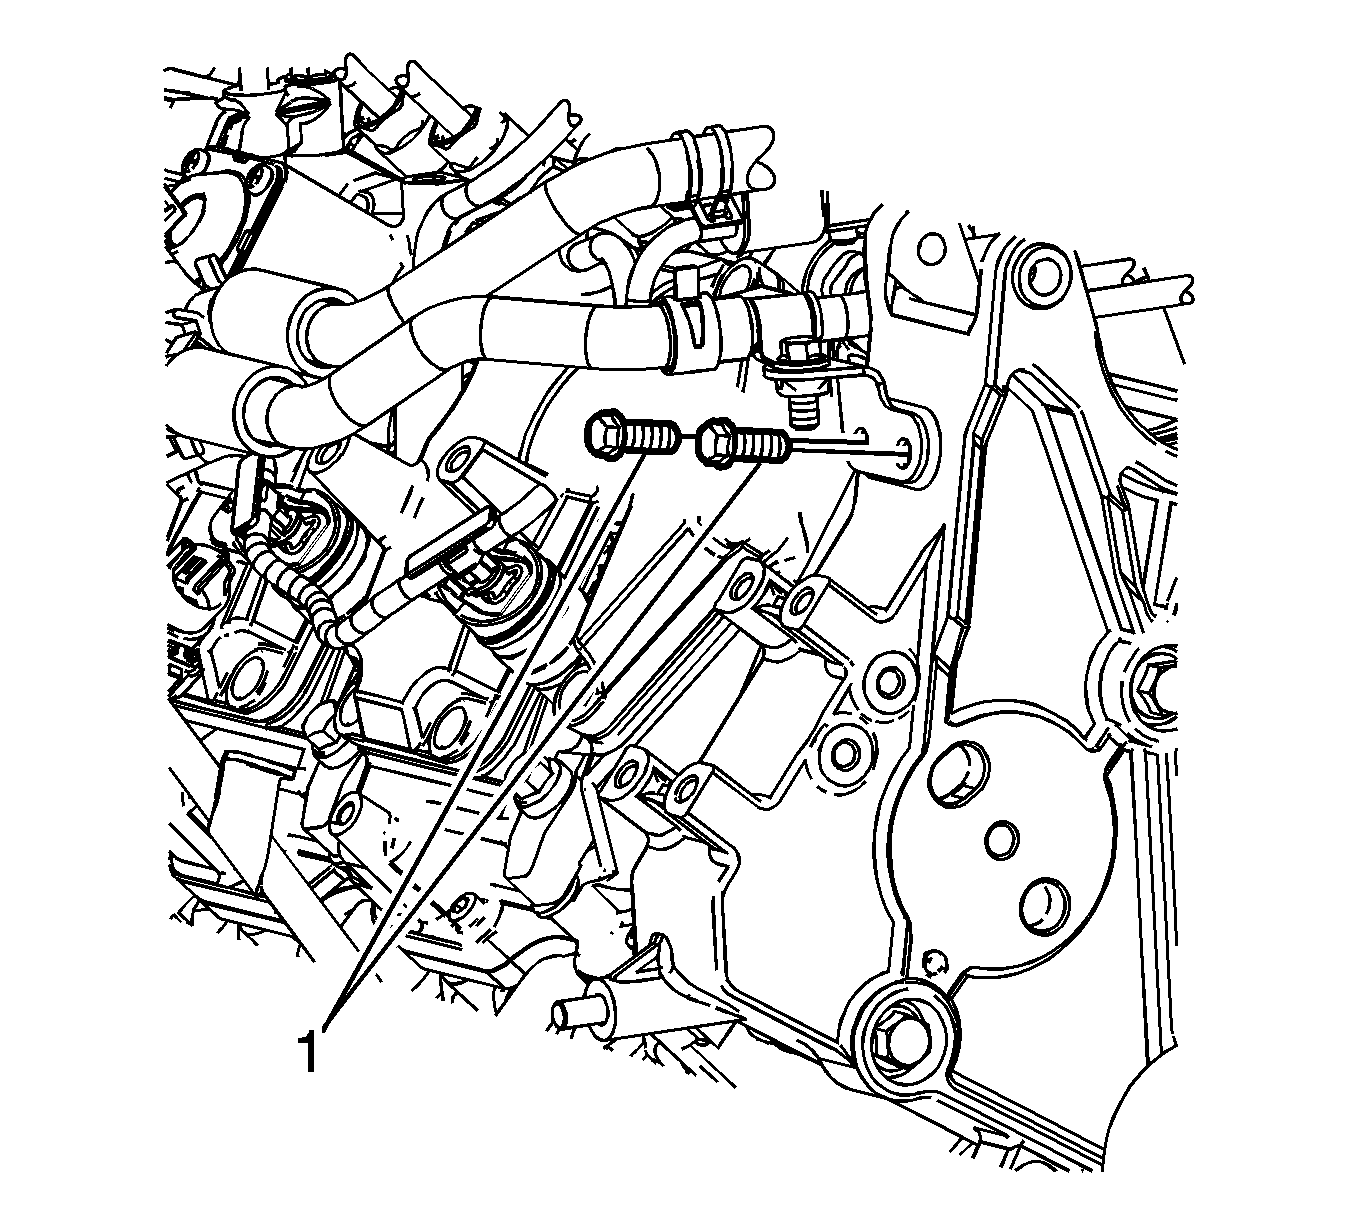
- Remove the fuel feed pipe bracket bolts (1).
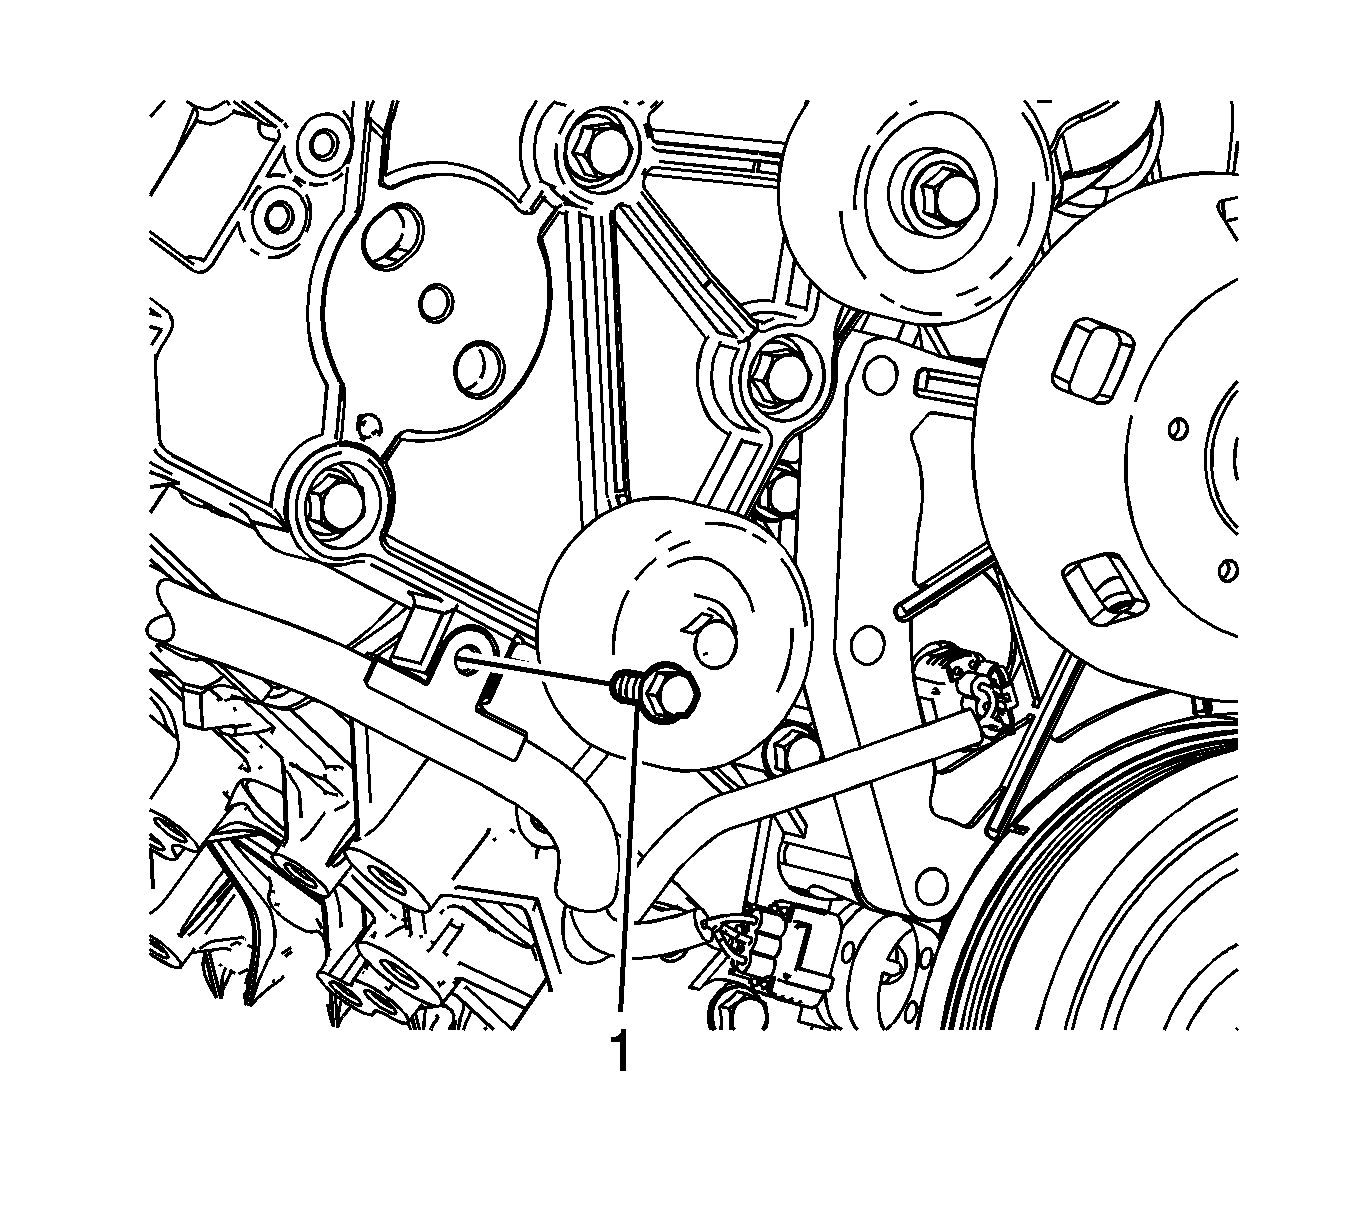
- Remove the engine wiring harness clip bolt (1).
- Reposition the engine wiring harness out of the way.
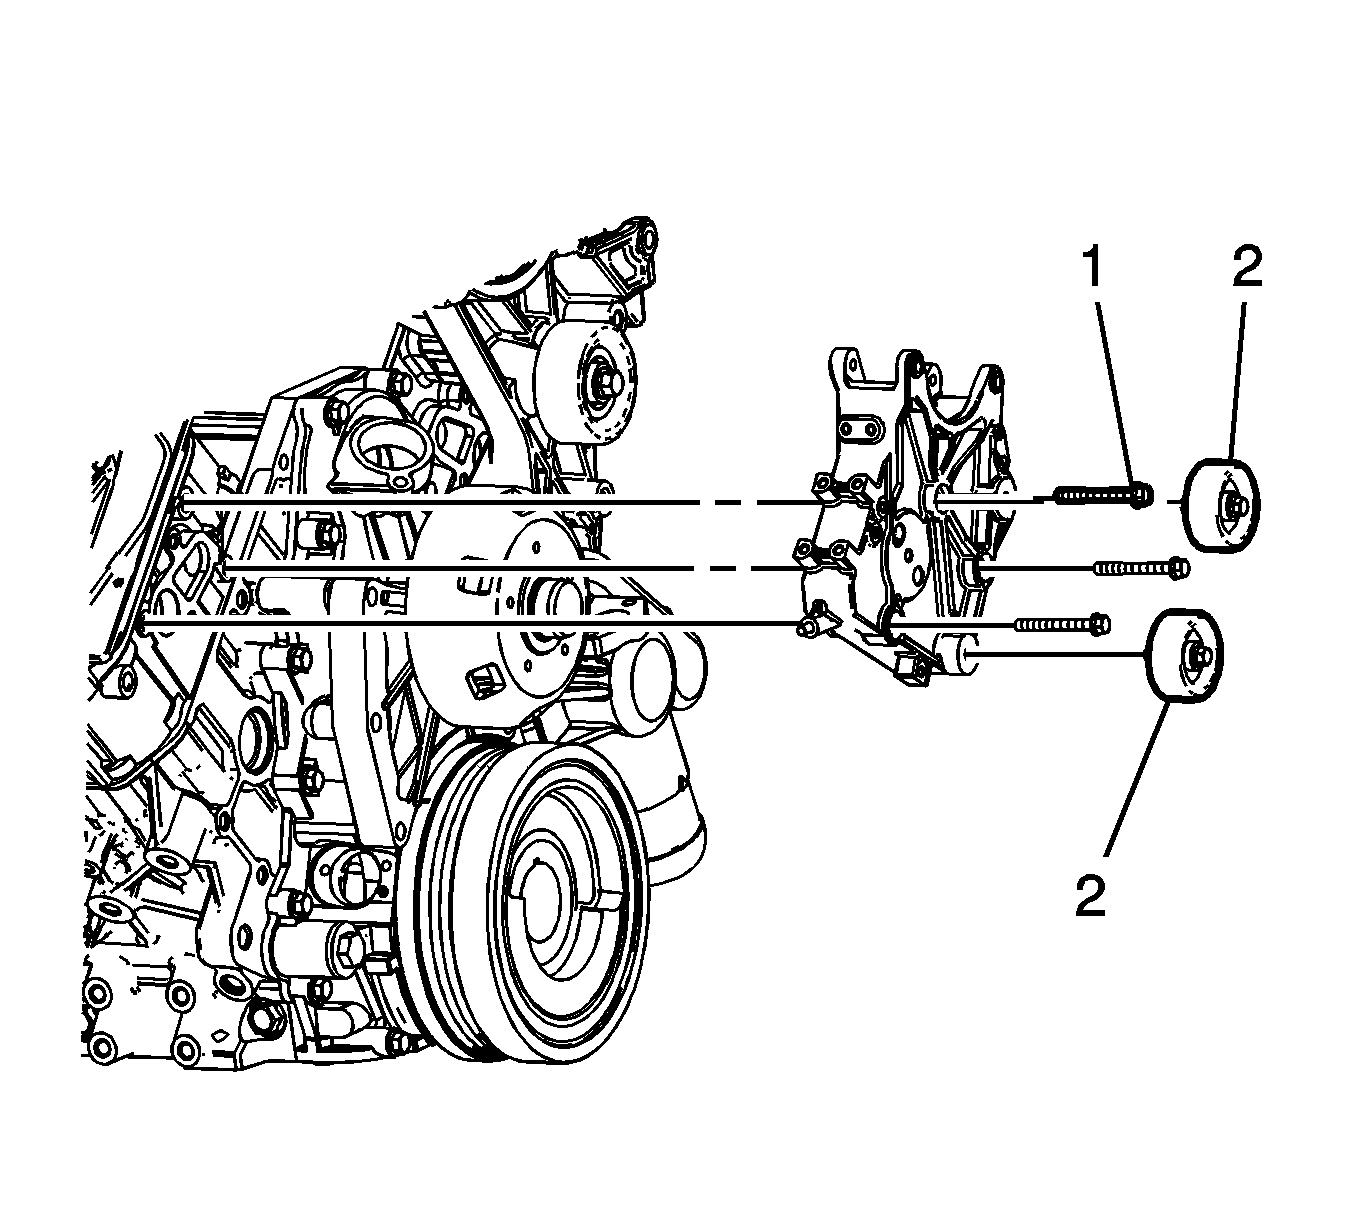
- Remove the generator bracket bolts (1)and nuts.
- Remove the generator bracket.
- If replacing the generator bracket, remove the idler pulley bolts (2) and remove the pulleys from the generator bracket.
Installation Procedure
- If the generator bracket was replaced, install the idler pulleys to the generator bracket and tighten the pulley bolts (2).
- Position the generator bracket to the engine and install the nuts and the bolts (1).
- Position the engine wiring harness and install the engine wiring harness clip bolt (1).
- Install the fuel feed pipe bracket bolts (1).
- Position the heater inlet hose/pipe to the engine.
- Install the heater inlet hose bracket to the generator bracket stud (2) and install the bracket nut (3).
- Install the heater inlet hose to the fuel filter adapter stud (1) and install the bracket nut (4).
- Install the oil level indicator tube bracket (2).
- Install the oil level indicator tube bracket bolts (1).
- Install the oil level indicator tube bolt (3).
- Install the engine wiring harness clip to the oil level indicator tube bracket (2).
- Install the drive belt tensioner. Refer to Drive Belt Tensioner Replacement .
- Install the generator. Refer to Generator Replacement .
- Install the intake air heater. Refer to Intake Air Heater Replacement .
- Install the fan assembly. Refer to Fan Replacement .
- Connect the negative battery cable. Refer to Battery Negative Cable Disconnection and Connection .
Notice: Refer to Fastener Notice in the Preface section.

Tighten
Tighten the bolts to 50 N·m (37 lb ft).
Tighten
Tighten the bolts to 50 N·m (37 lb ft).

Tighten
Tighten the bolt to 10 N·m (89 lb in).

Tighten
Tighten the bolts to 24 N·m (18 lb ft).

Tighten
Tighten the nut to 9 N·m (80 lb in).
Tighten
Tighten the nut to 9 N·m (80 lb in).

Tighten
Tighten the bolts to 21 N·m (15 lb ft).
Tighten
Tighten the bolts to 21 N·m (15 lb ft).
