For 1990-2009 cars only
Positive Crankcase Ventilation Valve Replacement Driver Side
Removal Procedure
- Loosen the charged air cooler inlet duct connector to turbocharger clamp (1).
- Remove the charged air cooler inlet duct connector (4) from the turbocharger.
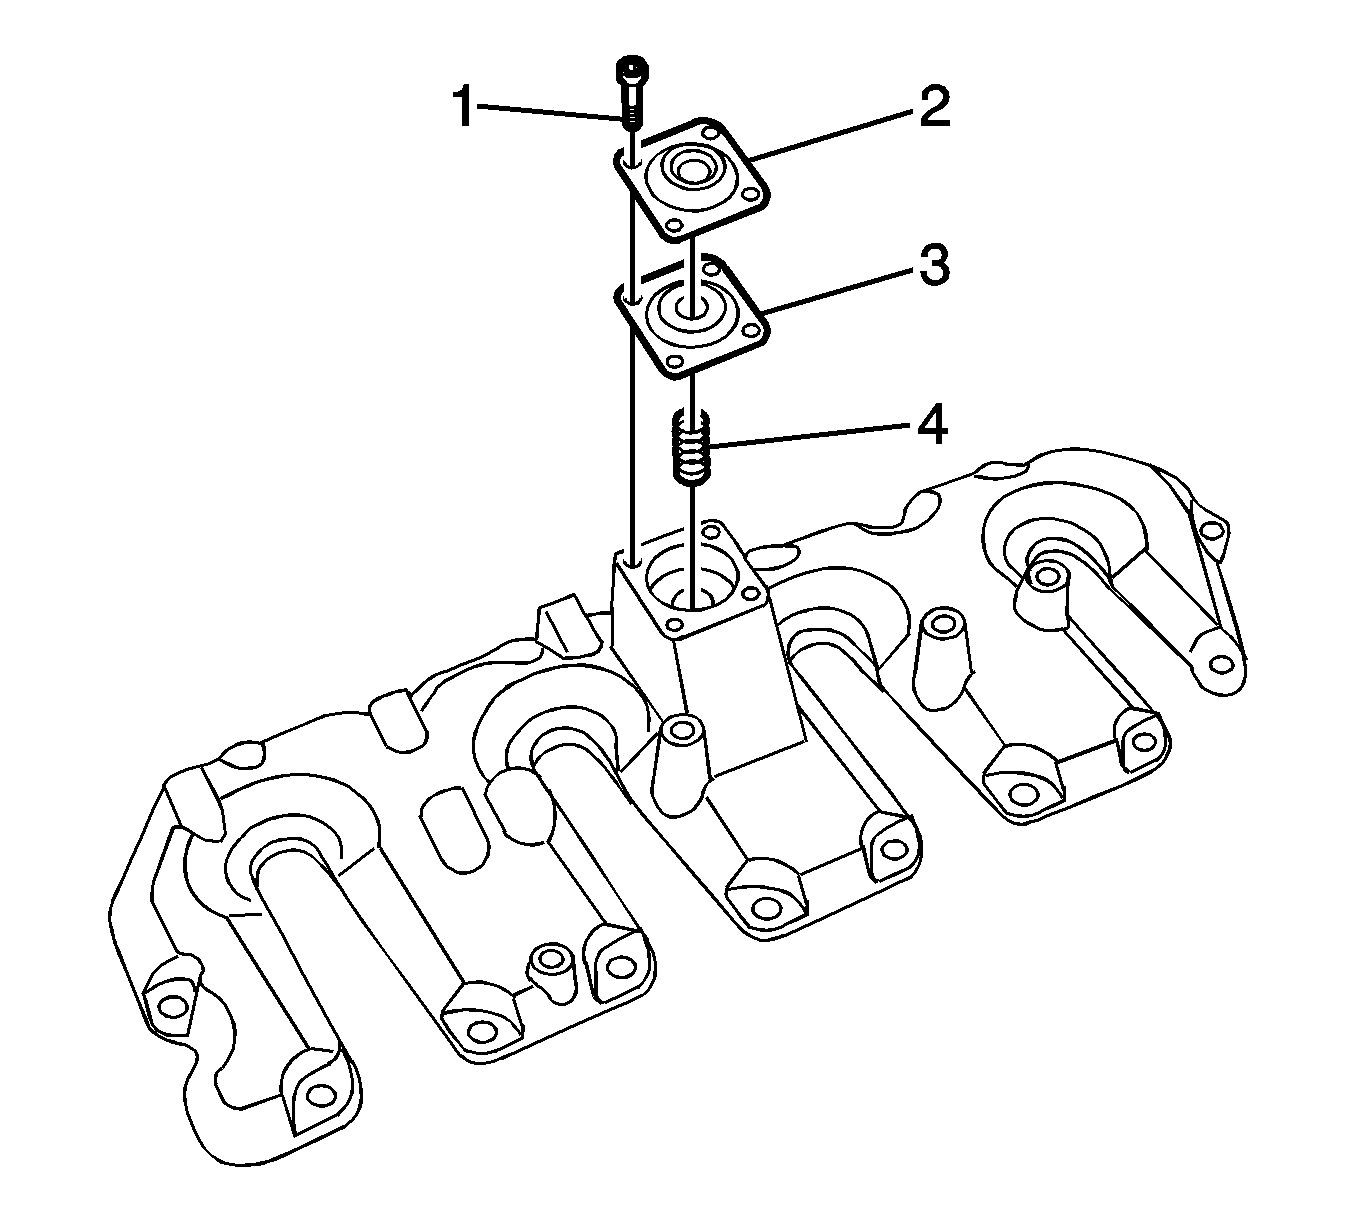
- Remove the positive crankcase ventilation (PCV) cover screws.
- Remove the PCV cover, diaphragm, and spring.
- Clean and inspect the cover, diaphragm, and spring.
- Discard the diaphragm if damage is found.
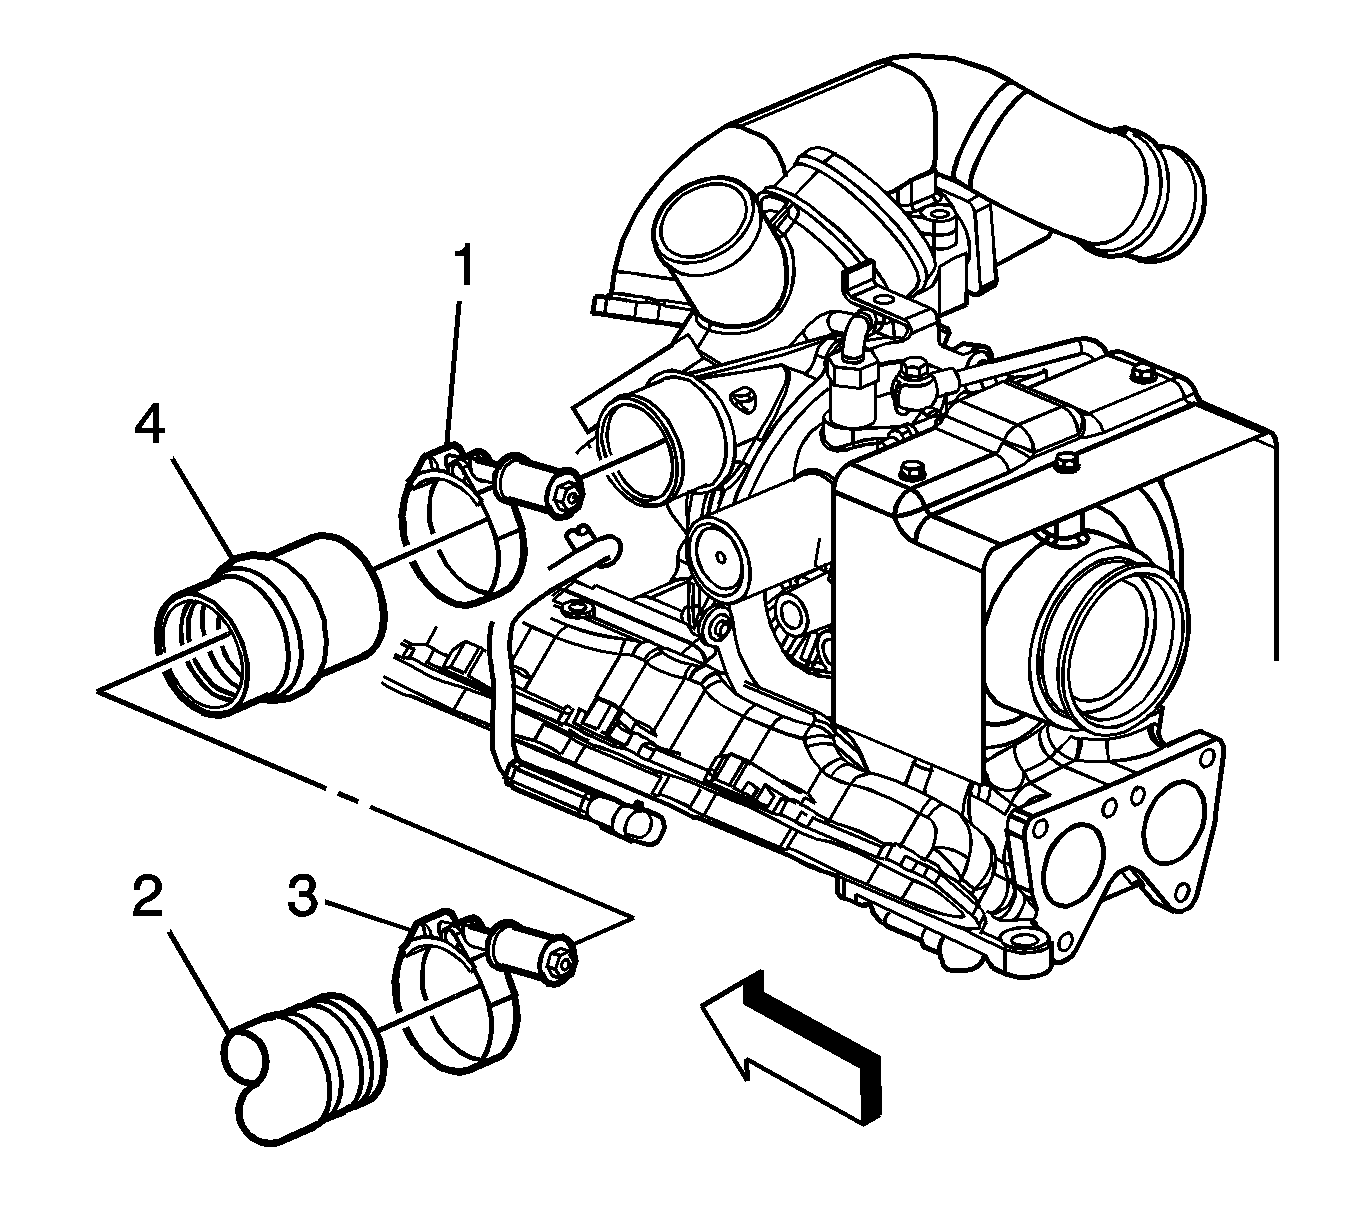
Important: After removing the charged air cooler duct, cover the turbocharger opening with tape in order to prevent entry of objects.
Important: Do not use a screwdriver or other tool to pry the hose loose. The hose can be torn or damaged. Loosen the hose by twisting.
Installation Procedure
- Install the spring, diaphragm, and cover.
- Install the PCV cover screws.
- Remove the tape from the turbocharger openings.
- Install the charged air cooler inlet duct connector (4) to the turbocharger.
- Tighten the charged air cooler inlet duct connector to turbocharger clamp (1).
Notice: Refer to Fastener Notice in the Preface section.
Tighten
Tighten the screws to 4 N·m (35 lb in).
Important: Lubricate the end of the duct prior to installation.
Tighten
Tighten the clamp to 6 N·m (53 lb in).
Positive Crankcase Ventilation Valve Replacement Passenger Side
Removal Procedure
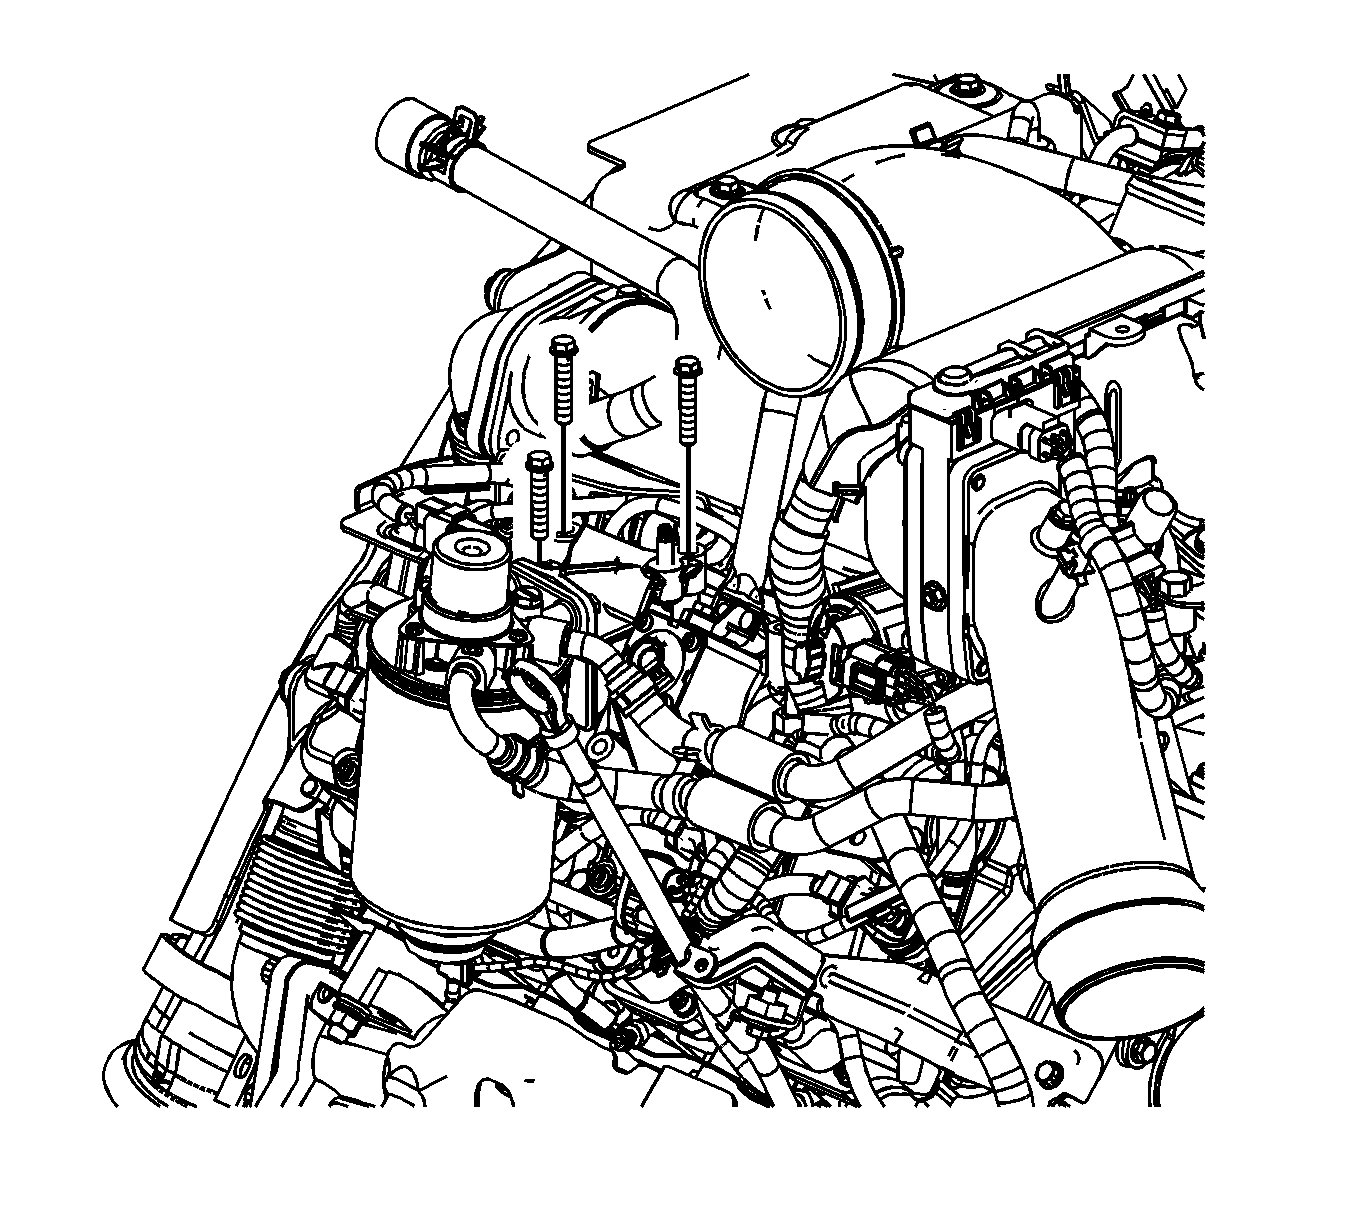
- Remove the air cleaner outlet duct. Refer to Air Cleaner Assembly Replacement.
- Remove the fuel filter bracket bolts.
- Position the fuel filter assembly out of the way.
- Remove the positive crankcase ventilation (PCV) cover screws.
- Remove the PCV cover, diaphragm, and spring.
- Clean and inspect the cover, diaphragm and spring.
- Discard the diaphragm if damage is found.
Installation Procedure
- Install the spring, diaphragm and cover.
- Install the PCV cover screws.
- Position the fuel filter assembly to the engine.
- Install the fuel filter bracket bolts.
- Install the air cleaner outlet duct. Refer to Air Cleaner Assembly Replacement.
Notice: Refer to Fastener Notice in the Preface section.
Tighten
Tighten the screws to 4 N·m (35 lb in).
Tighten
Tighten the bolts to 21 N·m (15 lb ft).
