For 1990-2009 cars only
Starter Solenoid Cable Replacement With LU3
Removal Procedure
- Disconnect the negative battery cable. Refer to Battery Negative Cable Disconnection and Connection.
- Remove the air cleaner outlet resonator. Refer to Air Cleaner Outlet Resonator Replacement.
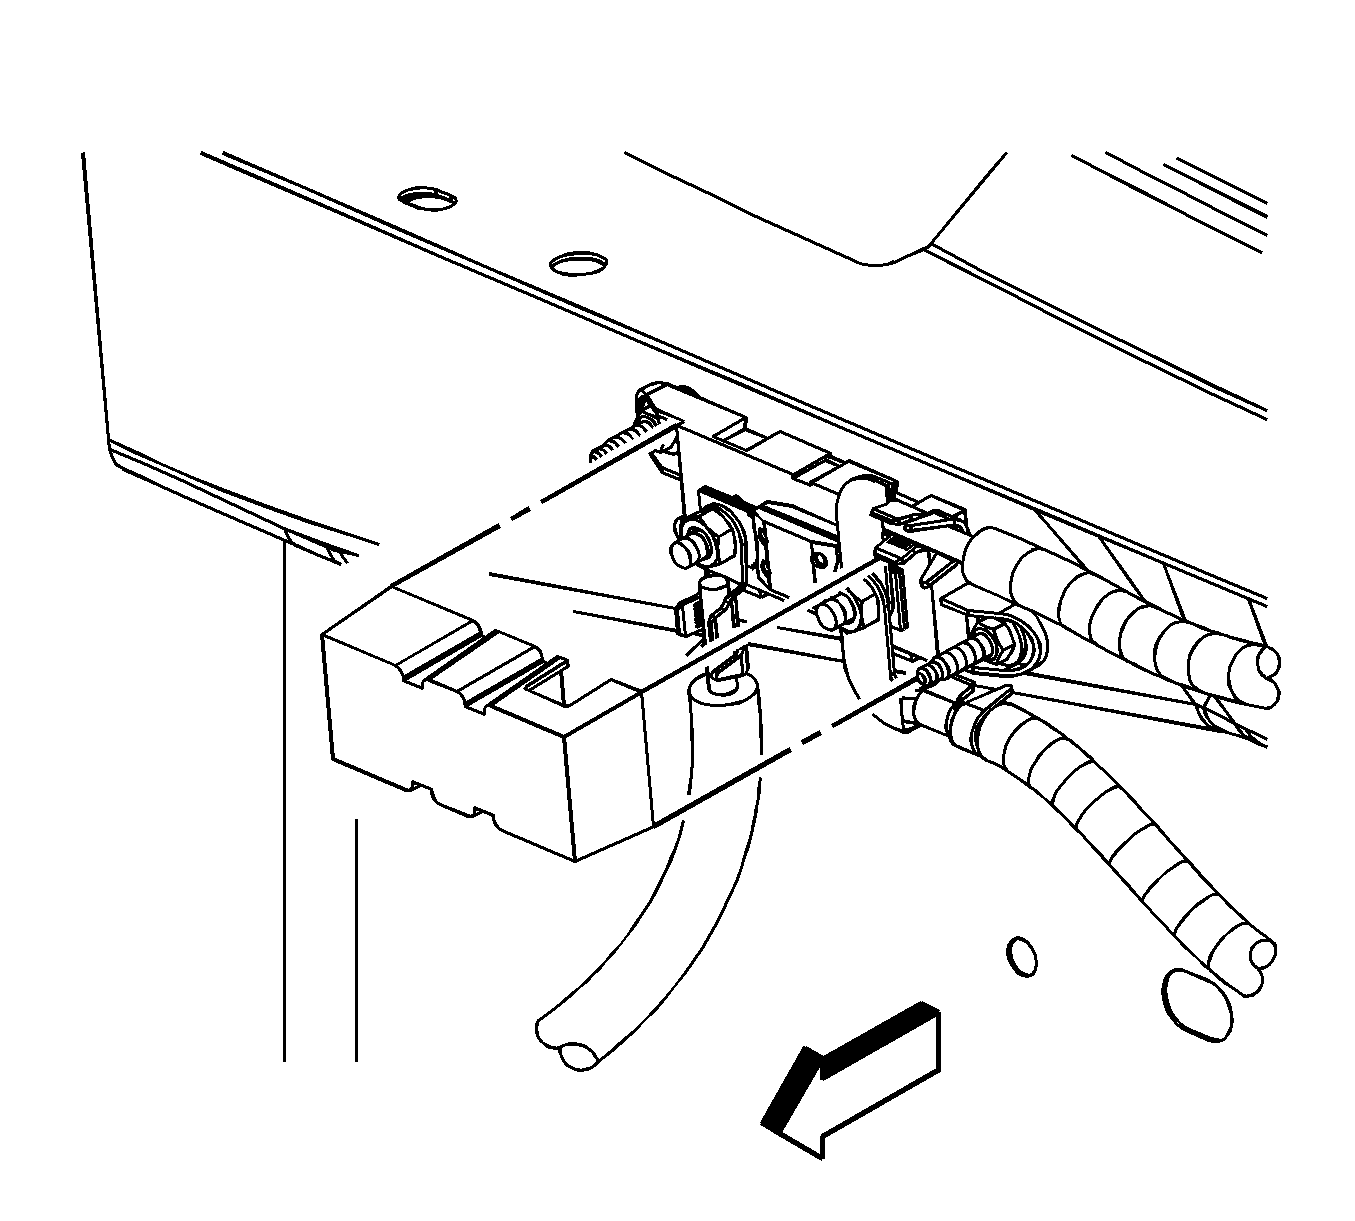
- Remove the mega fuse cover.
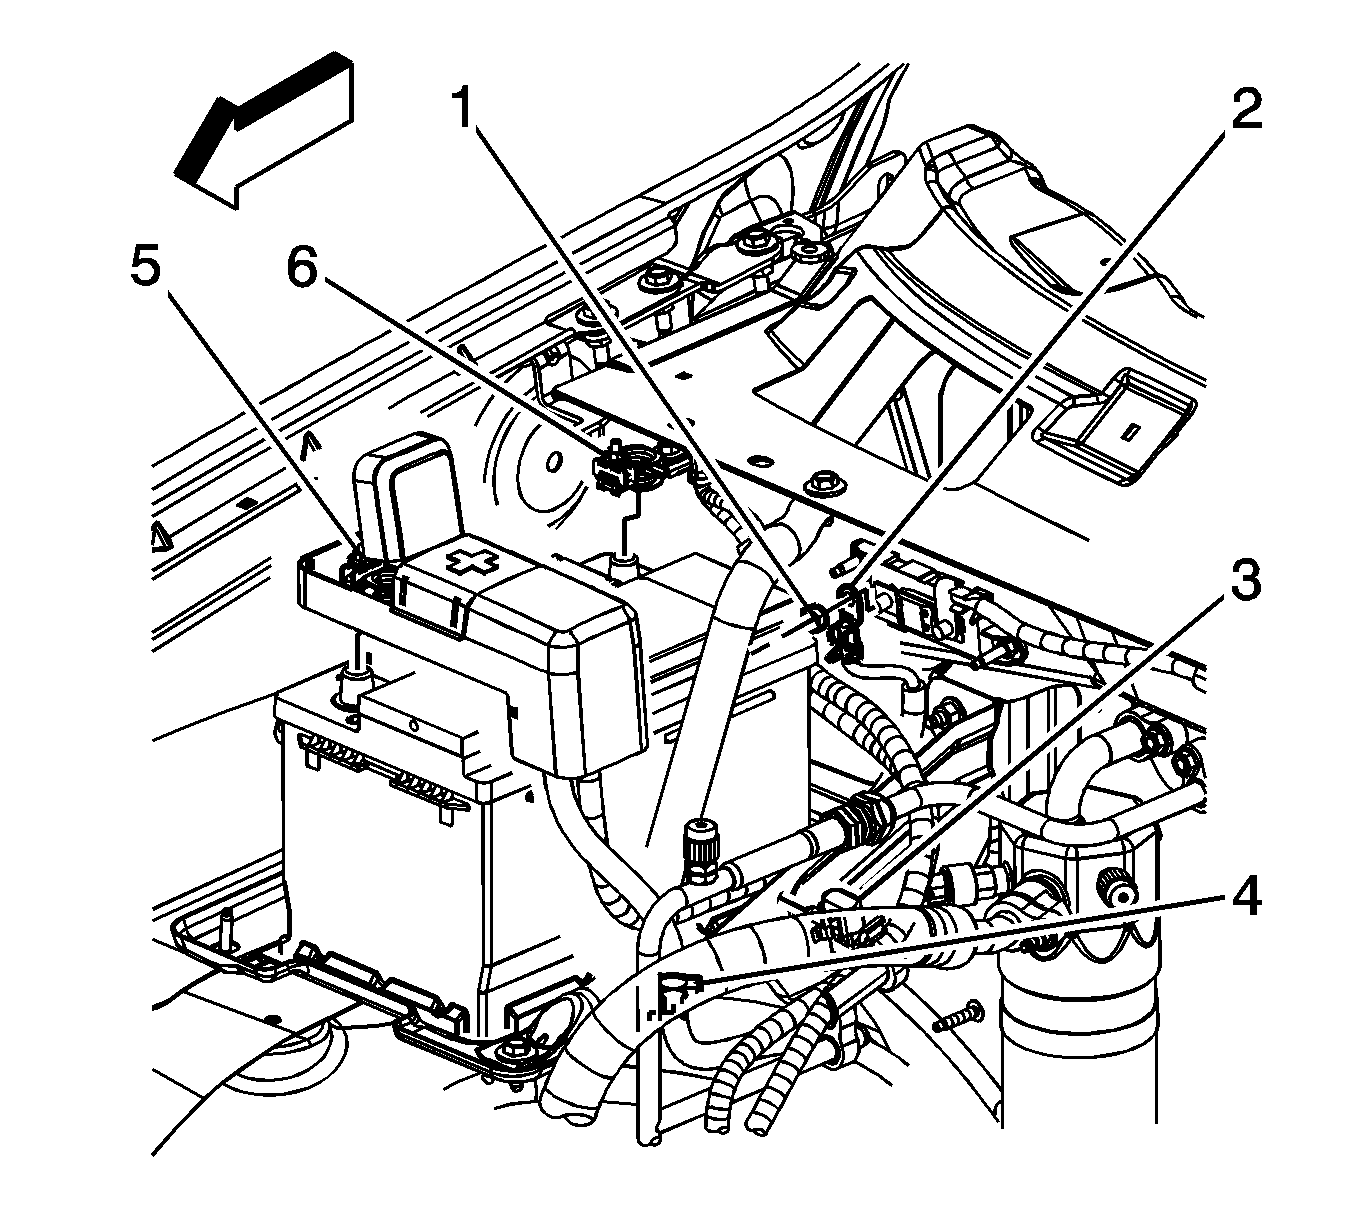
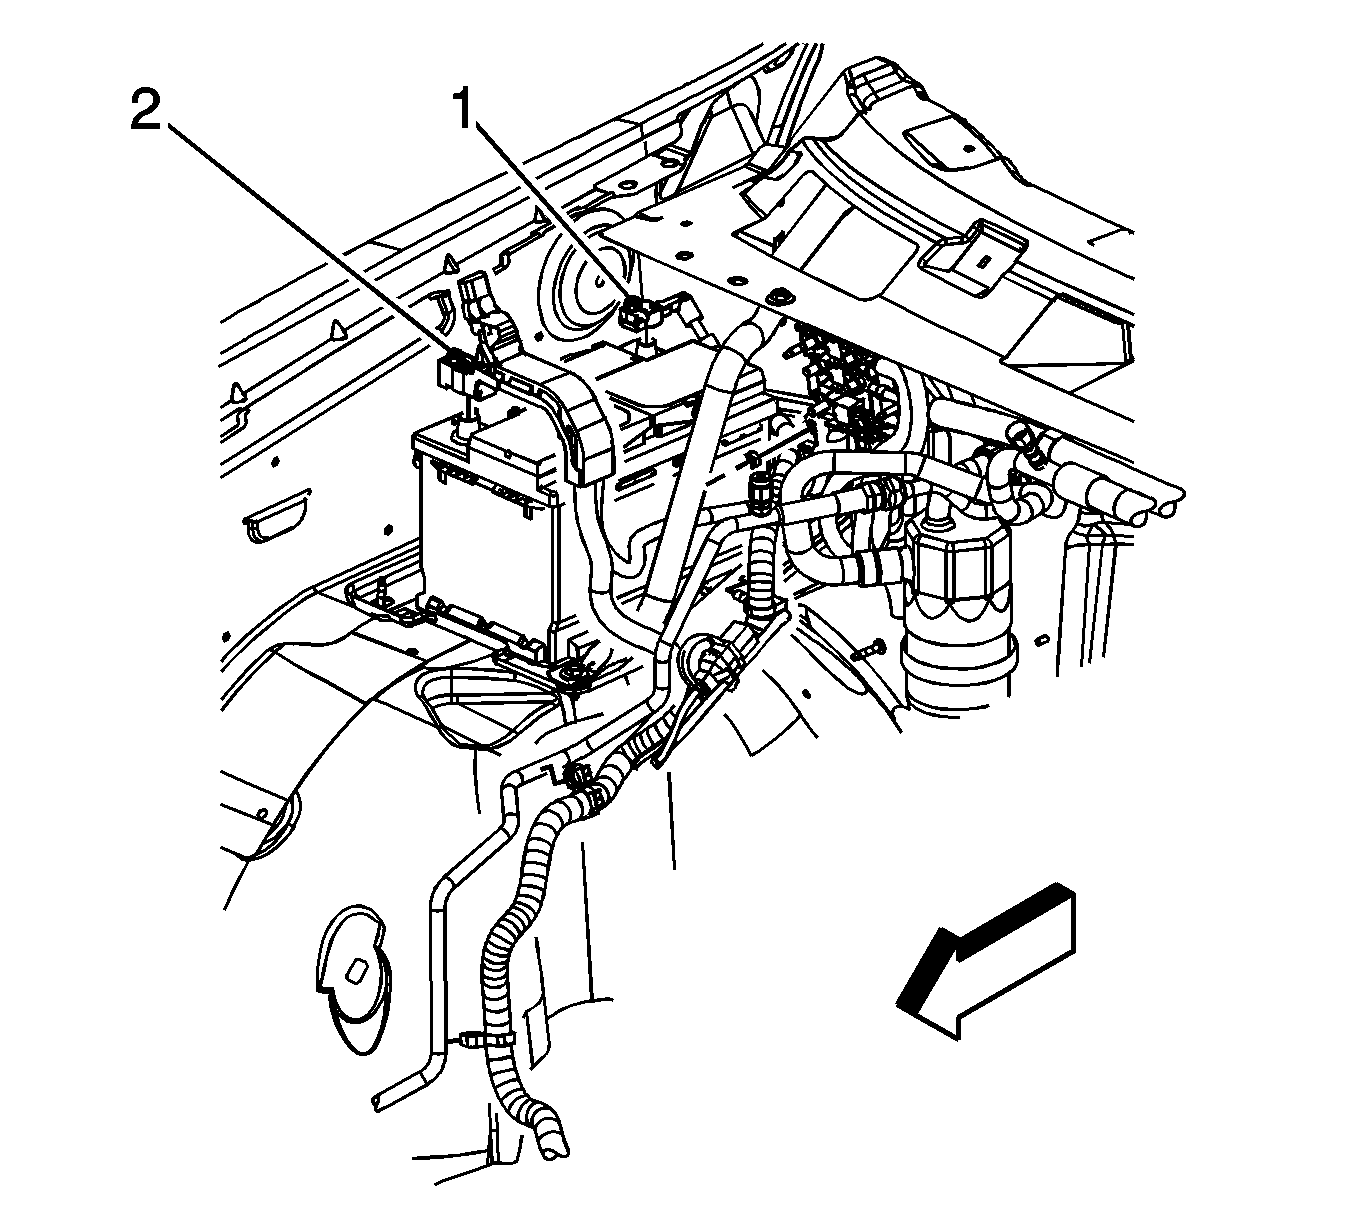
- Remove the starter solenoid cable nut (1) from the mega fuse stud.
- Remove the starter solenoid cable terminal (2) from the mega fuse stud.
- Open the starter solenoid cable cover at the positive battery terminal.
- Loosen the starter solenoid cable nut (5).
- Remove the starter solenoid cable from the positive battery terminal.
- Remove the starter solenoid cable clip (4) from the air conditioning (A/C) evaporator tube.
- Raise and support the vehicle. Refer to Lifting and Jacking the Vehicle.
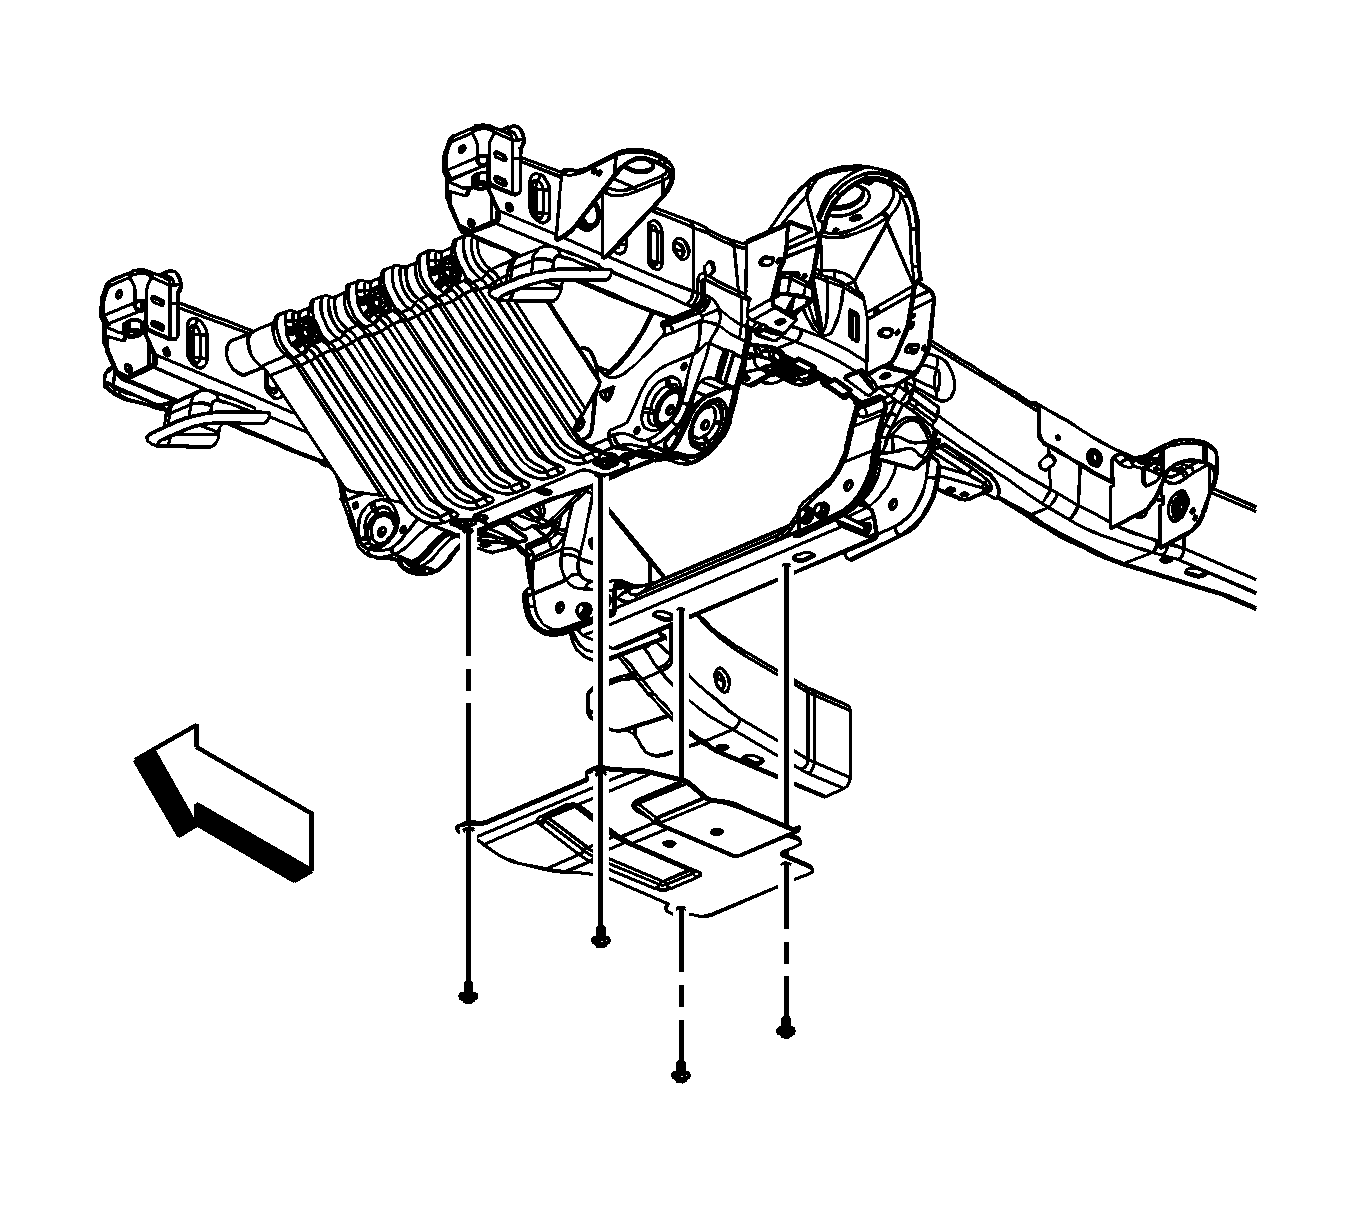
- Remove the oil pan skid plate bolts and plate, if equipped.
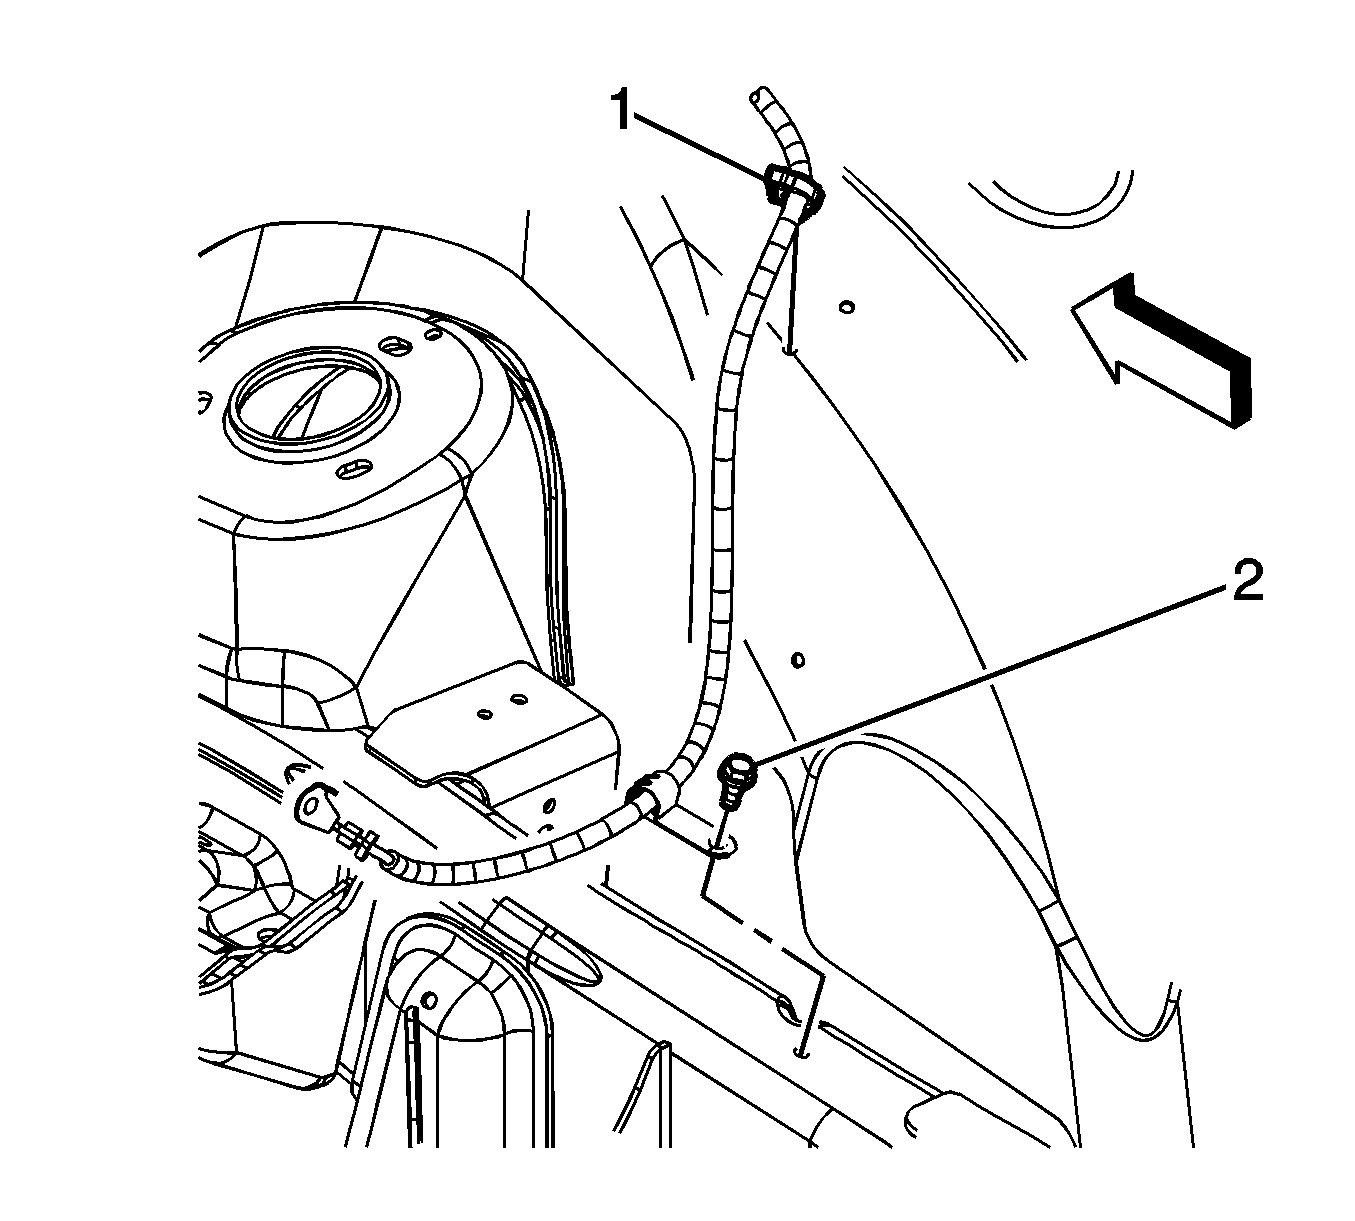
- Remove the starter solenoid cable clip (1) from the wheelhouse panel.
- Remove the starter solenoid cable clip bolt (2) from the frame.
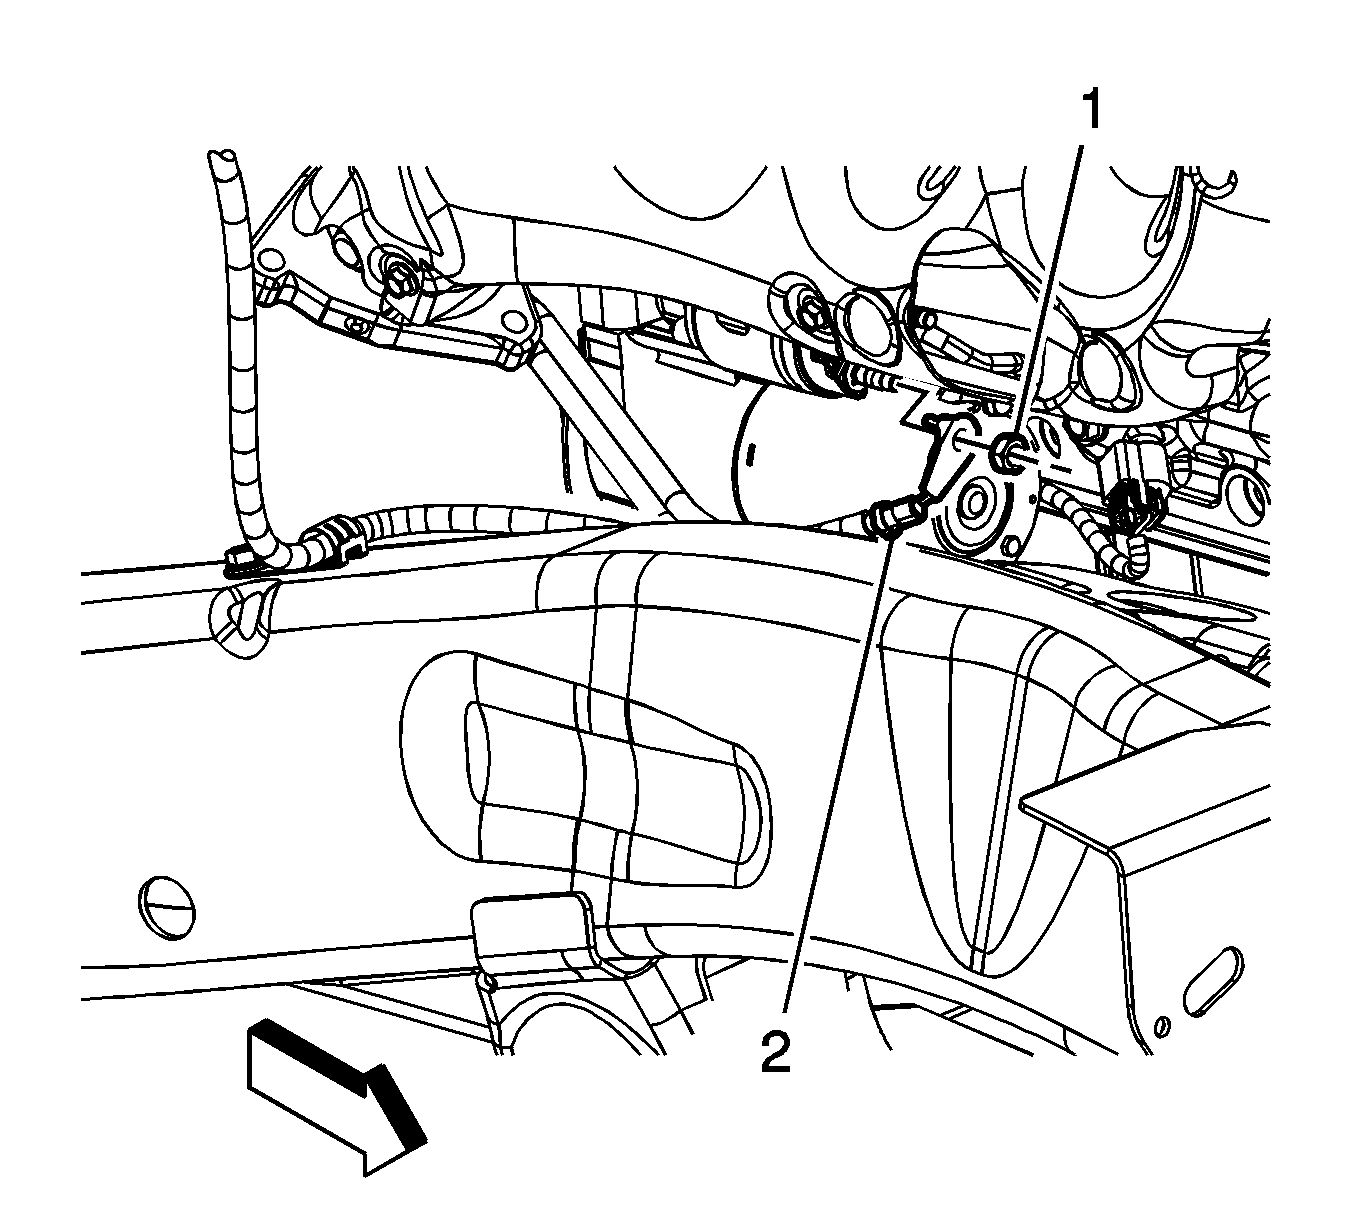
- Remove the starter solenoid cable nut (1) from the starter.
- Remove the starter solenoid cable (2) from the starter.
- Lower the vehicle.
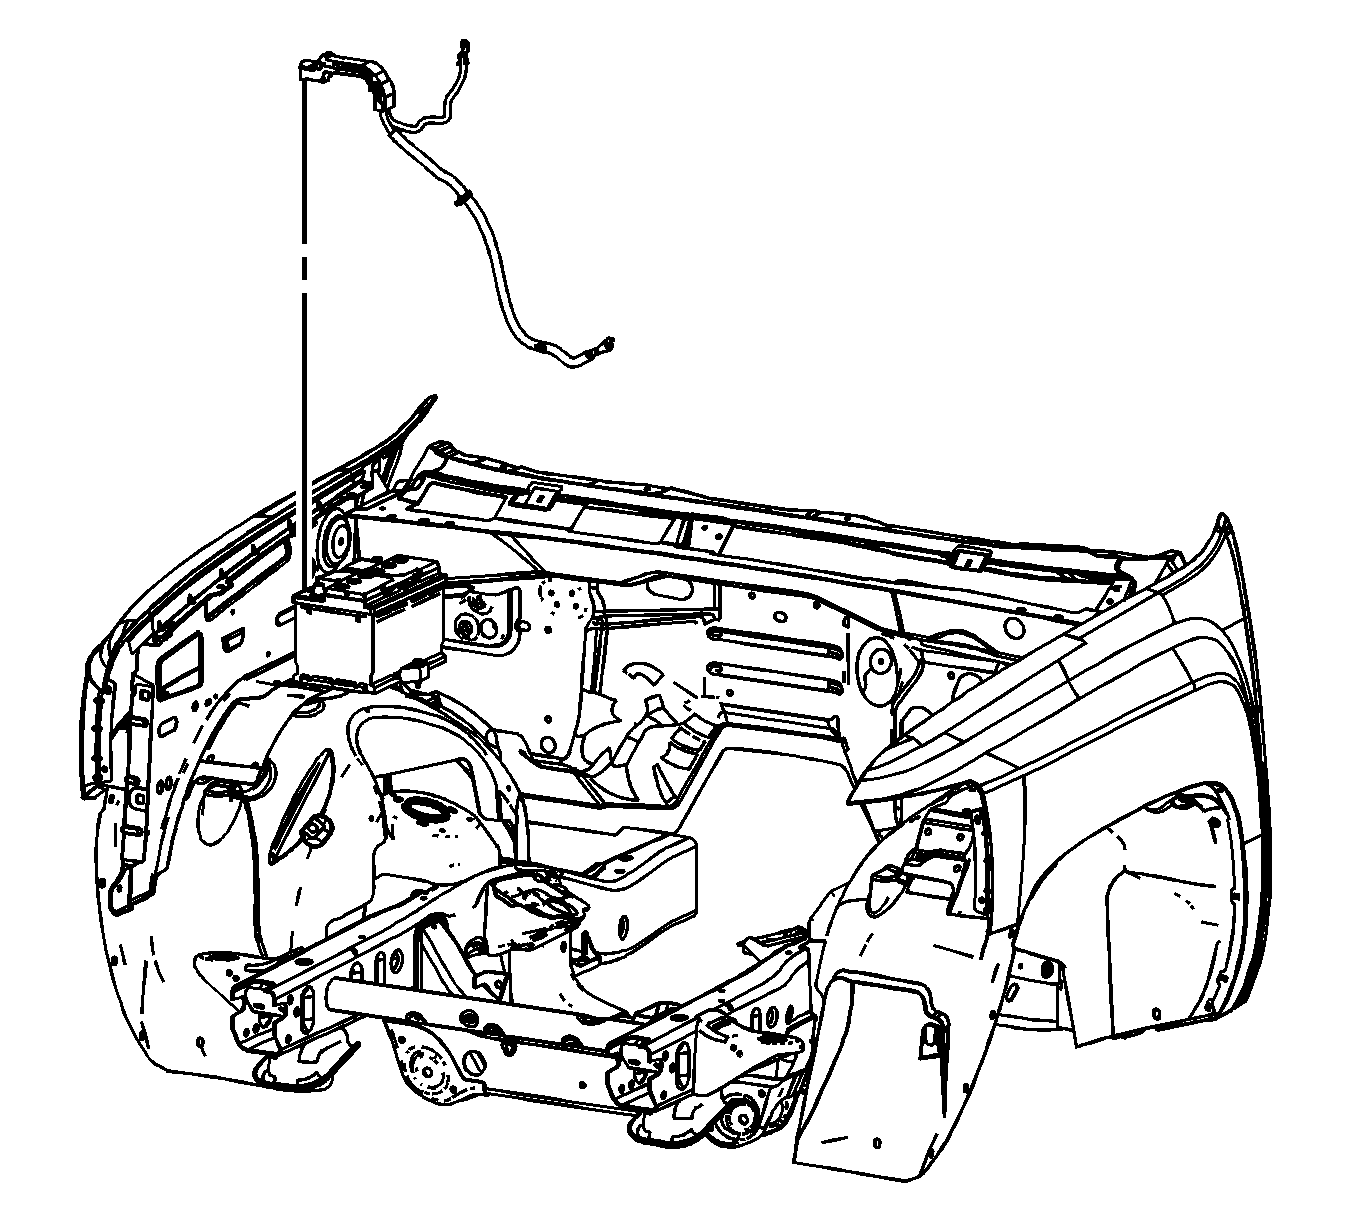
- Remove the starter solenoid cable from the vehicle.
Installation Procedure
- Install the starter solenoid cable to the vehicle.
- Install the starter solenoid cable to the positive battery terminal.
- Tighten the starter solenoid cable nut (5) to 5 N·m (44 lb in).
- Close the starter solenoid cable cover at the positive battery terminal.
- Install the starter solenoid cable terminal (2) to the mega fuse stud.
- Install the starter solenoid cable nut (1) to the mega fuse stud and tighten to 9 N·m (80 lb in).
- Install the starter solenoid cable clip (4) to the A/C evaporator tube.
- Install the mega fuse cover.
- Raise the vehicle.
- Install the starter solenoid cable (2) to the starter.
- Install the starter solenoid cable nut (1) to the starter and tighten to 9 N·m (80 lb in).
- Position the starter solenoid cable clip to the frame and install the starter solenoid cable clip bolt (2).
- Install the starter solenoid cable clip (1) to the wheelhouse panel.
- Position the oil pan skid plate and install the bolts and tighten to 28 N·m (21 lb ft).
- Lower the vehicle.
- Install the air cleaner outlet resonator. Refer to Air Cleaner Outlet Resonator Replacement.
- Connect the negative battery cable. Refer to Battery Negative Cable Disconnection and Connection.


Caution: Refer to Fastener Caution in the Preface section.


Starter Solenoid Cable Replacement With V8 Engine
Removal Procedure
- Disconnect the negative battery cable. Refer to Battery Negative Cable Disconnection and Connection.
- Remove the air cleaner outlet duct. Refer to Air Cleaner Resonator Outlet Duct Replacement.
- Remove the mega fuse cover.
- Remove the starter solenoid cable nut (1) from the mega fuse stud.
- Remove the starter solenoid cable terminal (2) from the mega fuse stud.
- Open the starter solenoid cable cover at the positive battery terminal.
- Loosen the starter solenoid cable nut (5).
- Remove the starter solenoid cable from the positive battery terminal.
- Remove the starter solenoid cable clip (4) from the air conditioning (A/C) evaporator tube.
- Raise and support the vehicle. Refer to Lifting and Jacking the Vehicle.
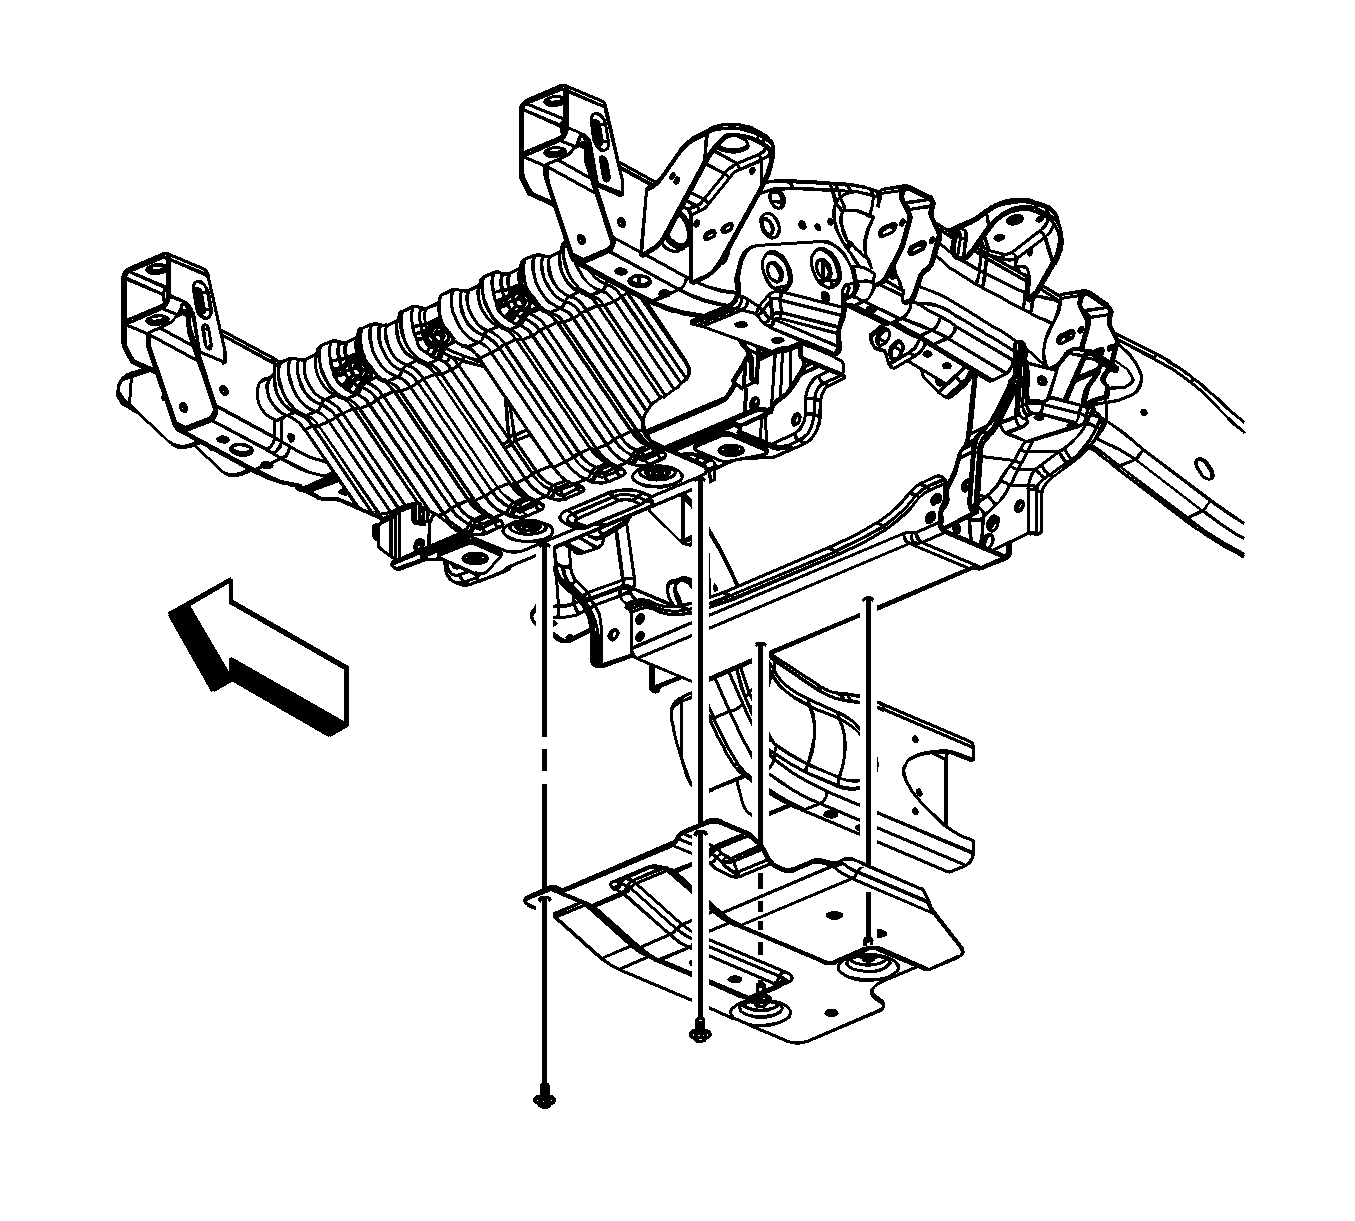
- For 1500 series vehicles, remove the oil pan skid plate bolts and plate.
- For 2500 series vehicles, remove the front 2 oil pan skid plate bolts, loosen the rear 2 bolts and remove the skid plate.
- Remove the starter solenoid cable clip (1) from the wheelhouse panel.
- Remove the starter solenoid cable clip bolt (2) from the frame.
- Remove the starter solenoid cable nut (1) from the starter.
- Remove the starter solenoid cable (2) from the starter.
- Lower the vehicle.
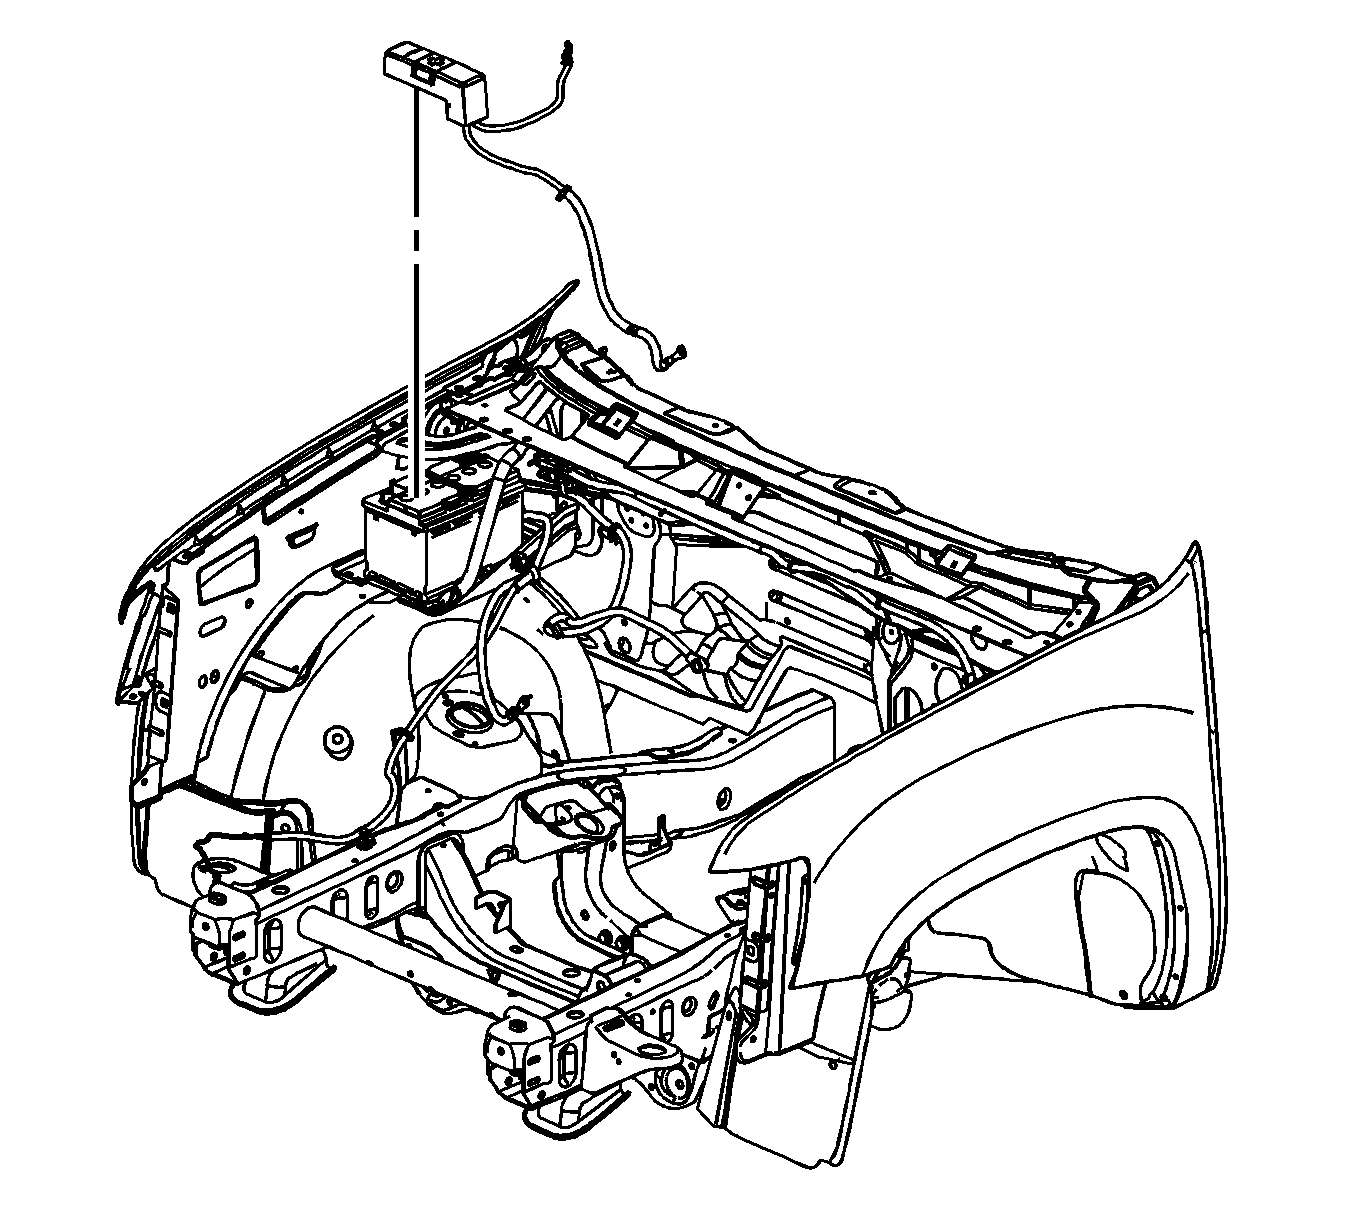
- Remove the starter solenoid cable from the vehicle.




Installation Procedure
- Install the starter solenoid cable to the vehicle.
- Install the starter solenoid cable to the positive battery terminal.
- Tighten the starter solenoid cable nut (5) to 5 N·m (44 lb in).
- Close the starter solenoid cable cover at the positive battery terminal.
- Install the starter solenoid cable terminal (2) to the mega fuse stud.
- Install the starter solenoid cable nut (1) to the mega fuse stud and tighten to 9 N·m (80 lb in).
- Install the starter solenoid cable clip (4) to the A/C evaporator tube.
- Install the mega fuse cover.
- Raise the vehicle.
- Install the starter solenoid cable (2) to the starter.
- Install the starter solenoid cable nut (1) to the starter and tighten to 9 N·m (80 lb in).
- Position the starter solenoid cable clip to the frame and install the starter solenoid cable clip bolt (2).
- Install the starter solenoid cable clip (1) to the wheelhouse panel.
- For 2500 series vehicles, install the oil pan skid plate and tighten the rear 2 bolts and install and tighten the front 2 bolts and tighten to 28 N·m (21 lb ft).
- For 1500 series vehicles, install the oil pan skid plate and bolts and tighten to 28 N·m (21 lb ft).
- Lower the vehicle.
- Install the air cleaner outlet duct. Refer to Air Cleaner Resonator Outlet Duct Replacement.
- Connect the negative battery cable. Refer to Battery Negative Cable Disconnection and Connection.


Caution: Refer to Fastener Caution in the Preface section.


Starter Solenoid Cable Replacement With LMM
Removal Procedure
- Disconnect the negative battery cable. Refer to Battery Negative Cable Disconnection and Connection.
- Remove the air cleaner assembly. Refer to Air Cleaner Assembly Replacement.
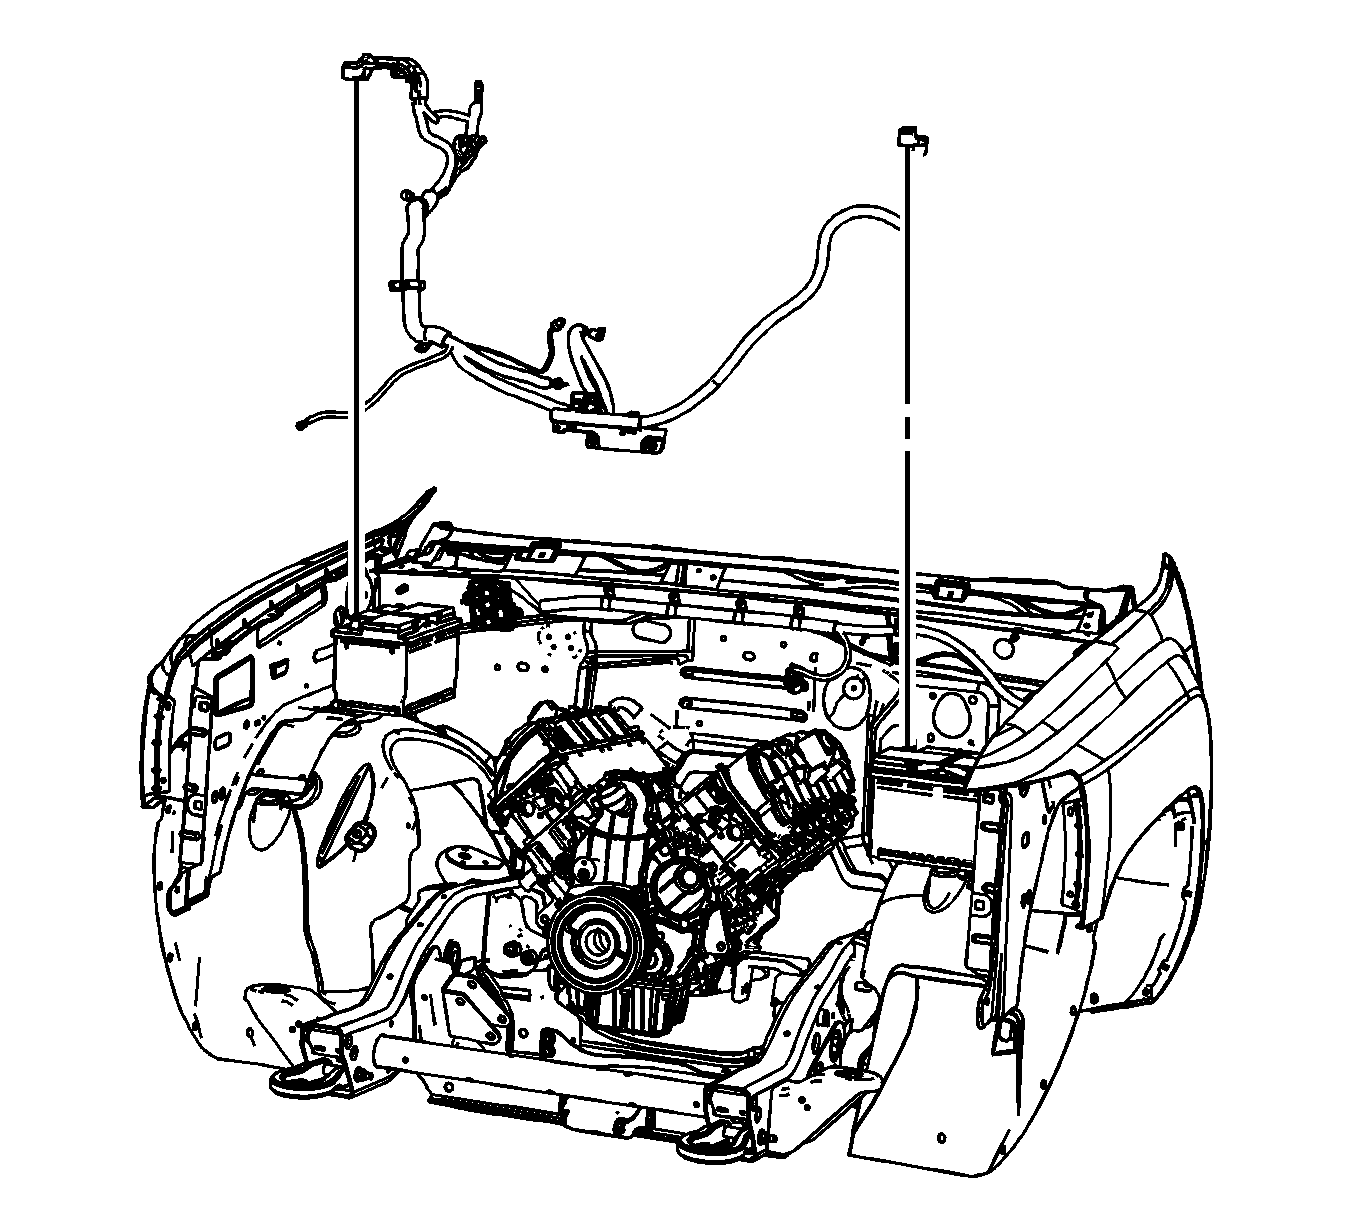
- Open the starter solenoid cable positive battery post cover.
- Loosen the starter solenoid cable nut (1).
- Remove the starter solenoid cable from the battery positive post.
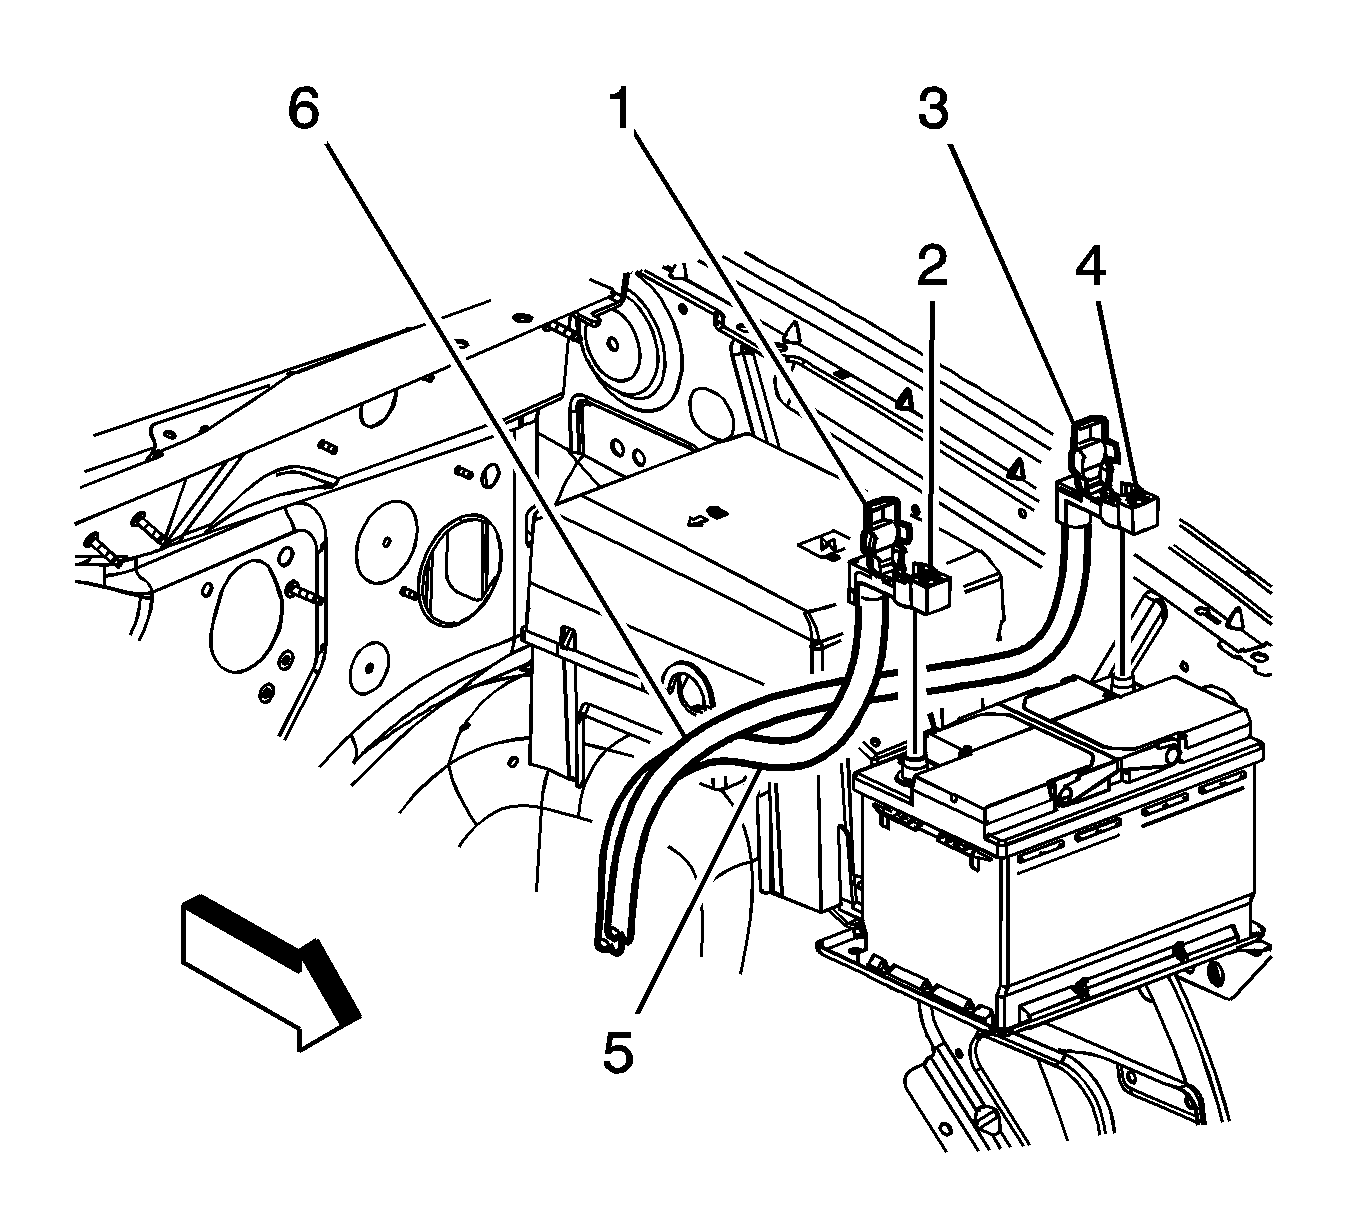
- Open the starter solenoid cable positive battery post cover (1).
- Loosen the starter solenoid cable nut (2).
- Remove the starter solenoid cable (5) from the battery positive post.
- Remove the starter solenoid cable clip (3) from the battery tray.
- Remove the starter solenoid cable clips (4) from the air conditioning (A/C) evaporator tube.
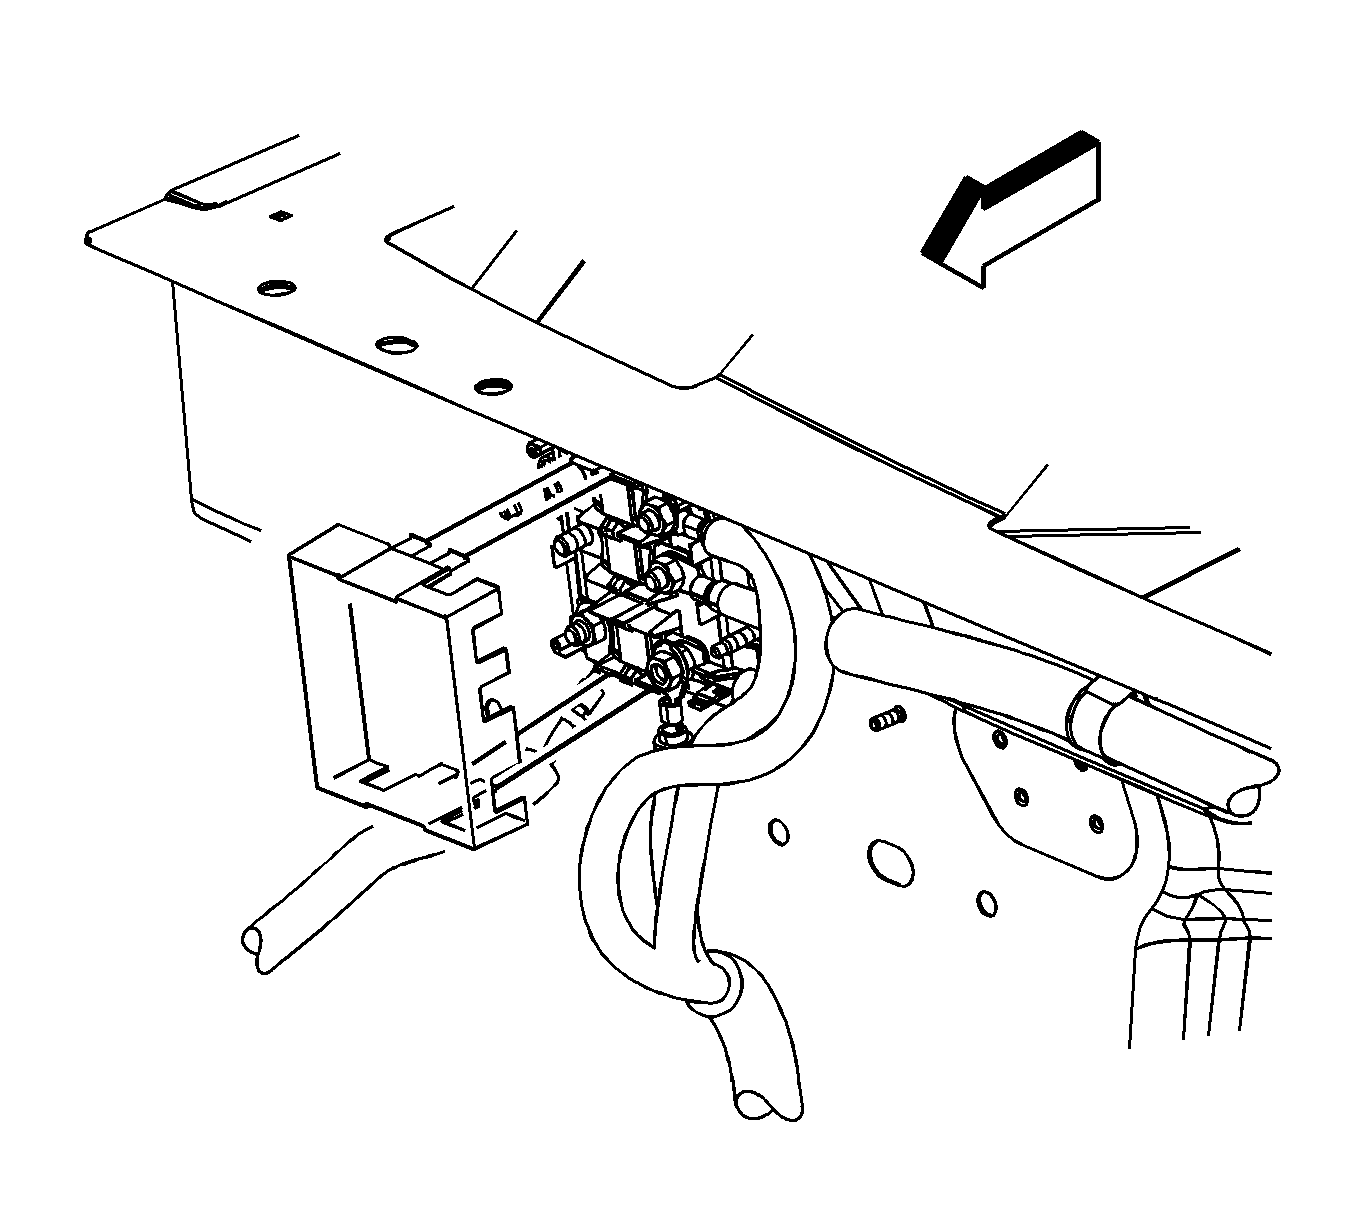
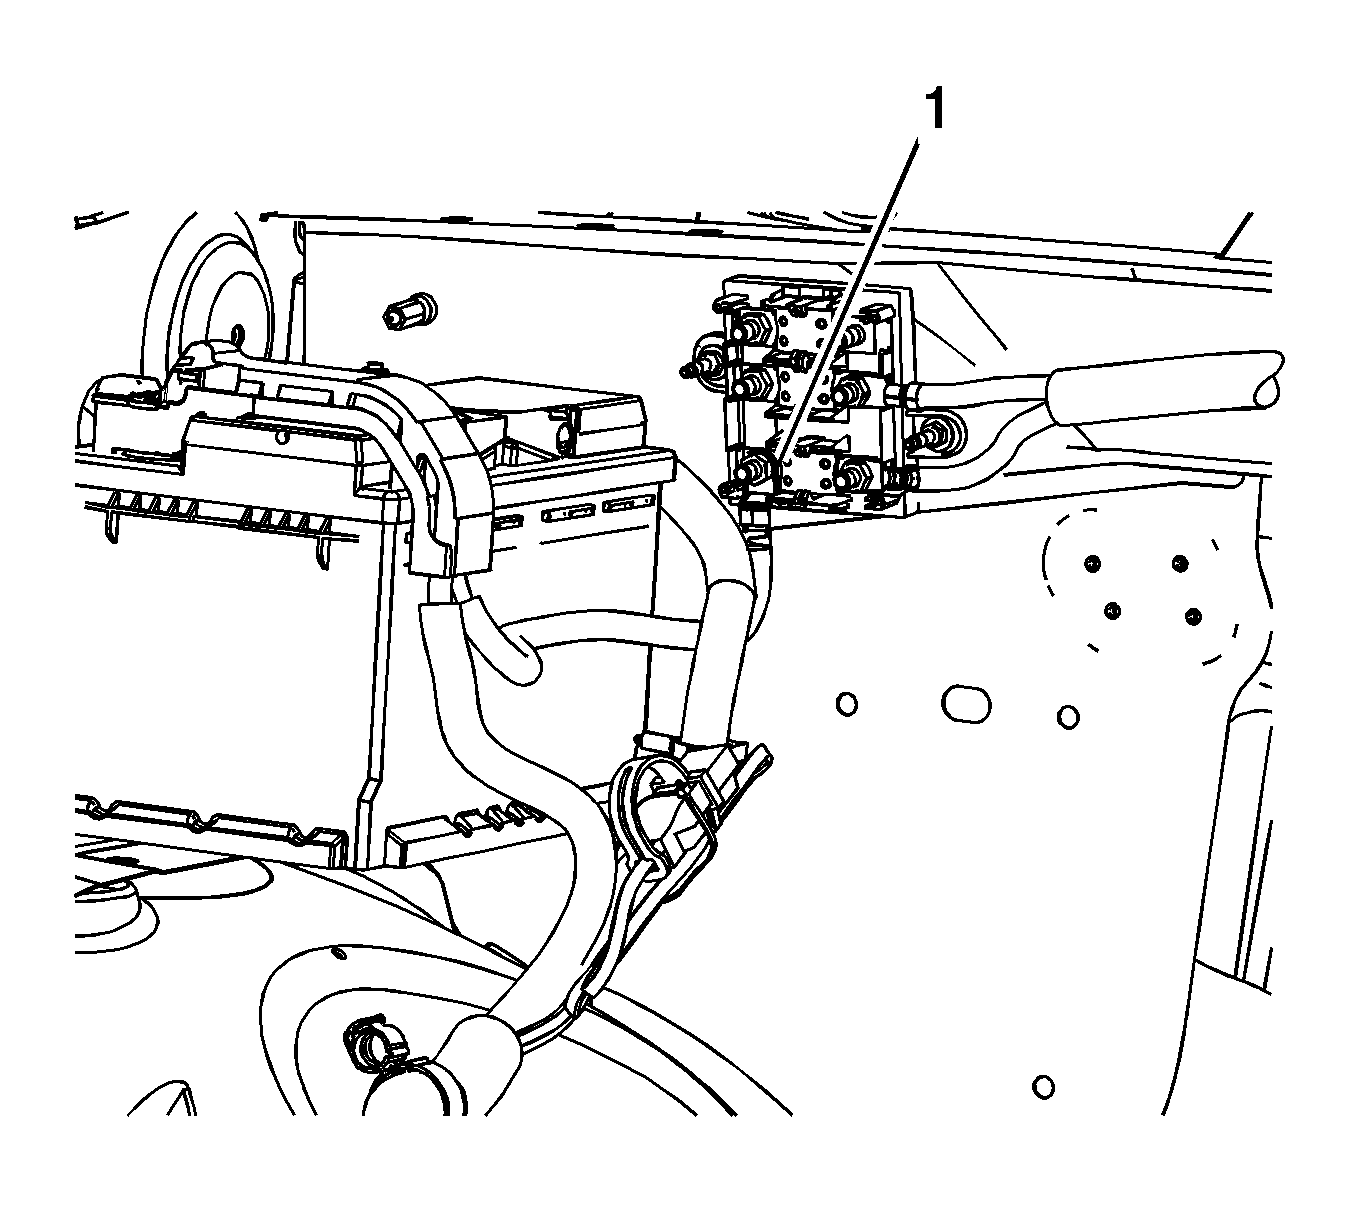
- Remove the mega fuse cover.
- Remove the starter solenoid cable to mega fuse nut (1).
- Remove the starter solenoid cable branch from the mega fuse stud.
- Remove the wheelhouse liner. Refer to Front Wheelhouse Liner Replacement - Right Side.
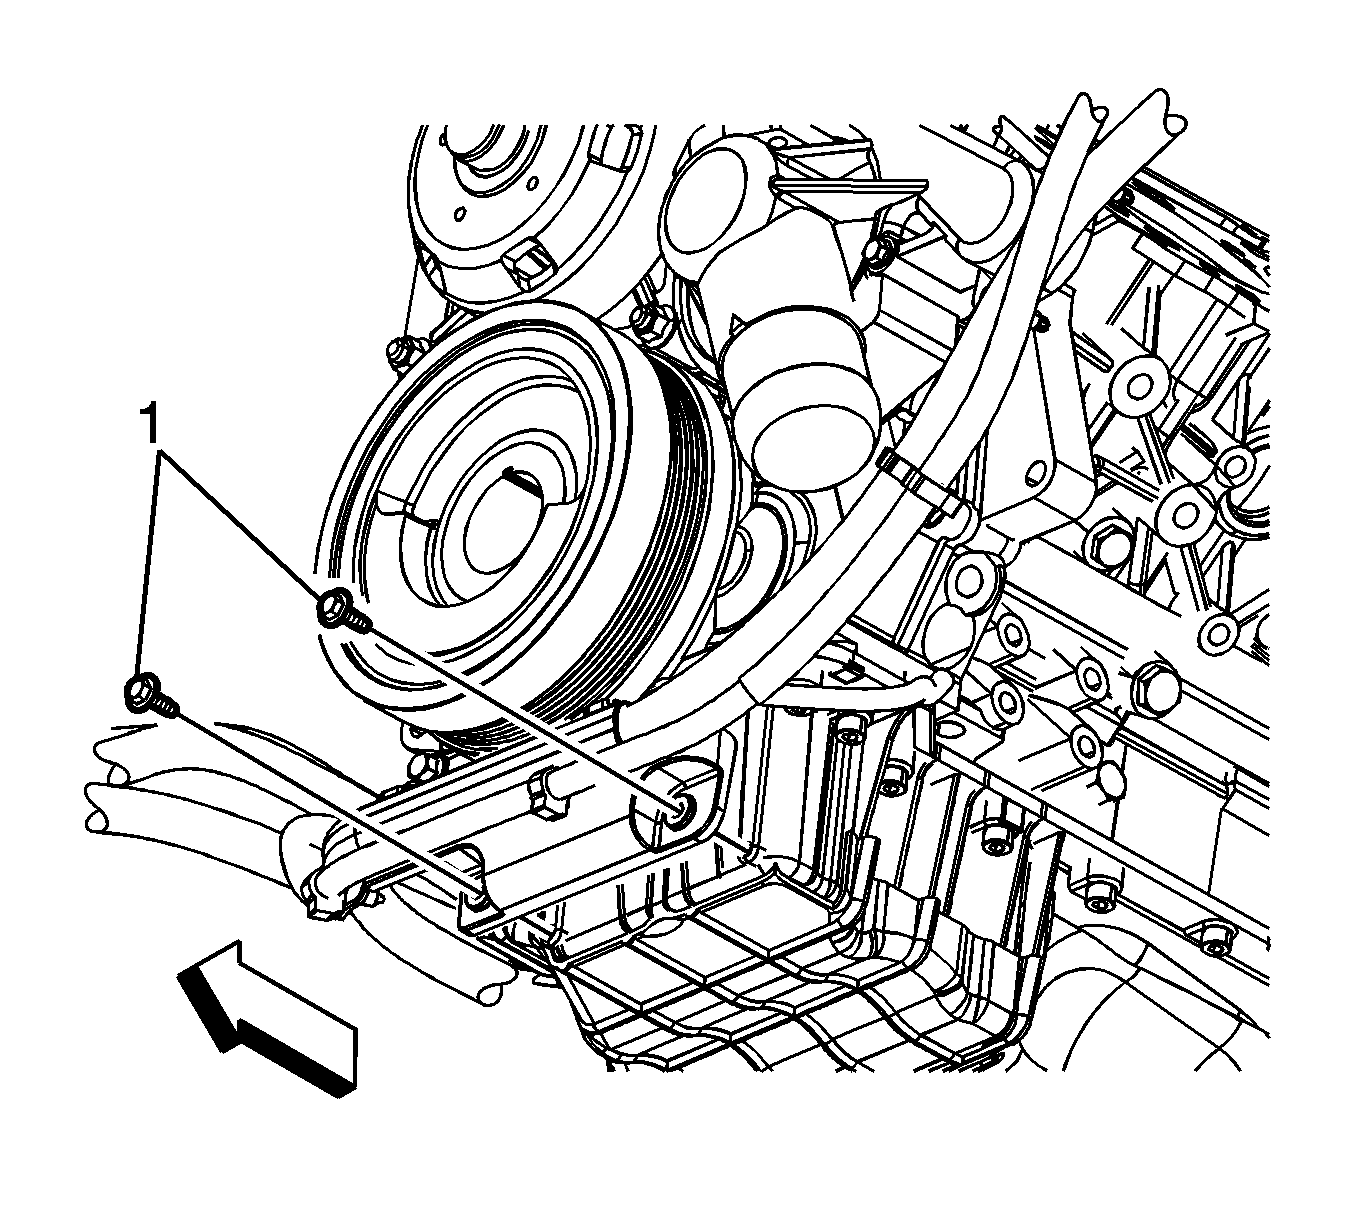
- Remove the front 2 oil pan skid plate bolts, loosen the rear 2 bolts and remove the skid plate.
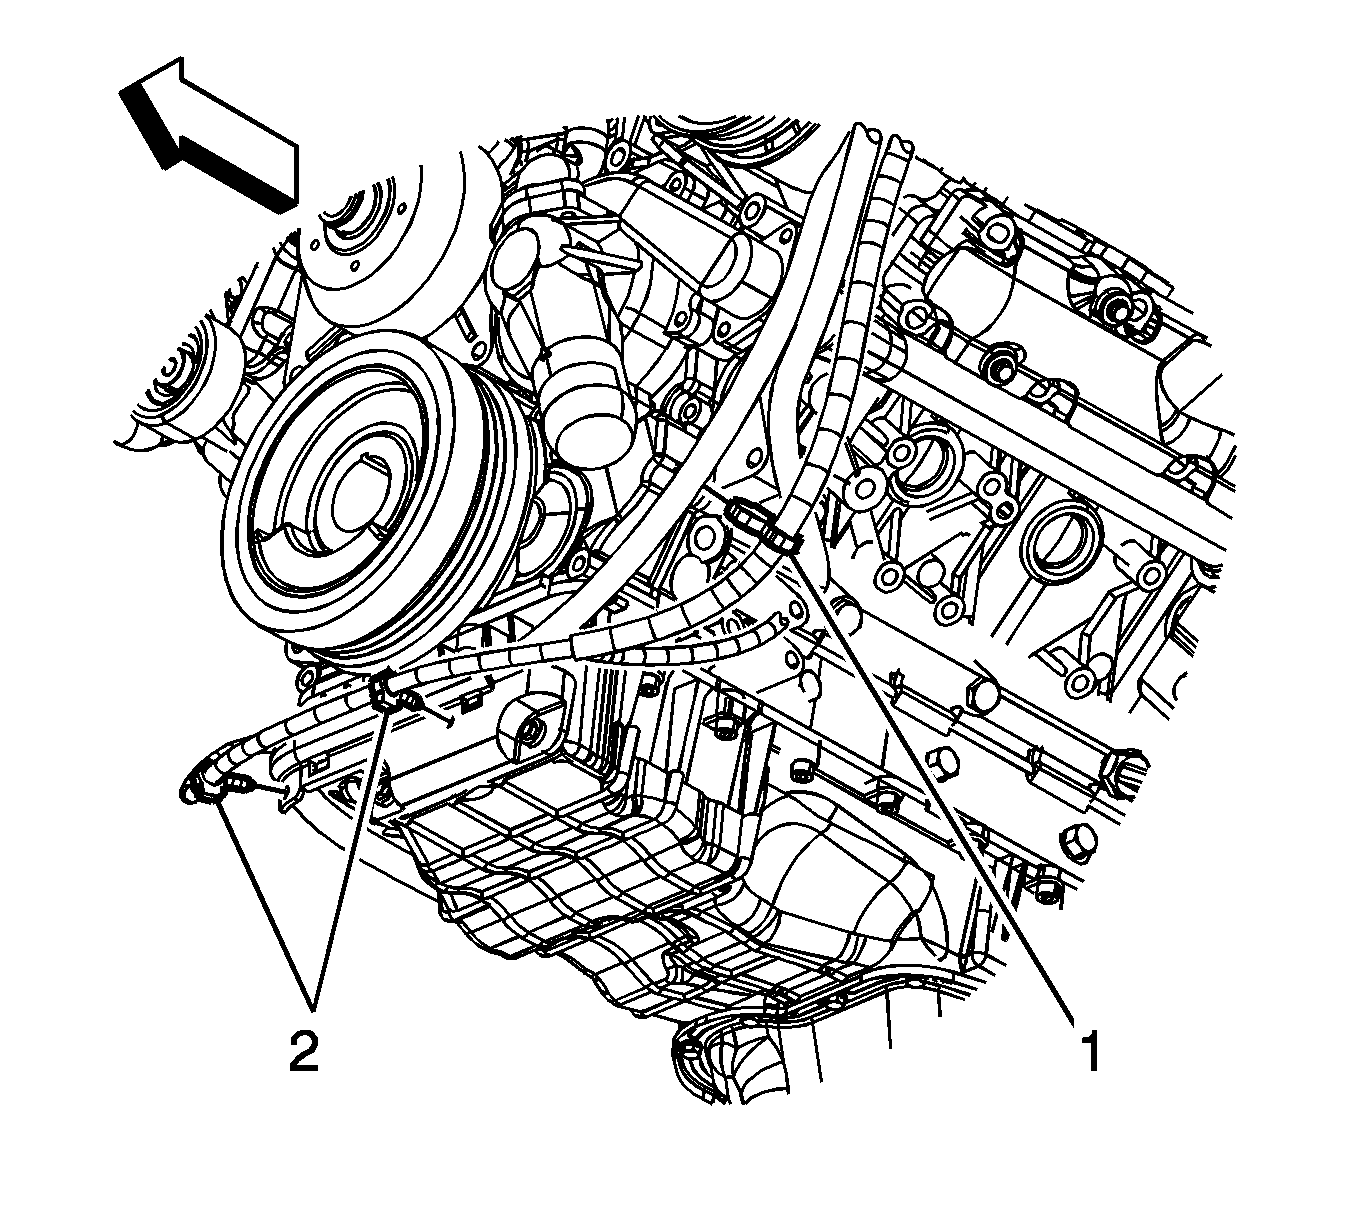
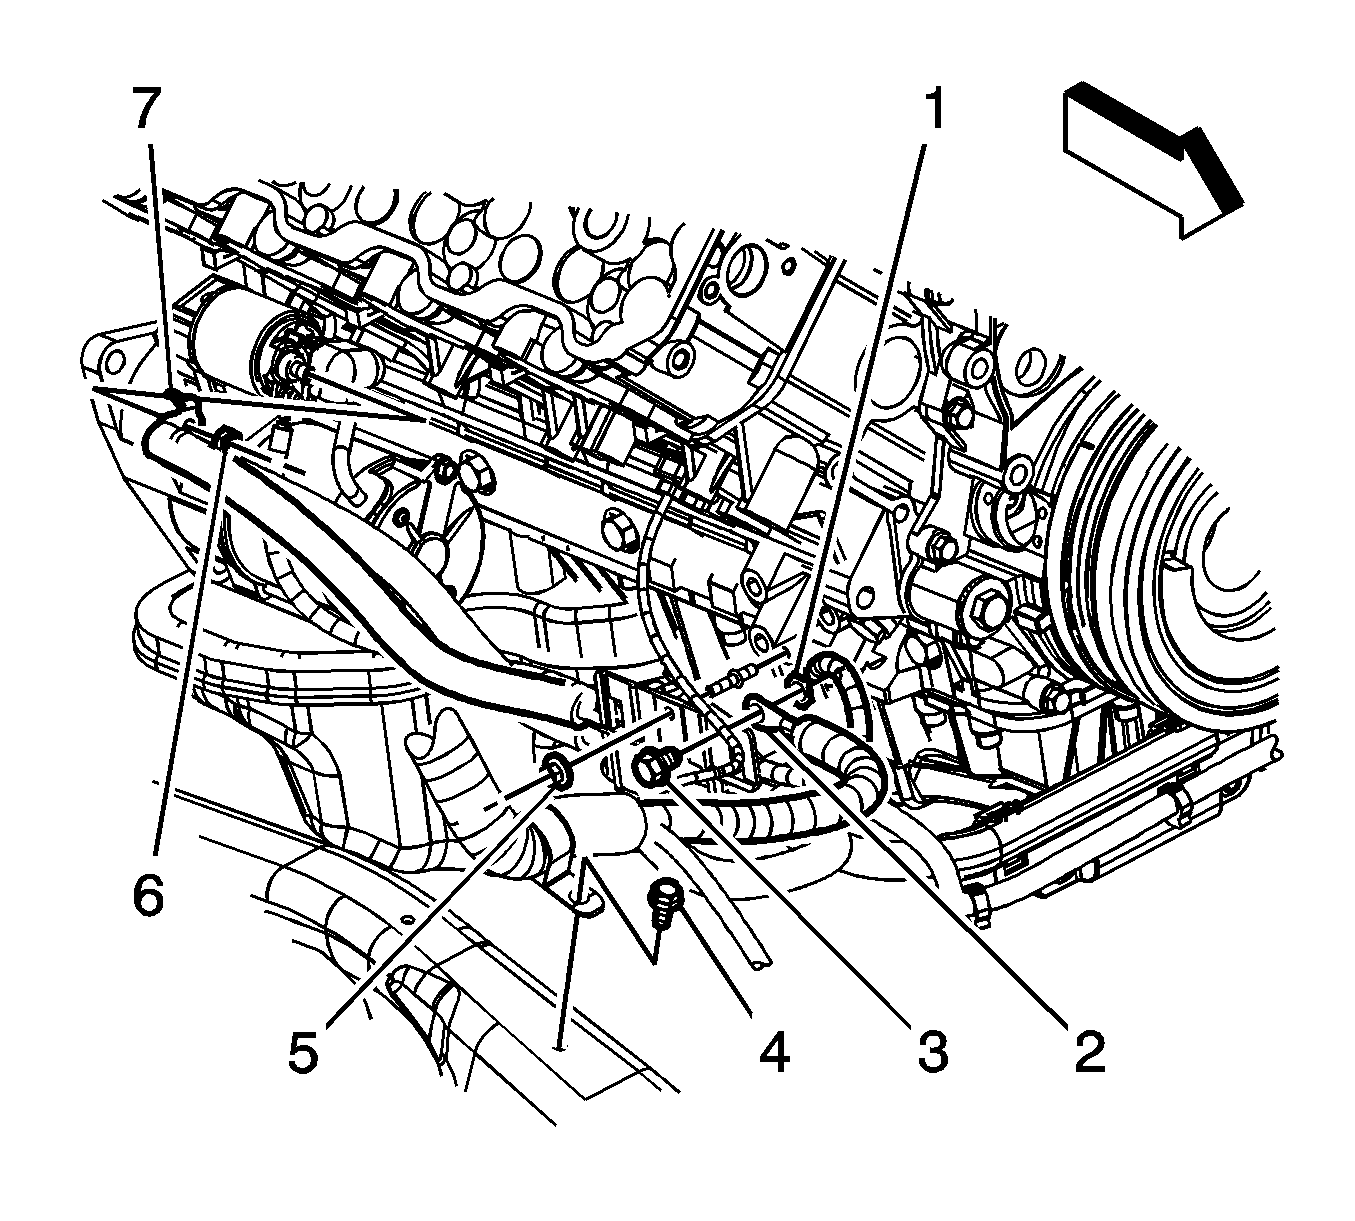
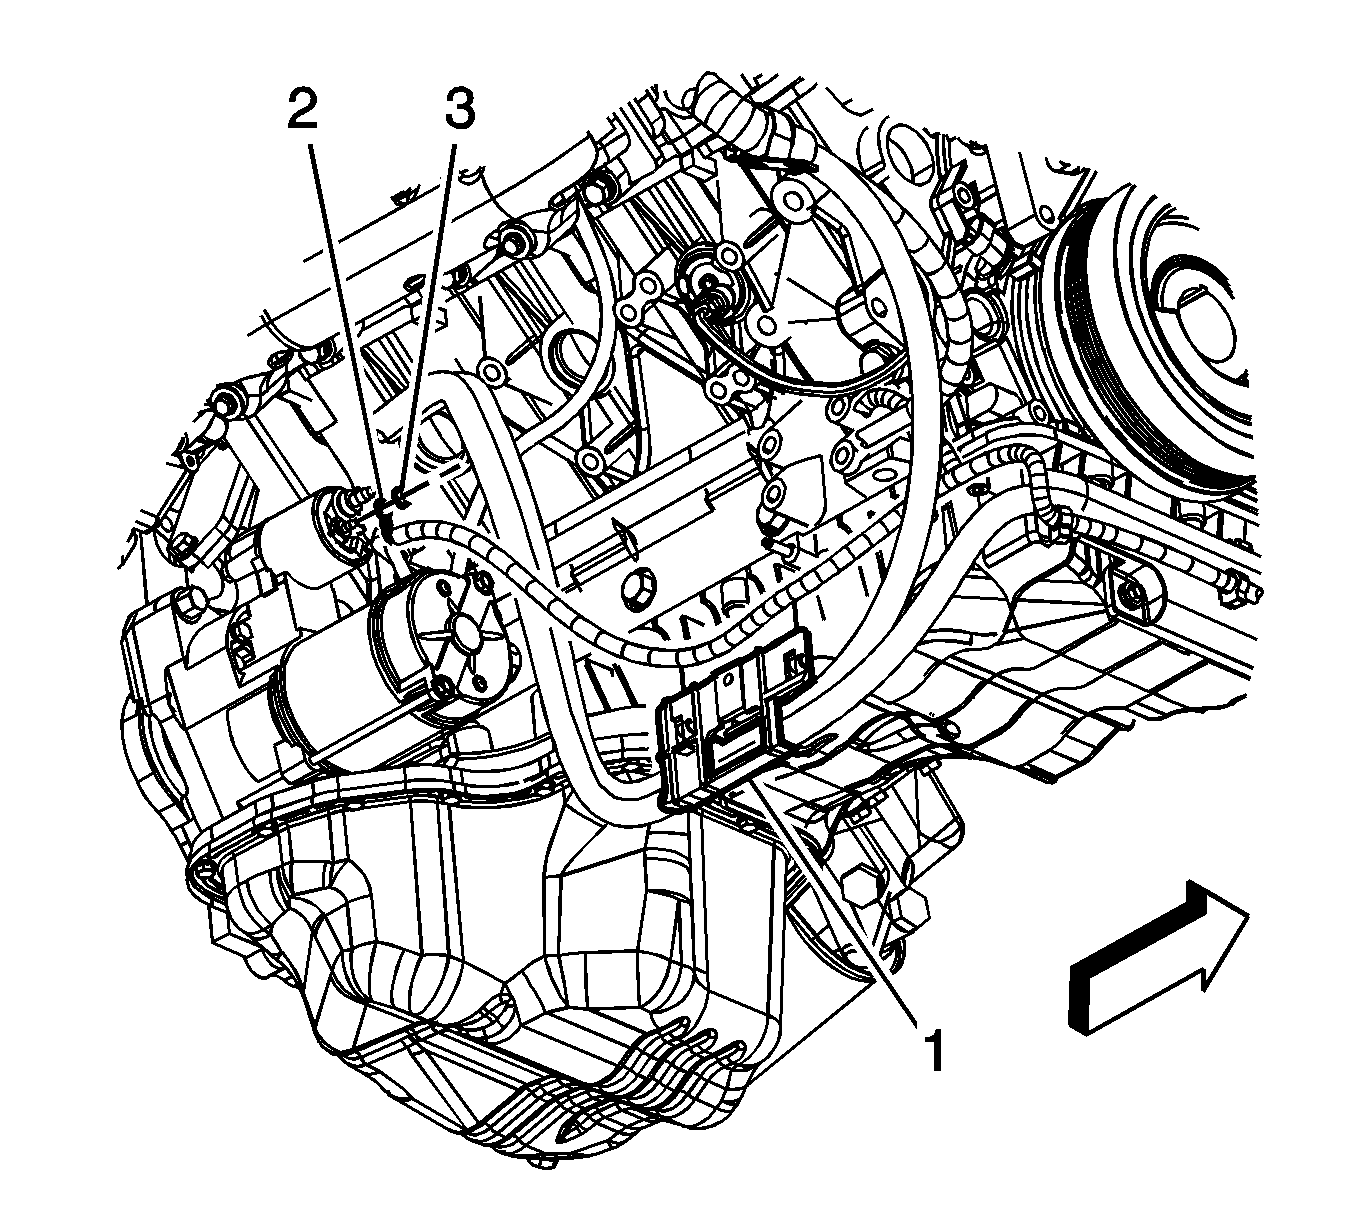
- Remove the engine wiring harness clip (1) from the starter solenoid cable.
- Remove the engine wiring harness clips (2) from the starter solenoid cable channel.
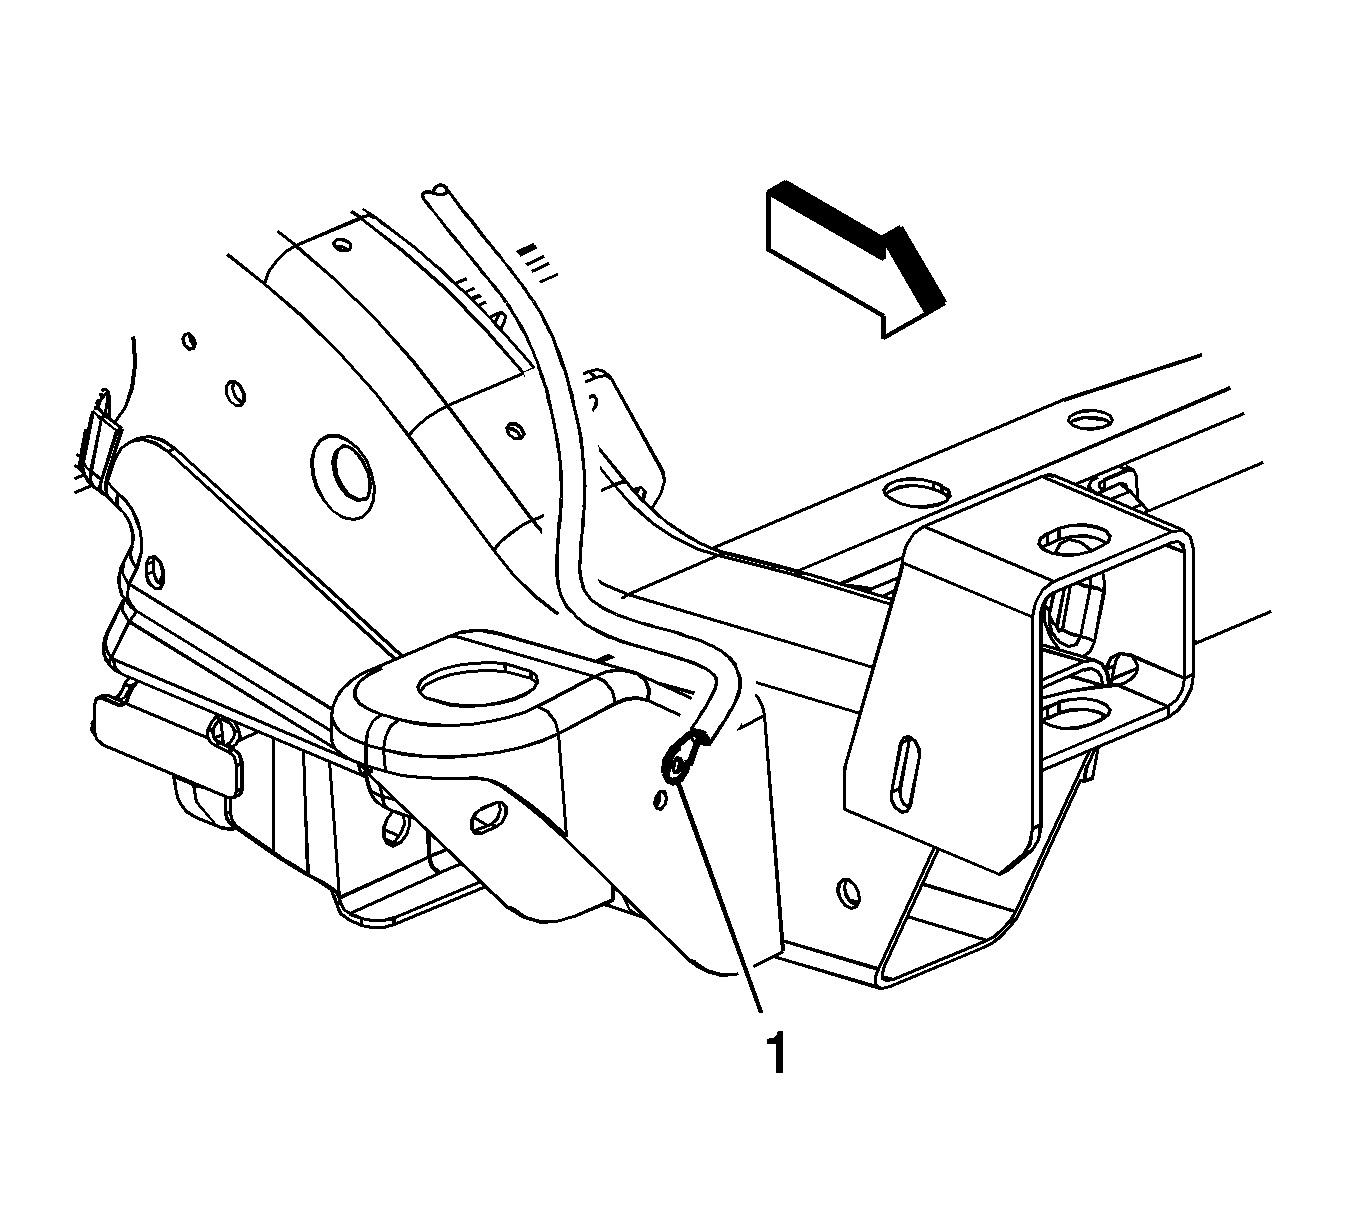
- Remove the starter solenoid cable bolt from the frame.
- Reposition the starter solenoid cable (1) from the frame.
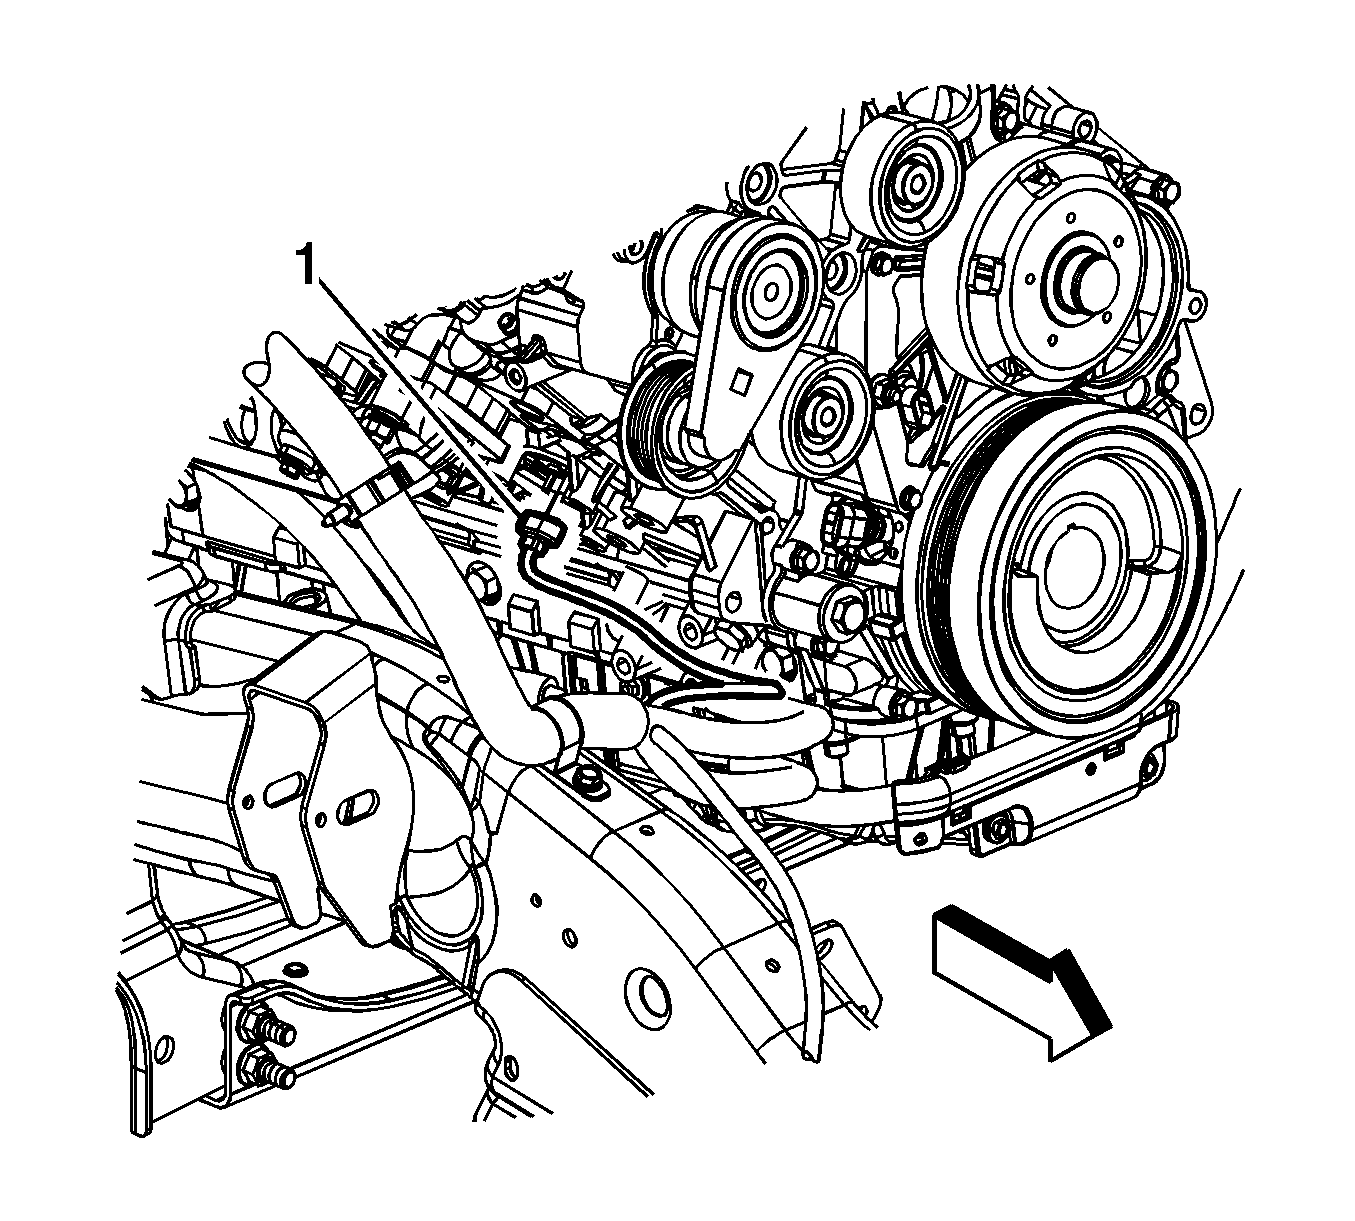
- Disconnect the coolant heater cord (1) from the coolant heater.
- Remove the starter solenoid cable nut (6) from the starter.
- Remove the starter solenoid cable (7) from the starter.
- Remove the starter solenoid cable bolt (3) from the engine block.
- Reposition the starter solenoid cable terminal (2) from the engine wiring harness ground terminal (1).
- Remove the starter solenoid cable bracket nut (5) and bracket from the stud.
- Remove the starter solenoid cable clip bolt (4) from the frame.
- Reposition the starter solenoid cable bracket (1) and remove the engine wiring harness from the rear clips on the bracket.
- Remove the starter solenoid cable channel bolts (1).
- Lower the vehicle.
- Remove the starter solenoid cable from the vehicle.

Installation Procedure
- Install the starter solenoid cable to the vehicle.
- Install the starter solenoid cable (5) to the battery positive post.
- Tighten the starter solenoid cable nut (2) to 5 N·m (44 lb in).
- Close the starter solenoid cable positive battery post cover (1).
- Install the starter solenoid cable to the battery positive post.
- Tighten the starter solenoid cable nut (1) to 7.5 N·m (66 lb in).
- Close the starter solenoid cable positive battery post cover.
- Raise and suitably support the vehicle. Refer to Lifting and Jacking the Vehicle.
- Position the starter solenoid cable to the oil pan and install the starter solenoid cable channel bolts (1) and tighten to 12 N·m (106 lb in).
- Reposition the starter solenoid cable bracket (1) and install the engine wiring harness to the clips on the rear of the bracket.
- Position the starter solenoid cable clip to the frame and install the bolt (4) and tighten to 12 N·m (106 lb in).
- Install the starter solenoid cable bracket onto the stud and install the nut (5) and tighten to 8 N·m (71 lb in).
- Position the engine wiring harness ground terminal (1) behind the starter solenoid cable terminal (2) and against the engine block.
- Install the starter solenoid cable bolt (3) to the engine block and tighten to 25 N·m (18 lb ft).
- Install the starter solenoid cable (7) onto the starter.
- Install the starter solenoid cable nut (6) to the starter and tighten to 9 N·m (80 lb in).
- Connect the coolant heater cord (1) to the coolant heater.
- Position the starter solenoid cable (1) to the frame.
- Install the starter solenoid cable bolt to the frame and tighten to 25 N·m (18 lb ft).
- Install the engine wiring harness clip (1) to the starter solenoid cable.
- Install the engine wiring harness clips (2) to the starter solenoid cable channel.
- Install the oil pan skid plate and tighten the rear 2 bolts and install and tighten the front 2 bolts and tighten to 28 N·m (21 lb ft).
- Install the wheelhouse liner. Refer to Front Wheelhouse Liner Replacement - Right Side.
- Install the starter solenoid cable branch terminal to the mega fuse stud.
- Install the starter solenoid cable to mega fuse nut (1) and tighten to 9 N·m (80 lb in).
- Install the mega fuse cover.
- Install the starter solenoid cable clip (3) to the battery tray.
- Install the starter solenoid cable clips (4) to the A/C evaporator tube.
- Install the air cleaner assembly. Refer to Air Cleaner Assembly Replacement.
- Connect the negative battery cable. Refer to Battery Negative Cable Disconnection and Connection.


Caution: Refer to Fastener Caution in the Preface section.


Starter Solenoid Cable Replacement With L9H and TP2
Removal Procedure
- Disconnect the auxiliary battery negative cable. Refer to Battery Negative Cable Disconnection and Connection.
- Remove the air cleaner outlet duct. Refer to Air Cleaner Resonator Outlet Duct Replacement.
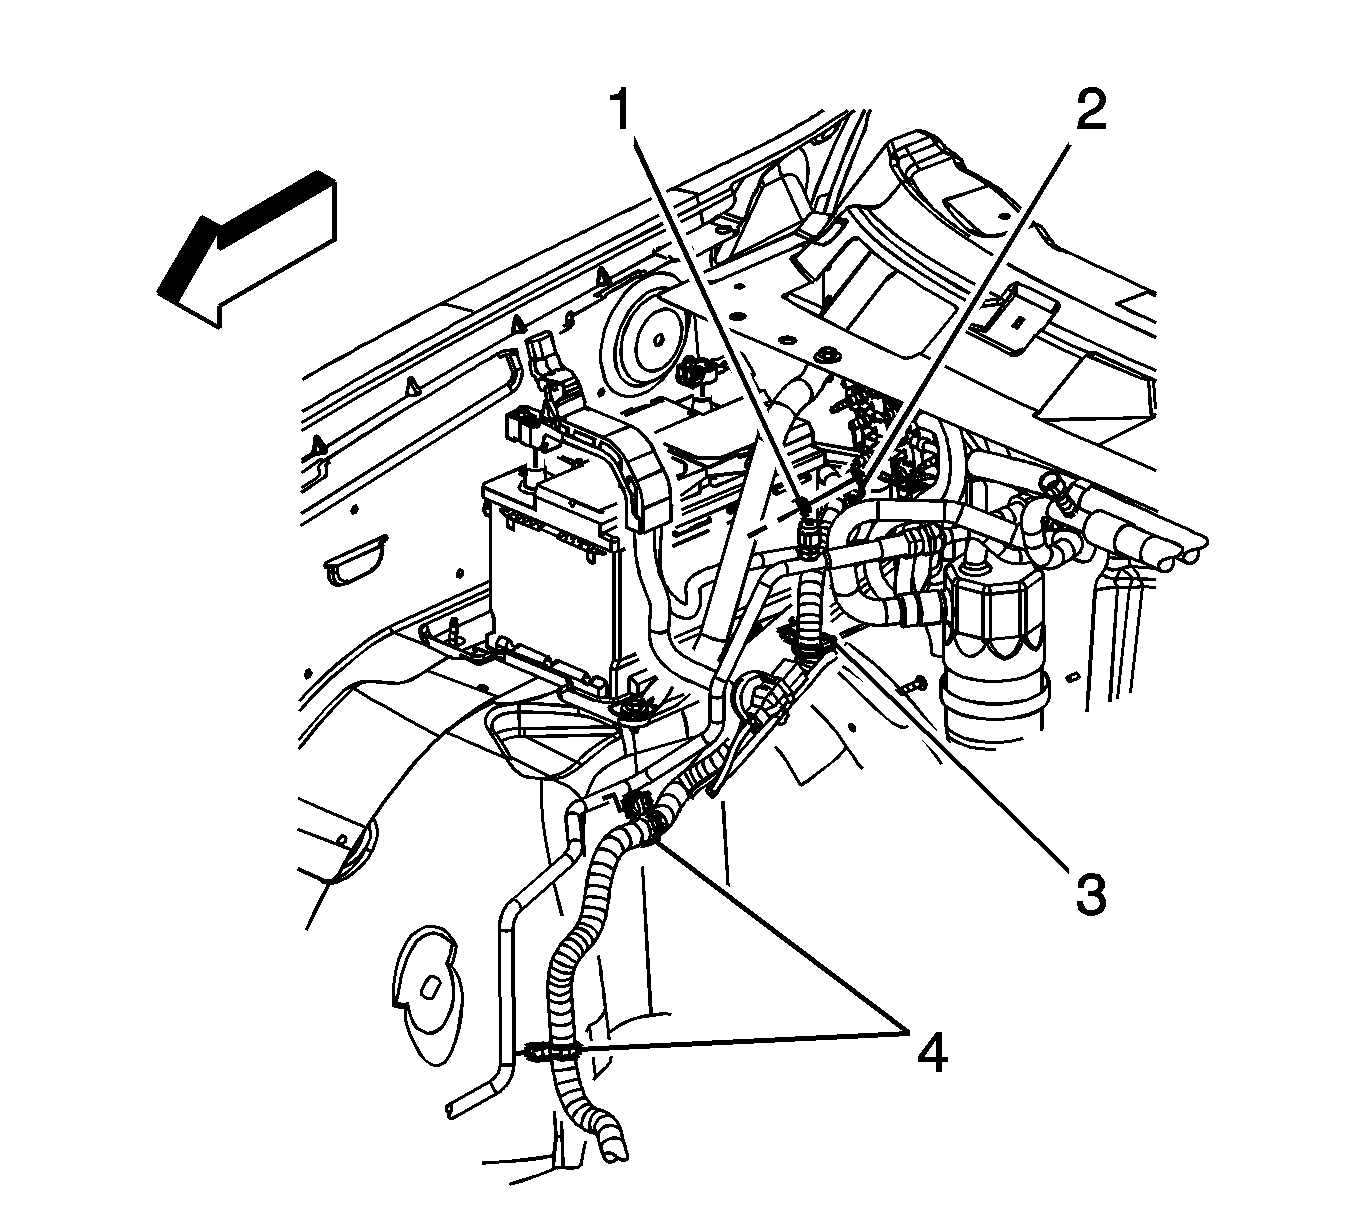
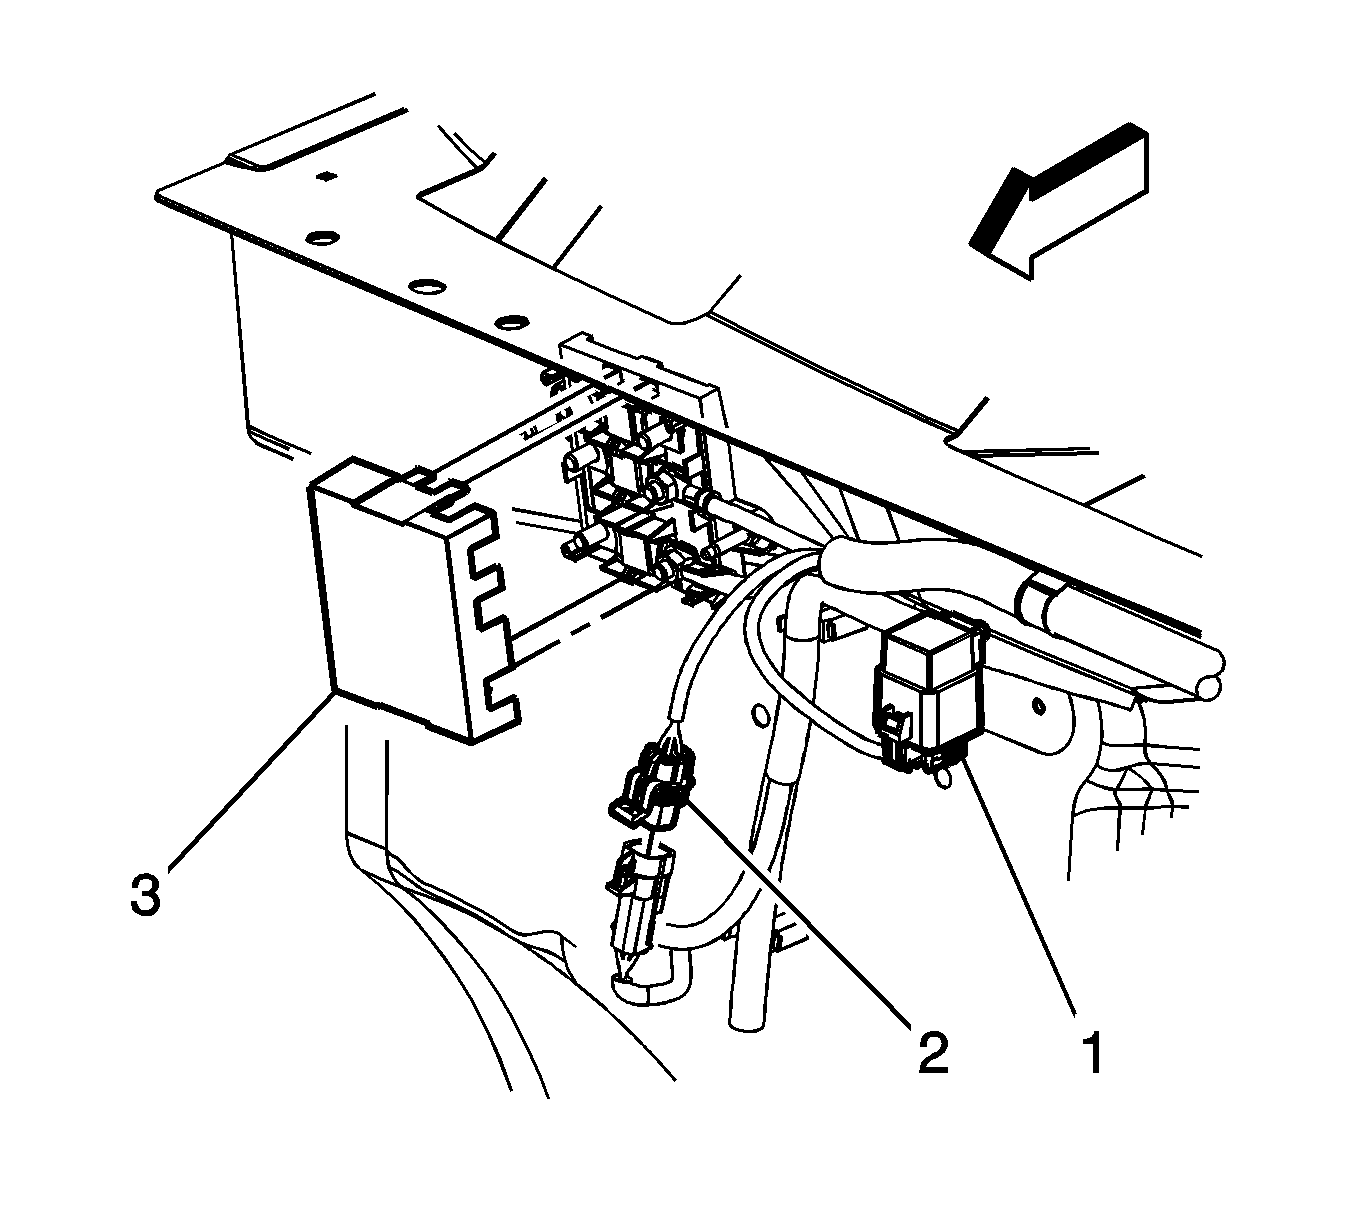
- Remove the mega fuse cover (3).
- Open the starter solenoid cable cover at the positive battery terminal.
- Loosen the starter solenoid cable nut (5).
- Remove the starter solenoid cable from the positive battery terminal.
- Remove the starter solenoid cable clip (4) from the air conditioning (A/C) evaporator tube.
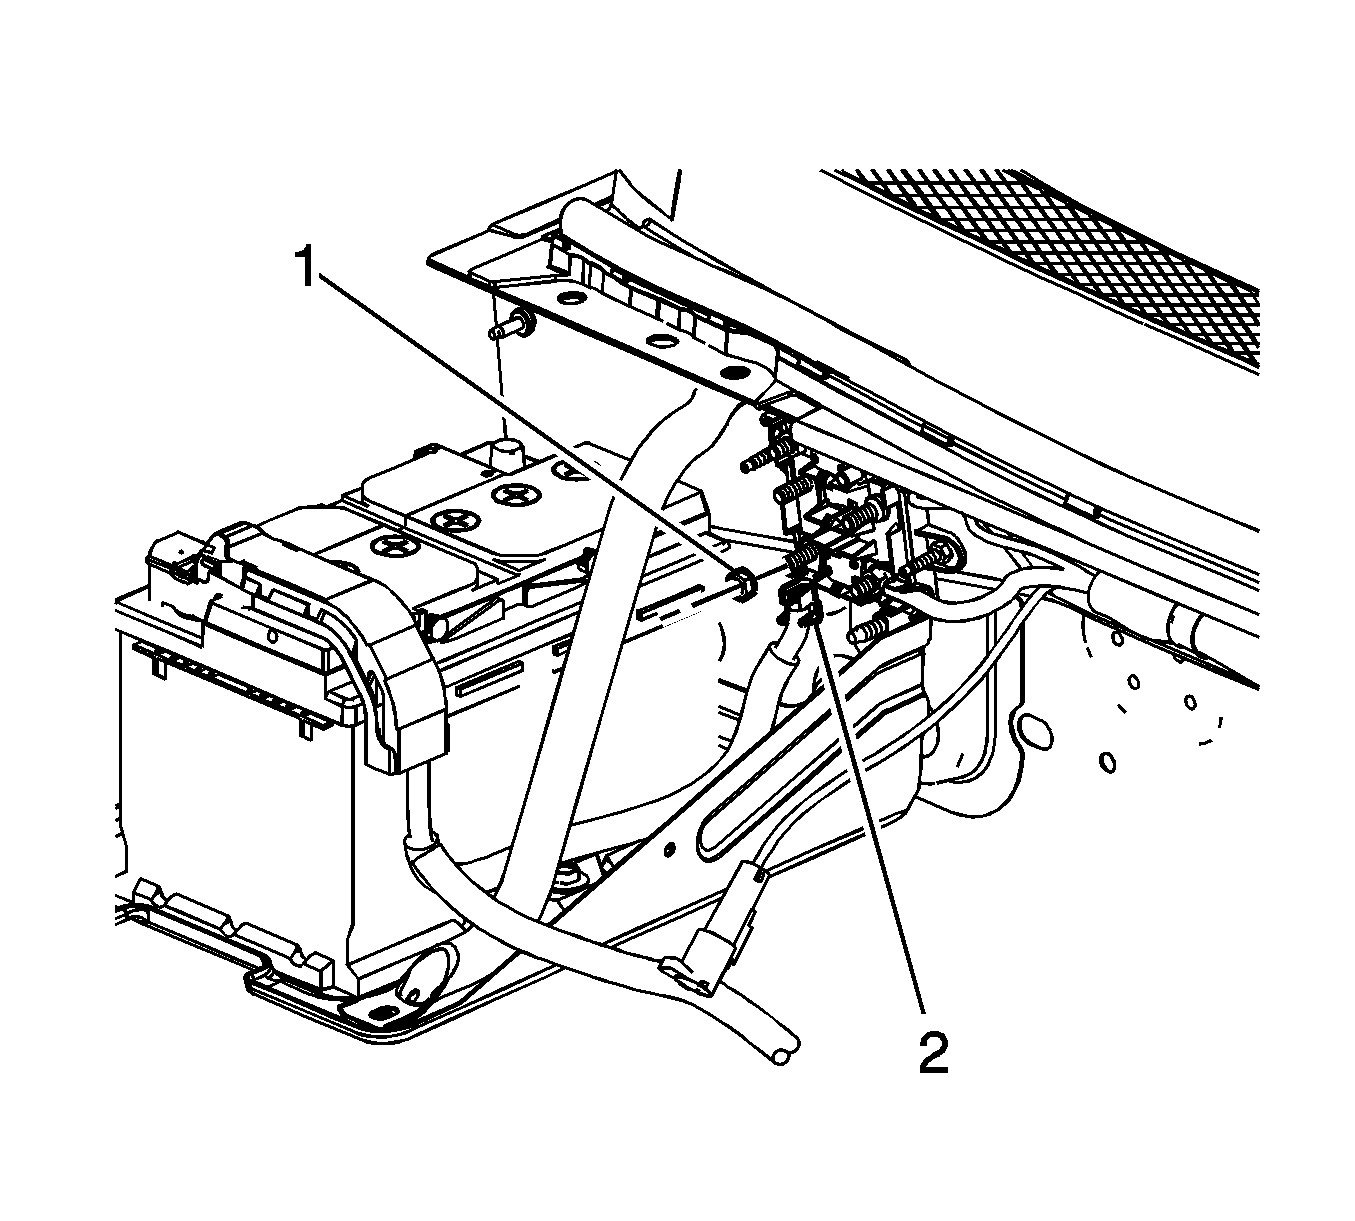
- Remove the starter solenoid cable nut (1) from the mega fuse stud.
- Remove the starter solenoid cable terminal (2) from the mega fuse stud.
- Raise and support the vehicle. Refer to Lifting and Jacking the Vehicle.
- Remove the front 2 oil pan skid plate bolts, loosen the rear 2 bolts and remove the skid plate.
- Remove the starter solenoid cable clip (1) from the wheelhouse panel.
- Remove the starter solenoid cable clip bolt (2) from the frame.
- Remove the starter solenoid cable nut (1) from the starter.
- Remove the starter solenoid cable (2) from the starter.
- Lower the vehicle.
- Remove the starter solenoid cable from the vehicle.



Installation Procedure
- Install the starter solenoid cable to the vehicle.
- Install the starter solenoid cable to the positive battery terminal.
- Tighten the starter solenoid cable nut (5) to 5 N·m (44 lb in).
- Close the starter solenoid cable cover at the positive battery terminal.
- Install the starter solenoid cable clip (4) to the A/C evaporator tube.
- Install the starter solenoid cable terminal (2) to the mega fuse stud.
- Install the starter solenoid cable nut (1) to the mega fuse stud and tighten to 9 N·m (80 lb in).
- Install the mega fuse cover (3).
- Raise the vehicle.
- Install the starter solenoid cable (2) to the starter.
- Install the starter solenoid cable nut (1) to the starter and tighten to 9 N·m (80 lb in).
- Position the starter solenoid cable clip to the frame and install the starter solenoid cable clip bolt (2).
- Install the starter solenoid cable clip (1) to the wheelhouse panel.
- Install the oil pan skid plate and tighten the rear 2 bolts and install and tighten the front 2 bolts and tighten to 28 N·m (21 lb ft).
- Lower the vehicle.
- Install the air cleaner outlet duct. Refer to Air Cleaner Resonator Outlet Duct Replacement.
- Connect the auxiliary battery negative cable. Refer to Battery Negative Cable Disconnection and Connection.


Caution: Refer to Fastener Caution in the Preface section.


