For 1990-2009 cars only
Removal Procedure
- Remove the rear sliding window lower garnish molding. Refer to Rear Window Lower Garnish Molding Replacement.
- Cycle the rear sliding window to the fully closed position.
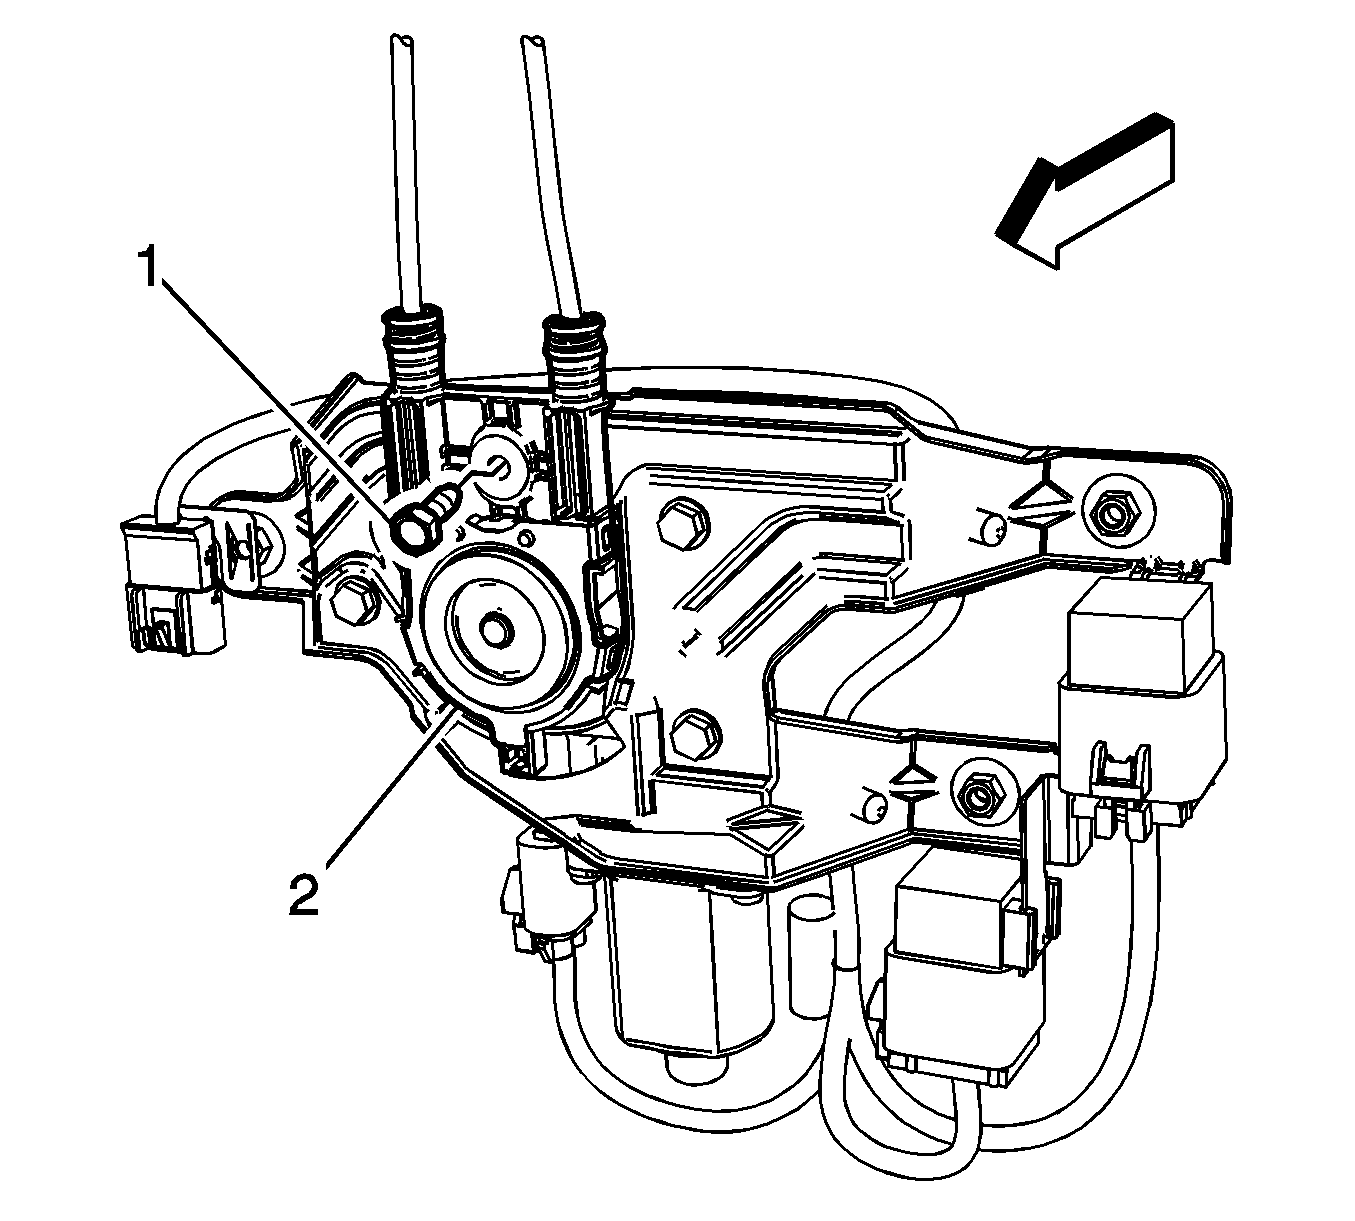
- Remove the screw (1) from the rear sliding window regulator and cables (2).
- Pull forward on the regulator and cables (2) to release it from the motor/module.
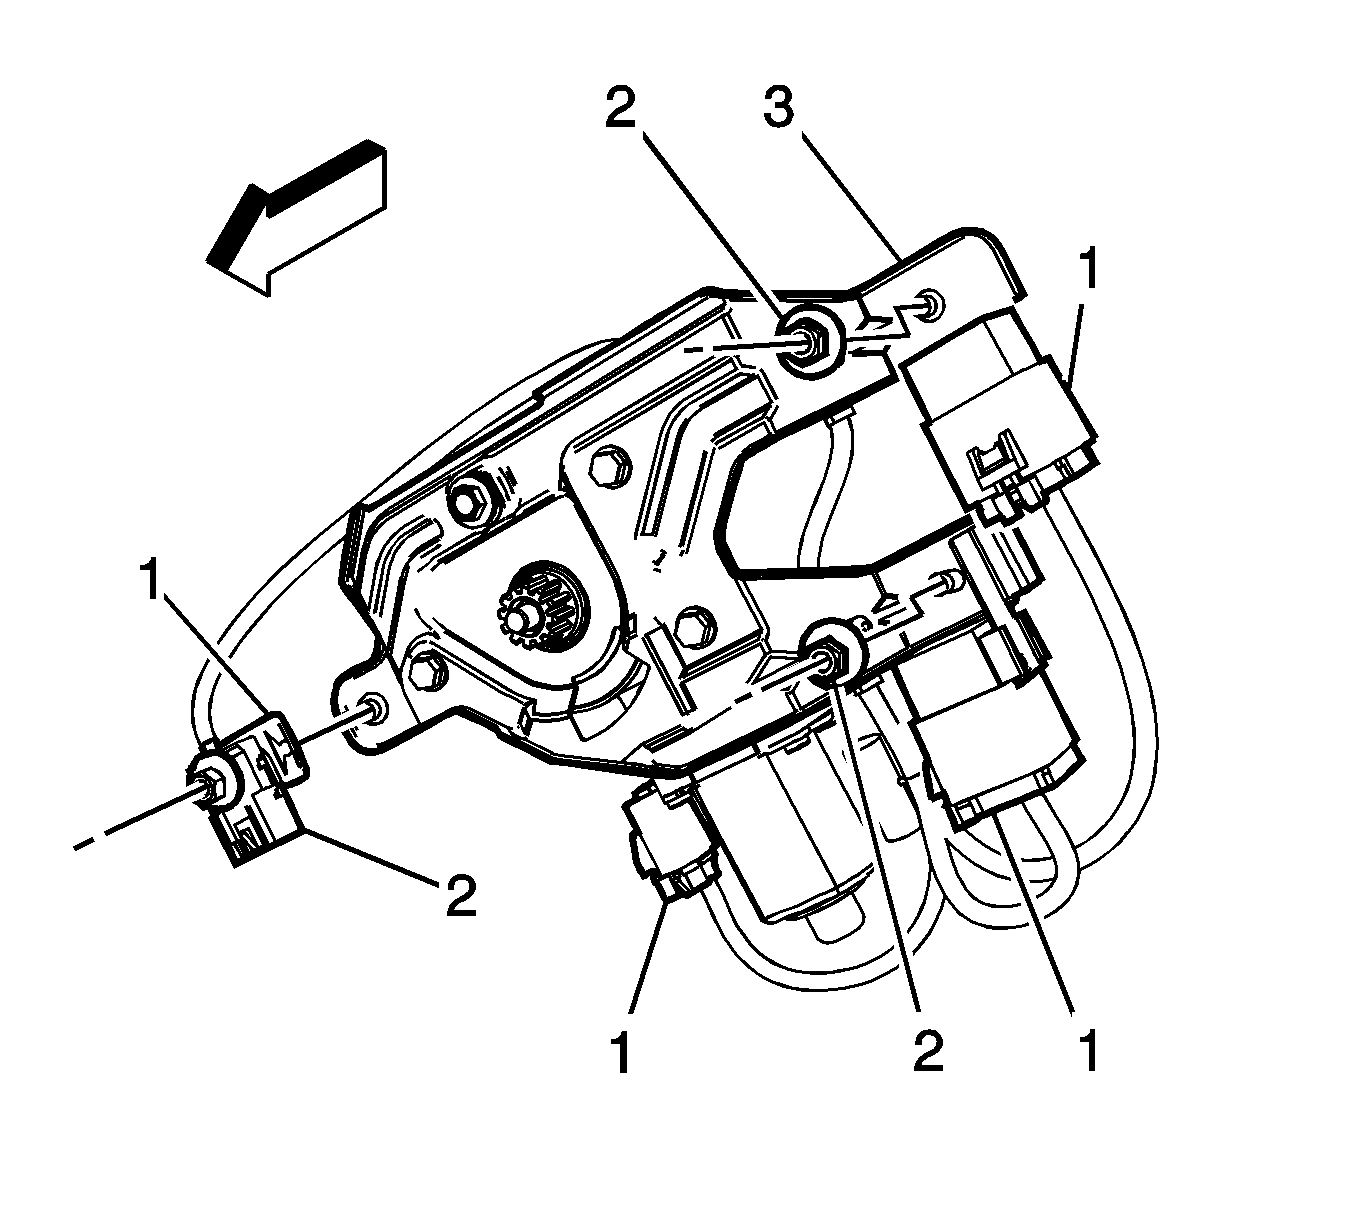
- Remove the rear sliding window motor/module nuts (2).
- Disconnect the rear sliding window electrical connectors from the motor/module and relays (1).
- Remove the rear sliding window motor/module assembly from the vehicle.
Note: The new rear sliding window motor/module is equipped with the bracket and relays.
Installation Procedure
- Install the rear sliding window motor/module assembly to the vehicle.
- Connect the rear sliding window electrical connectors to the motor/module and relays (1).
- Install the rear sliding window motor/module nuts (2).
- Install the rear sliding window regulator and cables (2) to the motor/module.
- Install the bolt (1) to the rear sliding window regulator and cables (2).
- Install the rear sliding window lower garnish molding. Refer to Rear Window Lower Garnish Molding Replacement.
- Inspect the rear sliding window for proper operation.
Caution: Refer to Fastener Caution in the Preface section.
Tighten
Tighten nut to 10 N·m (89 lb in).
Tighten
Tighten bolt to 11 N·m (97 lb in).
