Power Brake Booster Pump Fluid Accumulator Replacement Non-Hybrid
Special Tools
J-26889 Accumulator Piston Compressor
Removal Procedure
Warning: The accumulator contains compressed gas. Always use the proper tools and follow the recommended procedures or personal injury may result. Do not apply heat to accumulator. Do not attempt to repair an inoperative accumulator. Always replace an inoperative accumulator with a new one. Dispose of an inoperative accumulator by drilling a 1.5 mm (1/16 in) diameter hole through the end of the accumulator can, opposite the O-ring.
Warning: Push rod removal is not recommended. Improper staking of the push rod to the Hydroboost reaction piston can result in a loss of brakes. If the rod or seals require service, the entire unit must be replaced.
- Apply the park brake and block the wheels.
- Depress brake pedal at least 10 times in order to relieve pressure in the accumulator.
- Remove the master cylinder from the hydraulic booster. Refer to Master Cylinder Replacement.
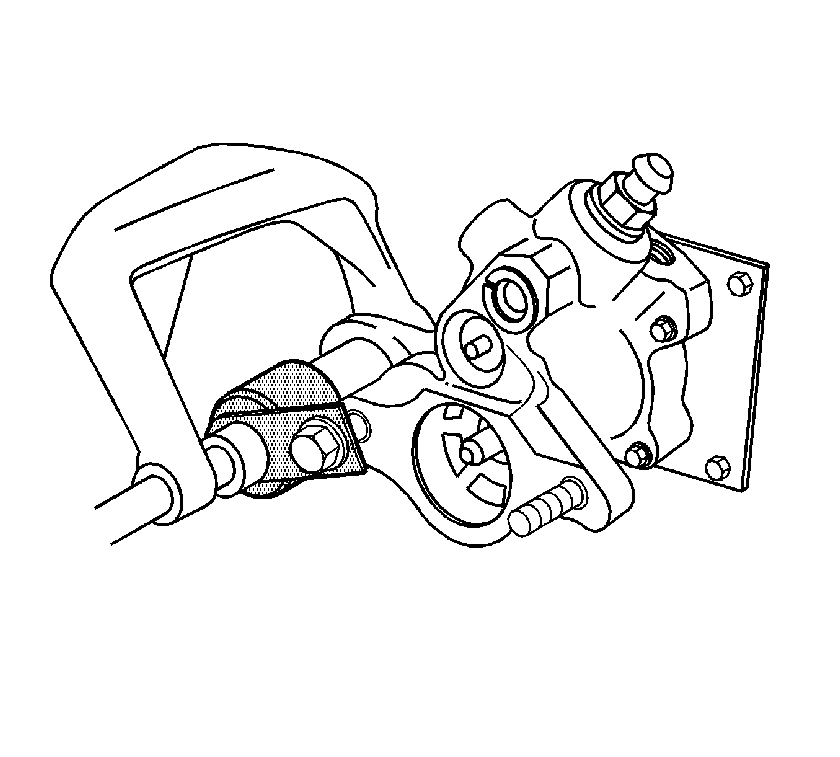
- Place the J-26889 Accumulator Piston Compressor over the end of the accumulator.
- Install the nut on the stud.
- Depress the accumulator with a C-clamp. If the accumulator does not move with moderate pressure, remove the C-clamp and depress the brake pedal ten times in order to relieve pressure in the accumulator.
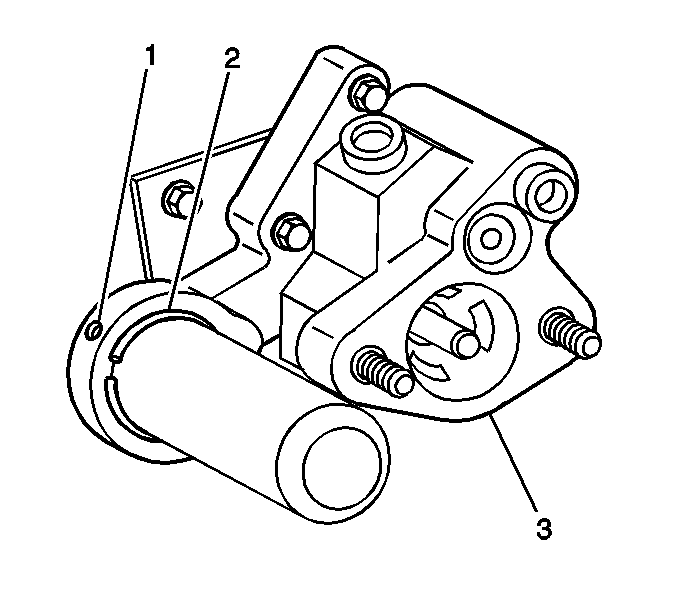
- Rotate the retaining ring (2) until either end of the ring is under the access hole (1).
- Depress and hold the retaining ring (2) with a small tool inserted into the access hole (1).
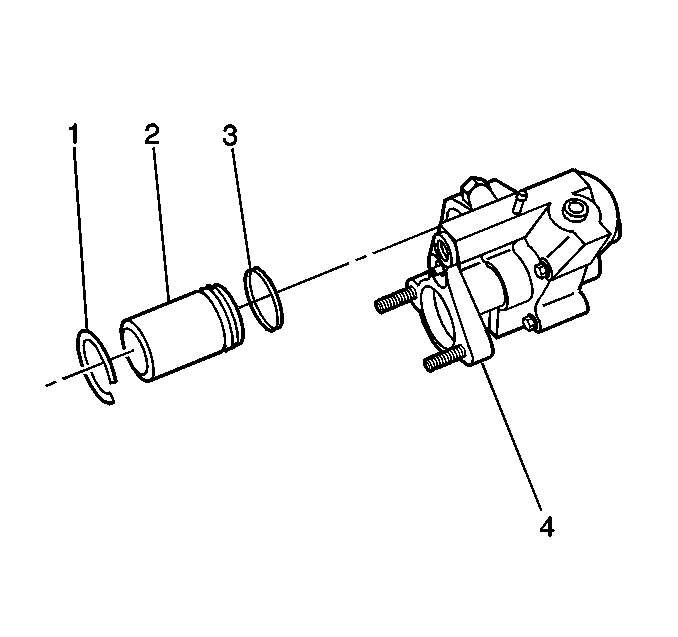
- Remove the accumulator retainer ring (1) using a small hook shaped tool.
- Release the C-clamp.
- Remove the nut from the stud.
- Remove the J-26889 Compressor .
- Remove the accumulator (2) and the O-ring seal (3).


Installation Procedure
- Lubricate all of the seals and the metal friction points with power steering fluid.
- Install the accumulator (2) and the O-ring seal (3).
- Place the J-26889 Compressor over the end of the accumulator.
- Install the nut on the stud.
- Depress the accumulator with a C-clamp.
- Install the accumulator retainer ring (1).
- Release the C-clamp.
- Remove the nut from the stud.
- Remove the J-26889 Compressor .
- Install the master cylinder to the hydraulic booster. Refer to Master Cylinder Replacement.
- Release the park brake and unblock the wheels.


Power Brake Booster Pump Fluid Accumulator Replacement Two-mode Hybrid
Removal Procedure
Warning: The high pressure accumulator (HPA) and the chambers of the brake modulator assembly to which it attaches, store brake fluid at extremely high pressures. Fluid pressure must be relieved before attempting to service the HPA. Ensure that the recommended procedures are followed to relieve system pressure, including using the manual pressure release steps. Failure to properly follow procedures to depressurize the system may result in personal injury.
Warning: Refer to Brake Fluid Irritant Warning in the Preface section.
Caution: Refer to Brake Fluid Effects on Paint and Electrical Components Caution in the Preface section.
- Turn the ignition to OFF, without pausing at ACCESSORY, and remove the ignition key.
- Raise and support the vehicle. Refer to Lifting and Jacking the Vehicle.
- Clean any dirt and debris from the brake modulator assembly and the HPA.
- Loosen the manual pressure relief valve (1) ¼ turn counterclockwise.
- Seat, but do not tighten, the manual pressure relief valve.
- Without disconnecting the brake pipes and hoses, remove the brake pressure modulator assembly bracket. Refer to Brake Pressure Modulator Valve Replacement.
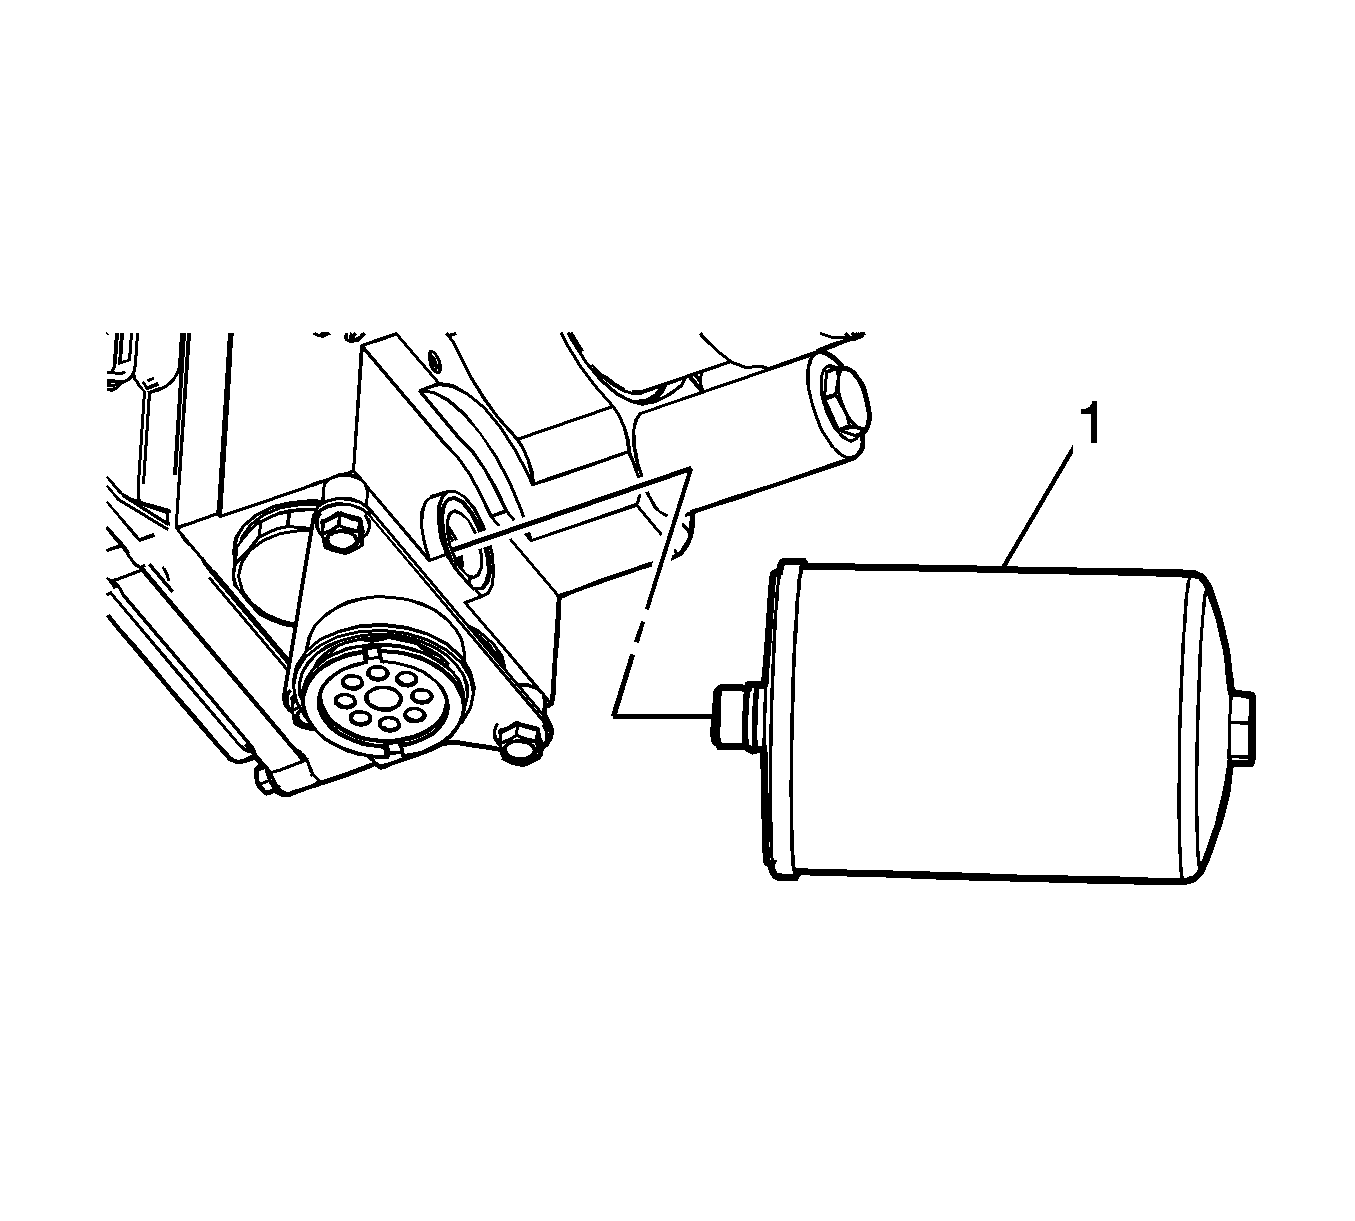
- Remove the HPA (1).
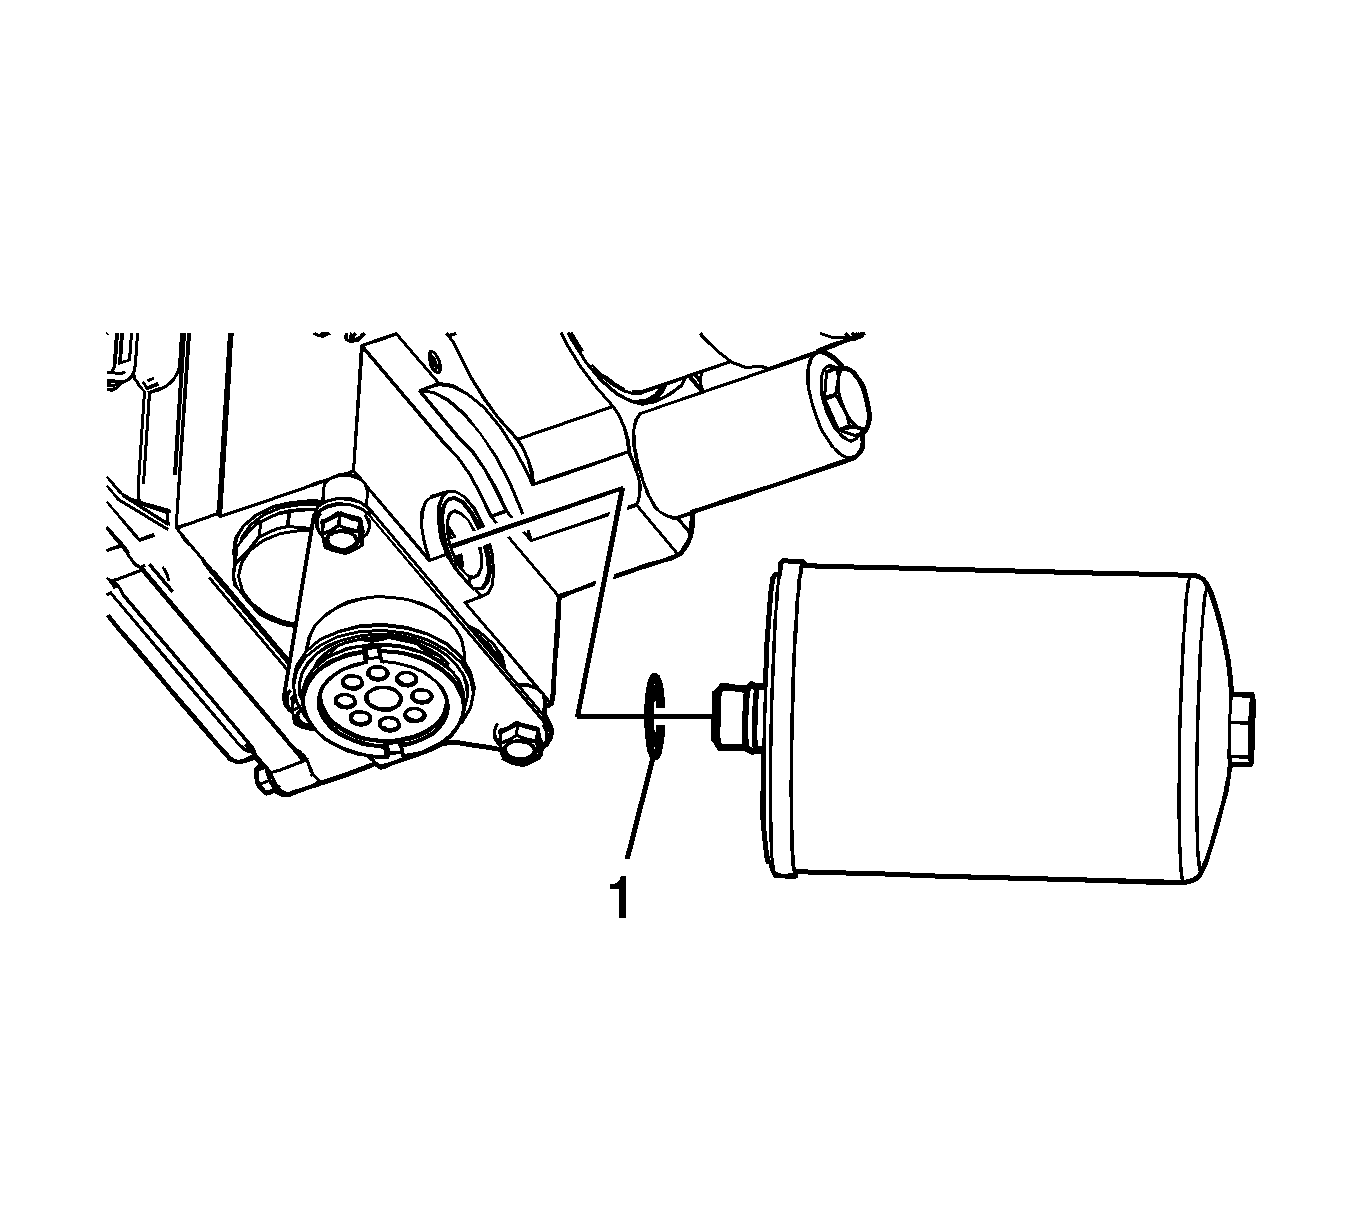
- Remove and discard the HPA O-ring seal (1).
- Remove any debris from the O-ring seal groove in the brake modulator assembly with a clean, lint-free shop cloth.
- If replacing the HPA, properly render inert and dispose of the HPA. Refer to Power Brake Booster Pump Fluid Accumulator Disposal.
Note: The ignition must be in the OFF position, without pausing at ACCESSORY, and without applying the brake pedal to ensure the brake modulator and high pressure accumulator (HPA) pressure relief occurs. This process will take approximately 1 to 3 minutes.
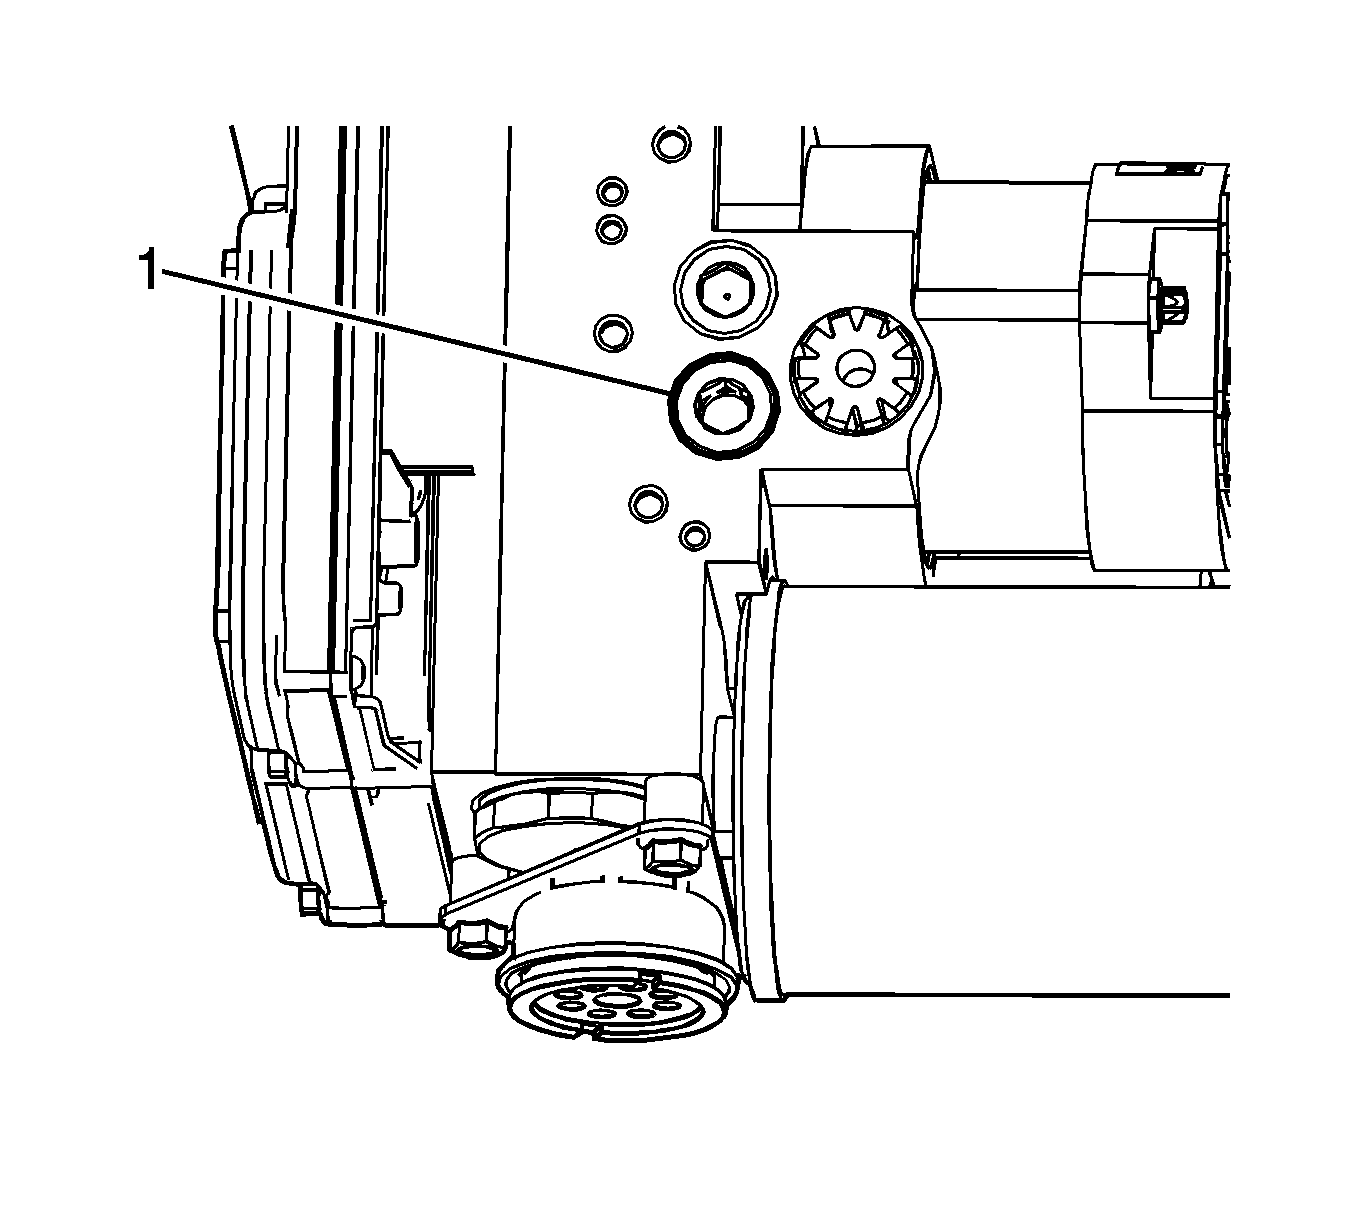
Note: To ensure brake modulator and HPA pressure relief has occurred, the manual pressure relief valve must be opened momentarily.
Note: Adequately support the brake modulator assembly to avoid placing stress on the brake pipes and hoses.
Installation Procedure
- Lubricate a new O-ring seal (1) with Delco Supreme 11®, GM P/N 12377967 (Canadian P/N 992667), or equivalent DOT-3 brake fluid from a clean, sealed brake fluid container.
- Install the O-ring seal to the HPA. Ensure the seal is fully seated in the groove of the HPA and is not twisted.
- Install the HPA (1) to the brake modulator assembly and tighten to 30 N·m (22 lb ft).
- Install the brake modulator assembly bracket and remove the support. Refer to Brake Pressure Modulator Valve Replacement.
- Tighten the brake modulator manual pressure relief valve (1) to 40 N·m (30 lb ft).
- Perform the Antilock Brake System Automated Bleed Procedure. Follow the procedure completely to ensure the learn procedure for the pressure and travel sensors has occurred.

Caution: Refer to Fastener Caution in the Preface section.


