For 1990-2009 cars only
Special Tools
J 42371 Hydraulic Clutch Line Separator
Removal Procedure
- Shift the transmission into 3rd or 4th gear.
- Remove the shift lever assembly. Refer to Transmission Control Replacement.
- Remove the propeller shaft. Refer to One-Piece Propeller Shaft Replacement or Two-Piece Propeller Shaft Replacement.
- Using J 42371 , push back on the white plastic sleeve on the quick connect in order to separate the hydraulic clutch line from the clutch actuator quick connect.
- Disconnect the following engine wiring harness electrical connectors:
- Remove the engine harness clips from the fuel feed/return line clips and transmission.
- Remove the starter motor. Refer to Starter Motor Replacement.
- Support the transmission using a suitable transmission jack.
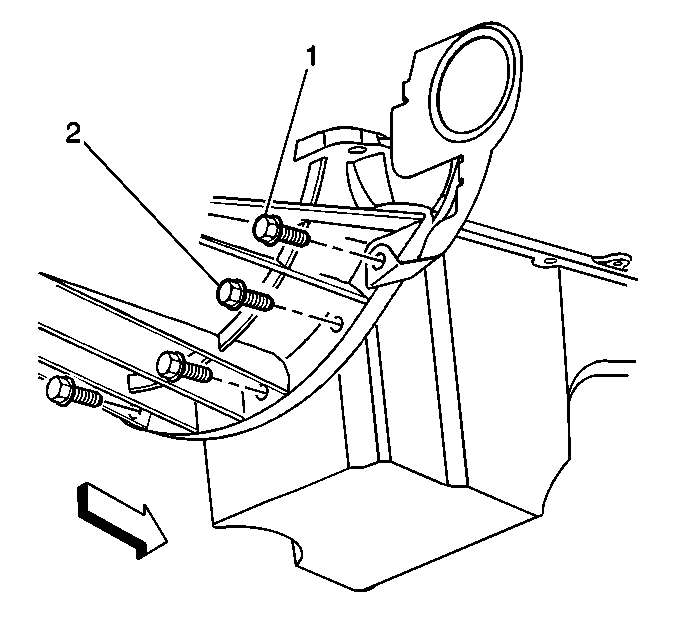
- Remove the transmission support crossmember. Refer to Transmission Support Crossmember Replacement.
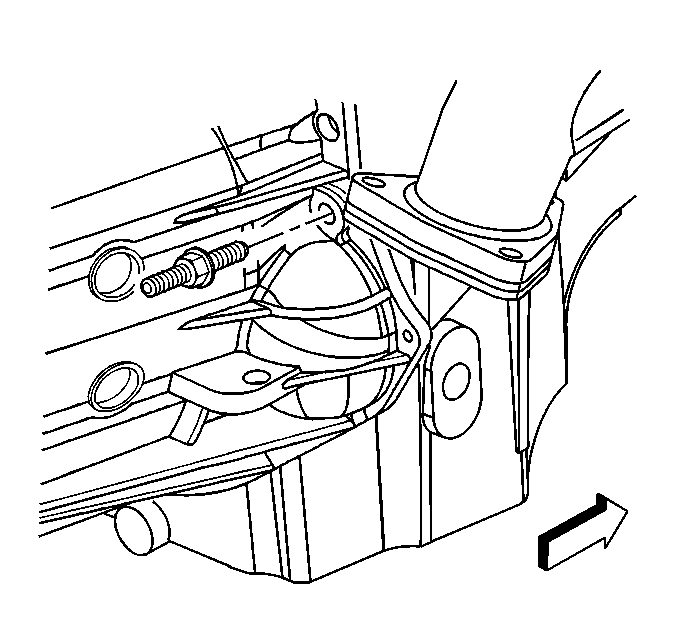
- Remove the bolts (1, 2) securing the bottom right side of the transmission to the engine.
- Remove the transmission cover.
- Remove the stud securing the right side of the transmission to the engine.
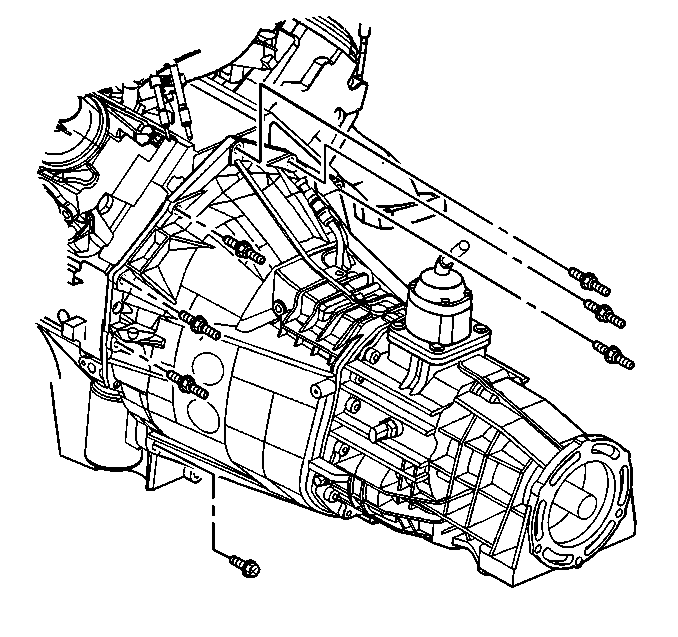
- Remove the bolt and studs securing the transmission to the engine.
- Pull the transmission straight back off the clutch hub splines. Do not let the transmission hang from the clutch assembly.
- Remove the transmission from the vehicle.
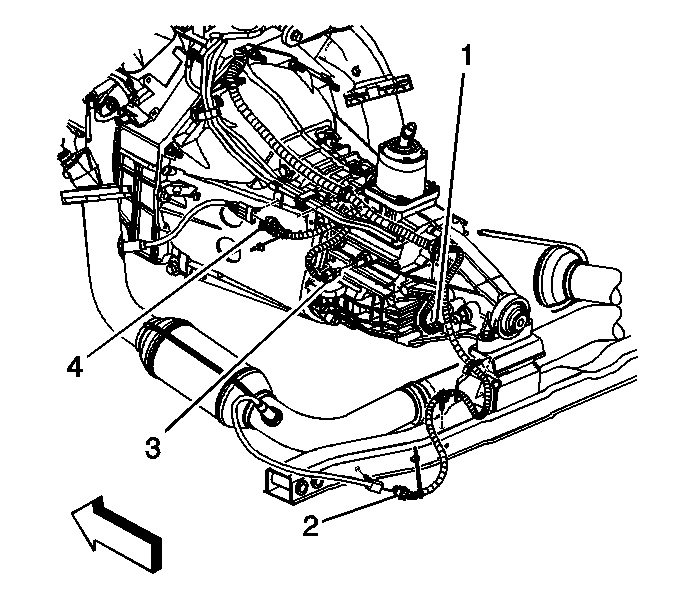
| • | Vehicle speed sensor (VSS) (1) |
| • | Backup lamp switch (3) |
| • | Oxygen sensor (4) |
Installation Procedure
- Install the transmission to the vehicle:
- Install the stud securing the right side of the transmission to the engine.
- Install the transmission cover.
- Install the bolts (1 2) securing the bottom right side of the transmission to the engine.
- Install the transmission support crossmember. Refer to Transmission Support Crossmember Replacement.
- Remove the transmission jack.
- Install the starter motor. Refer to Starter Motor Replacement.
- Install the engine harness clips to the fuel feed/return line clips and transmission.
- Connect the following engine harness electrical connectors:
- Connect the clutch actuator cylinder hose to the clutch master cylinder hose.
- Push together the clutch hydraulic hose quick connect fittings, then pull back on the fittings to verify engagement.
- Check the clutch hydraulic hoses for kinks or twists.
- Install the propeller shaft. Refer to One-Piece Propeller Shaft Replacement or Two-Piece Propeller Shaft Replacement.
- Fill the transmission with fluid.
- Install the shift lever assembly. Refer to Transmission Control Replacement.
- Bleed the clutch hydraulic system. Refer to Hydraulic Clutch Bleeding.
Caution: Refer to Fastener Caution in the Preface section.
| 1.1. | Ensure the transmission is positioned in the 3rd or 4th gear. |
| 1.2. | Rotate the transmission clockwise onto the clutch hub splines. |
| 1.3. | Install the bolt and studs securing the transmission to the engine. |
Tighten
Tighten the bolt/studs to 50 N·m (37 lb ft).
Tighten
Tighten the stud to 50 N·m (37 lb ft).
Tighten
Tighten the bolts to 50 N·m (37 lb ft).
| • | VSS (1) |
| • | Backup lamp switch (3) |
| • | Oxygen sensor (4) |
Note: DO NOT rely on an audible click or a visual verification on the clutch hydraulic hose quick connect fitting connection.
