For 1990-2009 cars only
Removal Procedure
- Disconnect the negative battery cable.
- Discharge and recover the refrigerant. Refer to Refrigerant Recovery and Recharging .
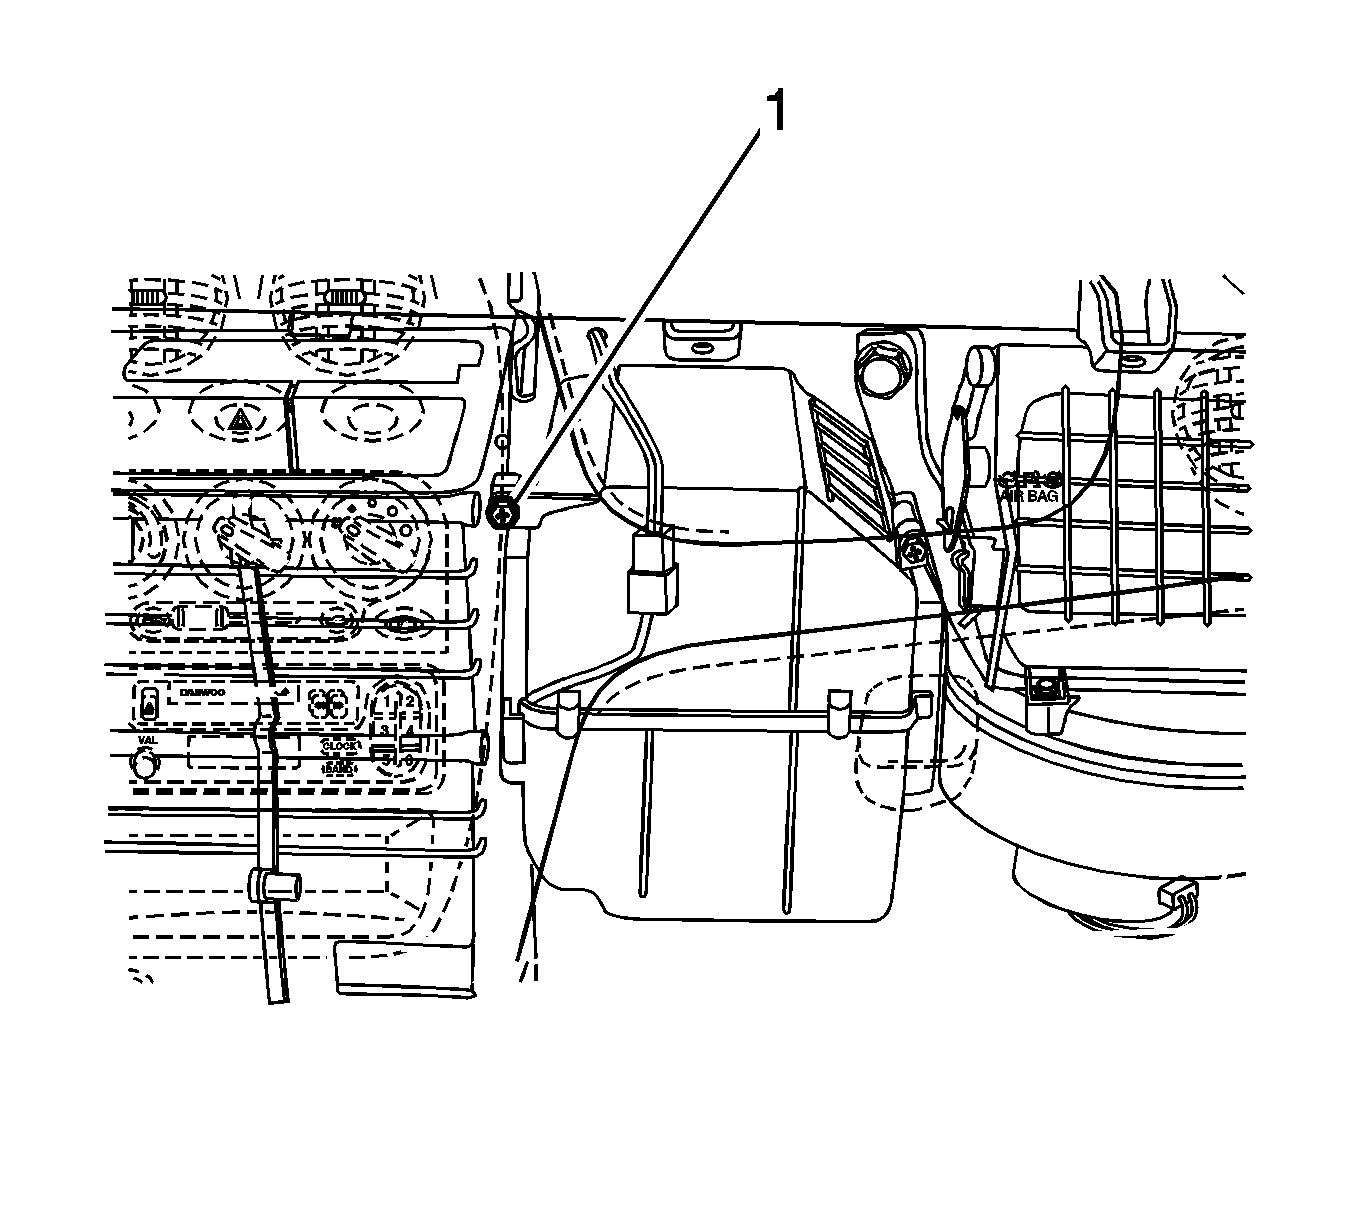
- Loosen the high pressure pipe line nut, receiver dryer to evaporator, and the low pressure pipe line nut, evaporator to compressor (1).
- Remove the glove box. Refer to Instrument Panel Storage Compartment Replacement in Instrument, Panel, Gages and Console.
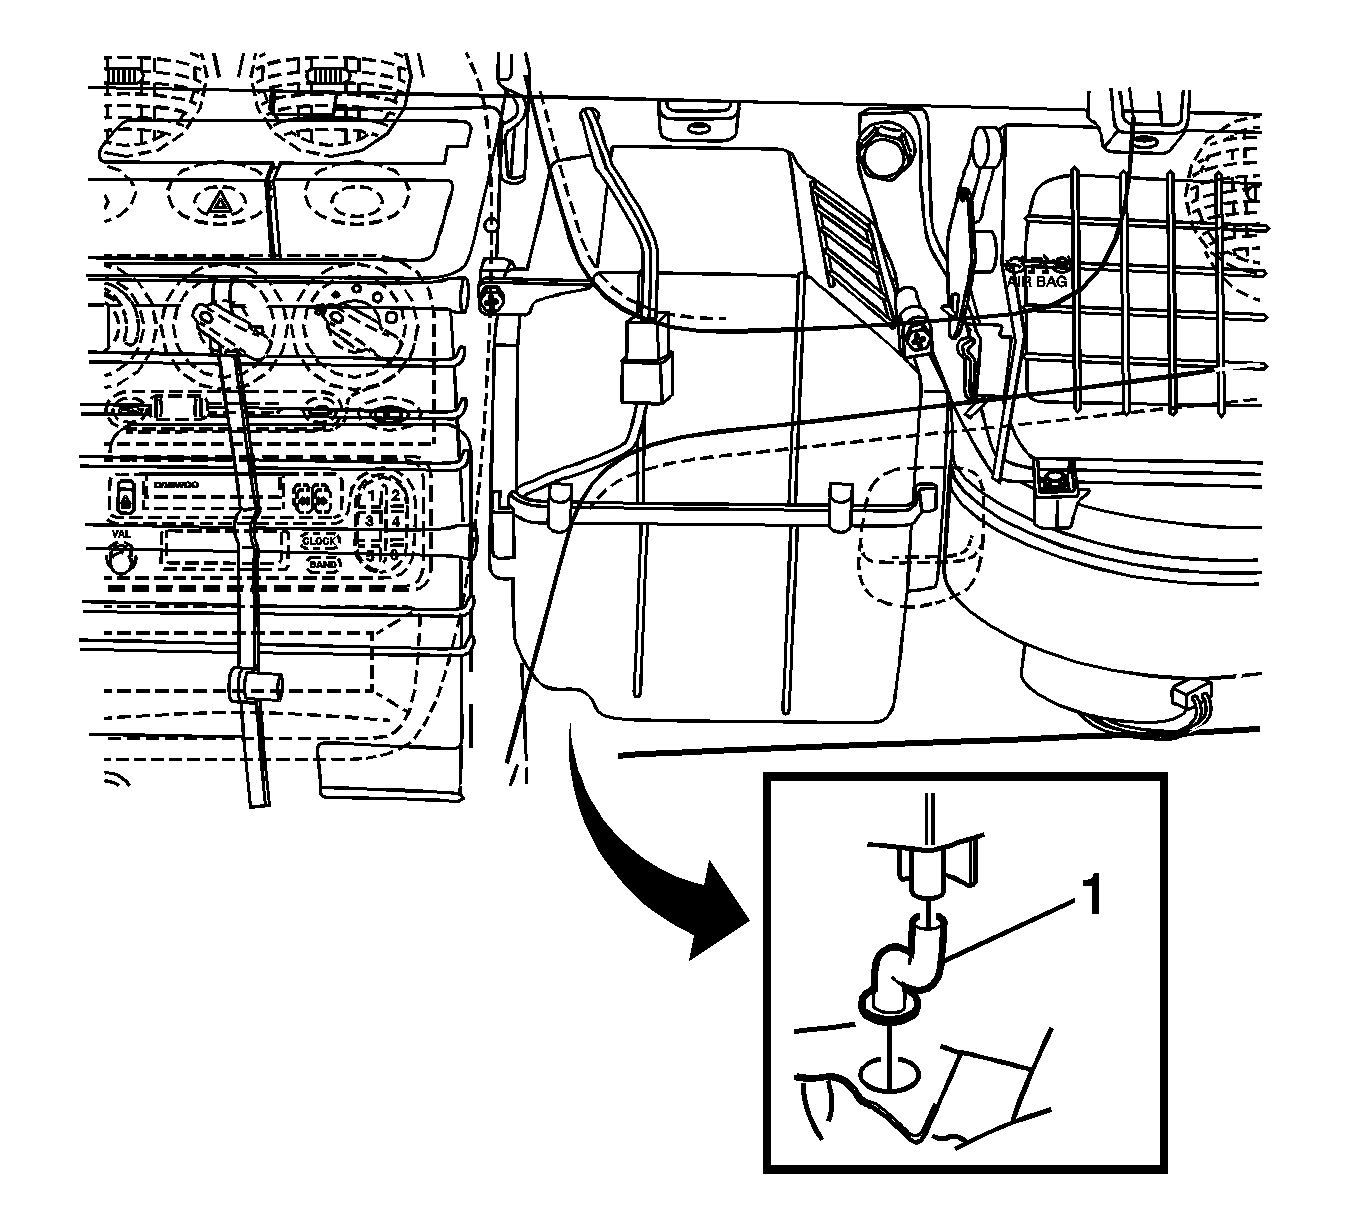
- Remove the drain hose from the evaporator unit.
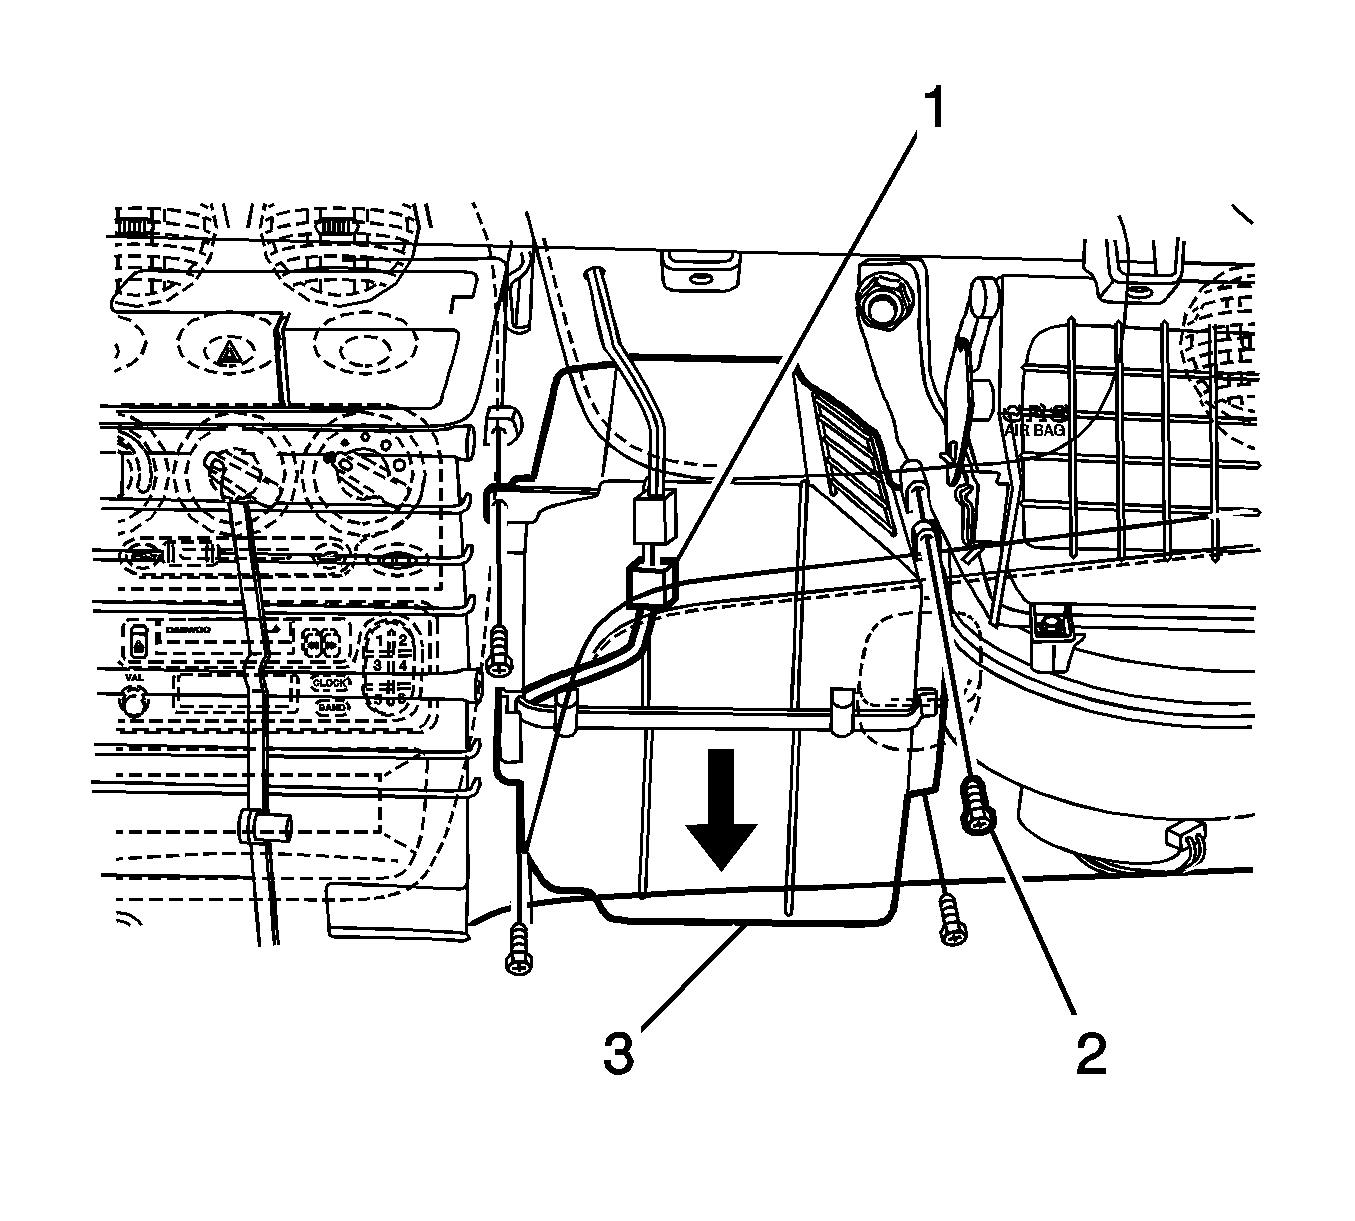
- Disconnect the thermistor connector (1).
- Remove the screws (2).
- Remove the evaporator backward slowly (3).
Caution: Refer to Battery Disconnect Caution in the Preface section.


Installation Procedure
- Install the evaporator with the screws.
- Connect the thermistor connector.
- Install the drain hose.
- Install the glove box. Refer to Instrument Panel Storage Compartment Replacement in Instrument Panel, Gages and Console.
- Install the high pressure pipe line nut, receiver dryer to evaporator, and the low pressure pipe line nut, evaporator to compressor.
- Evacuate and recharge the system. Refer to Refrigerant Recovery and Recharging .
- Connect the negative battery cable.

Notice: Refer to Fastener Notice in the Preface section.
Tighten
Tighten the high pressure pipe line nut to 14 N·m (10.5 lb ft).
Tighten
Tighten the low pressure pipe line nut to 14 N·m (10.5 lb ft).
