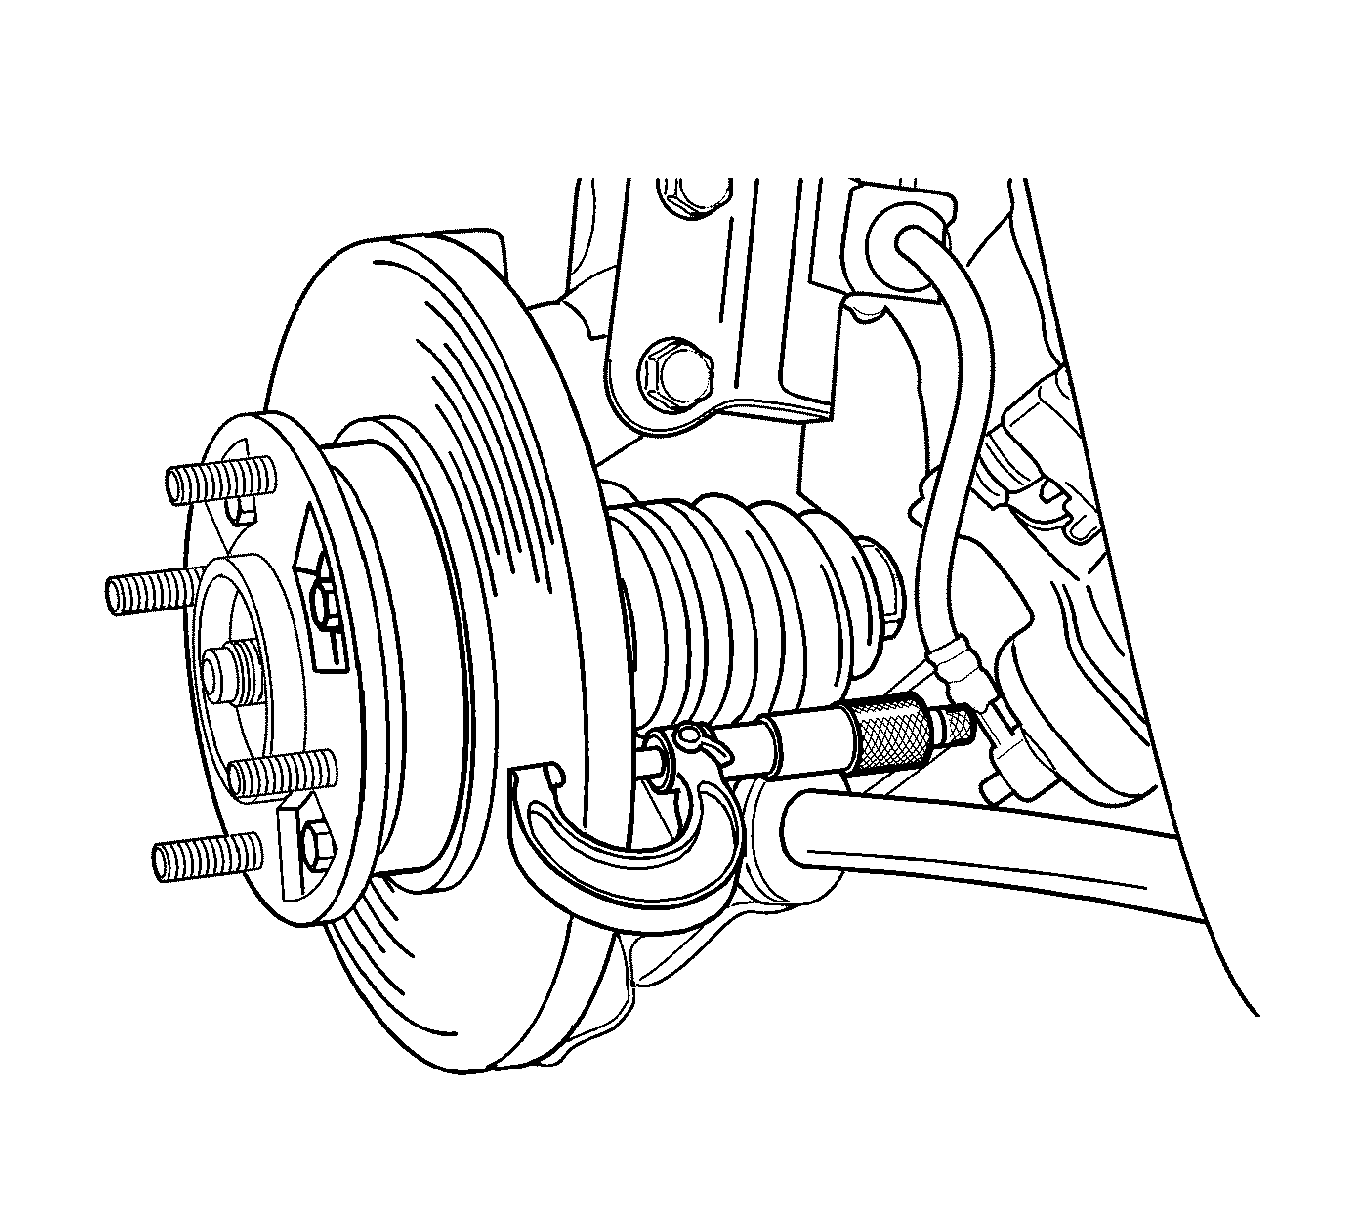
Thickness variation can be inspected by measuring the thickness of the rotor at 4 or more points around the circumference of the rotor. All measurements must be made at the same distance in from the edge of the rotor.
If the thickness of the rotor is below 10 mm (0.40 in), replace the brake rotor.
During manufacturing, the brake rotor and the tolerances of the braking surface regarding flatness and lateral runout are held very close. The maintenance of close tolerances on the shape of the braking surfaces is necessary to prevent brake roughness.

In addition to these tolerances, the surface finish must be held to a specified range. The control of the braking surface finish is necessary to avoid pulls and erratic performance and to extend lining life.
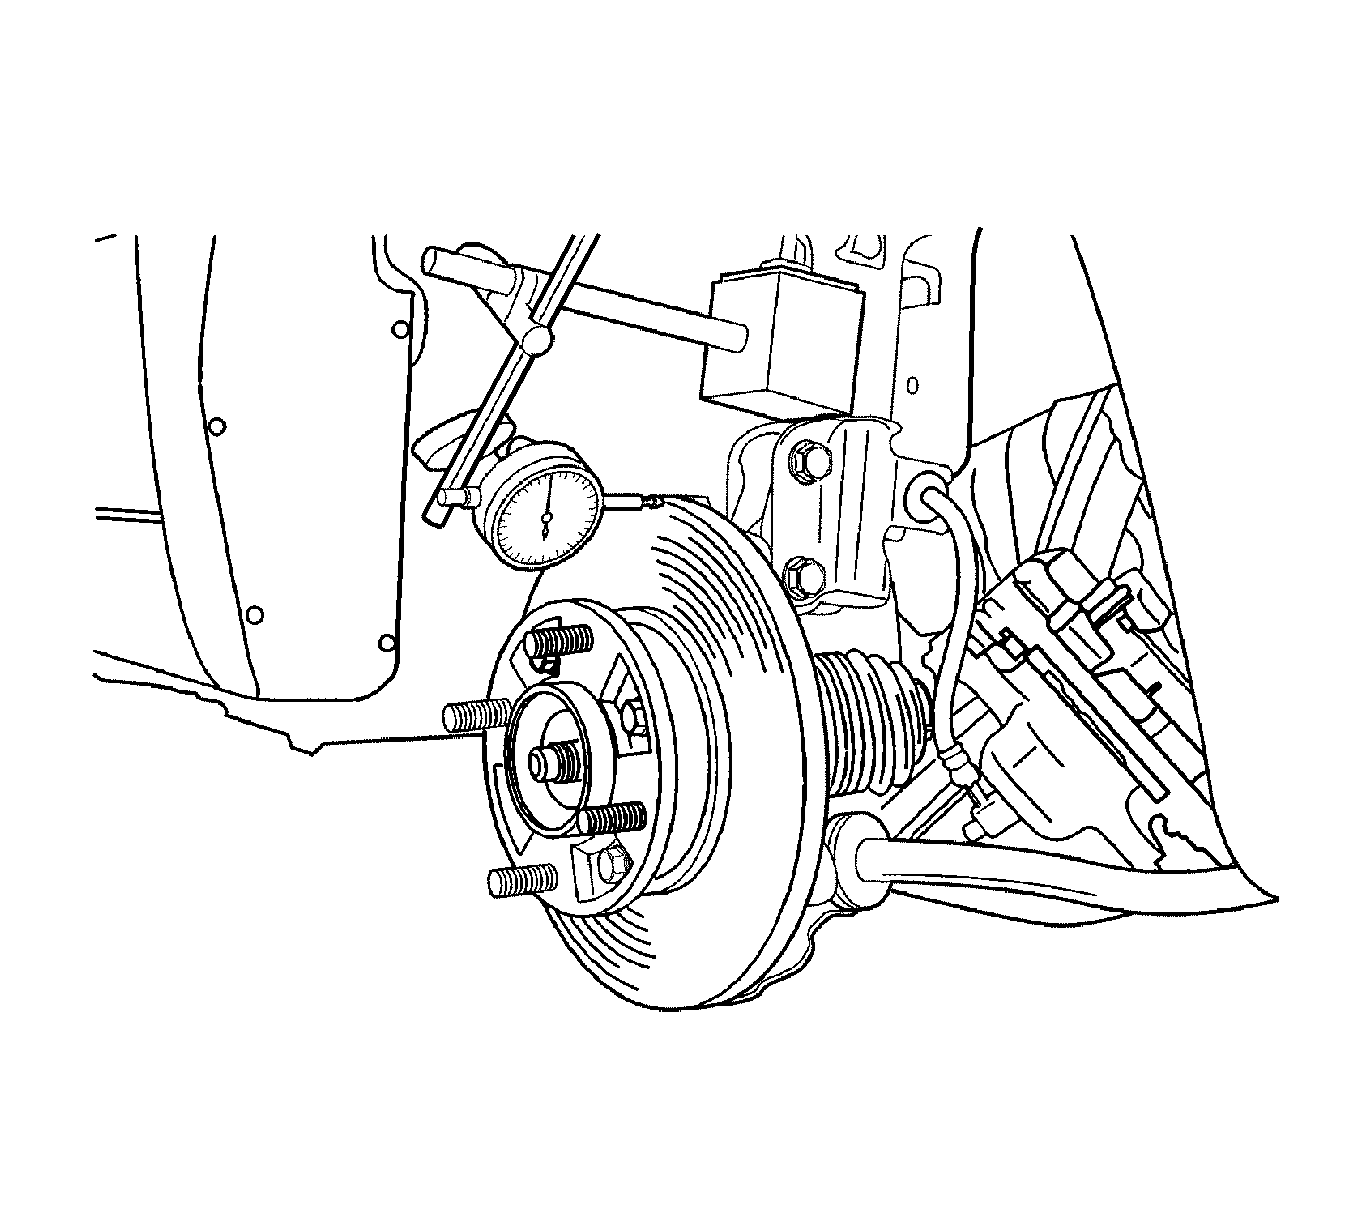
Important: Permissible lateral runout is a maximum 0.05 mm (0.002 in). If lateral runout exceeds the specification, ensure there is no dirt between the rotor and the hub and that contact surfaces are smooth and free from burrs.
Using a commercially-available dial indicator, inspect lateral runout as follows:
- Position the transaxle in NEUTRAL.
- Remove the rotor. Refer to Brake Rotor Replacement .
- Fasten a dial indicator to the strut.
- Set the gage probe tip to approximately 10 mm (0.4 in) from the outer edge of the brake rotor, perpendicular to the disc and under slight preload.
- Remove the dial indicator.
- Refinish the rotor, if required, with precision equipment. Discard the rotor if it fails to meet the above specifications after refinishing.
- Install the rotor. Refer to Brake Rotor Replacement .
Important: Since accurate control of the rotor tolerances is necessary for proper performance of the disc brakes, refinishing of the rotor should be done only with precision equipment.

