For 1990-2009 cars only
Removal Procedure
- Open the hood.
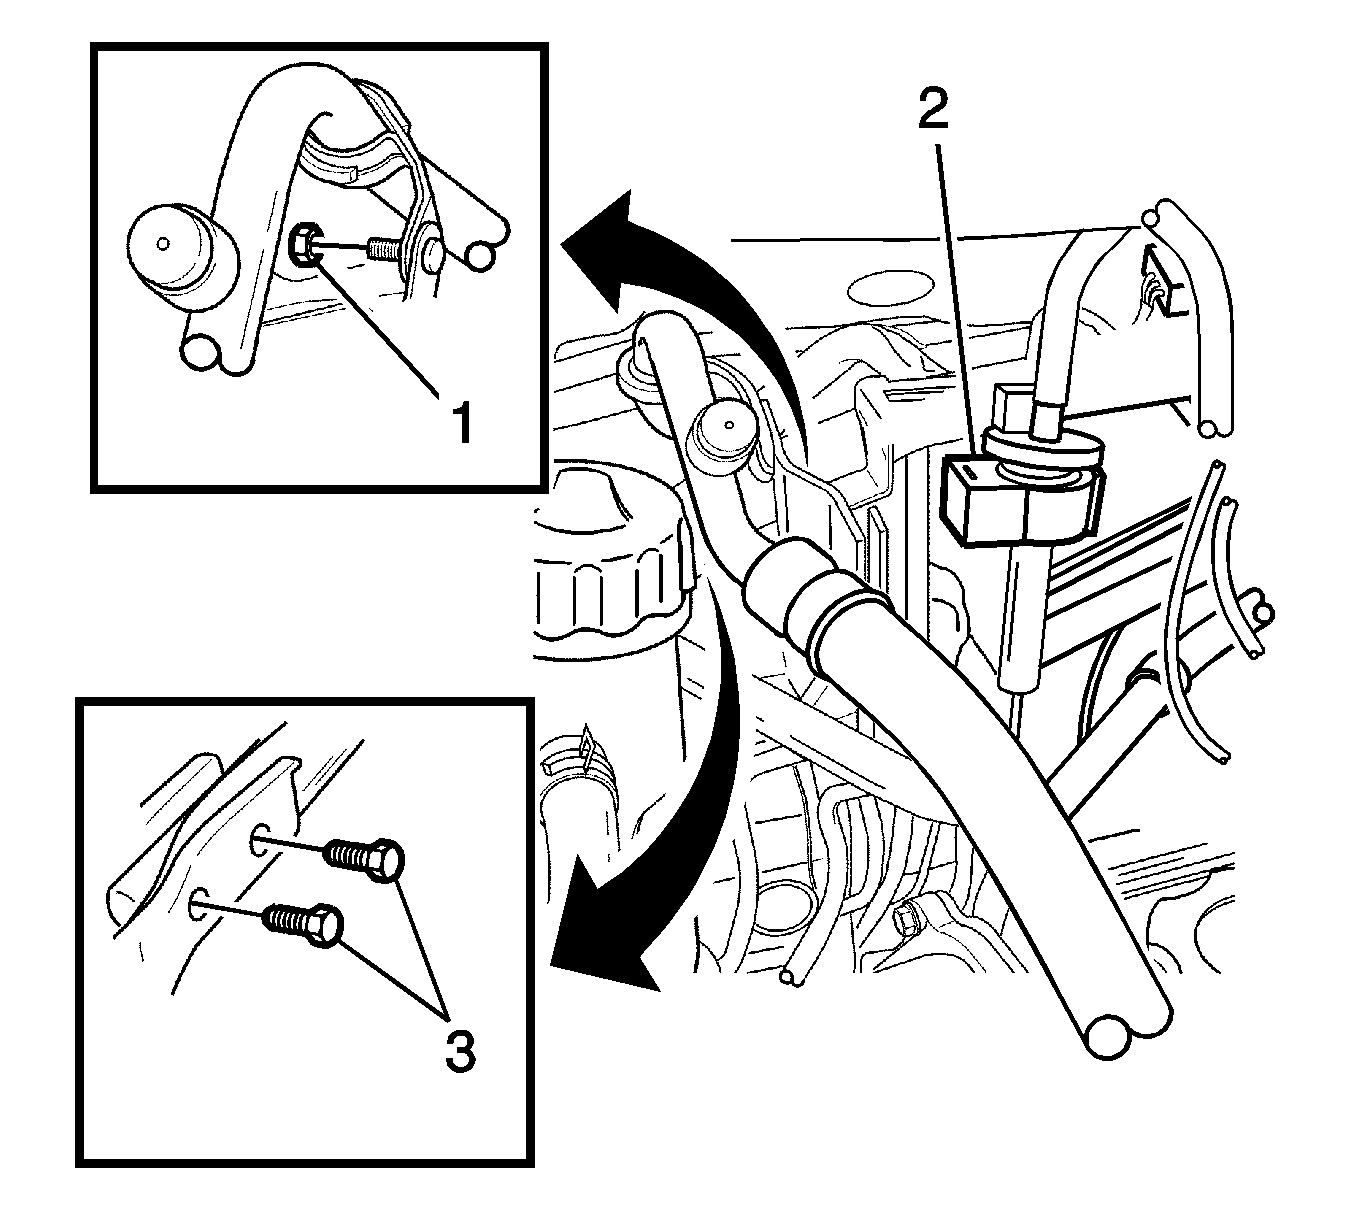
- Remove the purge control valve (1).
- Remove the A/C low pressure pipe bracket-to-strut bar nut (2).
- Remove the strut bar bolts at the passenger side (3).
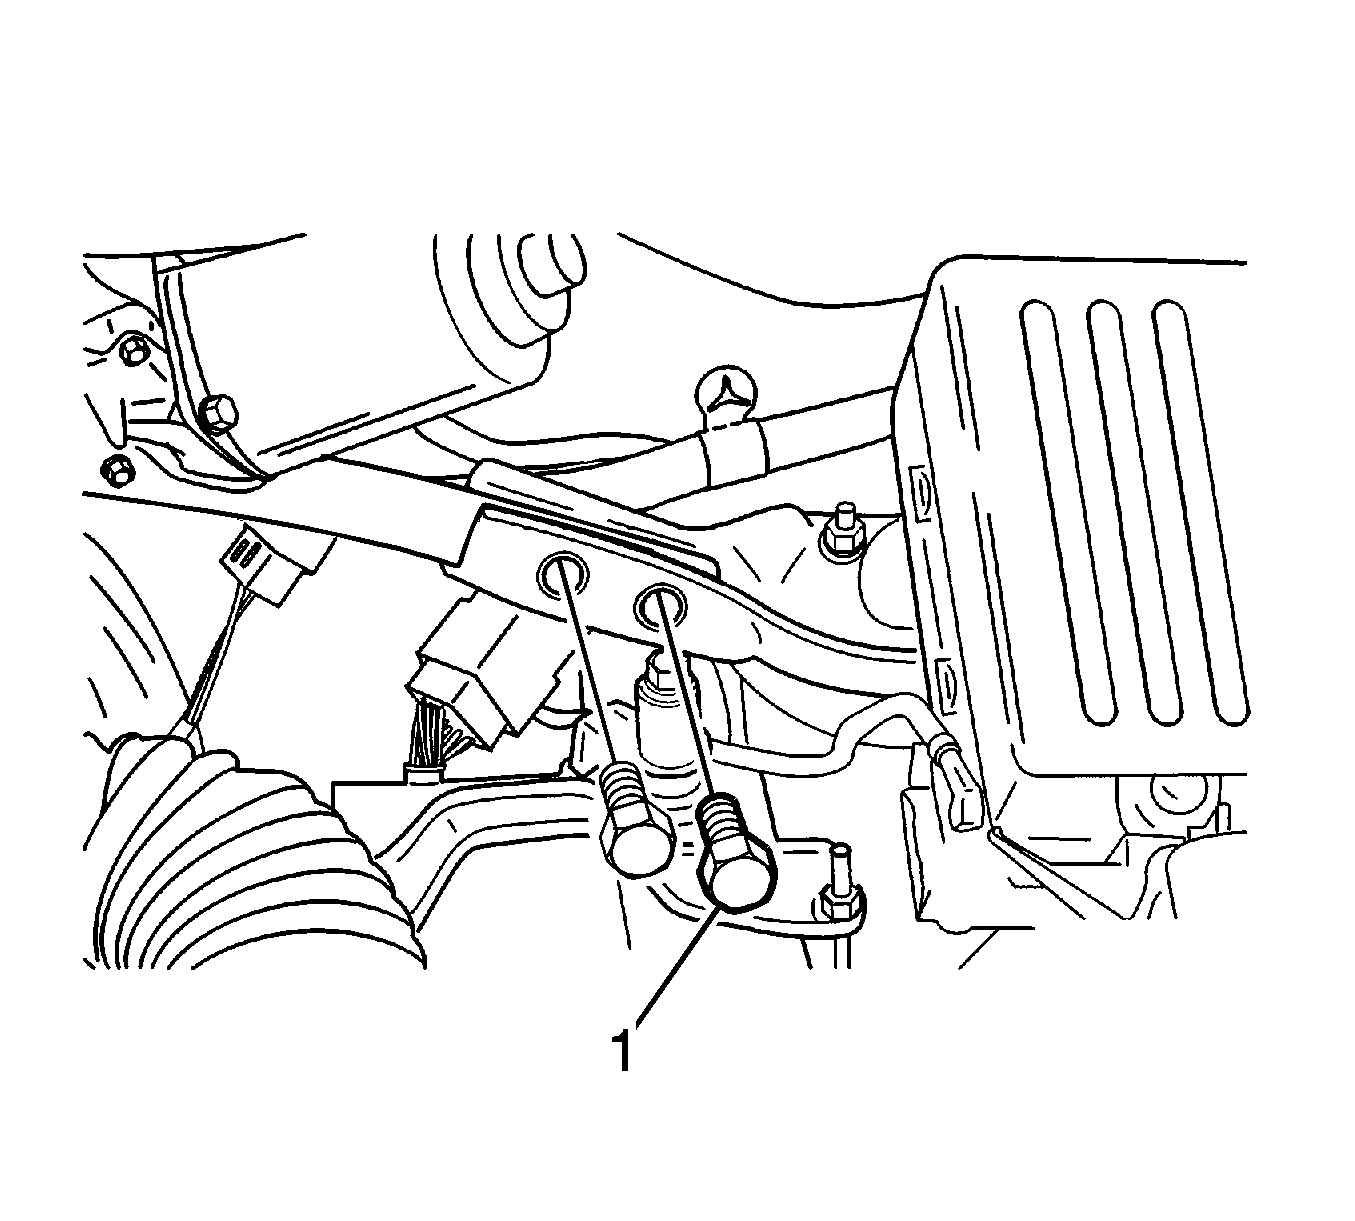
- Remove the strut bar bolts at the driver side (1).
- Remove the strut bar at passenger side.
- Remove the strut bar from the vehicle.

Notice: Be careful not to contact the battery terminal when removing the strut bar bolts. Damage to the battery terminal may occur.

Installation Procedure
- Install the strut bar at the passenger side.
- Install the strut bar at the driver side.
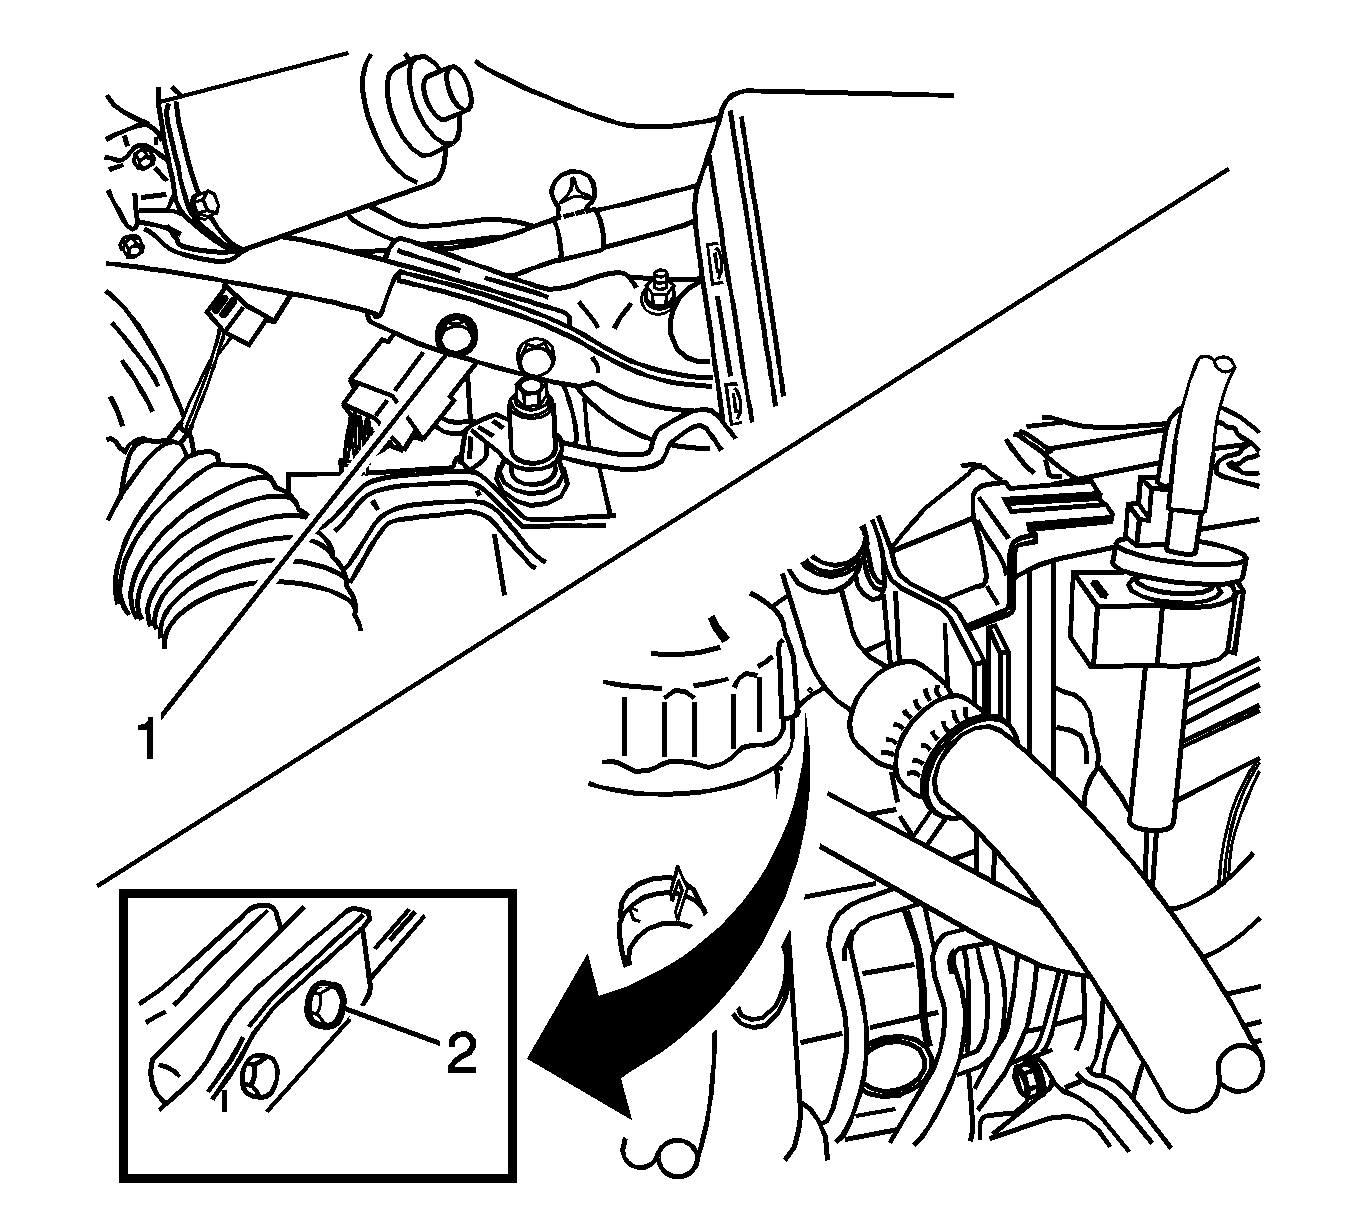
- Install the strut bar bolts at the driver side (1).
- Install the strut bar bolts at the passenger side (2).
- Install the A/C low pressure pipe bracket-to-strut bar nut.
- Install the purge control valve to the strut bar.

Notice: Be careful not to contact the battery terminal when removing the strut bar bolts. Damage to the battery terminal may occur.
Notice: Refer to Fastener Notice in the Preface section.
Tighten
Tighten the strut bar bolts to 35-55 N·m
(25-41 lb ft).
