For 1990-2009 cars only
Removal Procedure
- Relieve the fuel system pressure. Refer to Fuel Pressure Relief .
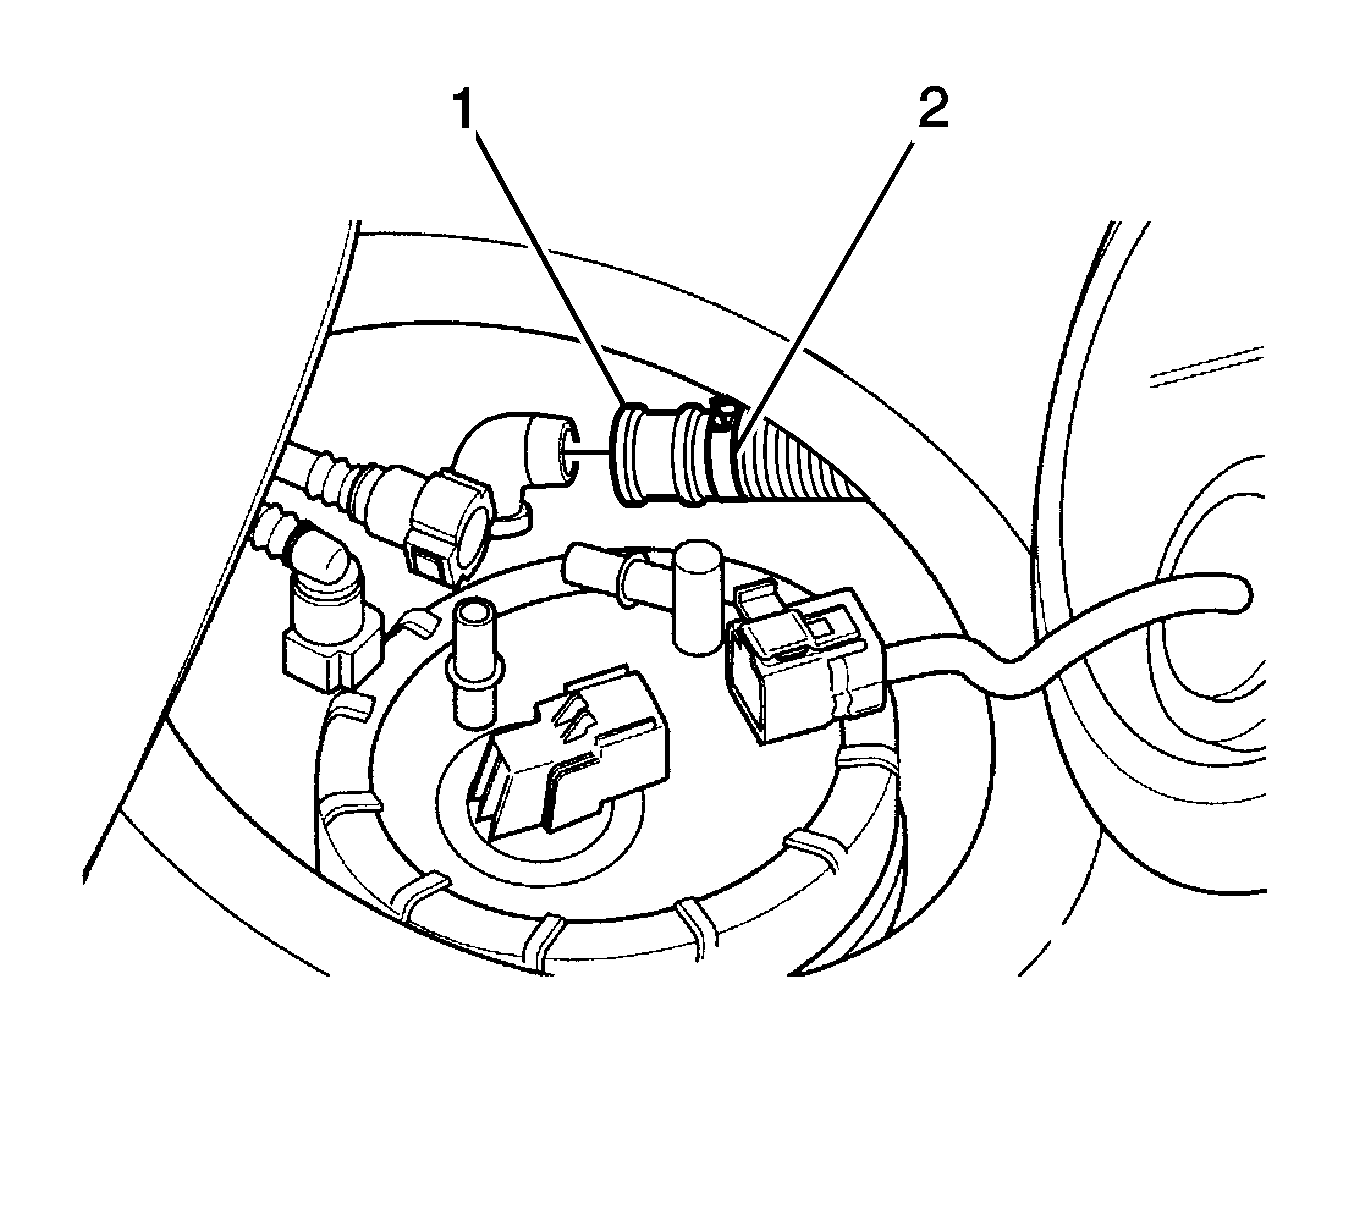
- Disconnect the fuel tank ventilation tube clamp (2).
- Disconnect the fuel tank ventilation tube (1).
- Place a pan below the fuel tank to catch the draining fuel.
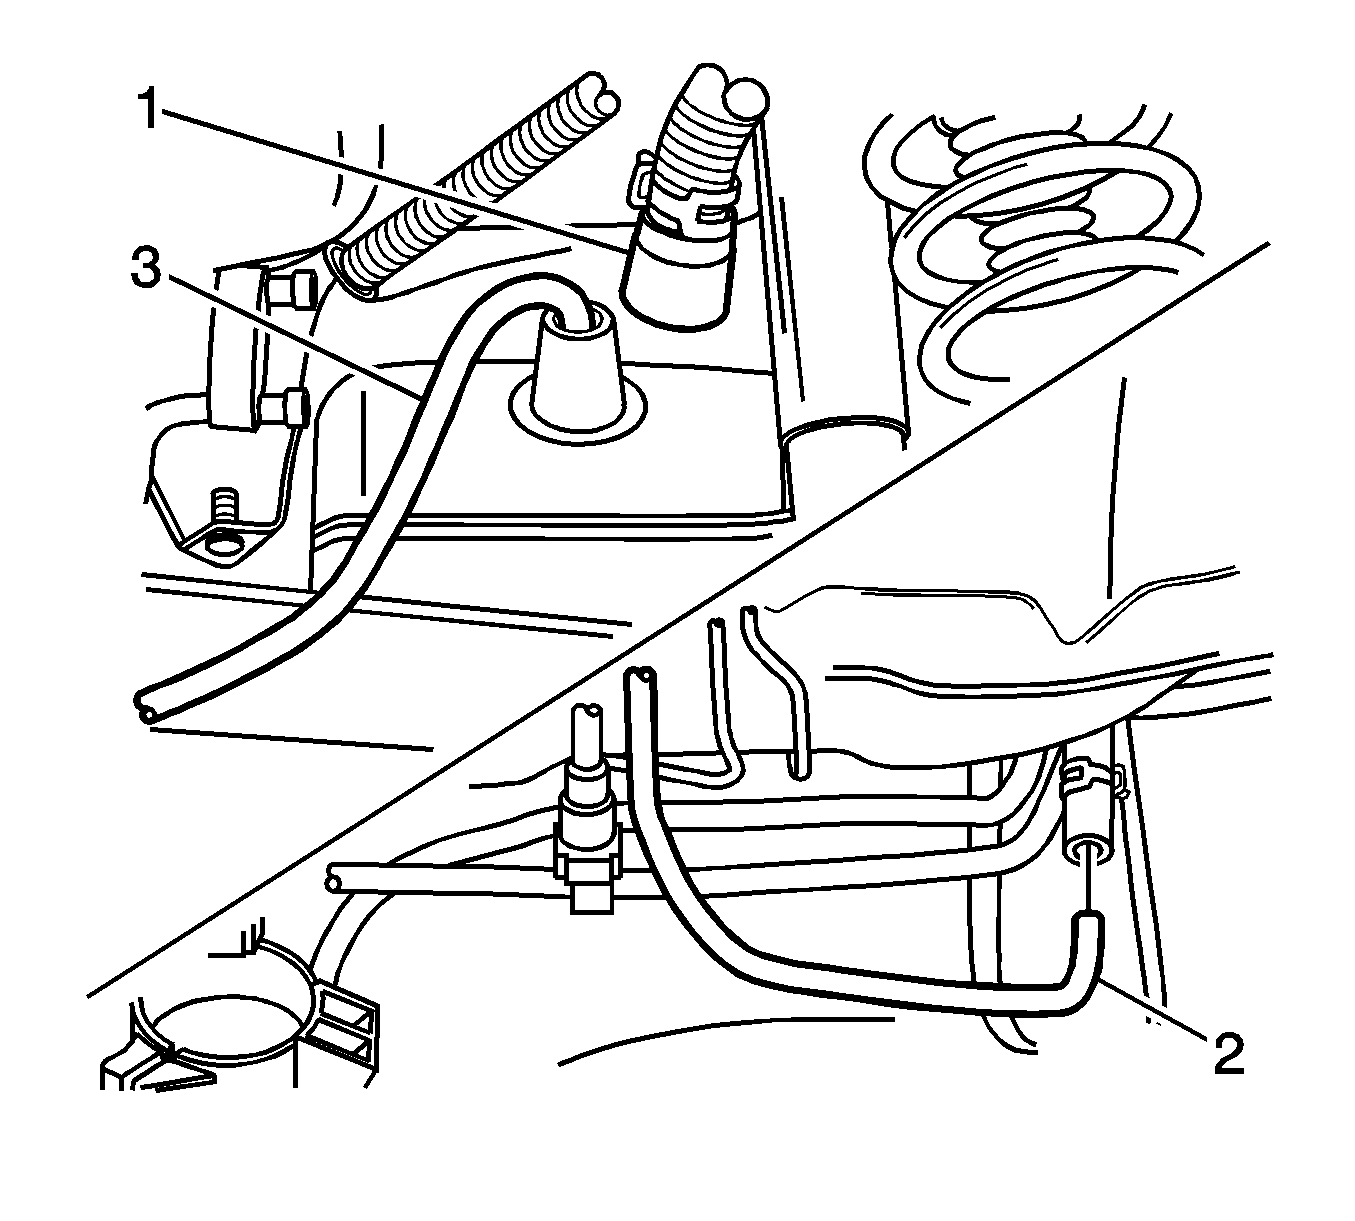
- Disconnect the fuel tank filter tube (1).
- Drain the fuel from the fuel tank using the ventilation tube joint port (2).
- Disconnect the evaporative emission canister line (3).
- Remove the fuel filter. Refer to Fuel Filter Replacement .
- Install the jack on the center of the fuel tank.
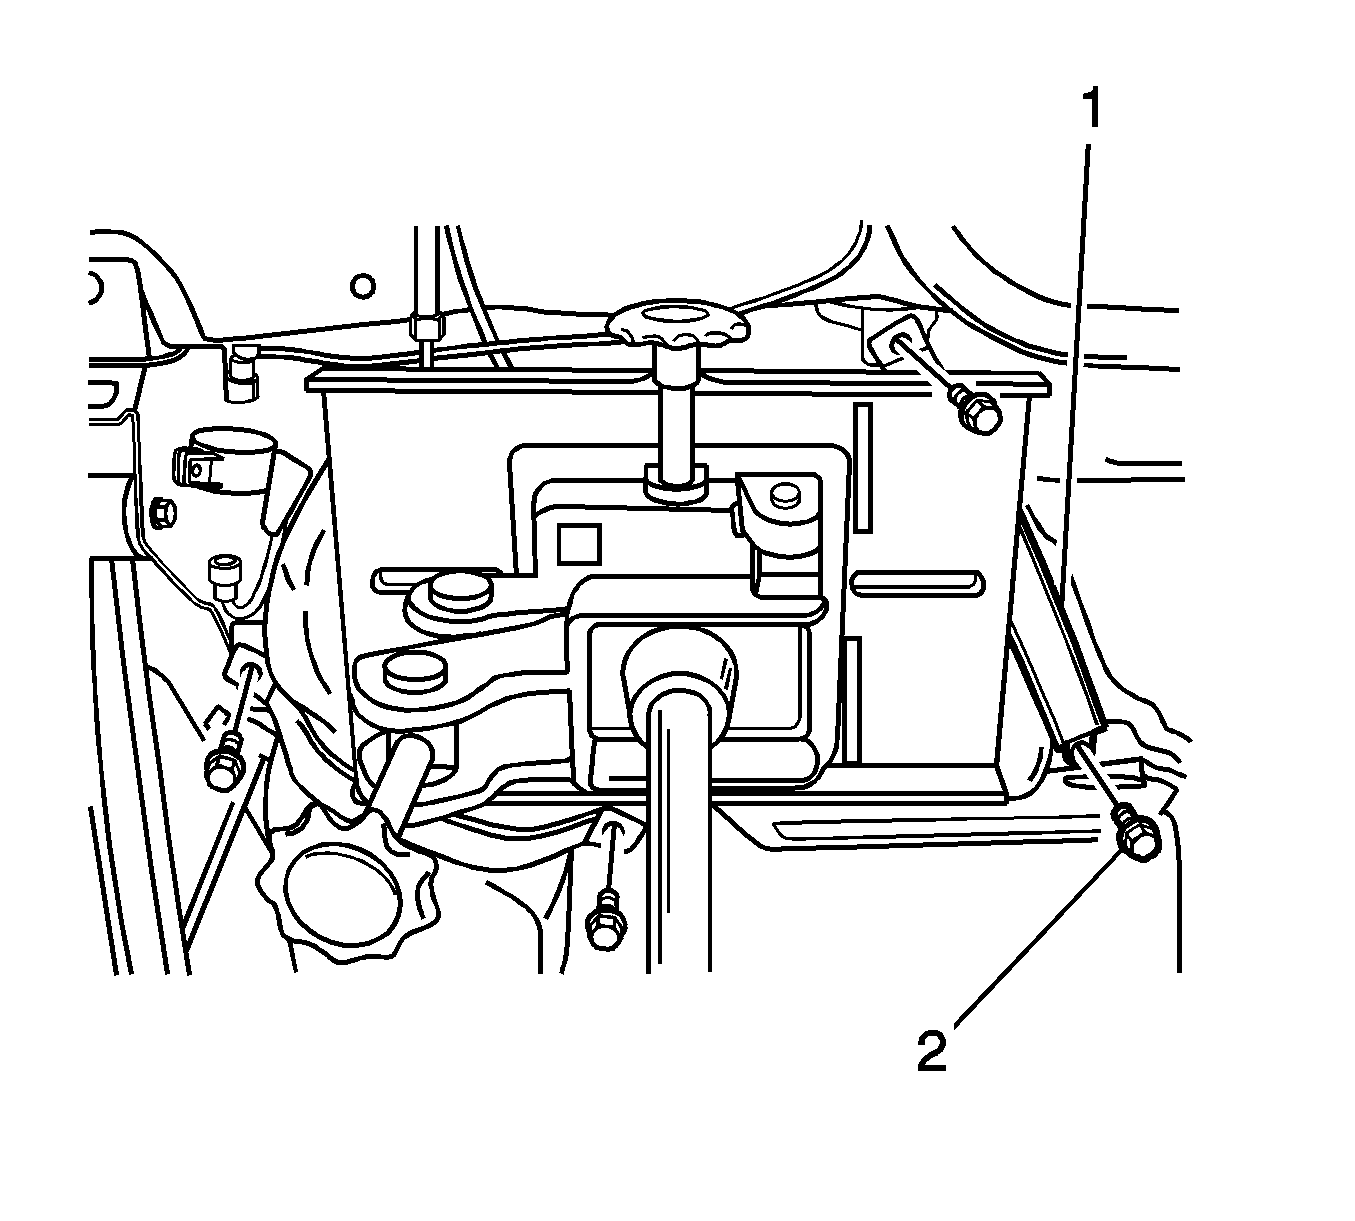
- Remove the fuel tank strap bolts (1).
- Remove the fuel tank straps (2).
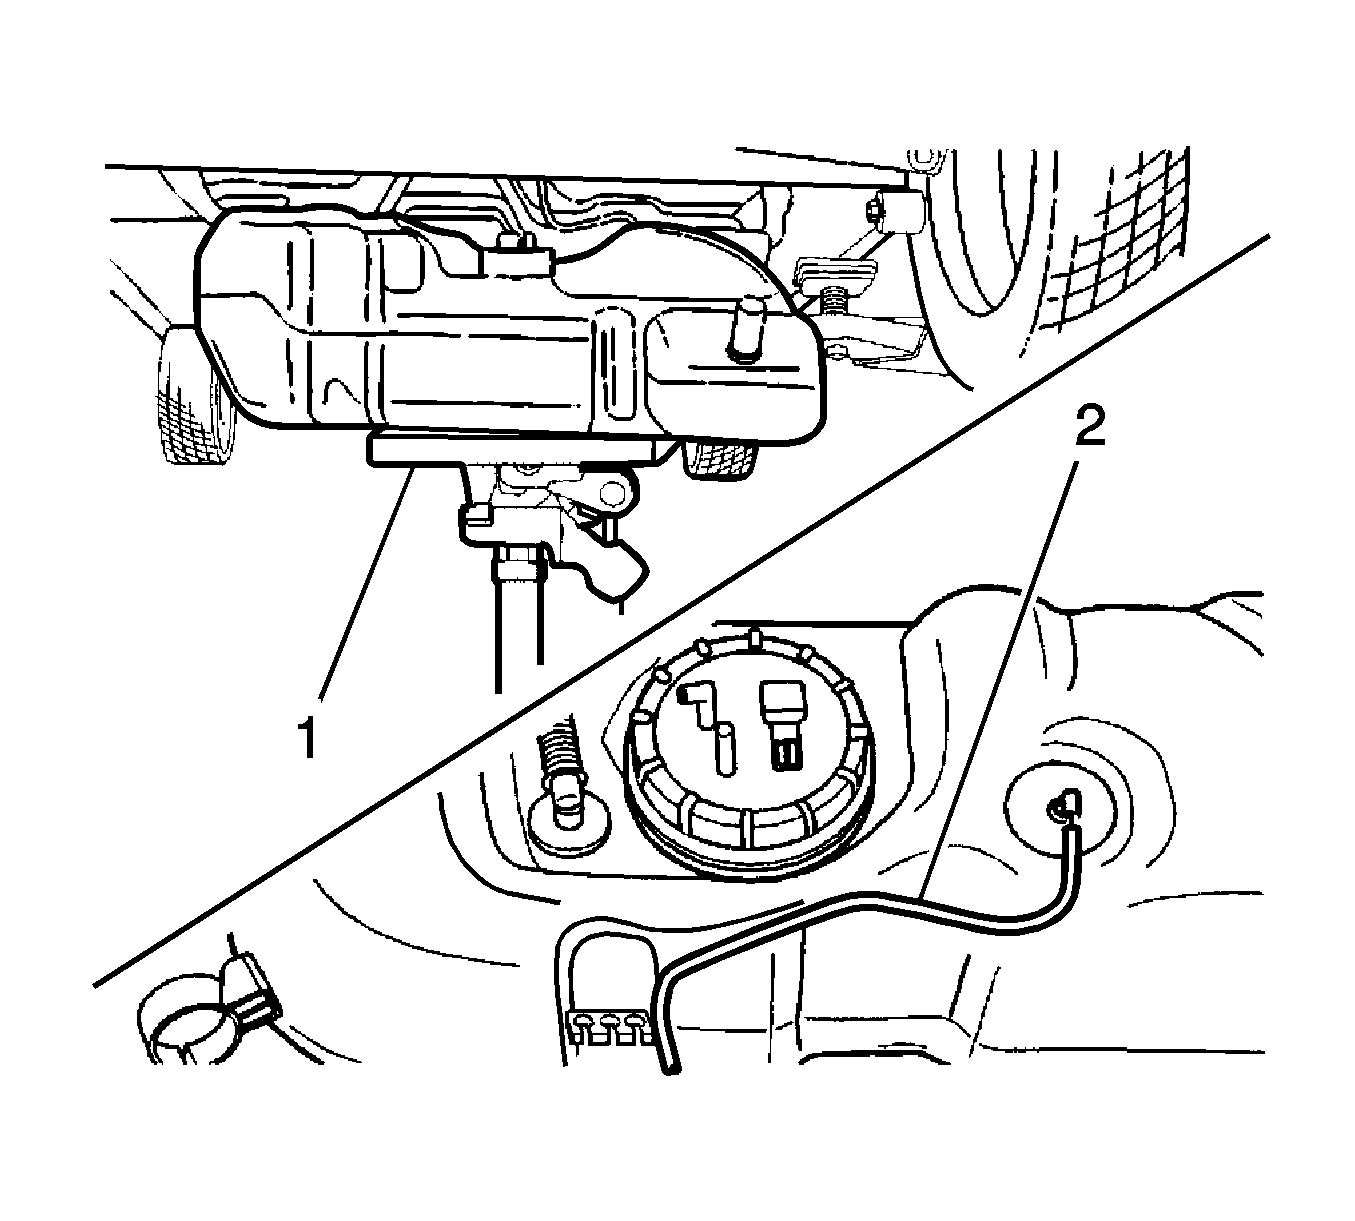
- Lower slowly the jack to remove the fuel tank easily (1).
- Disconnect the canister hose which is connected to the roll over valve from the fuel tank removed (2).
- Inspect the fuel tank for clacks, damages, and contaminations.
- Inspect the fuel lines for cracks and damages.
- Remove the fuel tank.
Caution: Refer to Gasoline/Gasoline Vapors Caution in the Preface section.
Notice: Refer to Fuel Pressure Notice in the Preface section.


Installation Procedure
- Connect the canister hose to the roll over valve. Connect to the fuel tank (2).
- Slowly raise the fuel tank on the jack (1).
- Install fuel tank straps (2).
- Install fuel tank strap bolts (1).
- Remove the fuel tank jack.
- Install the fuel filter. Refer to Fuel Filter Replacement .
- Connect the evaporative emission canister line (3).
- Connect the fuel tank filter tube.
- Connect the fuel tank ventilation tube (1).
- Connect the fuel tank ventilation tube clamp (2).
- Fill the tank with fuel.
- Turn the ignition ON and inspect the fuel system for leaks.

Notice: Refer to Fuel Tank Strap Fastener Notice in the Preface section.

Notice: Refer to Fastener Notice in the Preface section.
Tighten
Tighten the fuel tank strap bolts to 18-22 N·m (13-16 lb ft).

