For 1990-2009 cars only
Removal Procedure
- Remove air filter assembly. Refer to Air Cleaner Assembly Replacement for the 0.8L engine or Air Cleaner Assembly Replacement for the 1.0L engine.
- Disconnect the lower radiator hose and drain the coolant. Refer to Cooling System Draining and Filling.
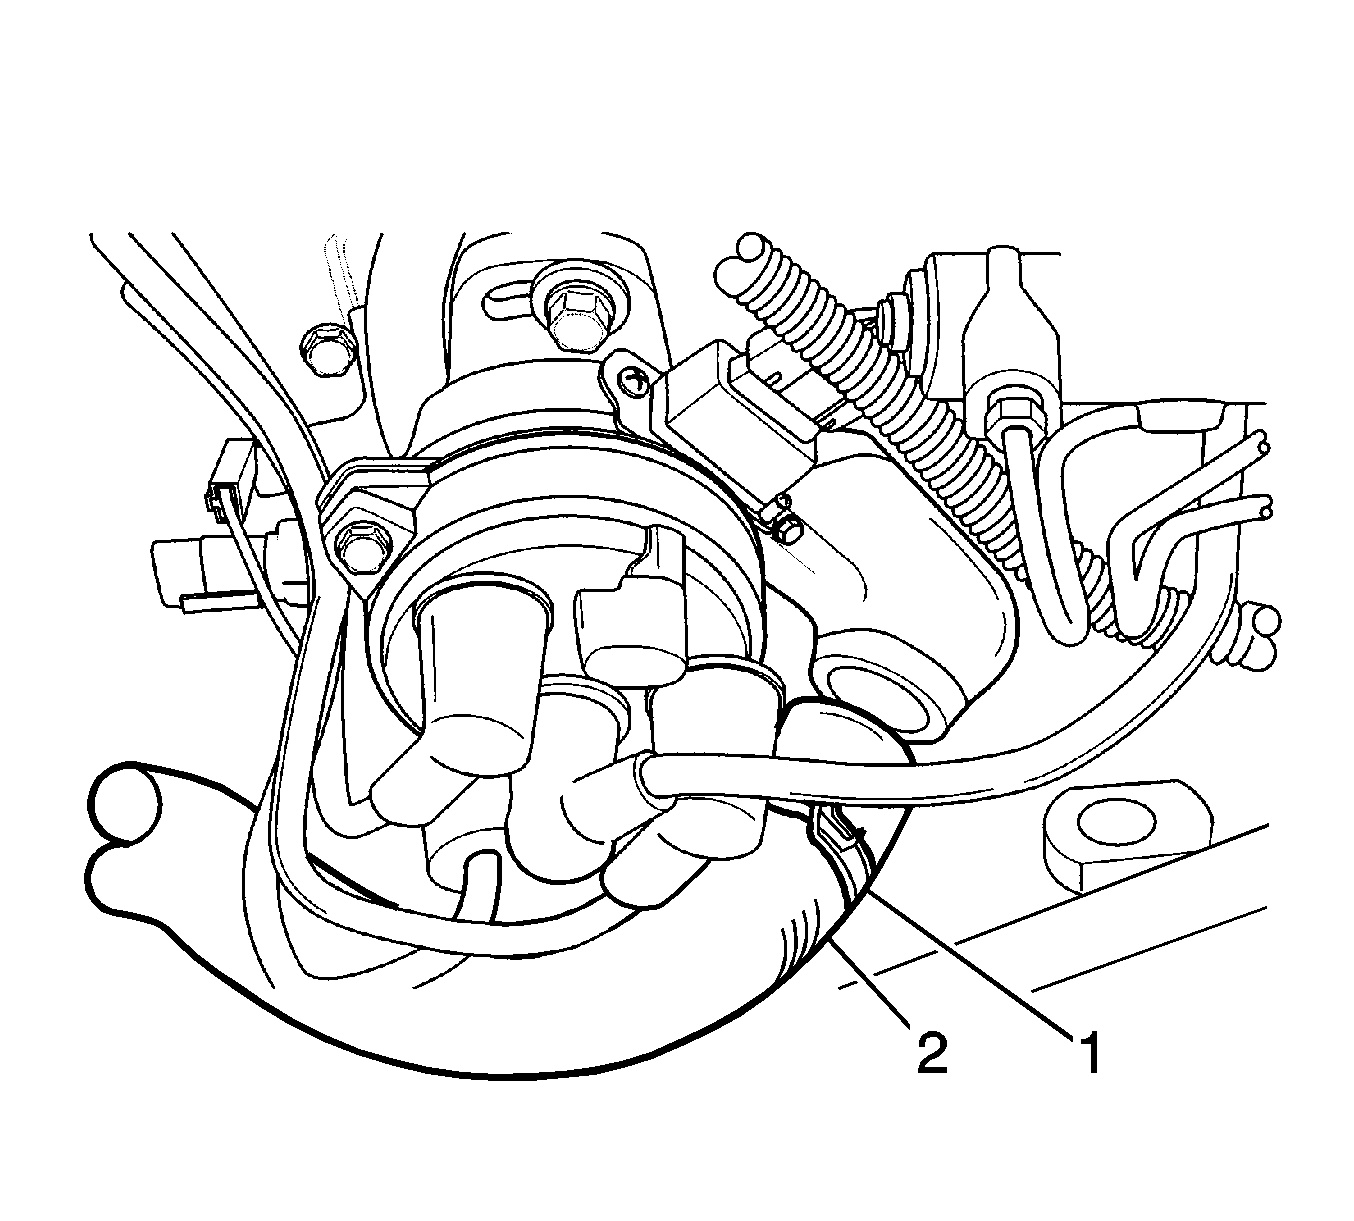
- Loosen the upper radiator hose clamp (1).
- Disconnect the upper radiator hose (2).
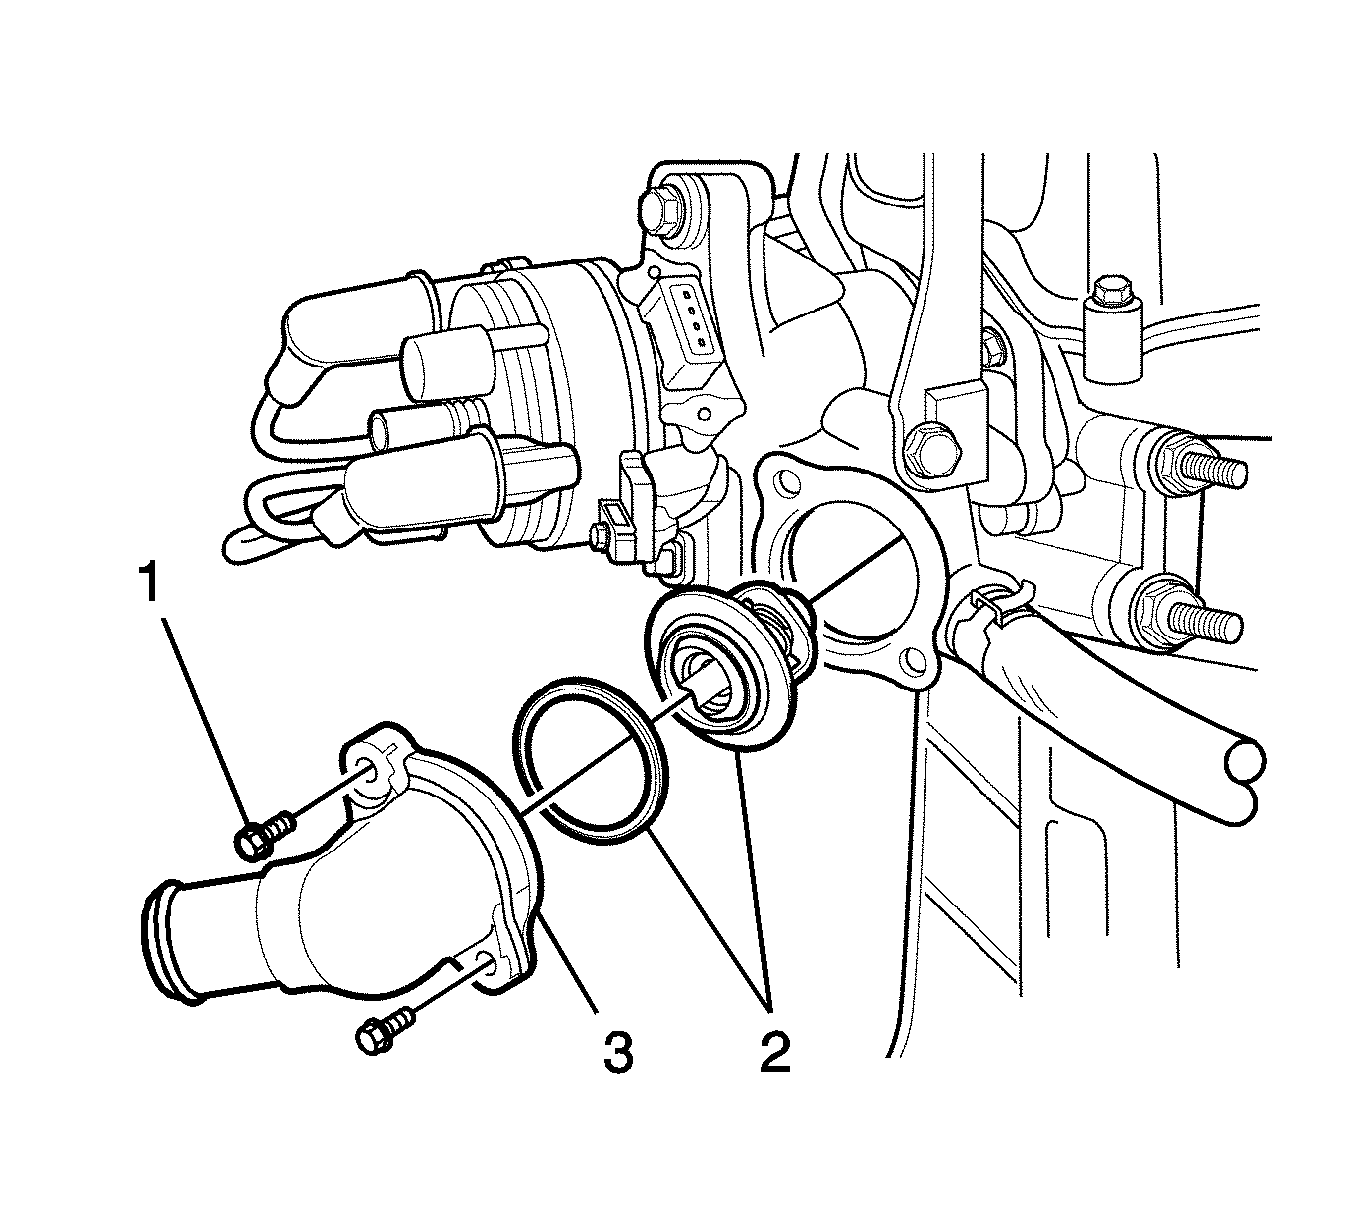
- Remove the thermostat bolts (1).
- Remove the thermostat housing (2).
- Remove the thermostat with the gasket (3).
- Inspect the gasket for cracks or other damage.
- Inspect the valve seat for foreign matter that could prevent the valve from seating properly.
- Inspect the thermostat for proper operation. Refer to Thermostat Diagnosis.

Warning: As long as there is pressure in the cooling system, the temperature can be considerably higher than the boiling temperature of the solution in the radiator without causing the solution to boil. Removal of the pressure cap while the engine is hot and pressure is high will cause the solution to boil instantaneously -- possibly with explosive force -- spewing the solution over the engine, fenders and the person removing the cap.

Installation Procedure
- Position the thermostat housing (2) with a new thermostat gasket (3).
- Install the thermostat bolts (1) and tighten to 8-15 N·m (71-130 lb in).
- Position the upper radiator hose (2) to the thermostat housing.
- Install the upper radiator hose clamp (1).
- Connect the lower radiator hose, then refill the cooling system. Refer to Cooling System Draining and Filling.
- Install the air filter assembly. Refer to Air Cleaner Assembly Replacement for the 0.8L engine or Air Cleaner Assembly Replacement for the 1.0L engine.

Caution: Refer to Fastener Caution in the Preface section.

