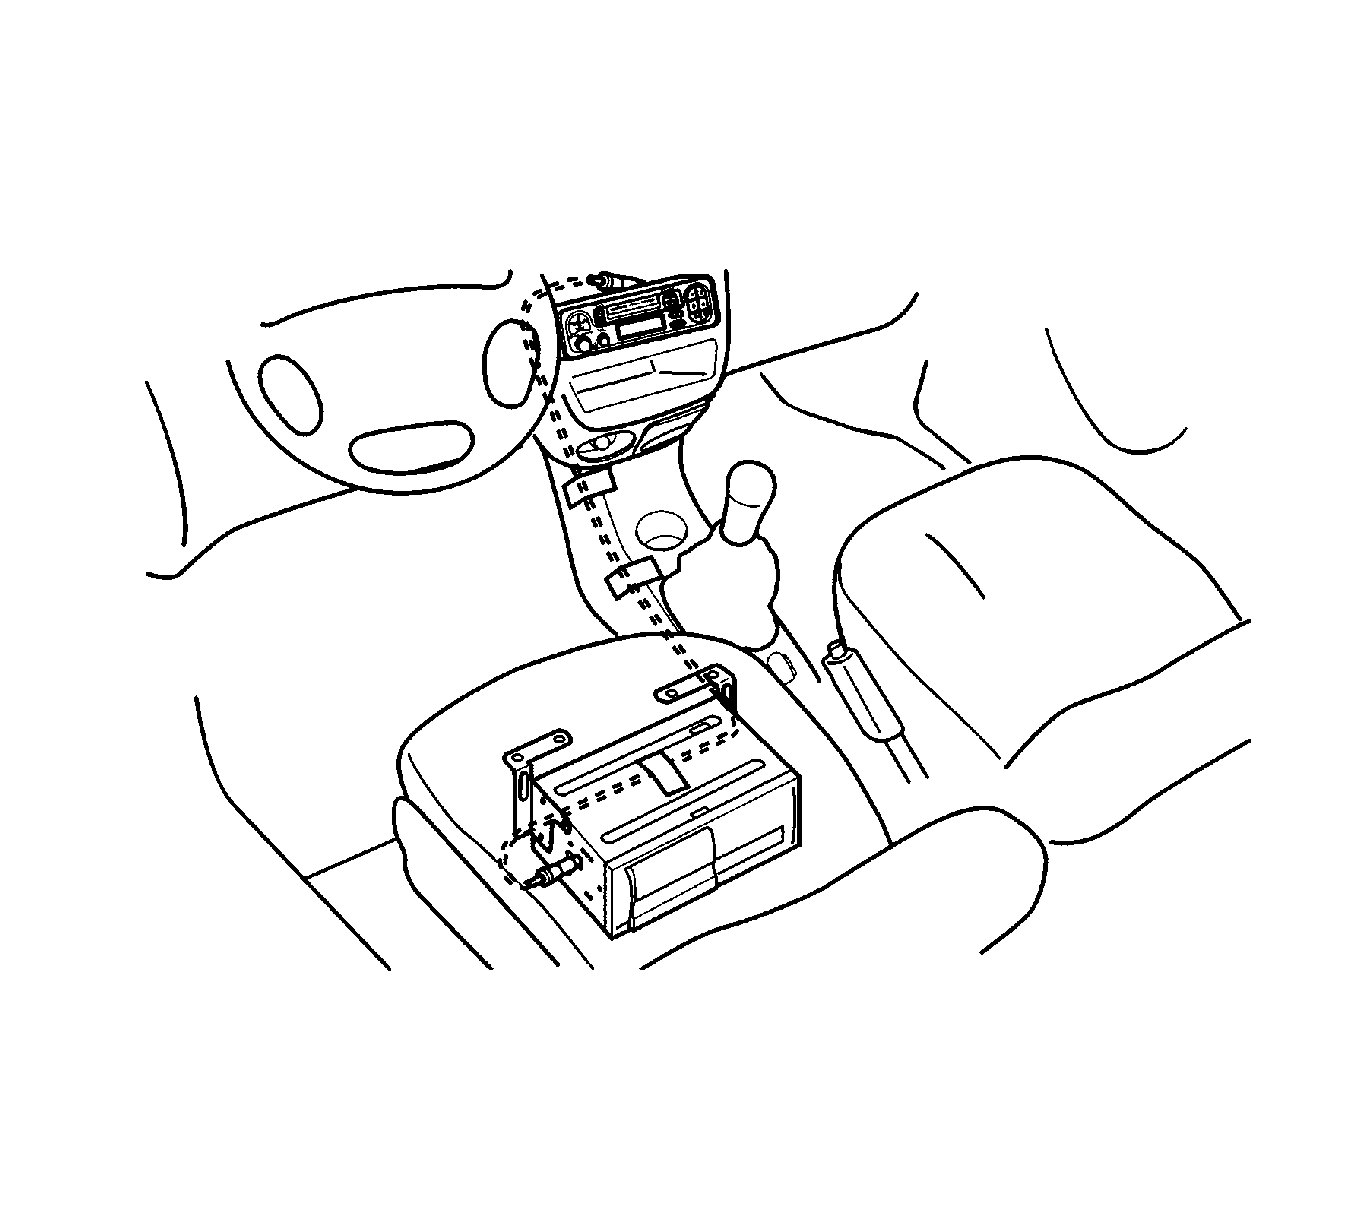
For 1990-2009 cars only
Removal Procedure
- Disconnect the negative battery cable.
- Remove the audio system from the instrument panel. Refer to Radio Replacement.
- Remove the front floor console. Refer to Front Floor Console Replacement.
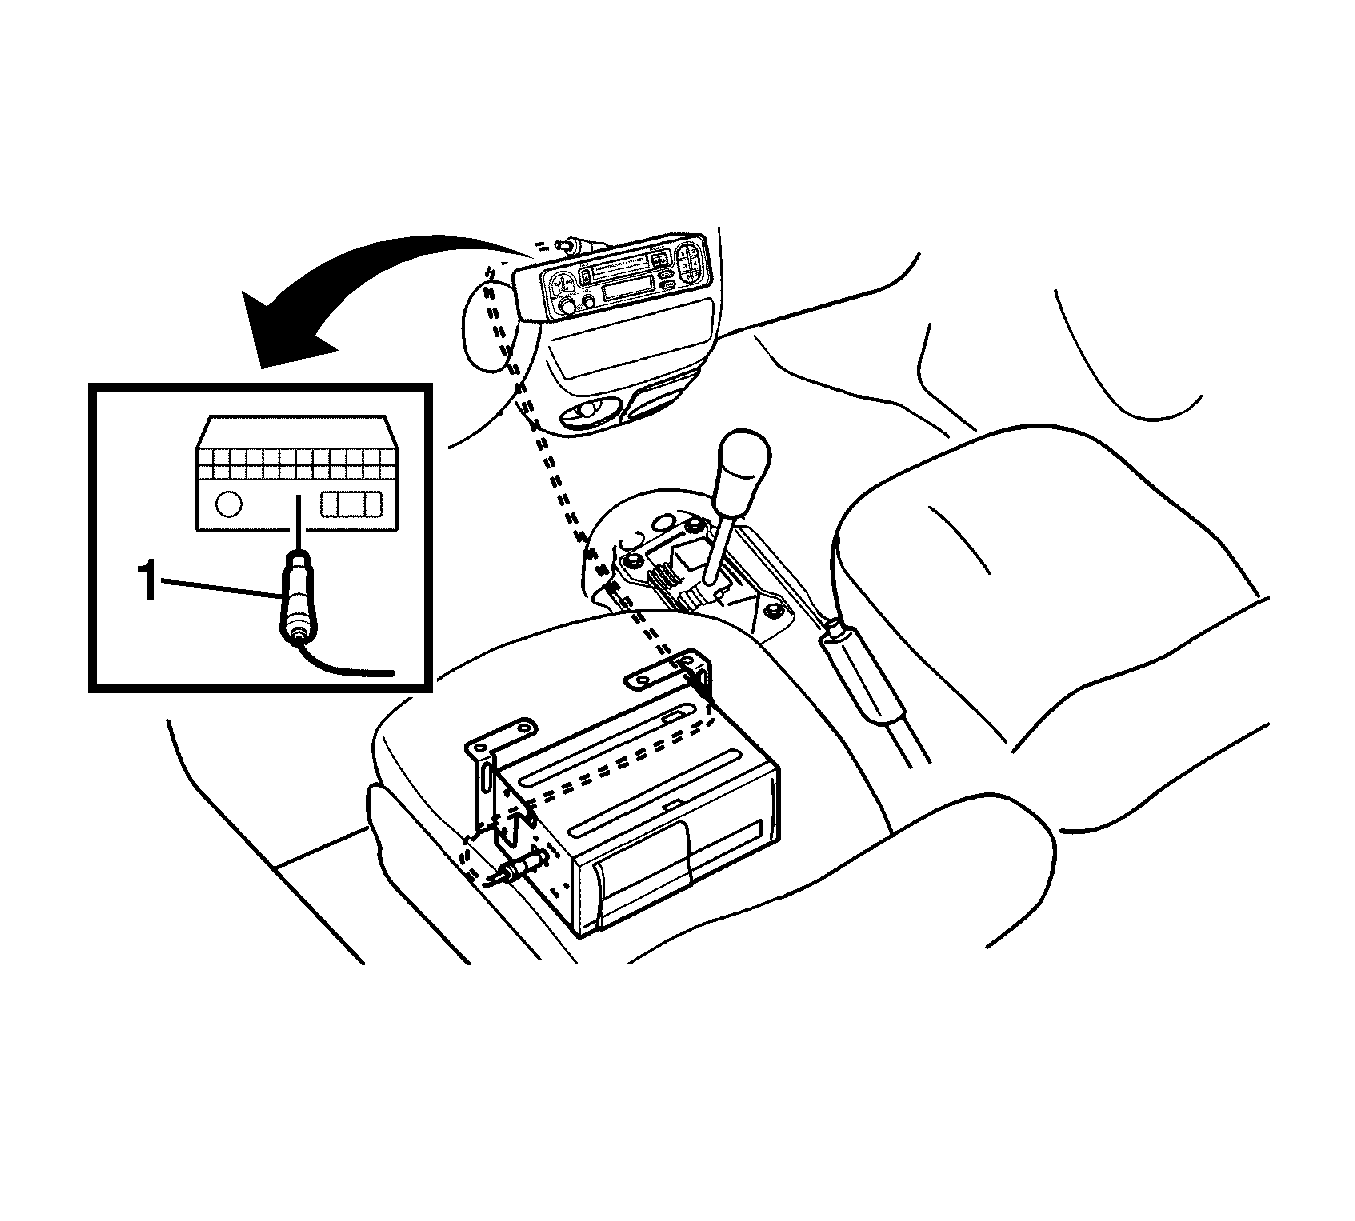
- Disconnect the CD changer electrical connector (1) from the audio system.
- Disconnect the CD changer electrical connector from the CD changer (1).
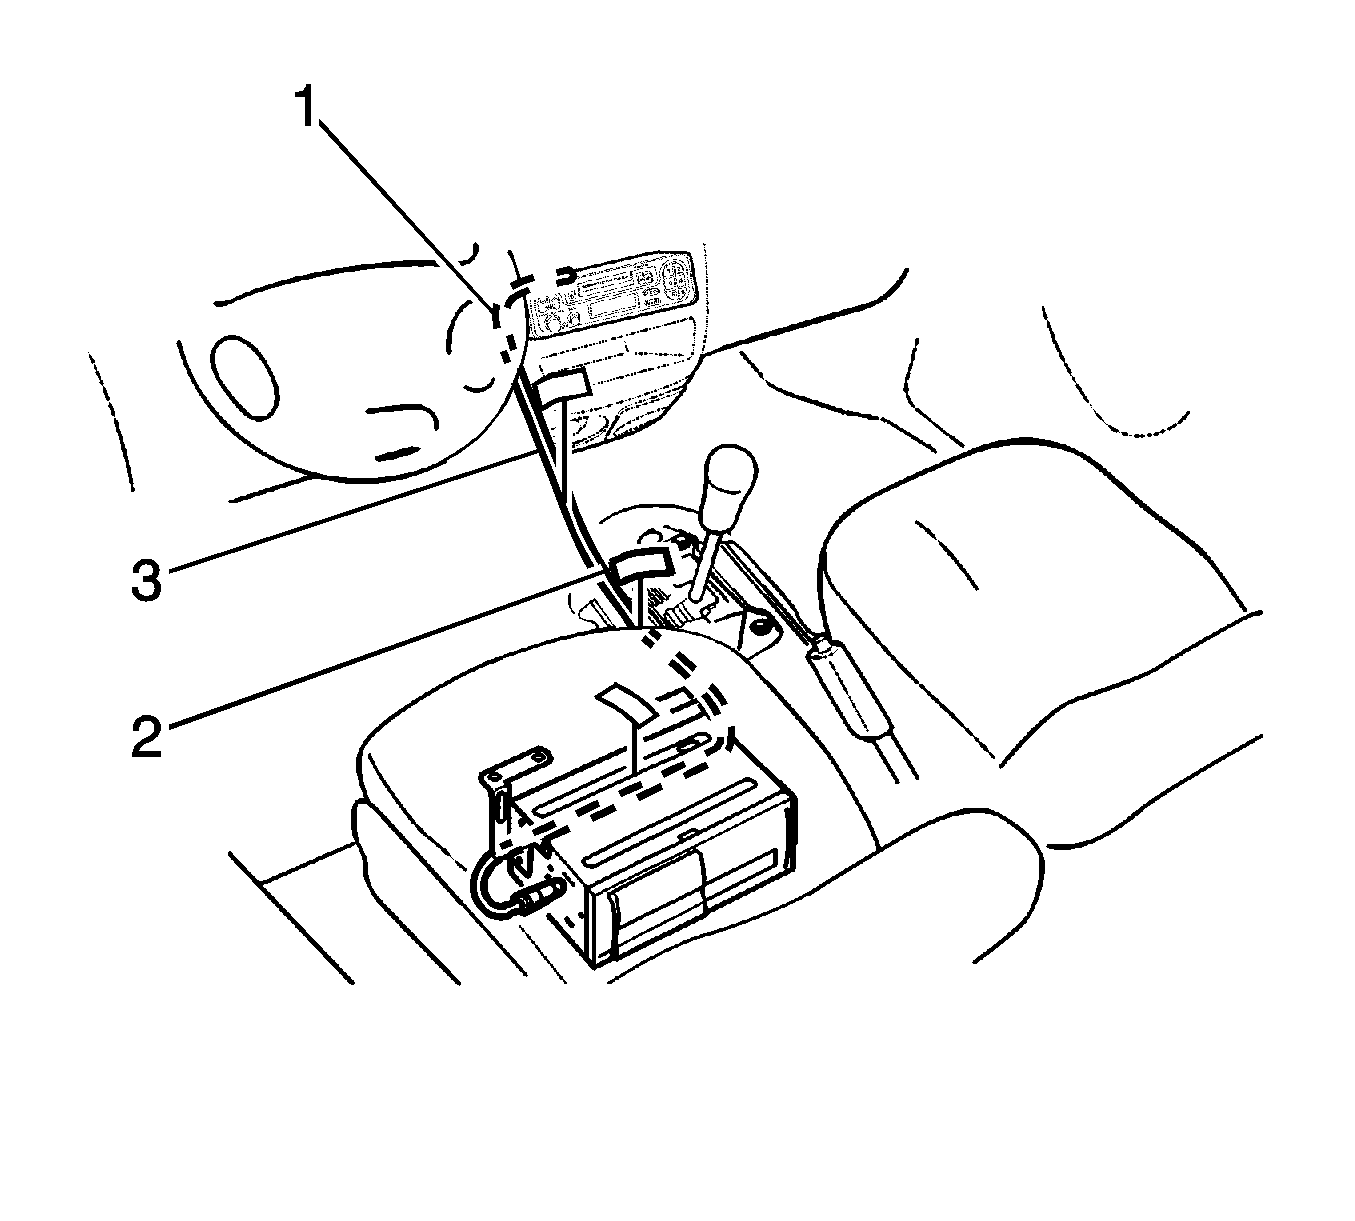
- Remove the sponge pads retaining the CD changer cable (2).
- Remove the clip retaining tie-bar (1).
- Remove the clip retaining instrument panel wiring harness (3).
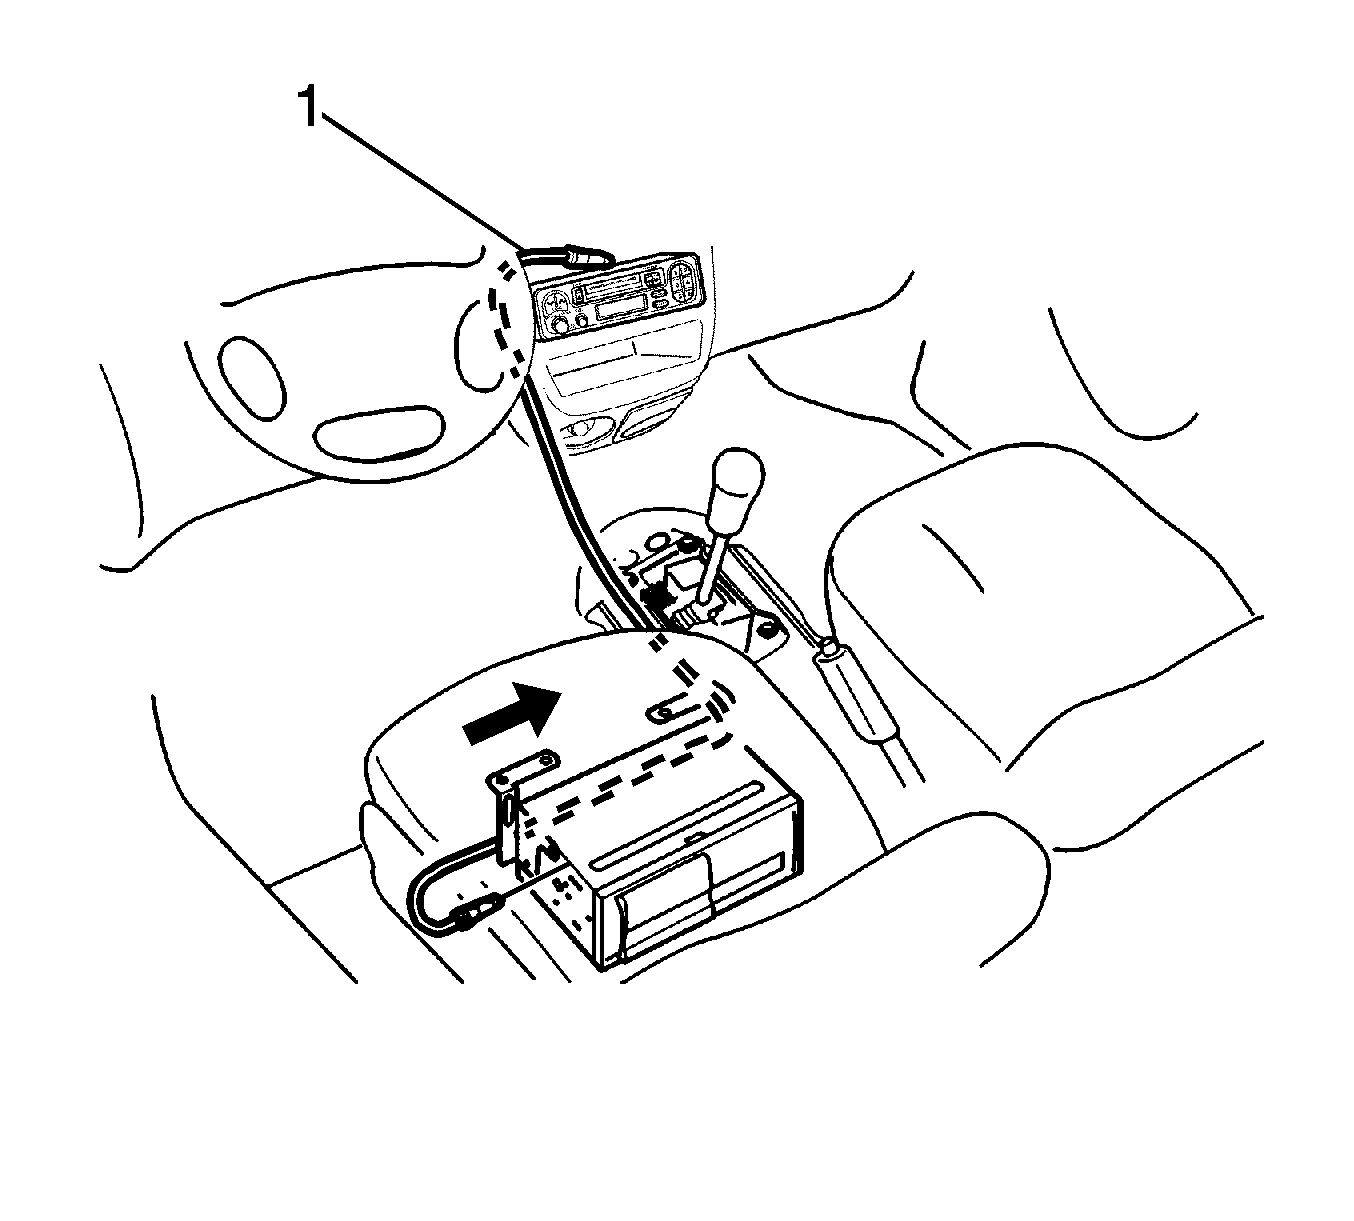
- Remove the CD changer cable (1).
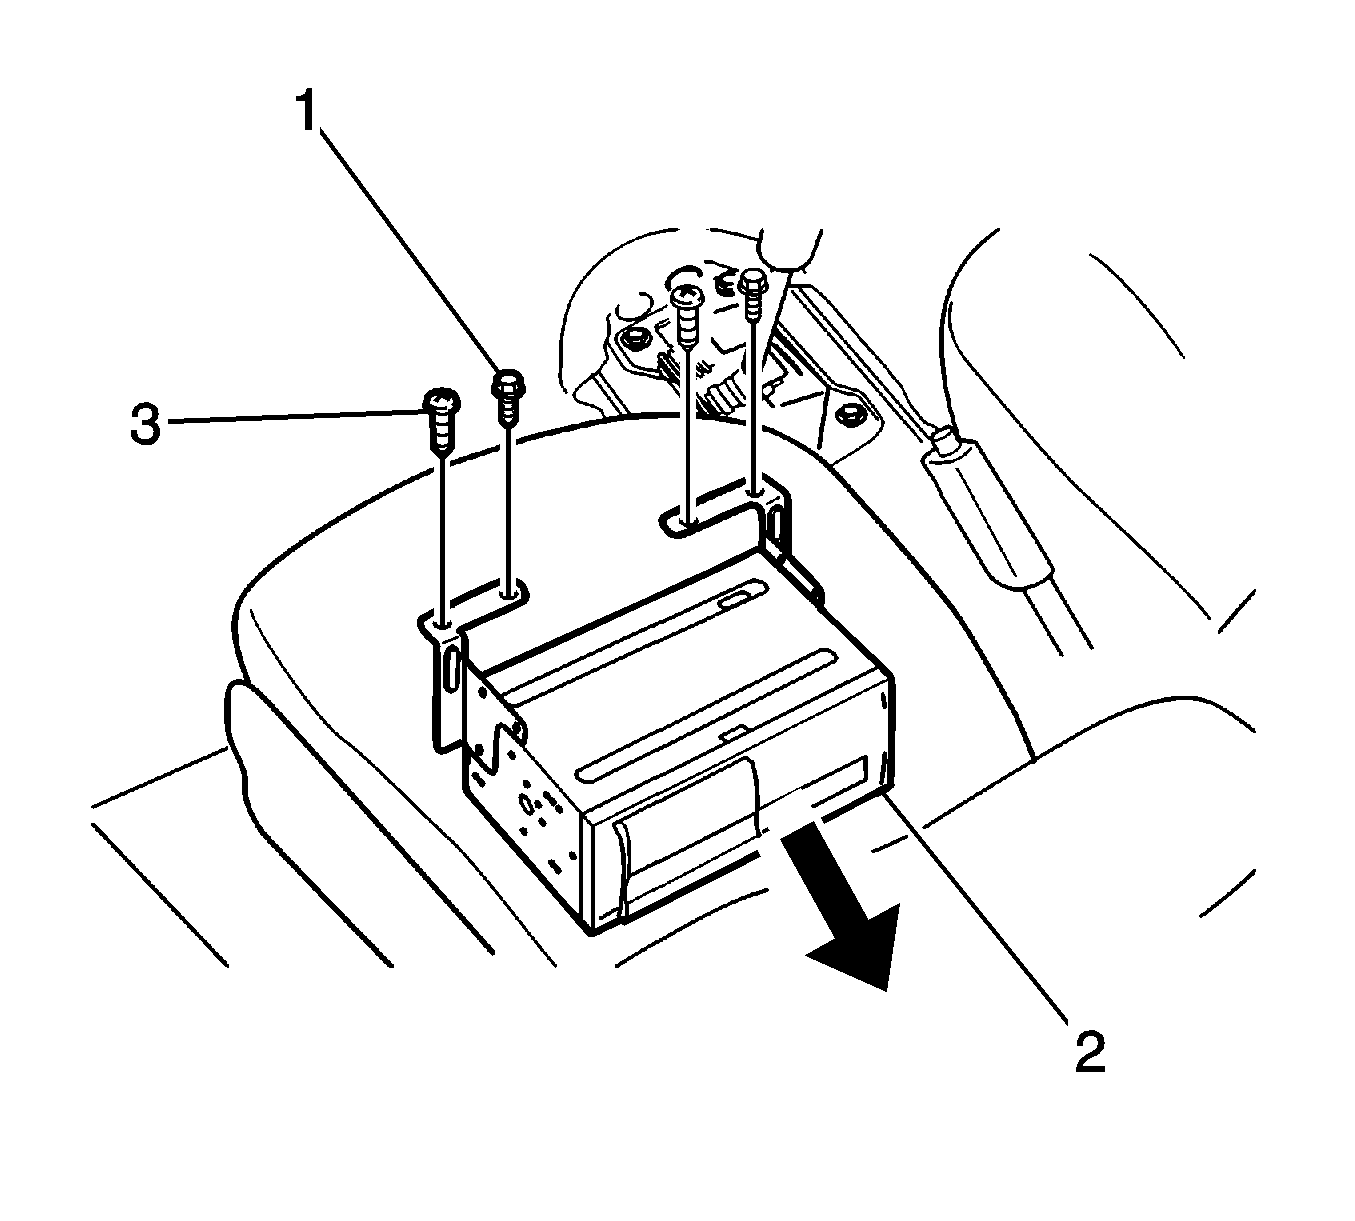
- Remove the CD changer bracket mounting bolts (1).
- Remove the CD changer bracket mounting screws (3).
- Remove the CD changer assembly (2).
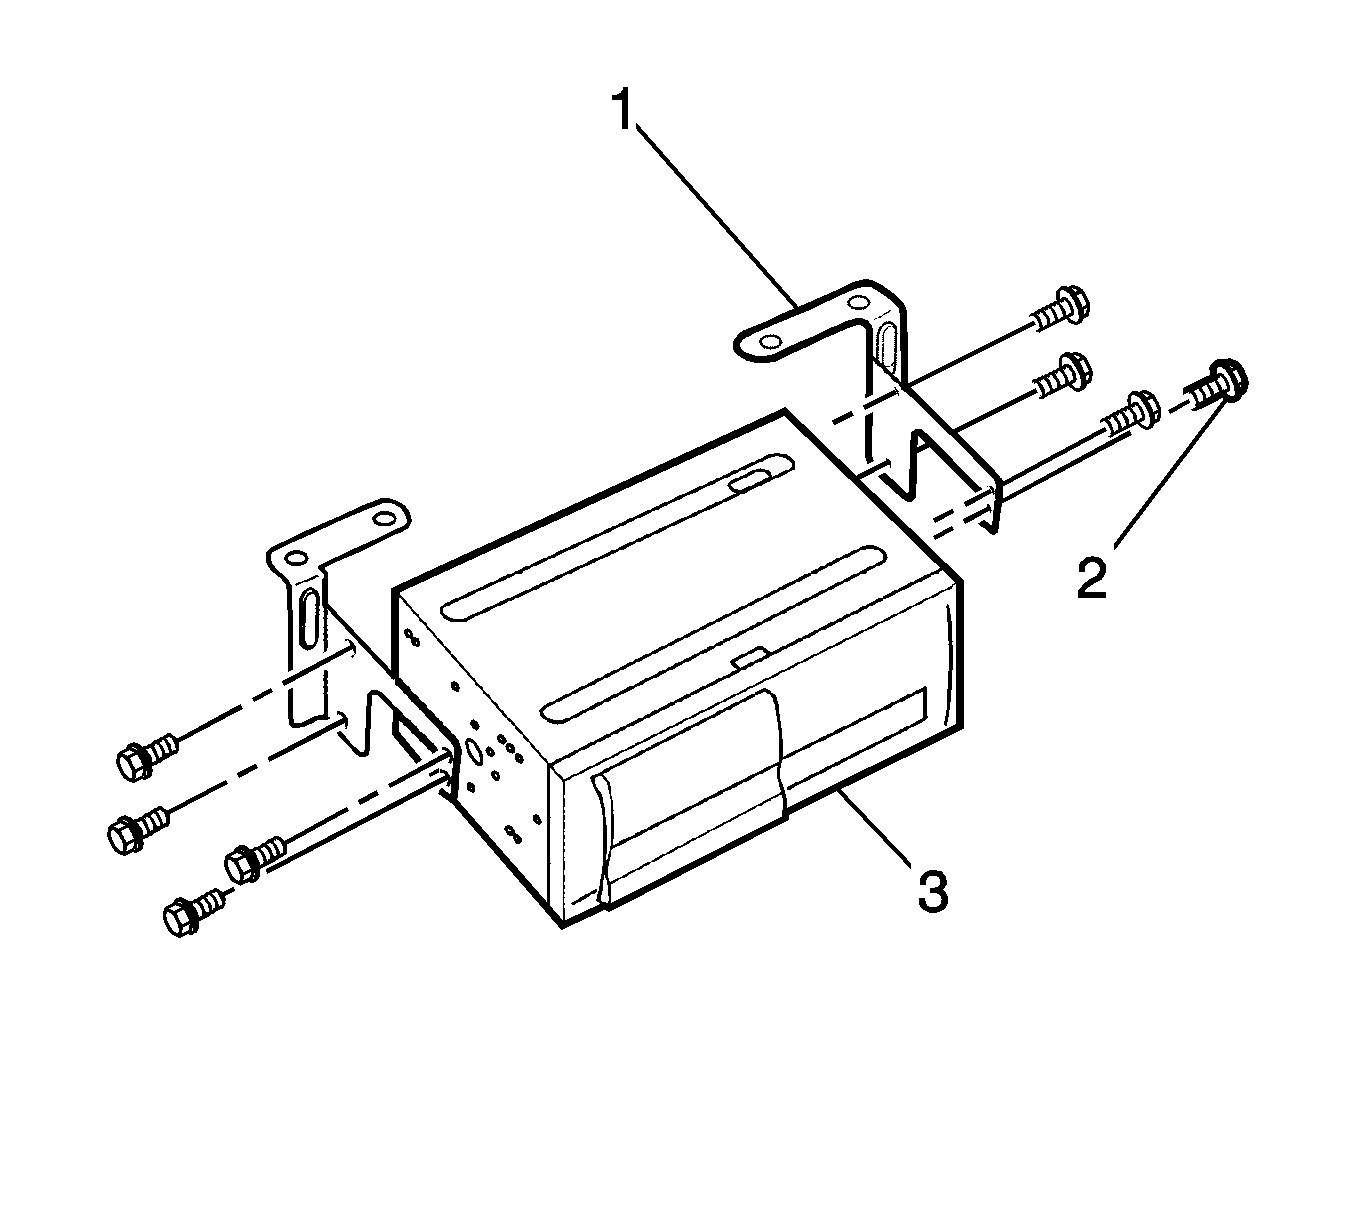
- Remove the bolts from the CD changer bracket (2).
- Remove the CD changer bracket (1).
- Remove the CD changer (3).
Warning: Refer to Battery Disconnect Warning in the Preface section.

Installation Procedure
- Install the CD changer bracket to the CD changer with the bolts.
- Mount the CD changer assembly under the driver seat with the bolts and the screws.
- Arrange the CD changer cable with the sponge pads and the clip.
- Connect the CD changer electrical connectors.
- Install the front floor console. Refer to Front Floor Console Replacement.
- Install the audio system to the instrument panel. Refer to Radio Replacement.
- Connect the negative battery cable.
