For 1990-2009 cars only
Removal Procedure
- Disconnect the negative battery cable.
- Remove the evaporator case assembly from the vehicle.
- Drain the coolant from the vehicle. Refer to Cooling System Draining and Filling in Engine cooling, in the 1999 C/K Service manual.
- Remove the heater hoses from the cowl. Refer to Heater Hoses Replacement .
- Rotate the instrument panel rearward. Refer to Instrument Panel Carrier Replacement In Instrument Panel, Gauges and Console.
- Disconnect the temperature actuator electrical connector.
- Remove the HVAC module assembly bolts from both sides of the cowl.

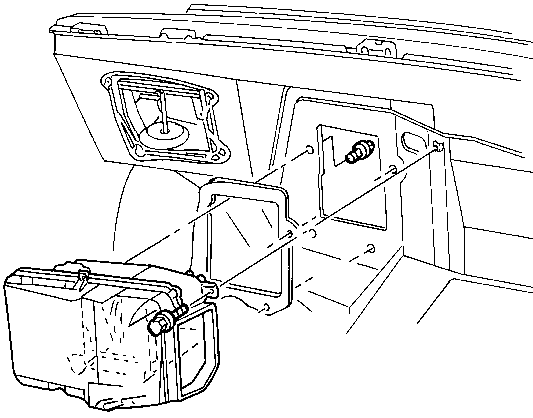
Remove the HVAC module assembly from the vehicle.
Installation Procedure
- Install the HVAC module assembly into the vehicle.
- Install the HVAC module assembly bolts to both sides of the cowl.
- Connect the temperature actuator electrical connector.
- Roll the instrument panel forward. Refer to Instrument Panel Carrier Replacement In Instrument Panel, Gauges and Console.
- Install the evaporator case assembly into the vehicle.
- Connect the heater hoses to the cowl. Refer to Heater Hoses Replacement .
- Service the cooling system. Refer to Cooling System Draining and Filling in Engine cooling, in the 1999 C/K Service manual.
- Connect the negative battery cable.
Tighten
Tighten the bolts to 4.5 N·m (40 lb in).
Tighten
Tighten the negative battery cable bolt to 17 N·m (13 lb ft).
