For 1990-2009 cars only
Fuel Pump Replacement Main
Removal Procedure
- Remove the negative battery cable.
- Relieve the fuel system pressure. Refer to Fuel Pressure Relief Procedure
- Raise the vehicle.
- Remove the fuel tank.
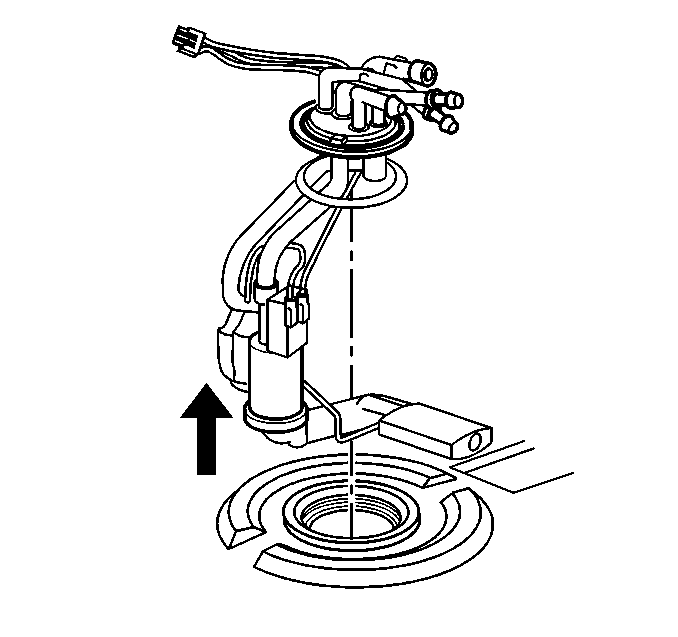
- Reomove the fuel sender unit assembly by turning the cam lock counterclockwise using tool J 39765 .
- Disconnect the fuel pump from the sender assembly.
- Inspect the fuel pump attaching hose for signs of deterioration.
- Inspect the rubber sound insulation at the bottom of the pump.
- Inspect the strainer.
| • | Refer to Fuel Tank Replacement (Suburban) for the Suburban. |
| • | Refer to Fuel Tank Replacement (Tahoe/Yukon) for the Yukon/Tahoe. |
| • | Refer to Fuel Tank Replacement (Pick-up - Side Tank) for the Pick-up. |
| • | Refer to Fuel Tank Replacement (Extended Cab - Side Tank) for the Extended Cab. |
| • | Refer to Fuel Tank Replacement (Cab and Chassis - Side Tank) for the Cab and Chassis with a side tank. |
| • | Refer to Fuel Tank Replacement (Cab and Chassis - Rear Tank) for the Cab and Chassis with a rear tank only. |
| • | Refer to Fuel Tank Replacement for the 4DR Utility. |

| • | Pull the fuel pump up into the attaching hose while pulling outward from the bottom support. |
| • | Do Not damage the rubber insulator or the strainer. |
Installation Procedure
- Connect the fuel pump assembly into the attaching hose.
- Install the fuel sender assembly into the fuel tank. Insert a new O-ring seal.
- Install the cam lock assembly. Turn the cam lock clockwise to lock it.
- Install the fuel tank.
- Add fuel removed from the tank.
- Check for fuel leaks.

| • | Refer to Fuel Tank Replacement (Suburban) for the Suburban. |
| • | Refer to Fuel Tank Replacement (Tahoe/Yukon) for the Yukon/Tahoe. |
| • | Refer to Fuel Tank Replacement (Pick-up - Side Tank) for the Pick-up. |
| • | Refer to Fuel Tank Replacement (Extended Cab - Side Tank) for the Extended Cab. |
| • | Refer to Fuel Tank Replacement (Cab and Chassis - Side Tank) for the Cab and Chassis with a side tank. |
| • | Refer to Fuel Tank Replacement (Cab and Chassis - Rear Tank) for the Cab and Chassis with a rear tank only. |
| • | Refer to Fuel Tank Replacement for the 4DR Utility. |
| 6.1. | Turn the ignition ON for 2 seconds. |
| 6.2. | Turn OFF the ignition for 10 seconds. |
| 6.3. | Again, turn the ignition switch to the ON position. |
| 6.4. | Check for fuel leaks. |
Fuel Pump Replacement Balance
Removal Procedure
Caution: Replace the O-ring seals exposed during component service in order to reduce the risk of fire and personal injury that may result from a fuel leak.
- Disconnect the negative battery cable.
- Loosen the filler cap(s) to relieve fuel tank pressure.
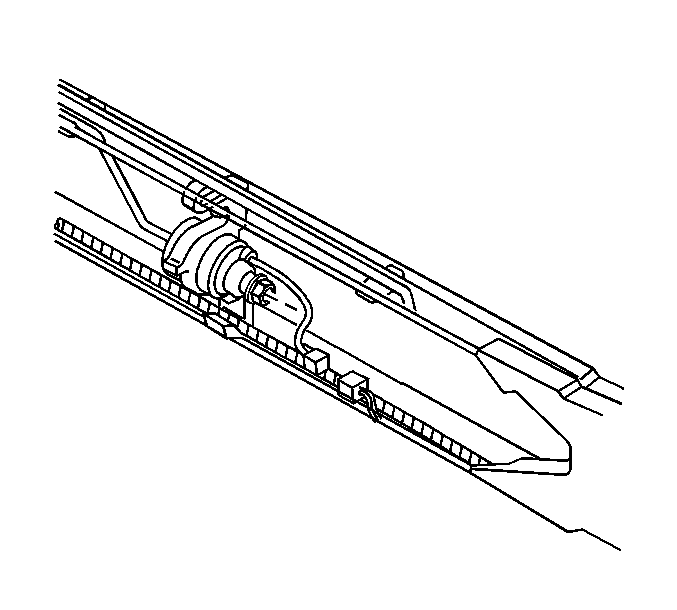
- Disconnect the electrical connector.
- Clean both fuel pipe connections and surrounding areas at the fuel pump before disconnecting to avoid possible contamination of the fuel system.
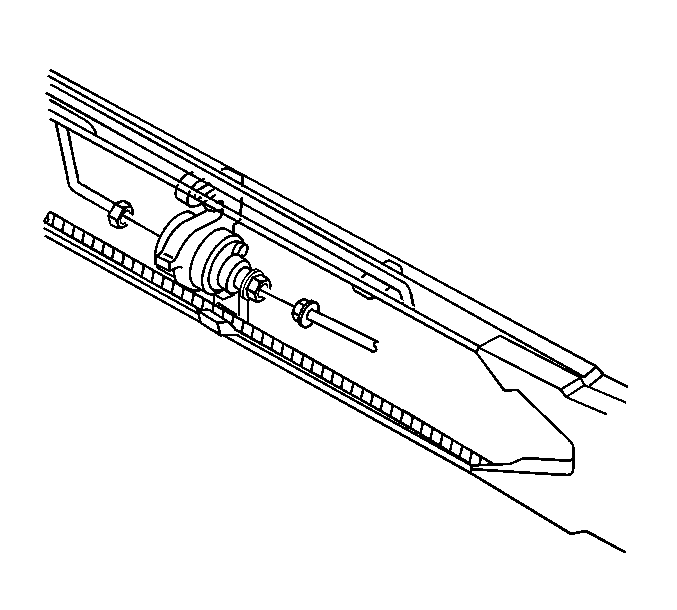
- Disconnect both fuel pipes from the pump.
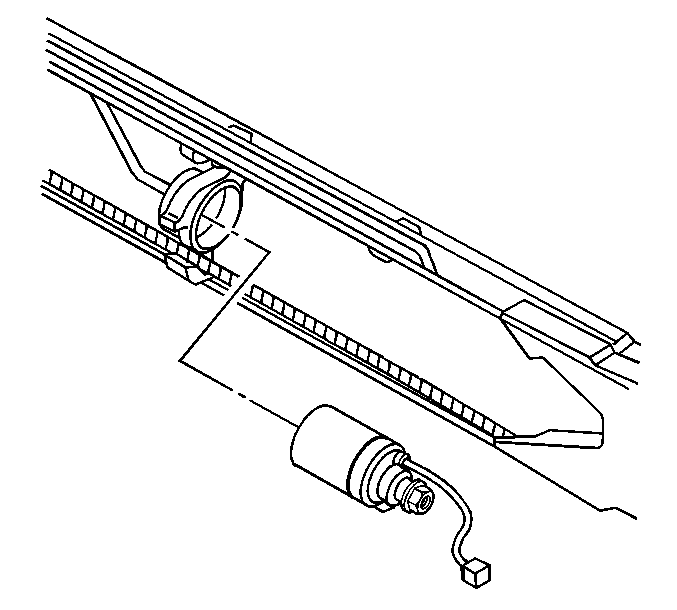
- Slide the pump out of the bracket.


Installation Procedure
- Install the new fuel pipe O-rings.
- Position the new pump in the pump bracket.
- Connect the fuel feed pipe and suction pipe to the fuel pump.
- Connect the electrical connector.
- Connect the negative battery cable.
- Check for fuel leaks.


Tighten
| • | Use a backup wrench to prevent the pump from turning. |
| • | Tighten the fittings to 30 N·m (22 lb ft). |

| 6.1. | Turn the ignition ON for 2 seconds. |
| 6.2. | Turn OFF the ignition for 10 seconds. |
| 6.3. | Again, turn the ignition switch to the ON position. |
| 6.4. | Check for fuel leaks. |
