Removal Procedure
- Remove the lower valve rocker arm covers. Refer to Valve Rocker Arm Cover Replacement - Lower Left Side or Valve Rocker Arm Cover Replacement - Lower Right Side .
- Loosen the valve clearance lock nuts on each rocker arm.
- Loosen the valve clearance adjusting screw on each rocker arm to relieve tension on the valve train.
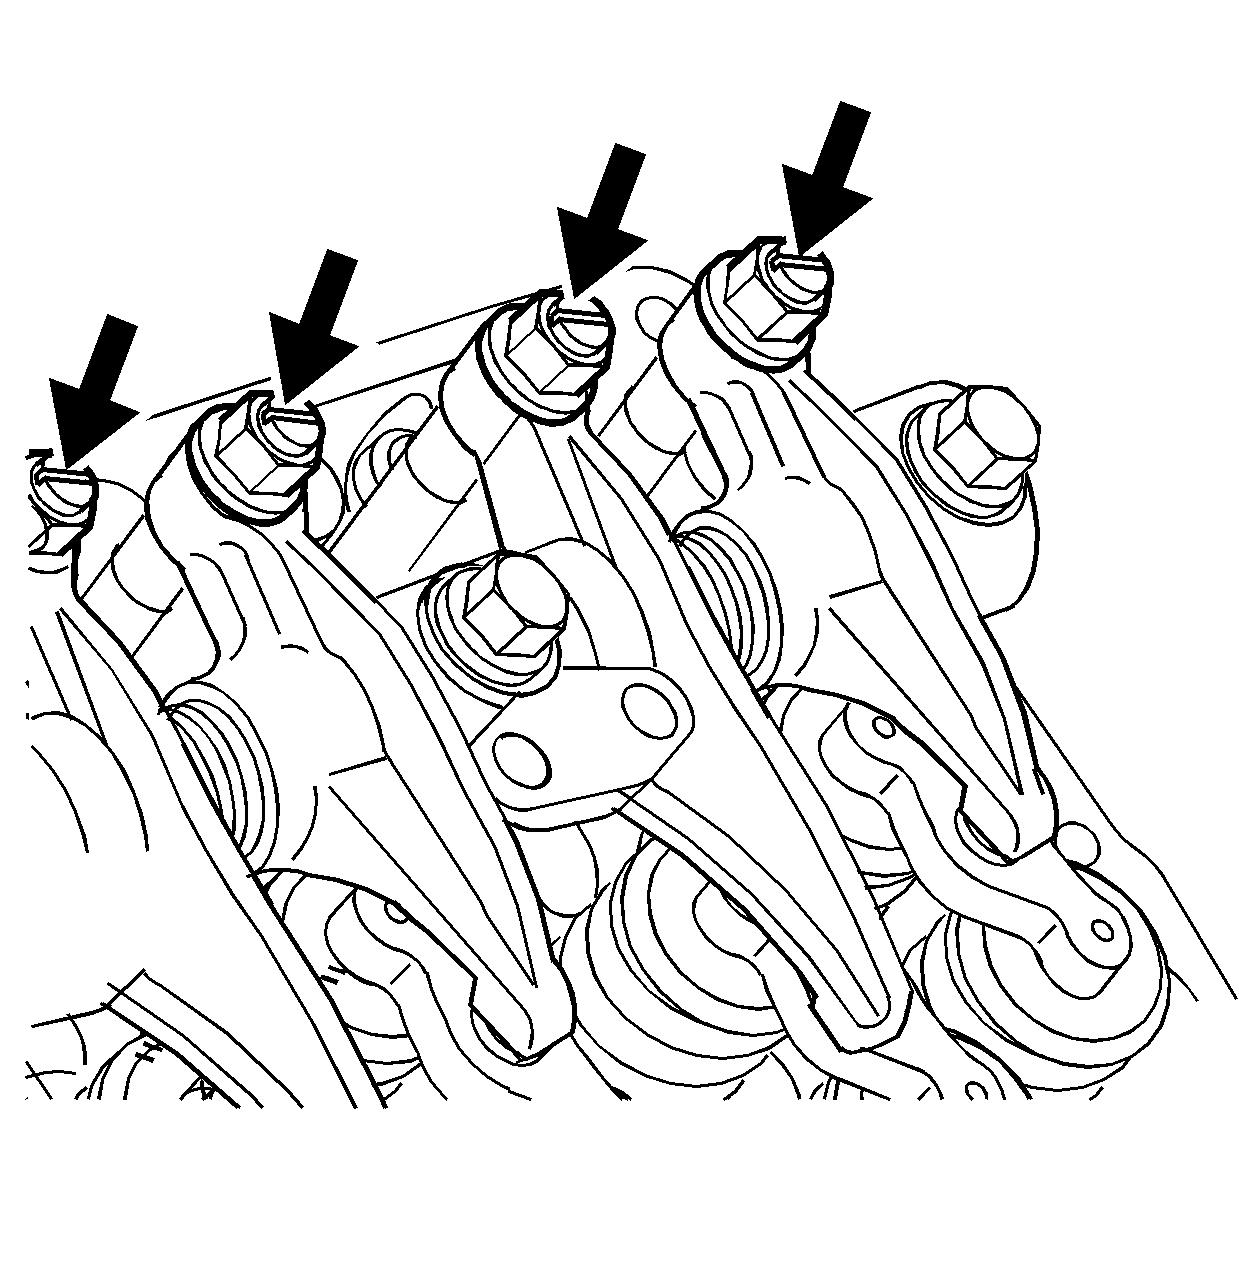
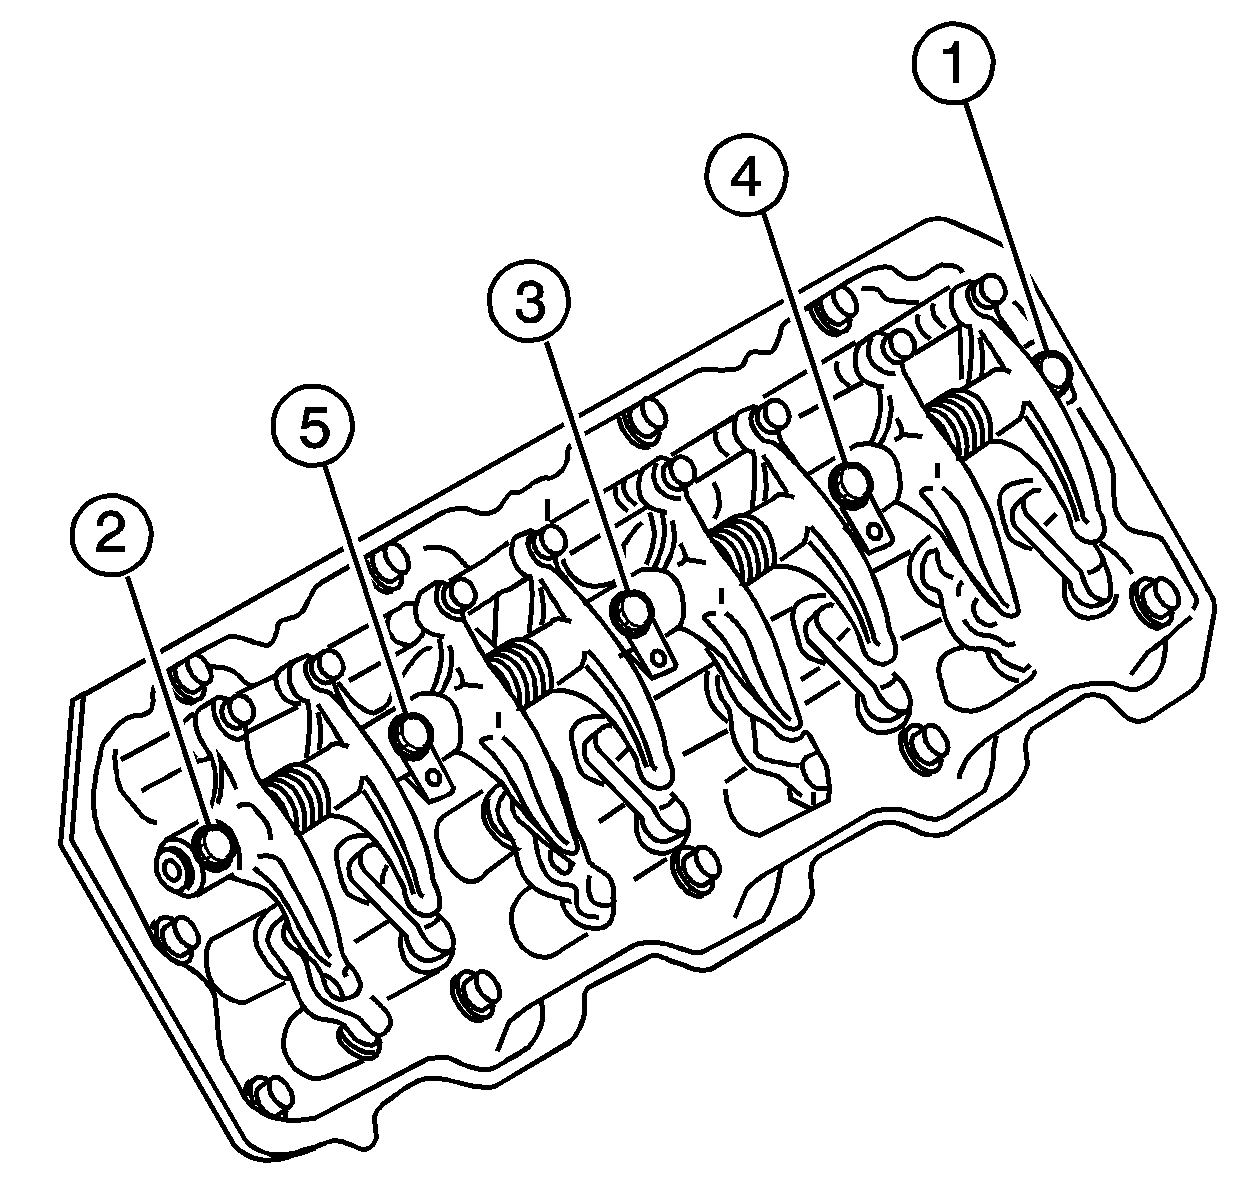
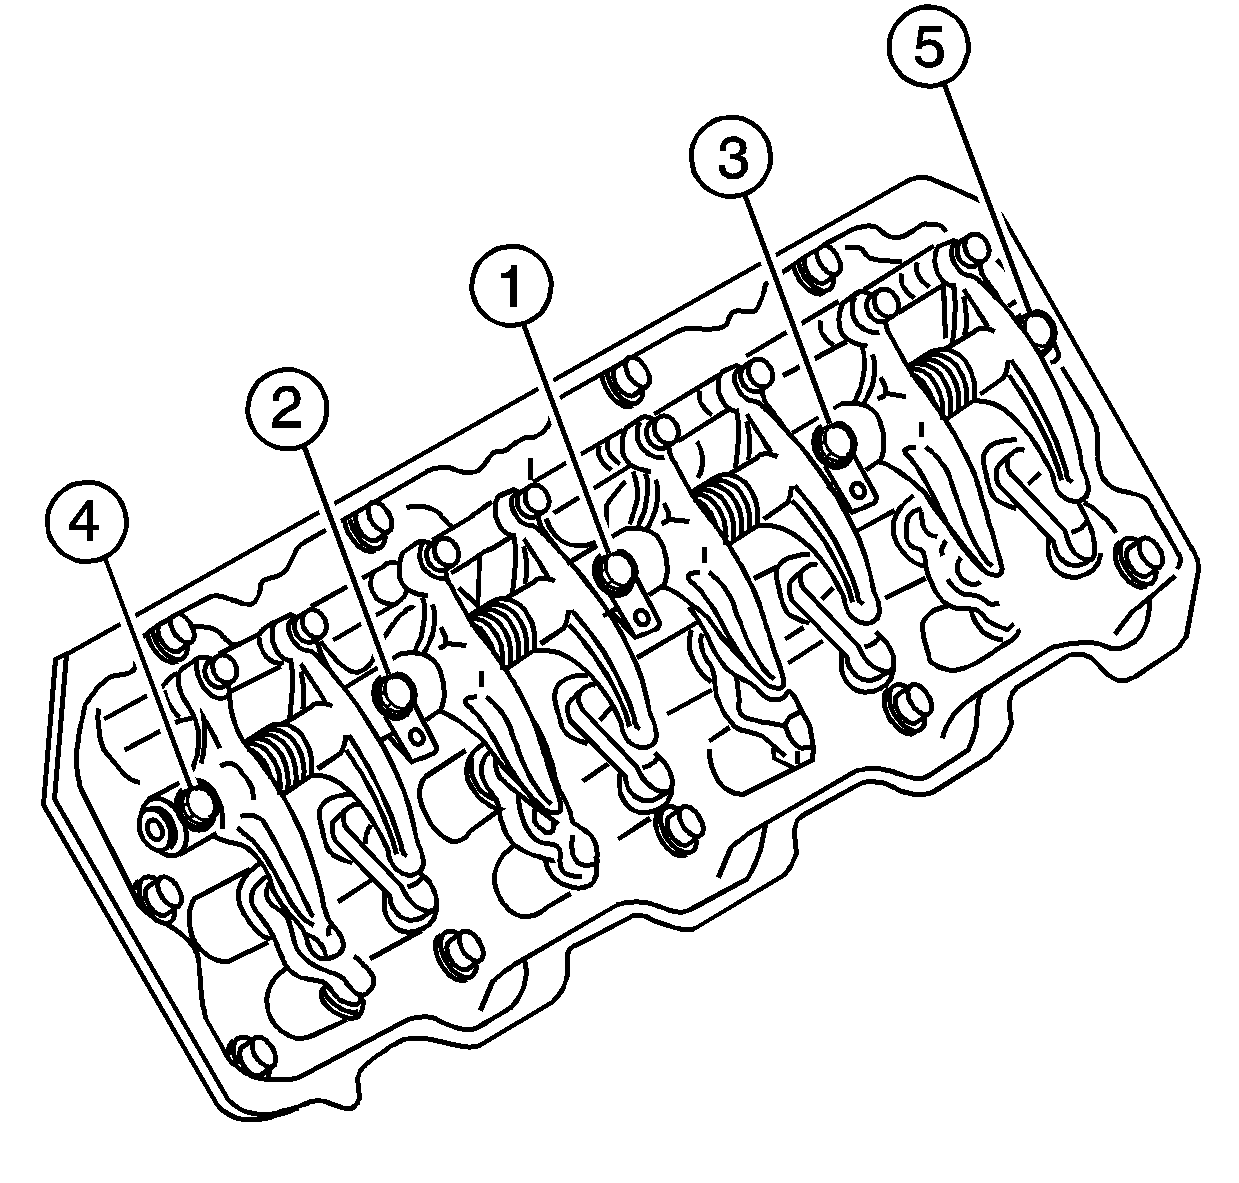
- Loosen the rocker arm shaft assembly bolts in the proper sequence. Leave the bolts in the rocker arm shaft brackets.
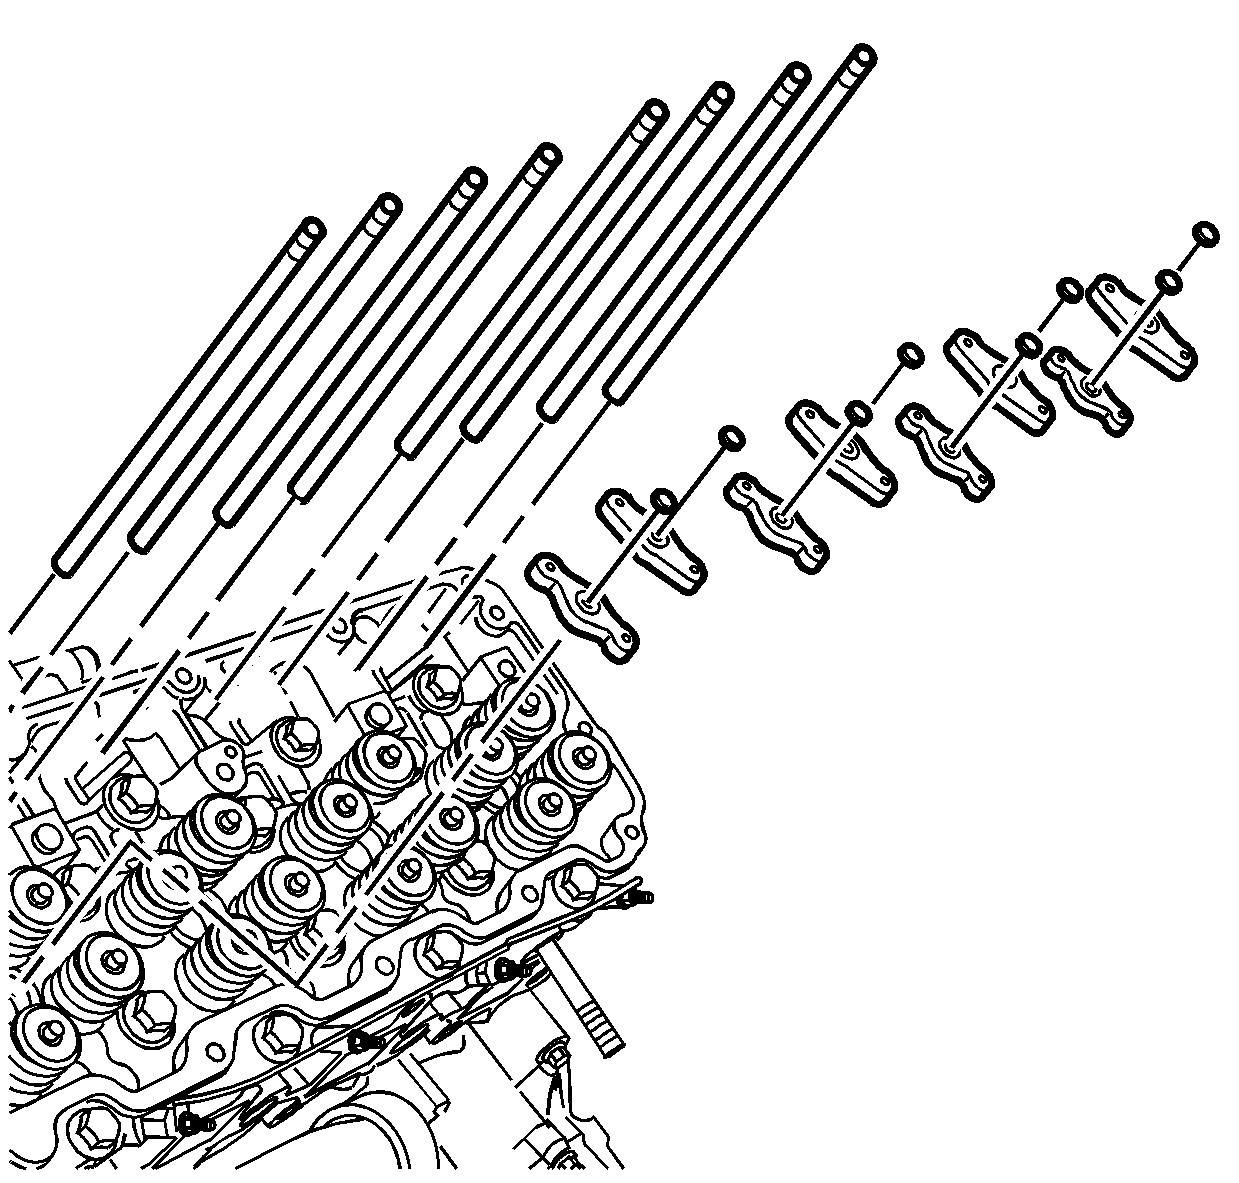
- Remove the rocker arm shaft assembly from the cylinder head.
- Remove the valve bridge pins.
- Remove the valve bridges.
- Remove the valve push rods.
- Clean all parts in a suitable cleaning solvent.
Important: The valve rocker arm bolts retain the rocker arms on the shaft. Do not remove the bolts from the rocker arm shaft brackets.
Disassembly Procedure
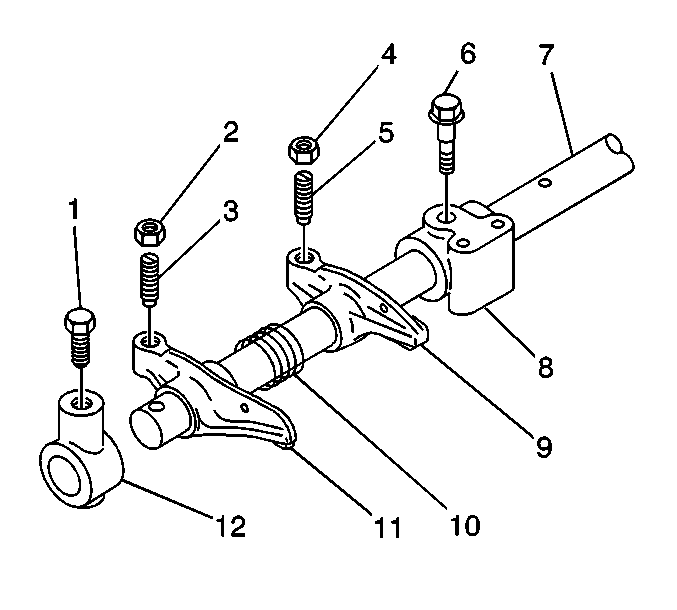
- Remove the rocker arm shaft bracket bolts (1).
- Remove the bracket (12), rocker arm exhaust (11) and spring (10).
- Remove the remaining rocker arms, springs, and brackets.
Inspection and Repair
- Using a micrometer, measure the rocker arm shaft outside diameter at the locations of the rocker arm.
- Measure the rocker arm inside diameter.
- Replace the rocker arm if the measurement exceeds the service limit.
- Inspect the valve clearance adjusting screw for damage.
- Inspect the valve bridge and the valve bridge pin for damage.
- Replace the valve bridge or valve bridge pin if damage is found.
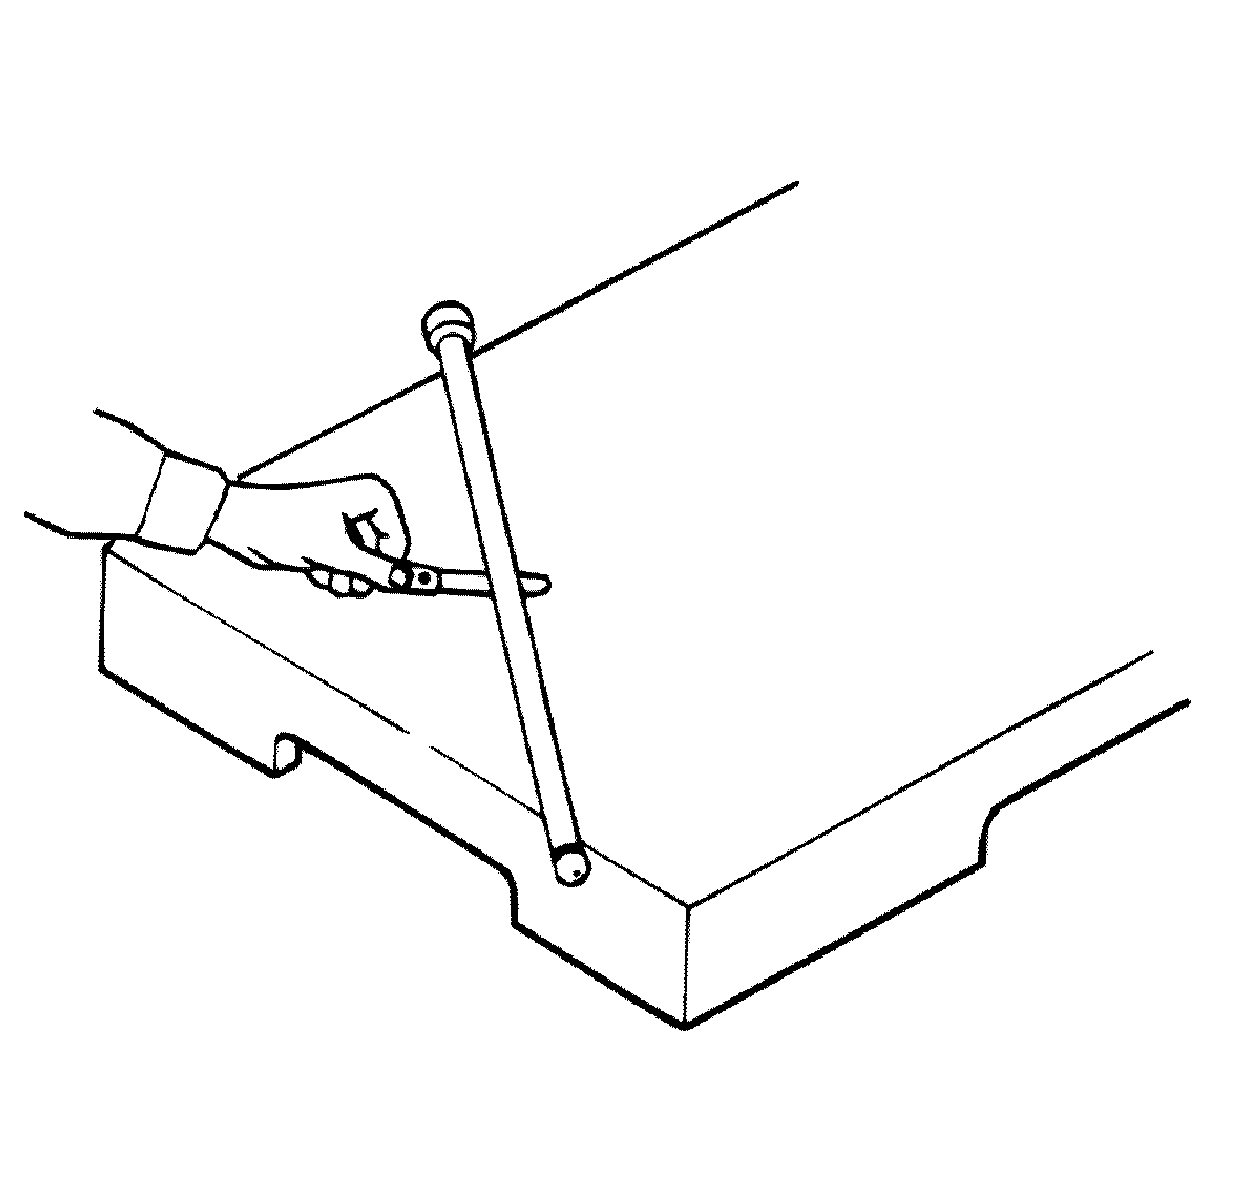
- Measure the pushrod for warpage.
- Replace the pushrod if the warpage exceeds 0.8 mm (0.031 in).
The production value is 21.979-22 mm (0.8653-0.8661 in) and the service limit is 21.85 mm (0.8602 in).
Replace the rocker arm shaft if the measurement value is less than the service limit.
The production value is 22.01-22.035 mm (0.8665-0.8675 in).
Replace the valve clearance adjusting screw if damage is found.
Assembly Procedure
- Lubricate the rocker arm shaft (7) and the inside of the rocker arms with clean engine oil.
- Install the rocker arm bracket (12) on one end of the rocker arm shaft with bolt.
- Install the rocker arm intake (9), spring (10), rocker arm exhaust (11), and the bracket with bolt. Continue in the same sequence to the last bracket.
- Push the bracket to compress the springs and then install the bolt.
Installation Procedure
- Lubricate the top of the valves, the valve bridge stem, the valve bridge, and the valve bridge pins with clean engine oil.
- Install the valve bridge pins.
- Install the valve bridges.
- Lubricate the valve lifter end of the pushrod with clean engine oil.
- Install the pushrods.
- Lubricate the following with clean engine oil during installation:
- Install the rocker arm shaft assembly to the cylinder head.
- Adjust the valve clearance. Refer to Valve Clearance Adjustment .
- Install the lower valve rocker arm cover. Refer to Valve Rocker Arm Cover Replacement - Lower Left Side or Valve Rocker Arm Cover Replacement - Lower Right Side .
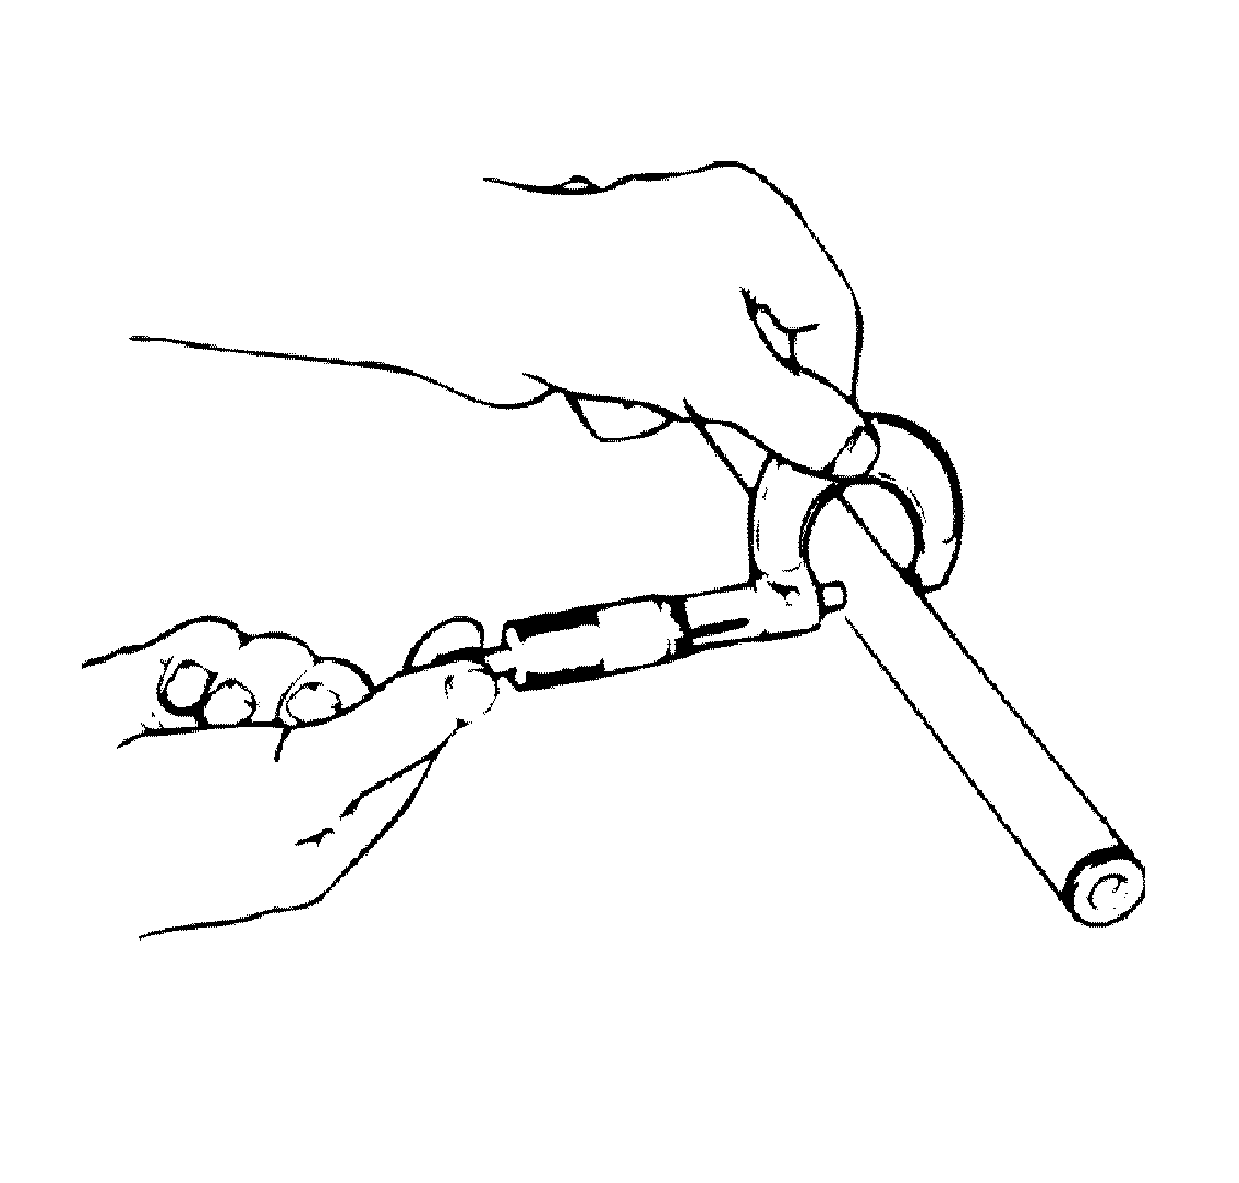
To ensure the pushrod is properly installed, gently pull up on the pushrod. You should feel resistance from the pushrod trying to lift the valve lifter.
| • | Rocker arm shaft bolt threads |
| • | Tops of the push rods |
| • | Rocker arms |
| • | Rocker arm shaft |
Notice: Use the correct fastener in the correct location. Replacement fasteners must be the correct part number for that application. Fasteners requiring replacement or fasteners requiring the use of thread locking compound or sealant are identified in the service procedure. Do not use paints, lubricants, or corrosion inhibitors on fasteners or fastener joint surfaces unless specified. These coatings affect fastener torque and joint clamping force and may damage the fastener. Use the correct tightening sequence and specifications when installing fasteners in order to avoid damage to parts and systems.
Tighten
Tighten the rocker arm shaft bolts to 41 N·m (30 lb ft)
in the proper sequence.
