For 1990-2009 cars only
Evaporative Emission Canister Replacement 1500 Series
Removal Procedure
Important: Clean all evaporative emission (EVAP) line connections and surrounding areas prior to disconnecting, in order to avoid possible EVAP system contamination.
- Raise and suitably support the vehicle. Refer to Lifting and Jacking the Vehicle in General Information.
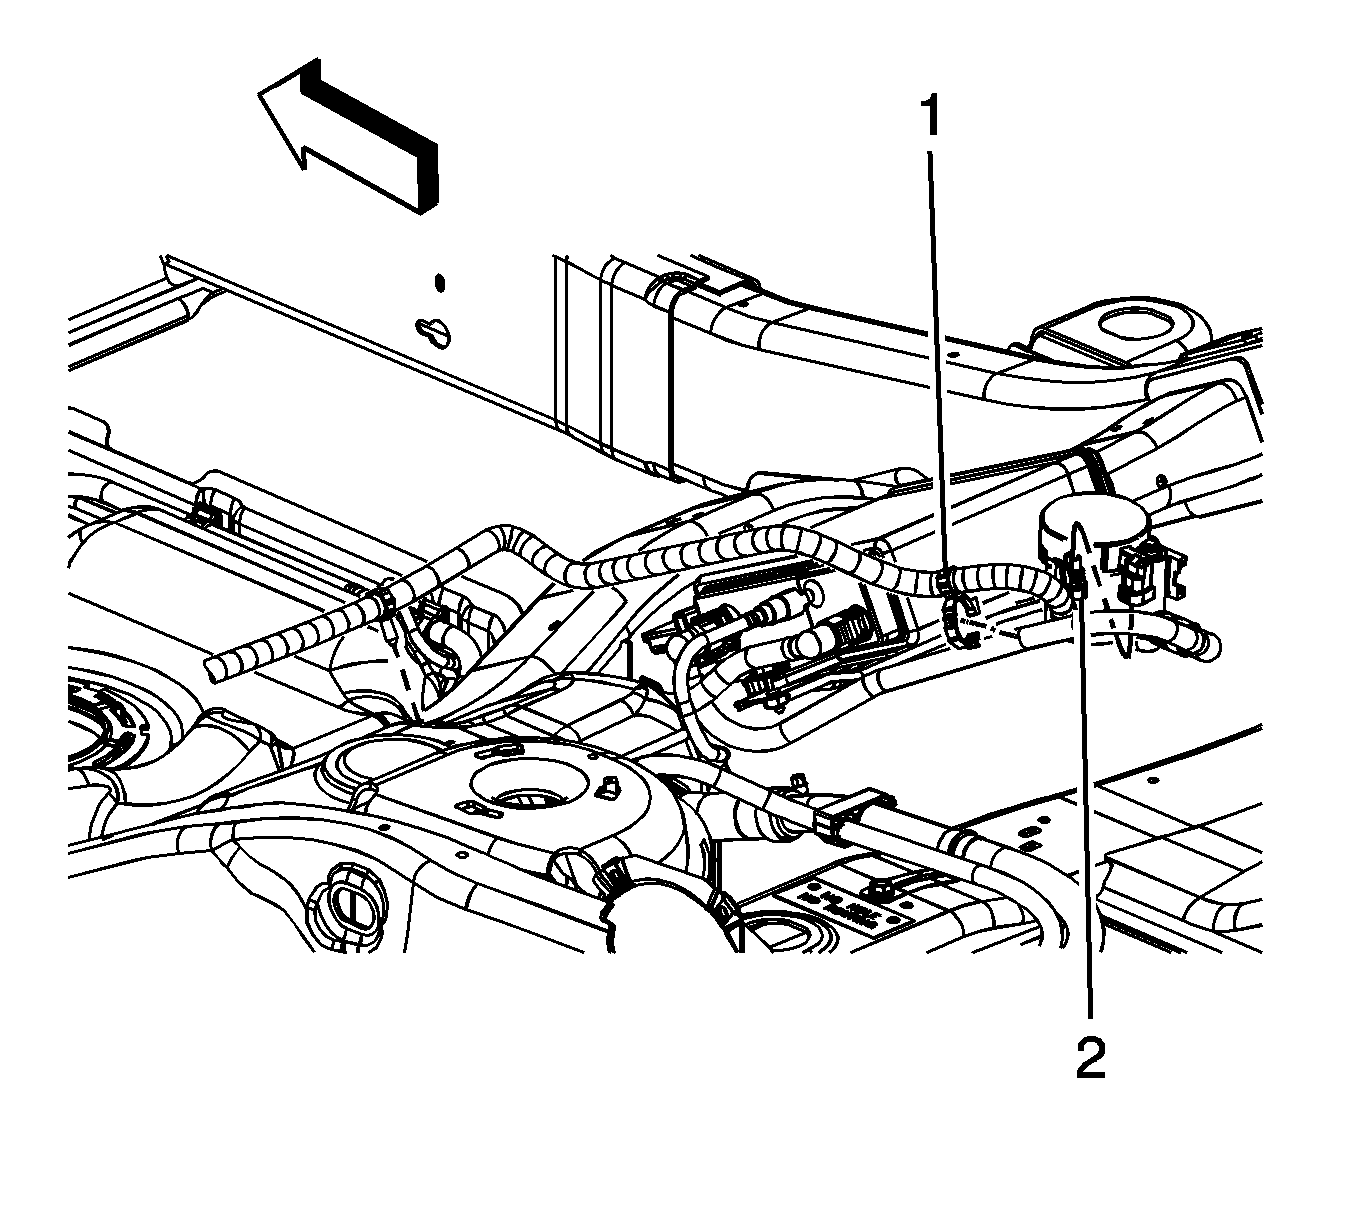
- Disconnect the EVAP canister vent solenoid (CVS) electrical connector (2).
- Remove the harness clip (1) from the CVS line.
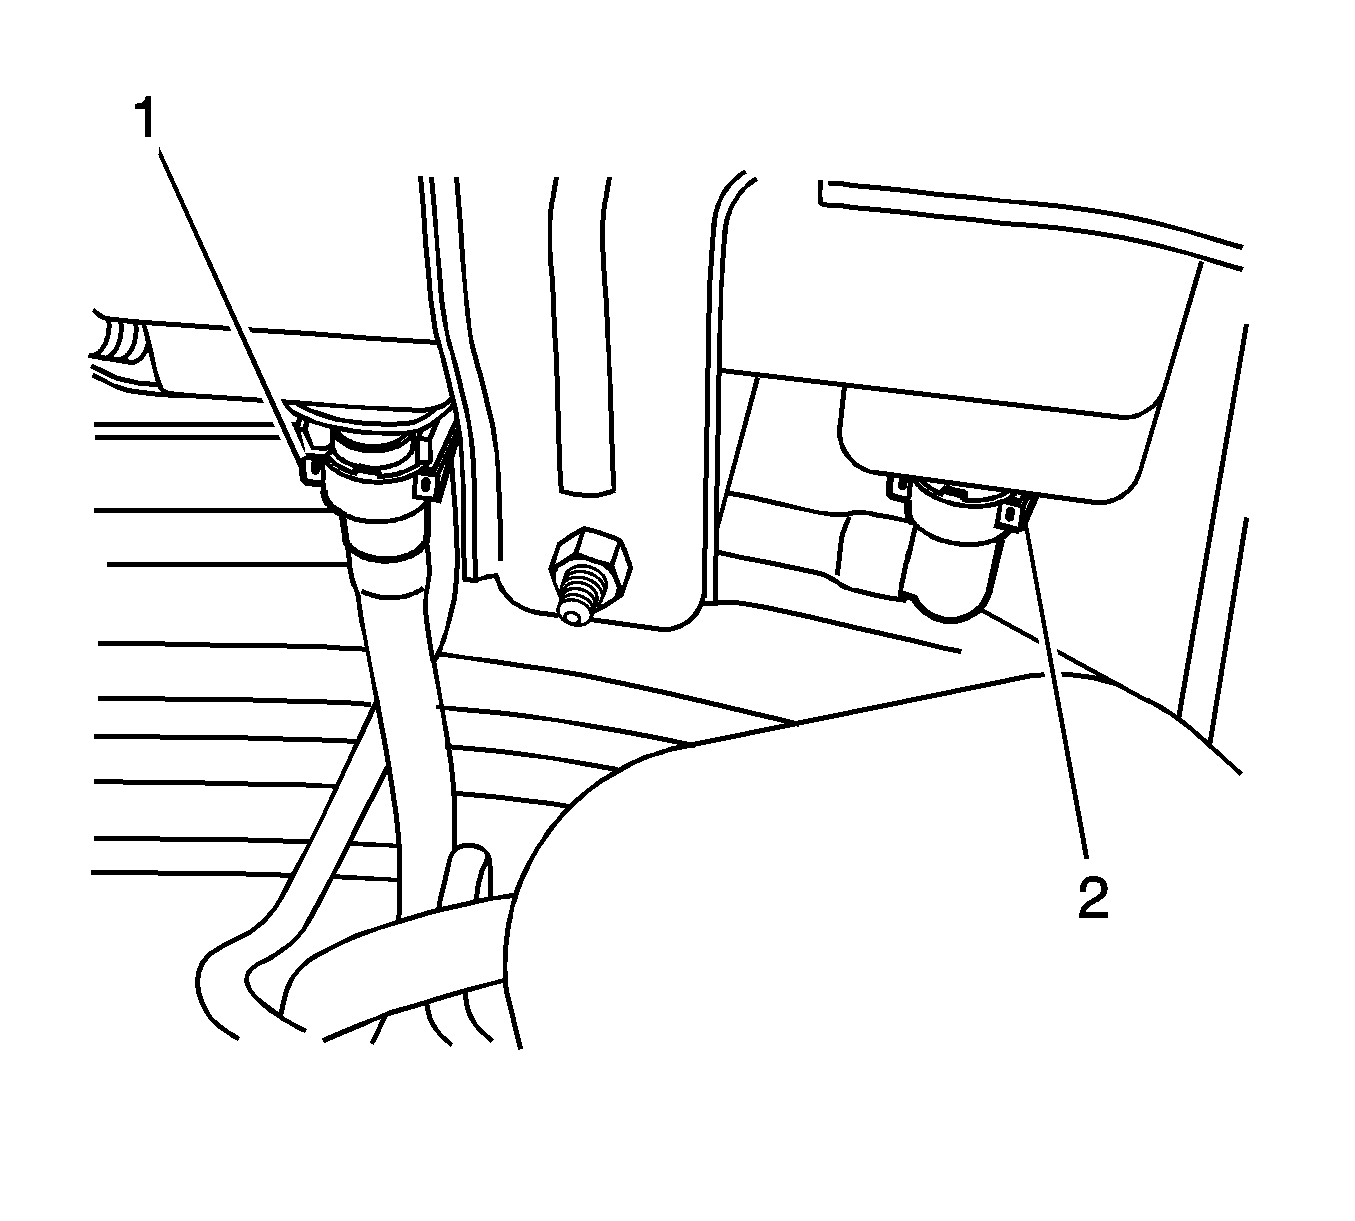
- Disconnect the EVAP quick connecting fittings (1, 2) from the canister. Refer to Plastic Collar Quick Connect Fitting Service .
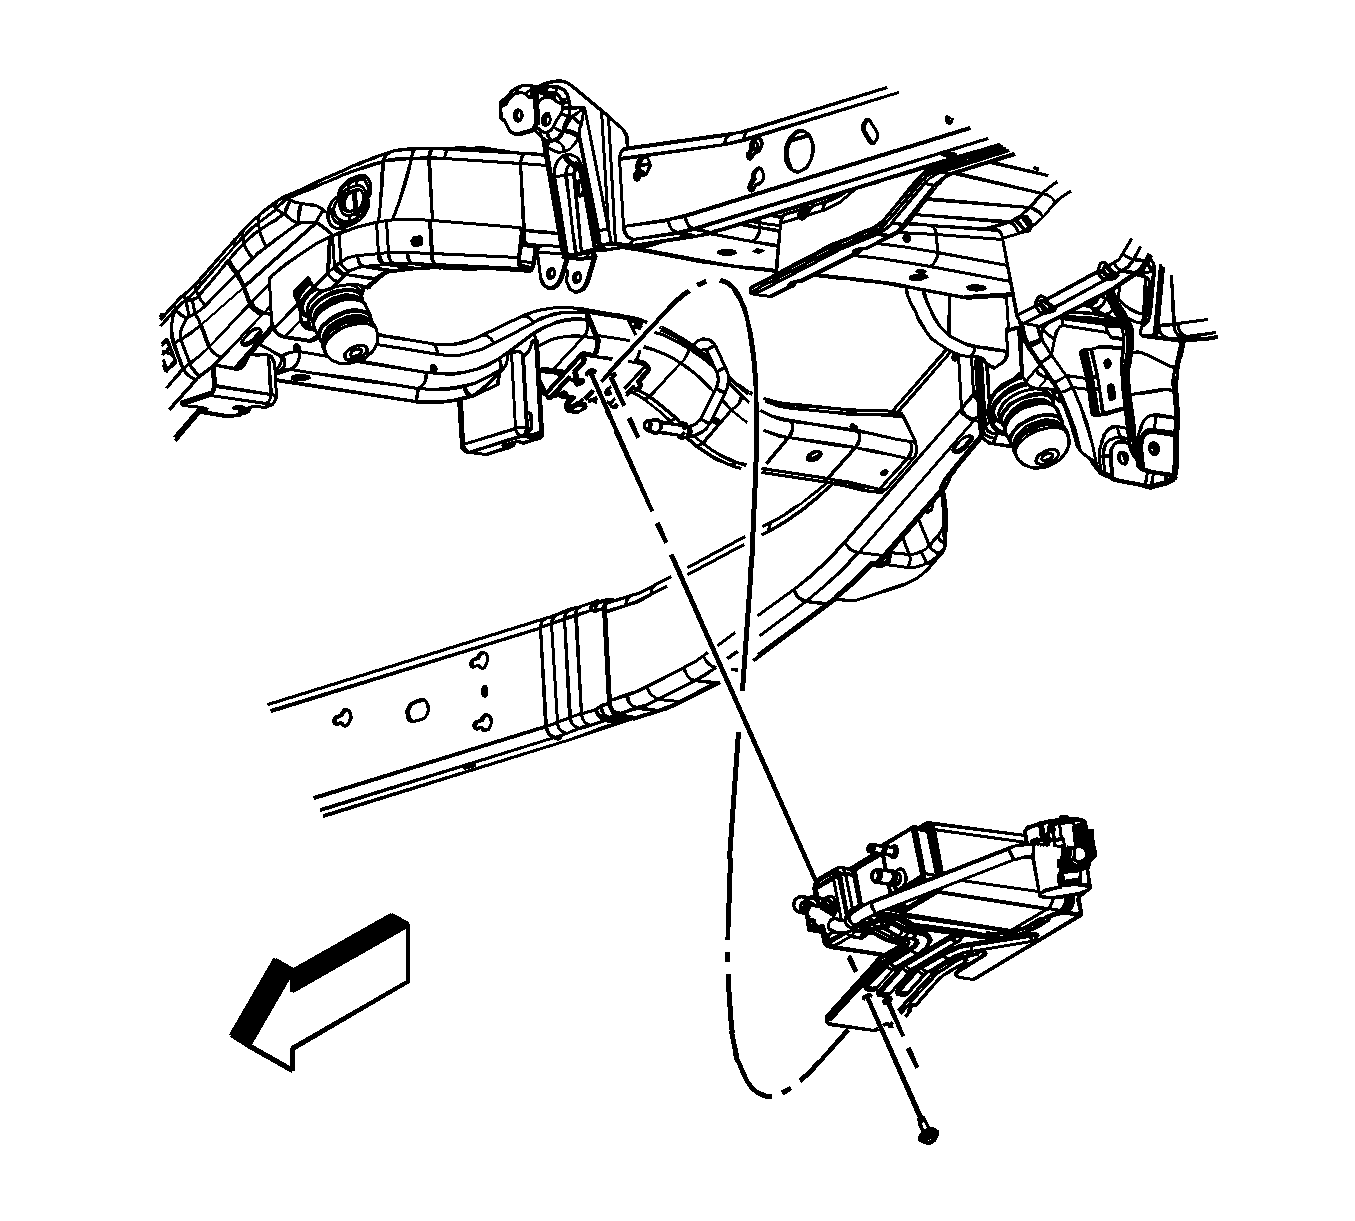
- Remove the EVAP canister bracket bolts.
- Remove the EVAP canister.
- If necessary, remove the EVAP canister to bracket bolt.
- If necessary, remove the EVAP canister from the bracket.
- If necessary, remove the CVS from the canister.
| 9.1. | Push in the CVS retainer. |
| 9.2. | Slide the CVS from the bracket. |
| 9.3. | Rotate the CVS to the vertical position. |
| 9.4. | Disconnect the CVS quick connect fitting. Refer to Plastic Collar Quick Connect Fitting Service . |
Installation Procedure
- If necessary, install the CVS to the canister.
- If necessary, install the EVAP canister to the bracket.
- If necessary, install the EVAP canister to bracket bolt.
- Install the EVAP canister.
- Install the EVAP canister bracket bolts.
- Connect the EVAP quick connecting fittings (1, 2) to the canister. Refer to Plastic Collar Quick Connect Fitting Service .
- Install the harness clip (1) to the CVS line.
- Connect the EVAP CVS electrical connector (2).
- Lower the vehicle.

| 1.1. | Connect the CVS quick connect fitting. Refer to Plastic Collar Quick Connect Fitting Service . |
| 1.2. | Rotate the CVS to the horizontal position. |
| 1.3. | Slide the CVS onto the bracket. |
| 1.4. | Pull out the CVS retainer in order for the CVS to engage. |
Notice: Refer to Fastener Notice in the Preface section.
Tighten
Tighten the bolt to 25 N·m (18 lb ft).
Tighten
Tighten the bolts to 25 N·m (18 lb ft).


Evaporative Emission Canister Replacement 2500 Series
Removal Procedure
Important: Clean all evaporative emission (EVAP) line connections and surrounding areas prior to disconnecting, in order to avoid possible EVAP system contamination.
- Remove the right side, rear bumper step pad. Refer to Rear Bumper Step Pad Replacement in Bumpers.
- Raise and suitably support the vehicle. Refer to Lifting and Jacking the Vehicle in General Information.
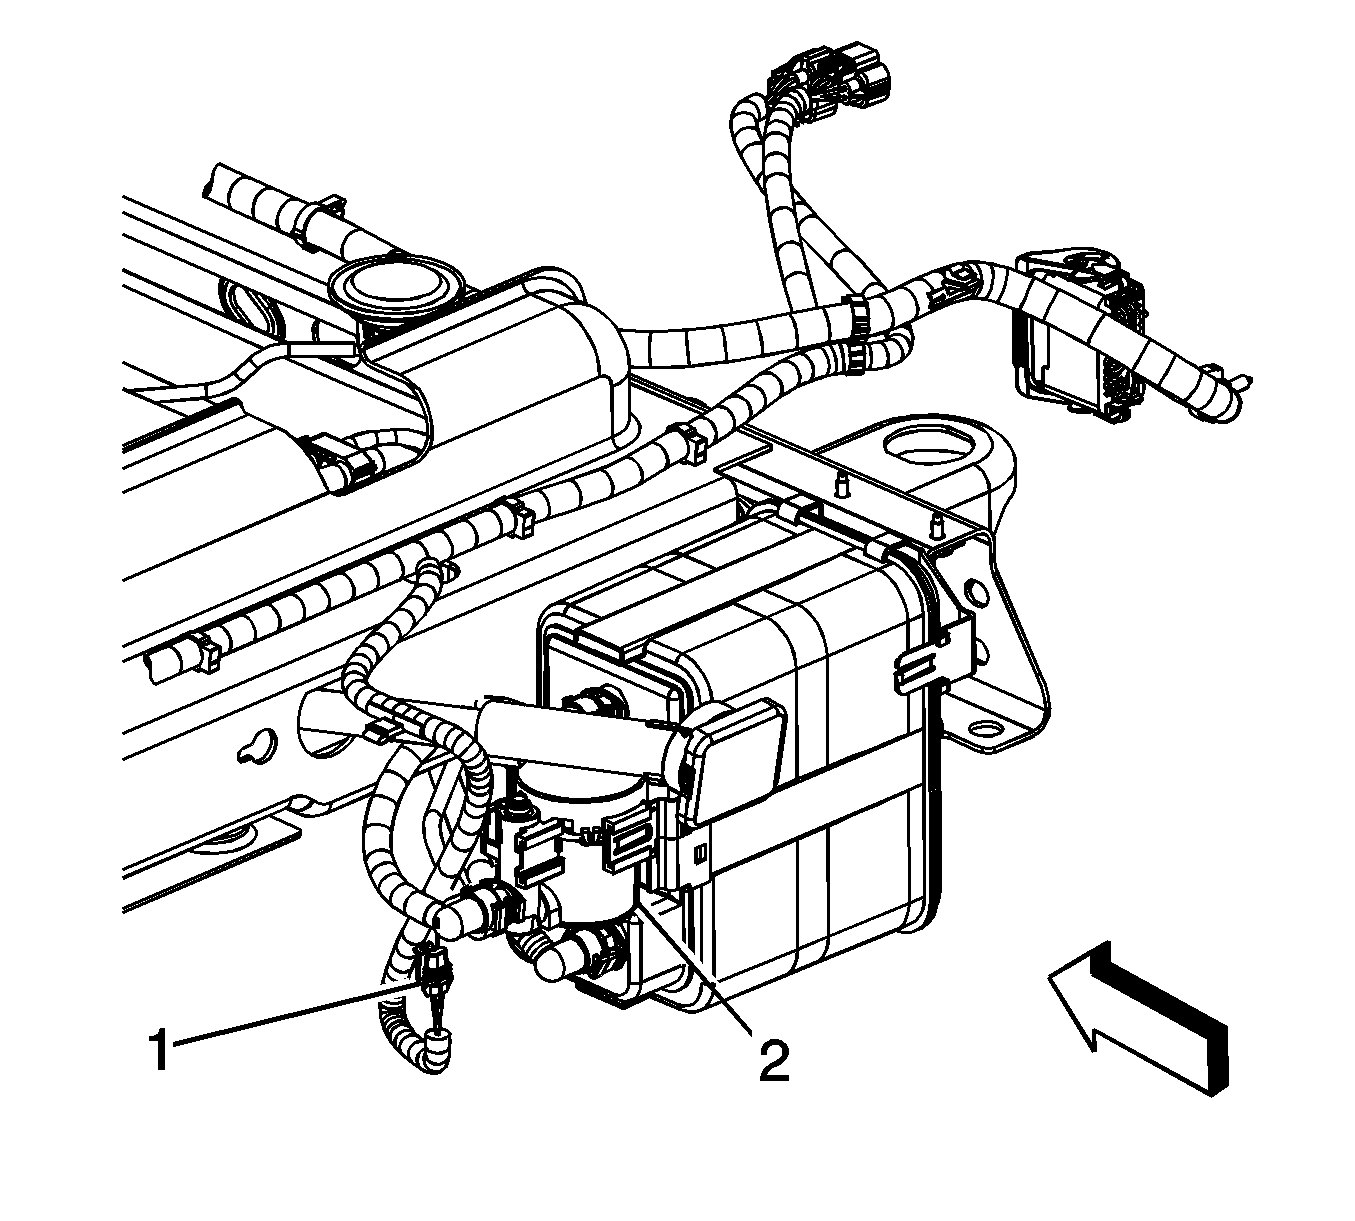
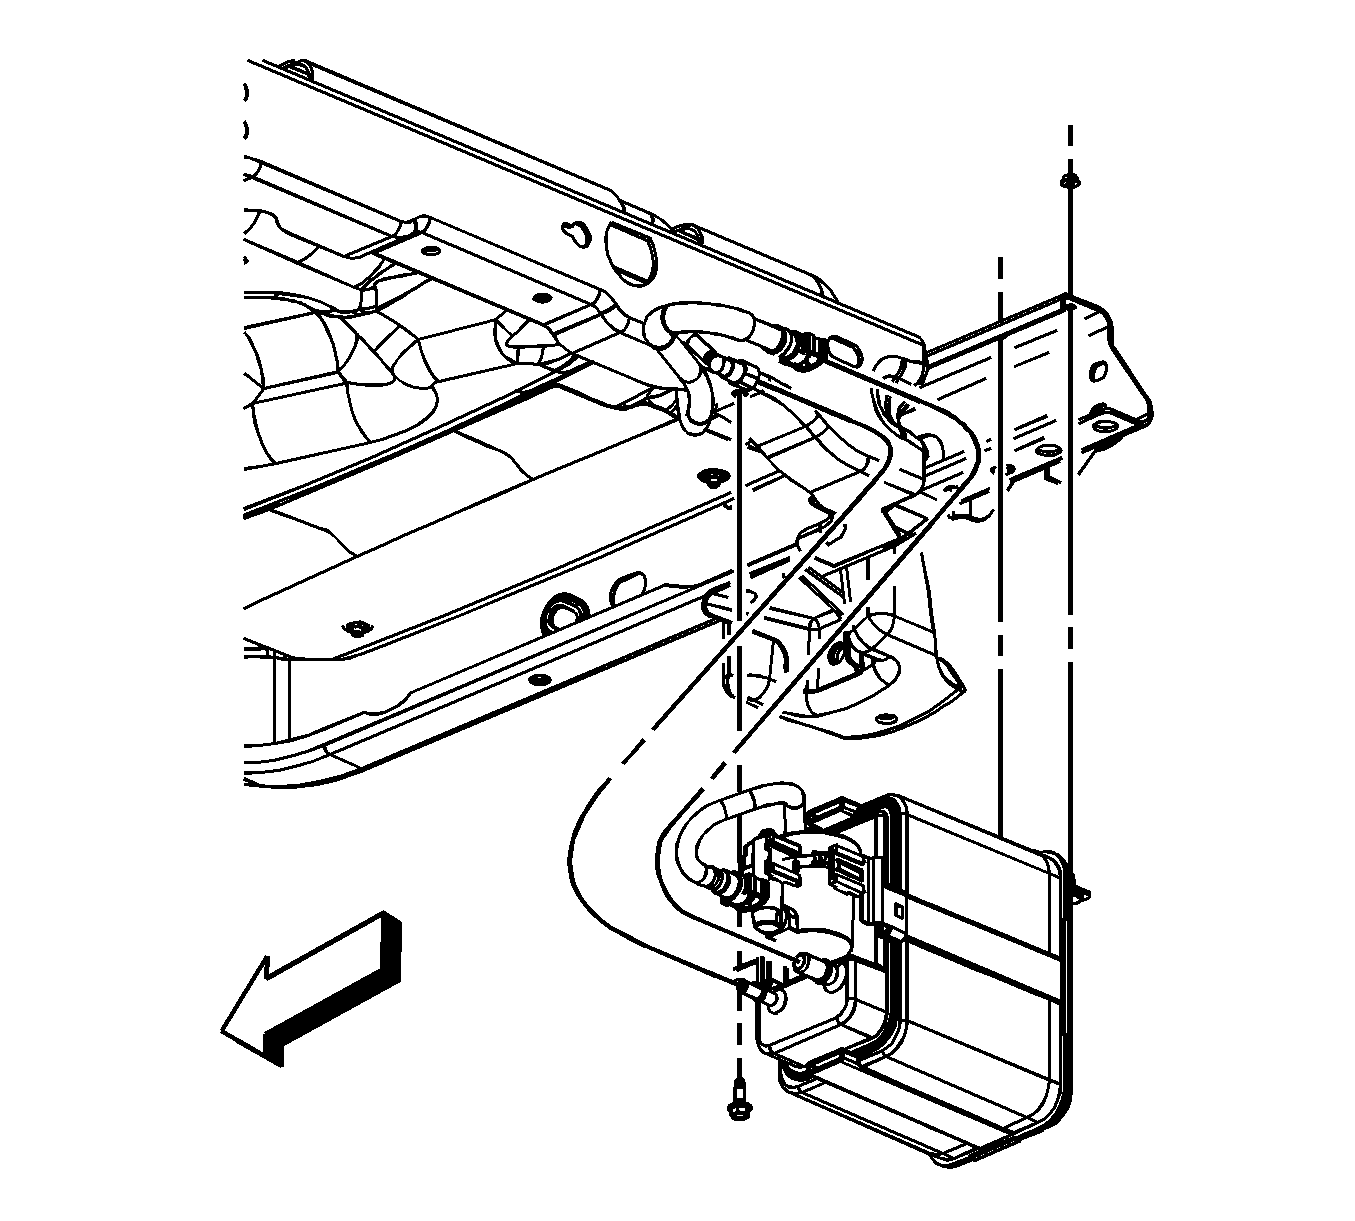
- Disconnect the EVAP canister vent solenoid (CVS) electrical connector (1).
- Disconnect the EVAP canister quick connect lines. Refer to Plastic Collar Quick Connect Fitting Service .
- Remove the EVAP canister bolt.
- Lower the vehicle half way.
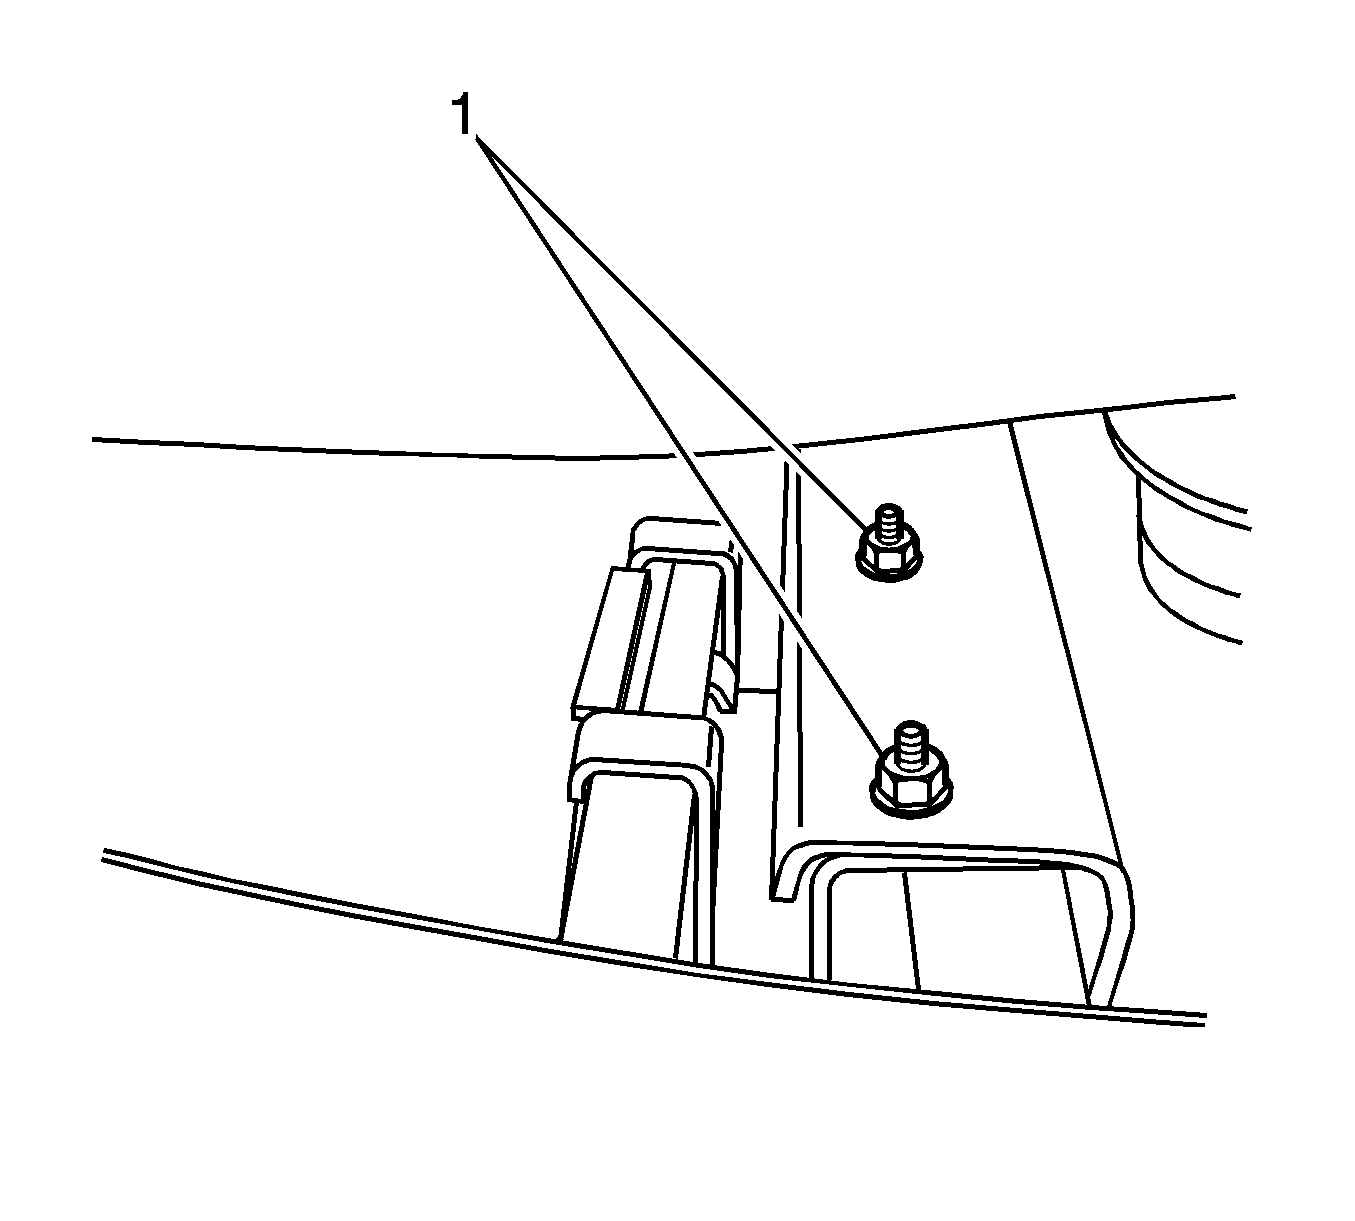
- Loosen the EVAP canister bracket nuts (1).
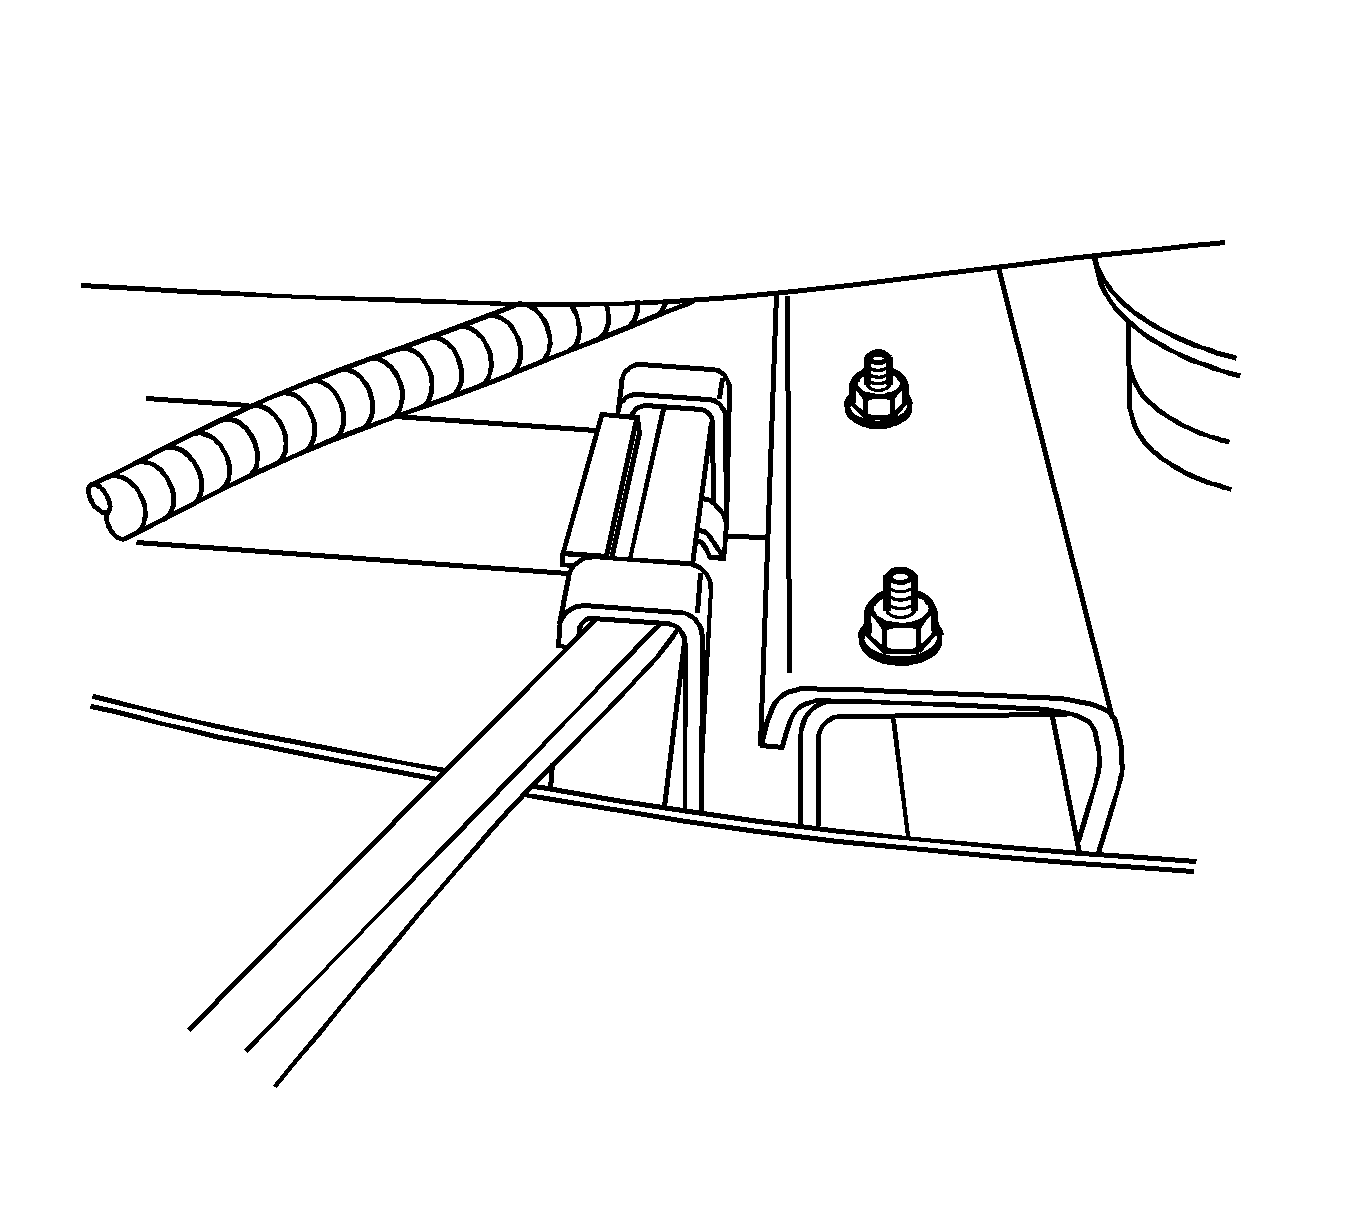
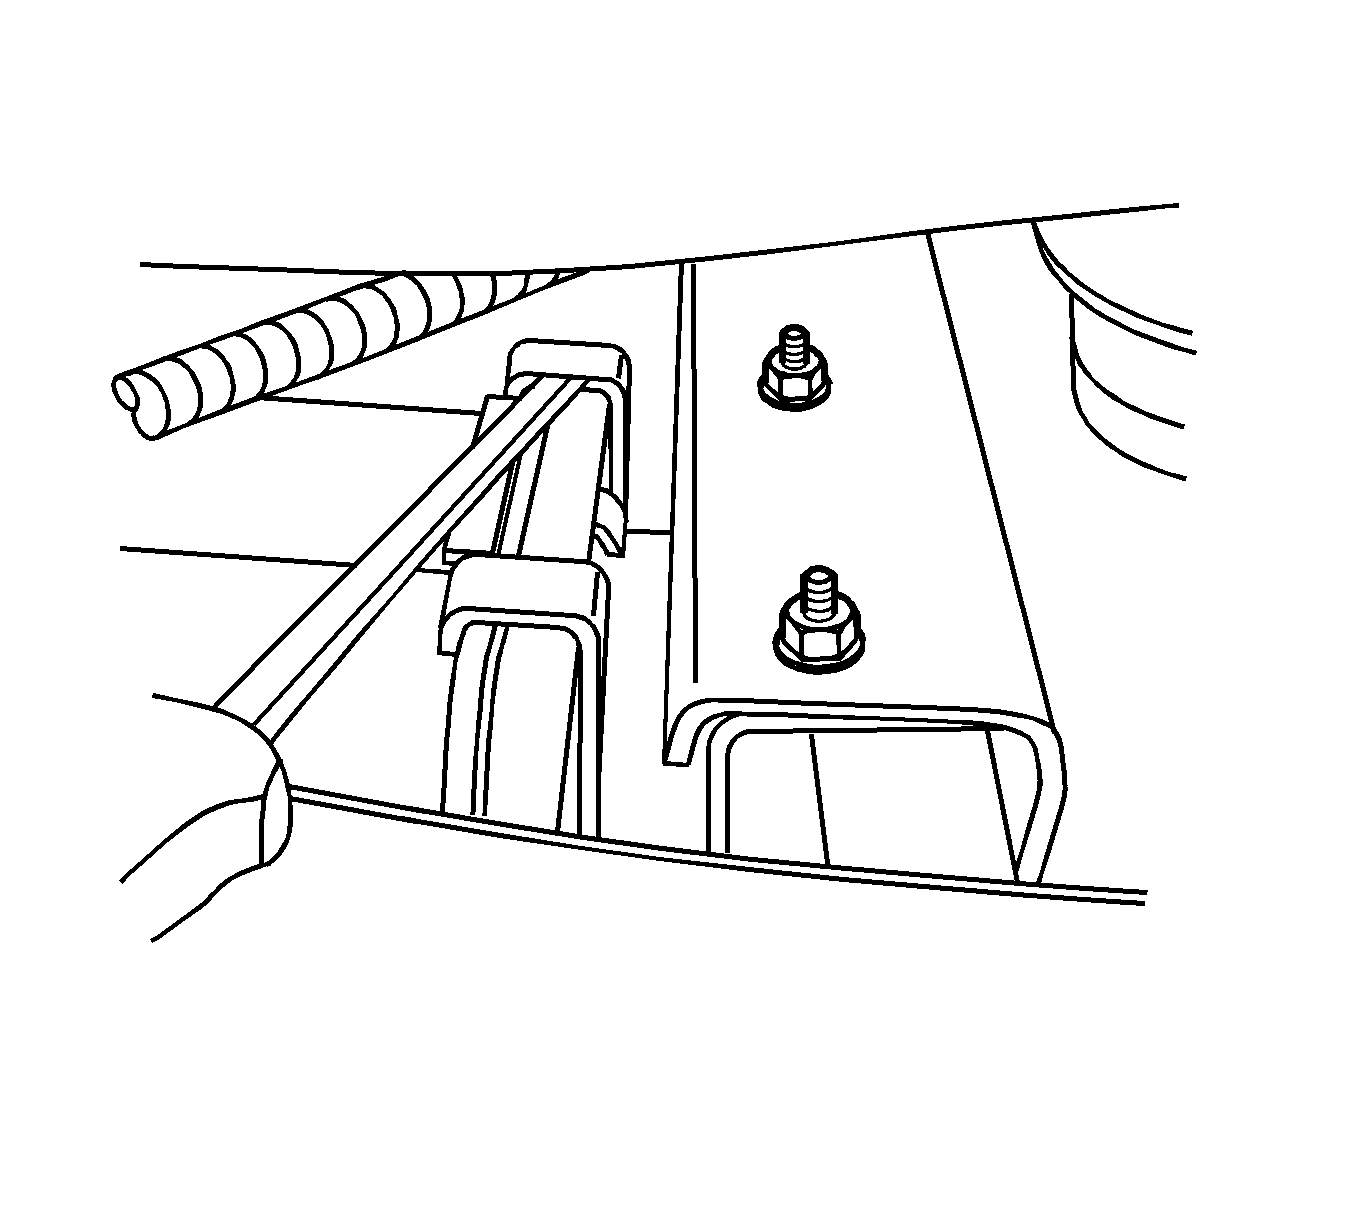
- Using a flat bladed screwdriver, disengage the front bracket clip.
- Using a flat bladed screwdriver, disengage the rear bracket clip.
- Remove the EVAP canister.
- Cap the EVAP lines in order to prevent possible EVAP system contamination.
Installation Procedure
- Remove the caps from the EVAP lines.
- Install the EVAP canister.
- Using a flat bladed screwdriver, engage the rear bracket clip.
- Using a flat bladed screwdriver, engage the front bracket clip.
- Tighten the EVAP canister bracket nuts (1).
- Raise the vehicle.
- Install the EVAP canister bolt.
- Connect the EVAP canister quick connect lines. Refer to Plastic Collar Quick Connect Fitting Service .
- Connect the EVAP canister vent solenoid (CVS) electrical connector (1).
- Lower the vehicle.
- Install the right side, rear bumper step pad. Refer to Rear Bumper Step Pad Replacement in Bumpers.


Notice: Refer to Fastener Notice in the Preface section.

Tighten
Tighten the nuts to 25 N·m (18 lb ft).

Tighten
Tighten the nuts to 25 N·m (18 lb ft).

