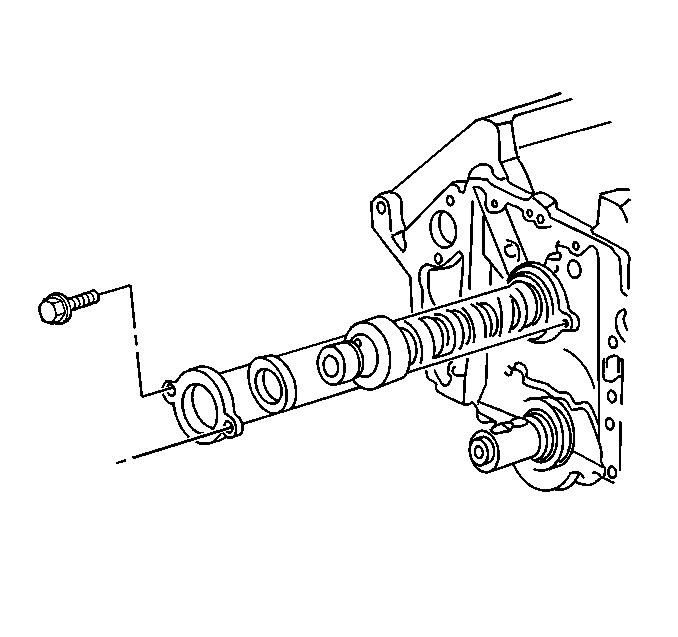
Removal Procedure
- Disconnect the negative battery cable. Refer to
Caution: Unless directed otherwise, the ignition and start switch must be in the OFF or LOCK position, and all electrical loads must be OFF before servicing any electrical component. Disconnect the negative battery cable to prevent an electrical spark should a tool or equipment come in contact with an exposed electrical terminal. Failure to follow these precautions may result in personal injury and/or damage to the vehicle or its components.
in General Information. - Evacuate the air conditioning system. Refer to HVAC.
- With the aid of an assistant, remove the radiator and air conditioning condenser as an assembly.
- Remove the grille and parking lamp assembly. Refer to Sheet Metal and Fiberglass.
- Remove the hood latch and brace assembly. Refer to Sheet Metal and Fiberglass.
- Remove the cylinder head assembly. Refer to Cylinder Head Replacement .
- Remove the oil pump drive. Refer to Oil Pump Replacement .
- Remove the valve lifters. Refer to Valve Lifter Replacement .
- Remove the timing chain. Refer to Timing Chain and Sprocket Replacement .
- Remove the camshaft sprocket.
- Remove the front engine mount through bolts and raise the engine block in position.
- Remove the bolts and the thrust bearing.
- Remove the camshaft.
- Remove the spacer if necessary.
- Clean, inspect, and repair or replace the camshaft and related components. Refer to Camshaft Clean and Inspect (Unit Repair).
Notice: Perform TDC Offset Recovery procedure if the timing chain, timing gears, engine front cover, crankshaft position sensor, crankshaft or other components affecting the timing are replaced.
Notice: When raising or supporting the engine for any reason, do not use a jack under the oil pan, any sheet metal, or the crankshaft pulley. Due to the small clearance between the oil pan and the oil pump screen, jacking against the oil pan may cause the pan to be bent against the pump screen. This will result in a damaged oil pickup unit.

Important: Pull the camshaft bolt from the block carefully to avoid damage to the camshaft bearings.
Installation Procedure
- Install the spacer with the chamfer toward the camshaft.
- Install the camshaft.
- Install the thrust plate and the spacer.
- Lower the engine.
- Install the engine mount through-bolts and nuts.
- Install the camshaft sprocket.
- Install the timing chain. Refer to Timing Chain and Sprocket Replacement .
- Install the valve lifters. Refer to Valve Lifter Replacement .
- Install the oil pump drive gear. Refer to Oil Pump Drive Replacement .
- Install the cylinder head assembly. Refer to Cylinder Head Replacement .
- Install the radiator and A/C condenser as an assembly. Refer to Heating, Ventilation, and Air Conditioning.
- Install the hood latch assembly. Refer to Sheet Metal and Fiberglass.
- Install the front grille and parking lamp assembly. Refer to Sheet Metal and Fiberglass.
- Charge the A/C system. Refer to Heating, Ventilation, and Air Conditioning.
- Connect the negative battery cable. Refer to Engine Electrical.

Important: When a new camshaft is installed, replace the following items:
• The valve lifters • The engine oil • The oil filter
| • | Coat the camshaft lobes with camshaft and valve Prelube GM P/N 1052365 or equivalent. |
| • | Lubricate the camshaft bearing journals with clean engine oil. |
| • | Insert the camshaft carefully into the block to avoid damage to the camshaft bearings. |
Tighten
Tighten the bolts to 23 N·m (17 lb ft).
Notice: Use the correct fastener in the correct location. Replacement fasteners must be the correct part number for that application. Fasteners requiring replacement or fasteners requiring the use of thread locking compound or sealant are identified in the service procedure. Do not use paints, lubricants, or corrosion inhibitors on fasteners or fastener joint surfaces unless specified. These coatings affect fastener torque and joint clamping force and may damage the fastener. Use the correct tightening sequence and specifications when installing fasteners in order to avoid damage to parts and systems.
Tighten
Tighten the bolts to 95 N·m (70 lb ft) or
the nuts to 70 N·m (50 lb ft).
Important: Align the timing marks.
