- With the ignition OFF, wipe the complete power steering system
dry including the following parts:
- Inspect the fluid level in the pump reservoir. Refer to
Checking and Adding Power Steering Fluid
.
- Start the engine.
Important: In order to prevent damage to the pump, do not hold the wheel against
the stops.
- Turn the steering wheel from stop to stop several times.

Notice: Use the correct fastener in the correct location. Replacement fasteners
must be the correct part number for that application. Fasteners requiring
replacement or fasteners requiring the use of thread locking compound or sealant
are identified in the service procedure. Do not use paints, lubricants, or
corrosion inhibitors on fasteners or fastener joint surfaces unless specified.
These coatings affect fastener torque and joint clamping force and may damage
the fastener. Use the correct tightening sequence and specifications when
installing fasteners in order to avoid damage to parts and systems.
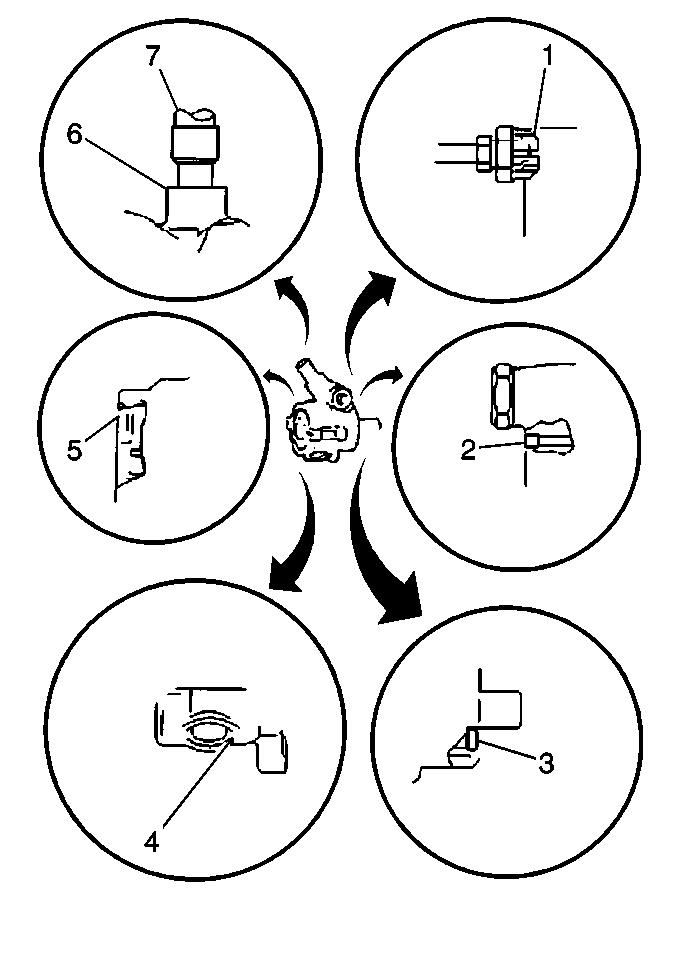
- Inspect the following
areas for leakage:
| 5.1. | The return tube fitting (6, 7): |
| 5.1.1. | If loose, tighten the hose clamp. |
| 5.1.2. | Replace the fitting if the fitting is deformed. |
| 5.1.3. | Apply LOCTITE™ 75559 solvent and LOCTITE™ 290 adhesive,
or the equivalent, to the tube-housing connection. |
| 5.2. | The pressure line fitting (1): |
| 5.2.1. | Inspect the fitting. |
Tighten
Tighten the fitting to 33 N·m (24 lb ft).
| 5.2.2. | Replace the seal if the leakage persists. |
| 5.3. | The ball seat leak (2): |
| 5.3.1. | Seat the ball in the housing with a blunt punch. |
| 5.3.2. | Apply LOCTITE™ 75559 solvent and LOCTITE™ 290 adhesive,
or the equivalent, to the area. Follow the manufacturer's instructions. |
| 5.4. | The drive shaft seal (3) |
| 5.4.1. | Replace the drive shaft seal. |
| 5.4.2. | Ensure that the drive shaft is clean and free of pitting in the
seal area. |
| 5.5. | The housing plug seal (4) |
| 5.5.1. | Seat the plug in the housing. |
| 5.5.2. | Apply LOCTITE™ 75559 solvent and LOCTITE™ 290 adhesive,
or the equivalent, to the plug-housing area. Follow the manufacturer's
instructions. |
| 5.6. | The housing seal (5) |
Replace the seal.

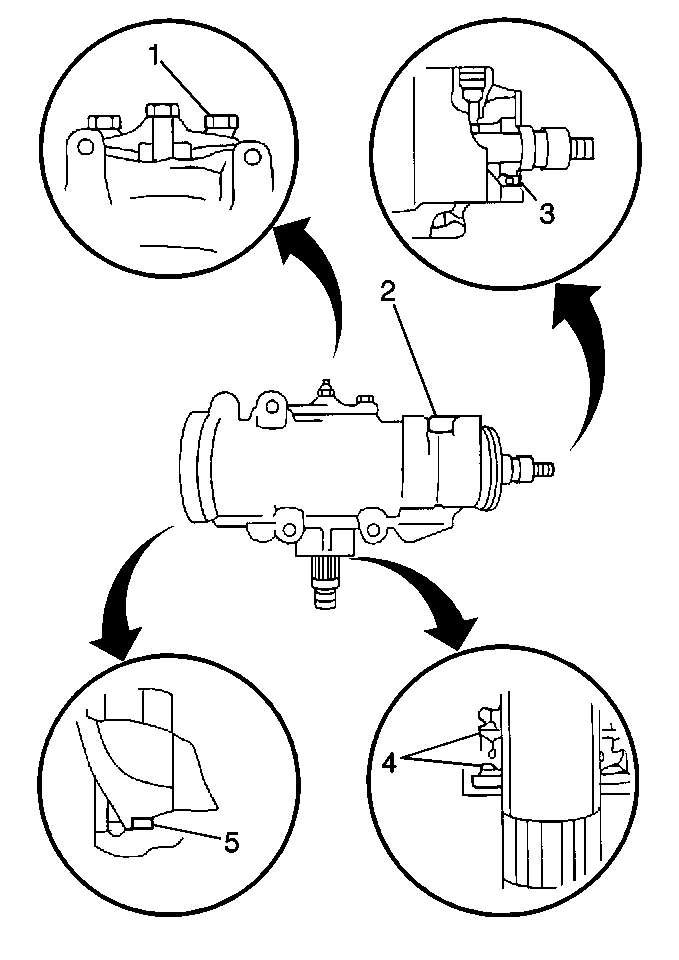
- Inspect the following parts for leakage:
| 6.1. | The side cover leak (1) |
| 6.1.1. | Check the side cover bolts. |
Tighten
Tighten the side cover bolts to 60 N·m (45 lb ft).
| 6.1.2. | Replace the side cover seal if the leakage persists. |
| 6.2. | The adjuster plug seal (3) |
Replace the adjuster plug seals.
| 6.3. | The pressure line fitting (2) |
| 6.3.1. | Inspect the line fitting nut. |
Tighten
Tighten the line fitting nut to 33 N·m (24 lb ft).
| 6.3.2. | Replace the steering gear if the leakage persists. |


