Intermediate Steering Shaft Replacement Lower
Tools Required
J 42640 Steering Column Anti-Rotation Pin
Removal Procedure
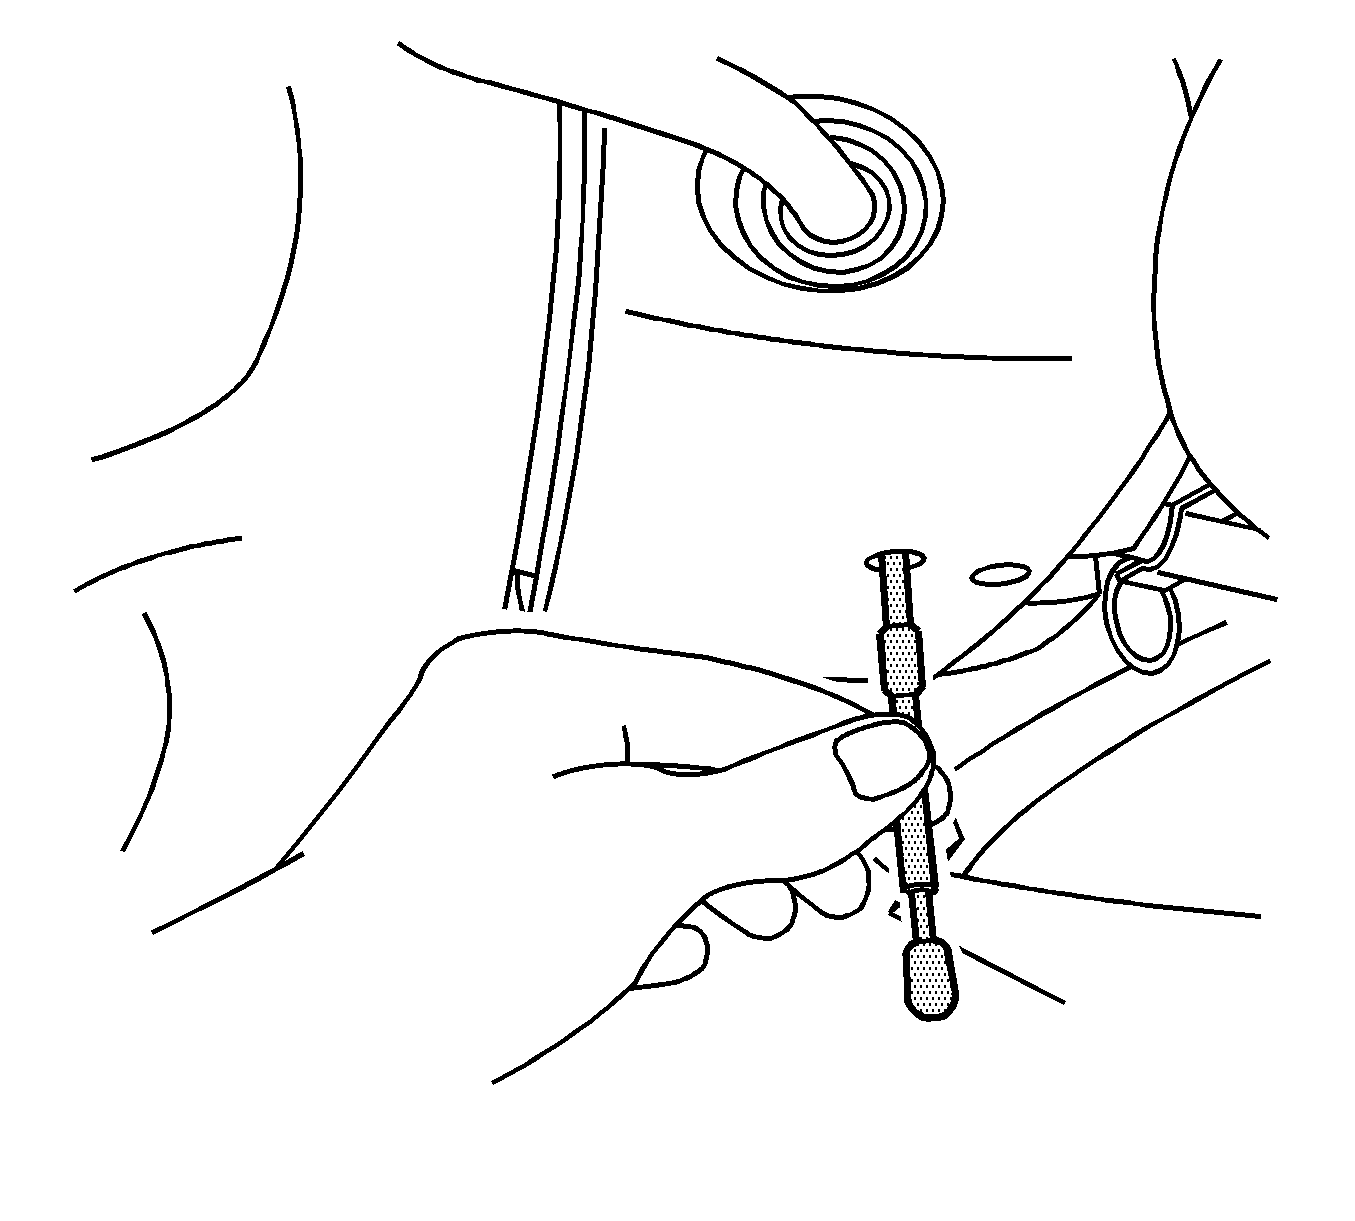
- Install the J 42640 in the steering column lower access hole.
- Mark the relationship of the intermediate shaft components in order to assure proper installation.
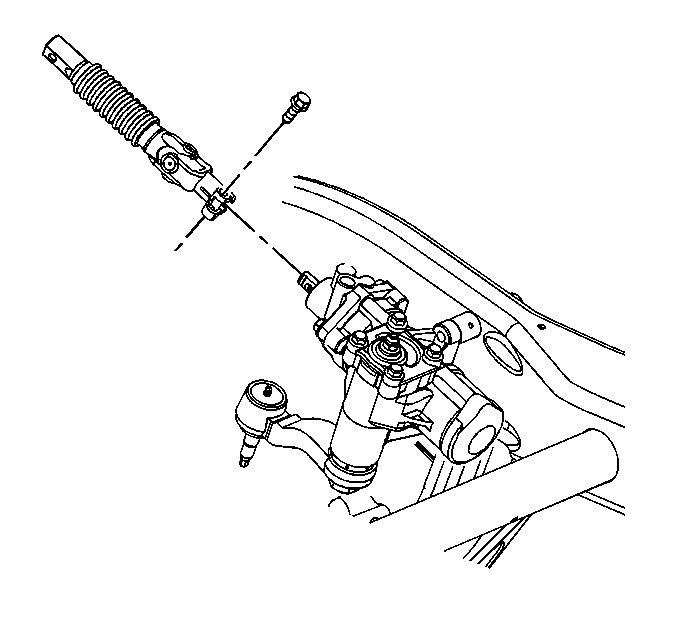
- Remove the bolt from the upper to lower shaft connection.
- Remove the bolt from the lower shaft coupler.
- Remove the intermediate shaft assembly.
- Slide the intermediate shaft down out of the upper shaft.

Notice: The wheels of the vehicle must be straight ahead and the steering column in the LOCK position before disconnecting the steering column or intermediate shaft from the steering gear. Failure to do so will cause the SIR coil assembly to become uncentered, which may cause damage to the coil assembly.

| 2.1. | Mark the relationship of the upper intermediate shaft to the lower intermediate shaft. |
| 2.2. | Mark the relationship of the lower shaft coupler to the steering gear input shaft. |
Slide the shaft towards the dash in order to get the lower shaft coupler clear of the steering gear input shaft.
Installation Procedure
- Install the upper end of the intermediate shaft into the upper shaft.
- Install the lower end of the intermediate shaft coupler.
- Install the bolt to the lower shaft coupler.
- Install the bolt to the upper end of the shaft.
- Remove the J 42640 from the steering column lower access hole.

| 2.1. | If you are reinstalling the same shaft, align the marks made during the removal procedure. |
| 2.2. | Install the lower end of the intermediate shaft coupler onto the steering gear worm shaft. |
Notice: Use the correct fastener in the correct location. Replacement fasteners must be the correct part number for that application. Fasteners requiring replacement or fasteners requiring the use of thread locking compound or sealant are identified in the service procedure. Do not use paints, lubricants, or corrosion inhibitors on fasteners or fastener joint surfaces unless specified. These coatings affect fastener torque and joint clamping force and may damage the fastener. Use the correct tightening sequence and specifications when installing fasteners in order to avoid damage to parts and systems.
Tighten
| • | Tighten the upper bolt to 62 N·m (45 lb ft). |
| • | Tighten the coupler pinch bolt to 47 N·m (35 lb ft). |

Intermediate Steering Shaft Replacement Upper
Tools Required
J 42640 Steering Column Anti-Rotation Pin
Removal Procedure
- Install the J 42640 in the steering column lower access hole.
- Set the front wheels in the straight-ahead position.
- Set the steering wheel in the LOCK position.
- Mark the relationships of the following components:
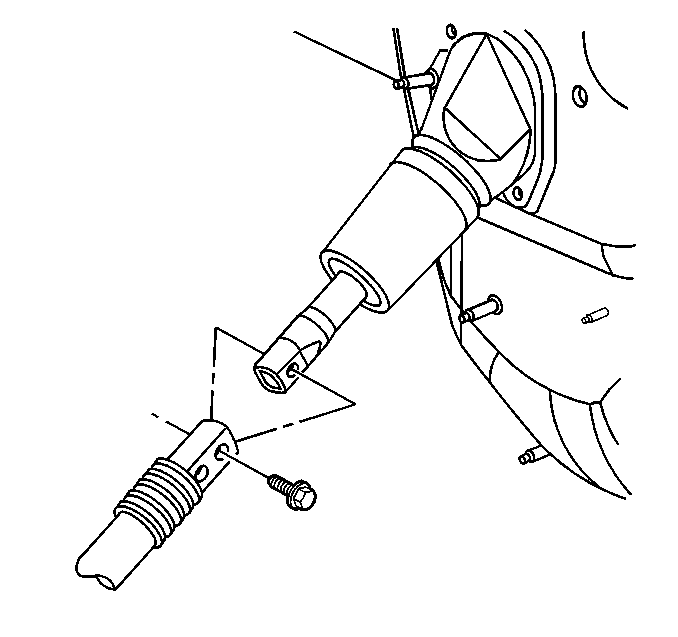
- Remove the nut and bolt from the lower shaft to upper shaft connection.
- Remove the nut and bolt from the upper shaft to steering column connection.
- Slide the intermediate shaft down, out of the steering column connection.
- Remove the accelerator pedal position sensor. Refer to Accelerator Pedal Position Sensor Replacement in Engine Controls.
- Slide the upper intermediate shaft towards the instrument panel, and out of the lower intermediate shaft. Remove the shaft from the vehicle.

Notice: The wheels of the vehicle must be straight ahead and the steering column in the LOCK position before disconnecting the steering column or intermediate shaft from the steering gear. Failure to do so will cause the SIR coil assembly to become uncentered, which may cause damage to the coil assembly.

Important: Mark the relationship of the intermediate shaft components in order to assure proper installation.
| • | The bolt and clamp at both ends of the upper intermediate shaft |
| • | The upper intermediate shaft to the lower intermediate shaft |
| • | The lower shaft coupler to the steering gear input shaft |
Installation Procedure
- Install the lower end of the upper intermediate shaft through the bulkhead, into the lower shaft.
- Install the upper end of the upper intermediate shaft to the steering column.
- Install the bolt and nut at the connection of the upper intermediate shaft and the steering column.
- Install the accelerator pedal position sensor. Refer to Accelerator Pedal Position Sensor Replacement in Engine Controls.
- Install the bolt and nut at the connection of the upper intermediate shaft and the lower intermediate shaft.
- Remove the J 42640 from the steering column lower access hole.

Important: If you are installing the same shaft, align the marks and the relationship of the bolt and clamp made during the removal procedure.
Notice: Use the correct fastener in the correct location. Replacement fasteners must be the correct part number for that application. Fasteners requiring replacement or fasteners requiring the use of thread locking compound or sealant are identified in the service procedure. Do not use paints, lubricants, or corrosion inhibitors on fasteners or fastener joint surfaces unless specified. These coatings affect fastener torque and joint clamping force and may damage the fastener. Use the correct tightening sequence and specifications when installing fasteners in order to avoid damage to parts and systems.
Tighten
Tighten the nut to 62 N·m (45 lb ft).
Tighten
Tighten the nut to 62 N·m (45 lb ft).

