For 1990-2009 cars only
- Install a scan tool.
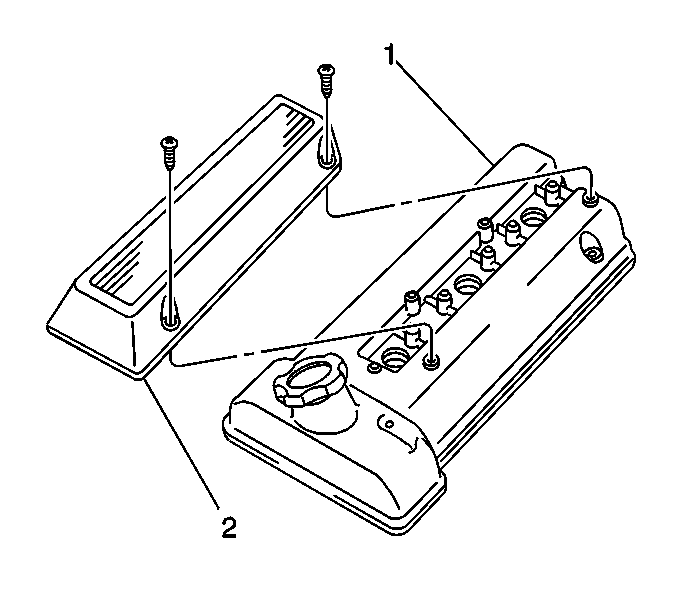
- Remove the two fasteners and the ignition coil cover (2) from the bank 1 valve cover (1).
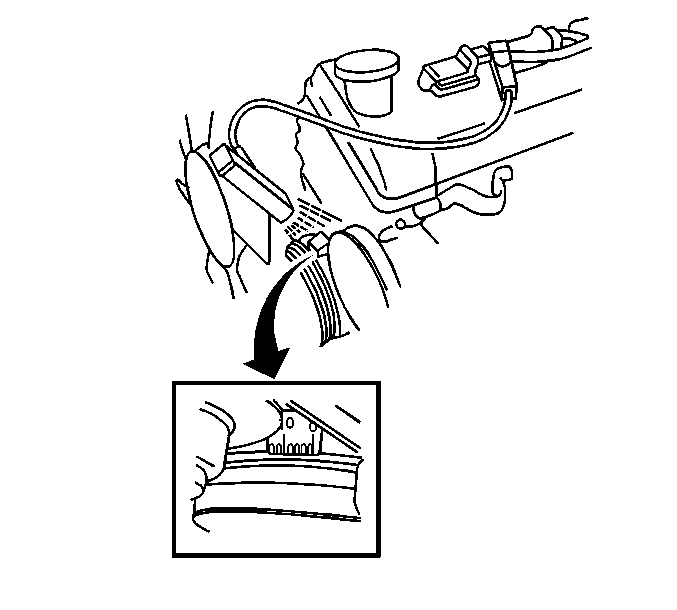
- Connect an inductive timing light to the number 1 ignition coil wiring harness.
- Start the engine.
- Allow the engine to reach normal operating temperature.
- Perform the following checks:
- Select the Engine Output Controls feature under Special Functions of the scan tool Diagnostic menu.
- TURN ON the Fixed Spark mode with the scan tool.
- Observe that the Spark parameter on the scan tool data list displays 5 degrees, indicating that the Fixed Spark mode has been activated.
- Inspect with the timing light that the crankshaft pulley notch lines up with the timing pointer, indicating that the timing is correctly set at 5 degrees.
- If the timing marks are not correctly aligned, adjust the ignition timing as follows:
- Repeat step 11 if the timing marks are not correctly aligned.
- Tighten the CMP sensor housing bolts (2) to the correct value.
- Inspect with the timing light that the crankshaft pulley mark and the timing pointer are still correctly aligned.
- TURN OFF the Fixed Spark mode with the scan tool.
- Observe the timing marks with the timing light.
- The crankshaft pulley mark should now be approximately 10-13 mm (0.4-0.5 in) to the left of the timing pointer, indicating normal operation.
- Install the ignition coil cover (2) to the bank 1 valve cover (1).
- Secure the ignition coil cover (2) with the two fasteners.
| • | The A/C is OFF. |
| • | The gearshift control lever is set in Park. |
| • | The parking brake lever is fully engaged. |
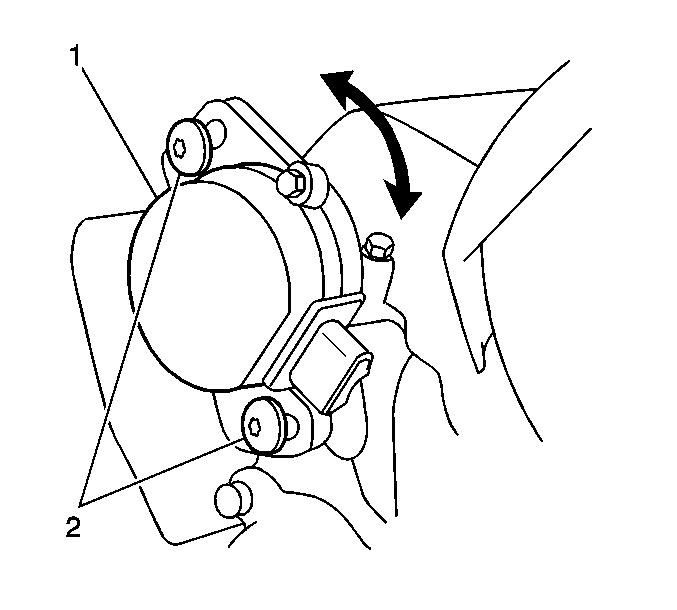
| 11.1. | Loosen the camshaft position (CMP) sensor housing bolts (2). |
| • | Rotate the CMP sensor housing (1) clockwise in order to advance the timing. |
| • | Rotate the CMP sensor housing (1) counterclockwise in order to retard the ignition timing. |
| 11.2. | Tighten the CMP sensor housing bolts (2). |
| 11.3. | Review the ignition timing with the timing light as in step 9. |
Notice: Use the correct fastener in the correct location. Replacement fasteners must be the correct part number for that application. Fasteners requiring replacement or fasteners requiring the use of thread locking compound or sealant are identified in the service procedure. Do not use paints, lubricants, or corrosion inhibitors on fasteners or fastener joint surfaces unless specified. These coatings affect fastener torque and joint clamping force and may damage the fastener. Use the correct tightening sequence and specifications when installing fasteners in order to avoid damage to parts and systems.
Tighten
Tighten the CMP sensor housing bolt to 15 N·m (11 lb ft).
Tighten
Tighten the two fasteners to 3 N·m (26 lb in).
