Removal Procedure
- Remove the engine front cover. Refer to Engine Front Cover Replacement .
- Remove the left secondary timing chain. Refer to Secondary Timing Chain Replacement - Left Side .
- Remove the primary timing chain. Refer to Primary Timing Chain Replacement .
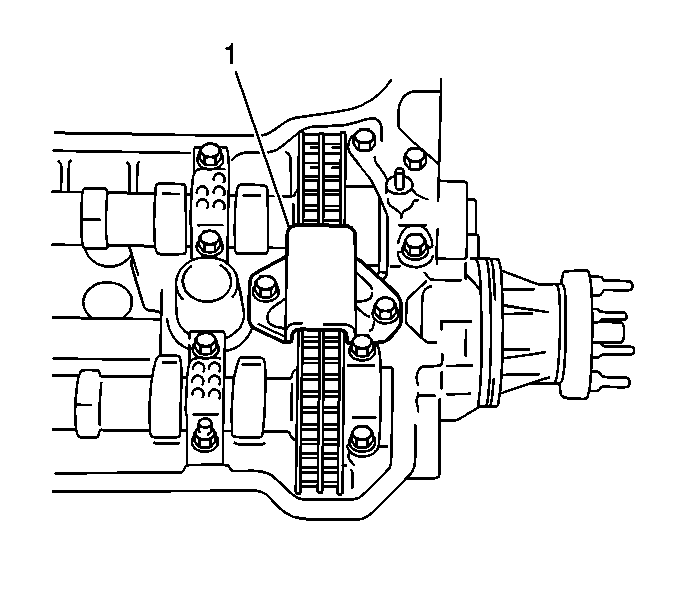
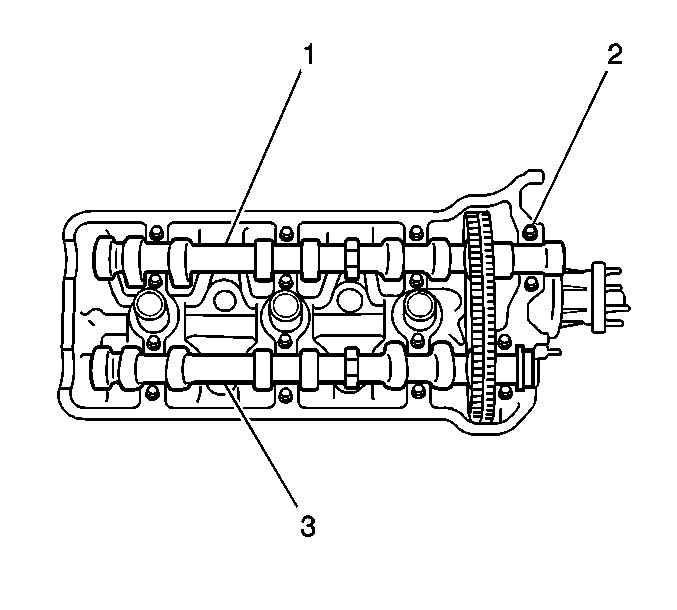
- Remove the 2 bolts and the timing chain guide (1).
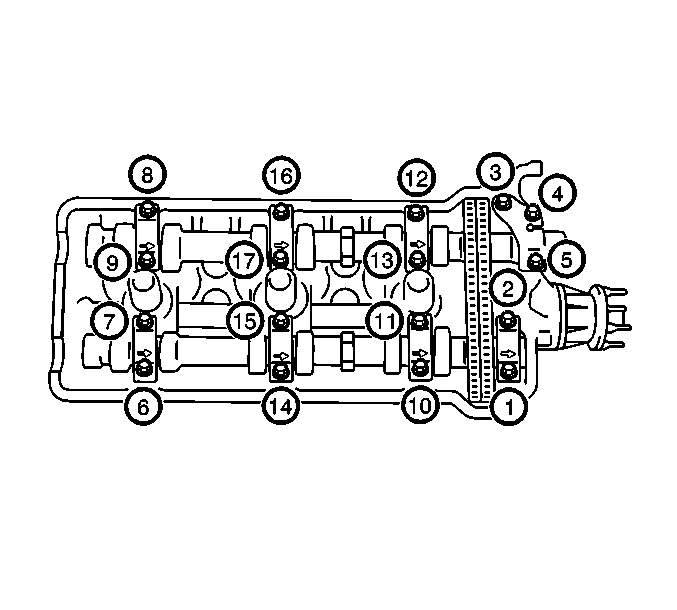
- Remove the camshaft bearing cap bolts in the proper sequence.
- Remove the camshaft bearing caps.
- Remove the camshafts and secondary timing chain as a set.
- Remove the 2 bolts and the timing chain tensioner (1).
Installation Procedure
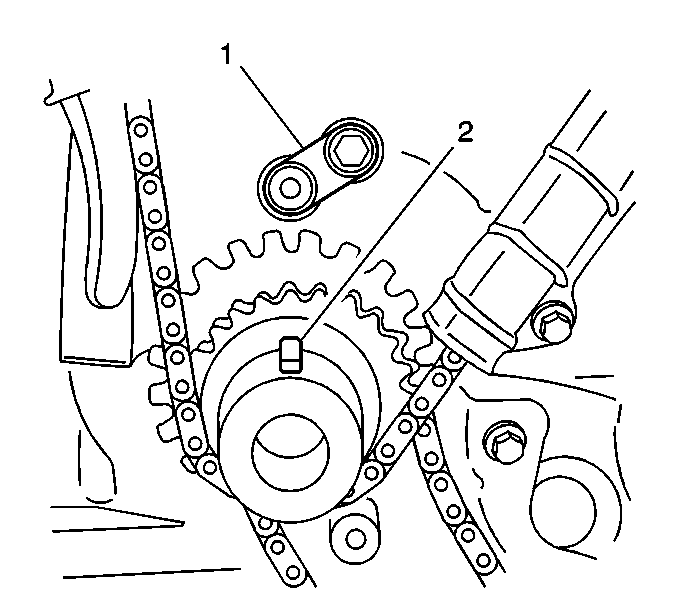
- Verify that the keyway (2) on the crankshaft is positioned properly.
- Apply oil to the secondary right timing chain tensioner (1).
- Install the timing chain tensioner (1) and secure with the 2 bolts.
- Apply oil to the camshaft lobes an journals.
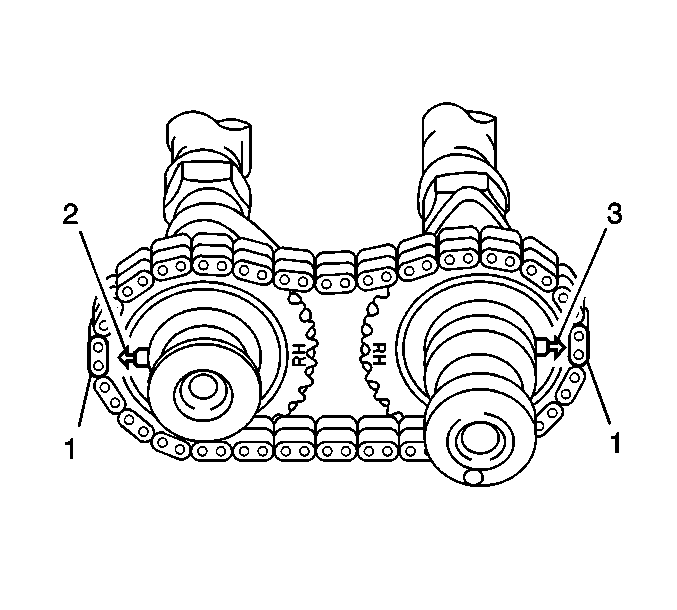
- Install the right timing chain to the camshaft sprockets by aligning the silver or yellow links (1) with the marks (2,3) on the camshaft sprockets.
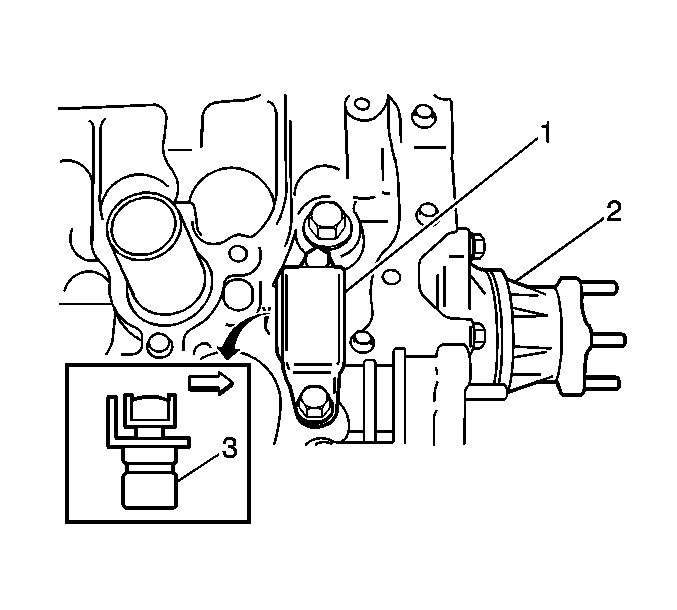
- Install the camshaft bearing cap pins (2)
- Install the camshafts with the timing chain to the cylinder head.
- Apply oil to the camshaft bearing cap bolts.
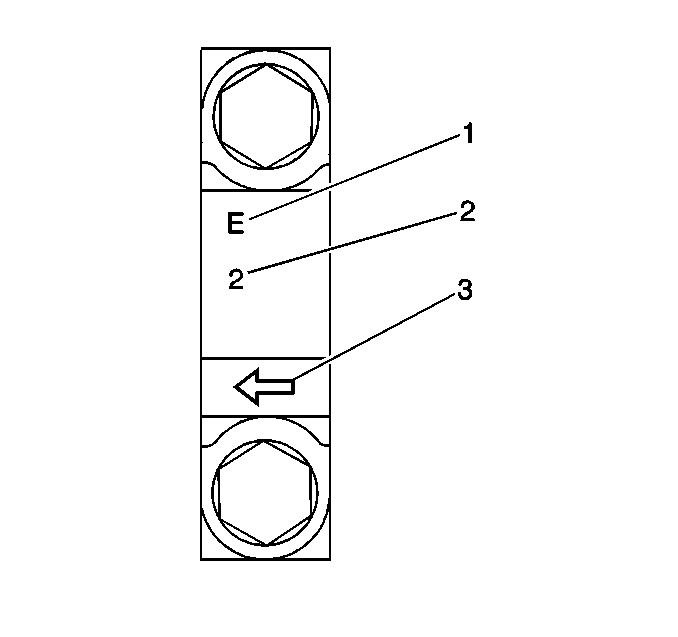
- Install the camshaft bearing caps. The caps are marked intake or exhaust (1), position away from the timing chain (2), and direction toward the timing chain (3).
- Tighten the camshaft bearing caps.
- Install the right secondary timing chain guide (1). Secure with the 2 bolts.
- Install the primary timing chain. Refer to Primary Timing Chain Replacement .
- Install the left secondary timing chain. Refer to Secondary Timing Chain Replacement - Left Side .
- Install the engine front cover. Refer to Engine Front Cover Replacement .

Notice: Use the correct fastener in the correct location. Replacement fasteners must be the correct part number for that application. Fasteners requiring replacement or fasteners requiring the use of thread locking compound or sealant are identified in the service procedure. Do not use paints, lubricants, or corrosion inhibitors on fasteners or fastener joint surfaces unless specified. These coatings affect fastener torque and joint clamping force and may damage the fastener. Use the correct tightening sequence and specifications when installing fasteners in order to avoid damage to parts and systems.
Tighten
Tighten the bolts to 11 N·m (7.5 lb ft).
Important: Cylinder head and camshaft damage may result if the bearing caps are incorrectly installed.
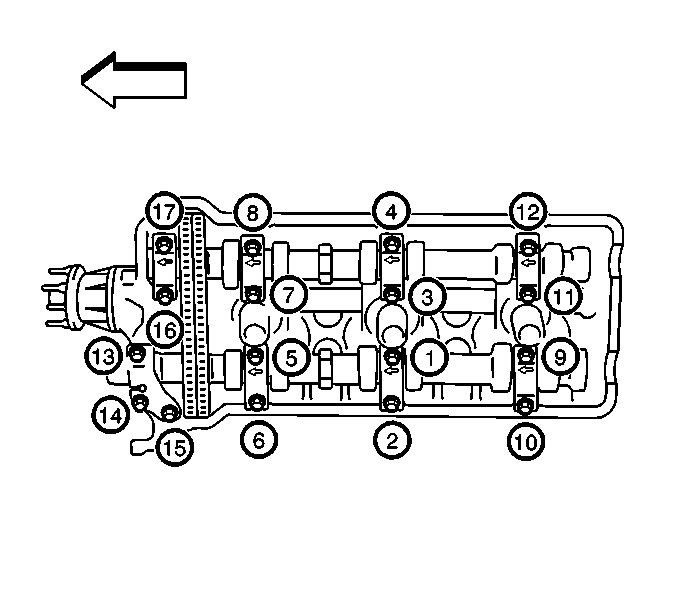
Tighten
Tighten the camshaft bearing caps in 3 progressive steps in the sequence
shown to 12 N·m (8.5 lb ft).

Tighten
Tighten the bolts to 11 N·m (7.5 lb ft).
