Timing Chain and Sprocket Installation Camshaft
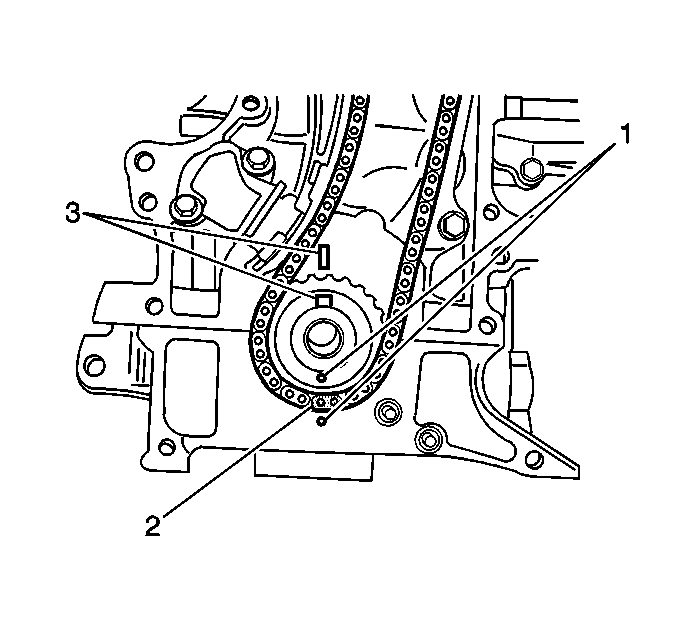
- Ensure that the crankshaft keyway is aligned with the mark on the engine block.
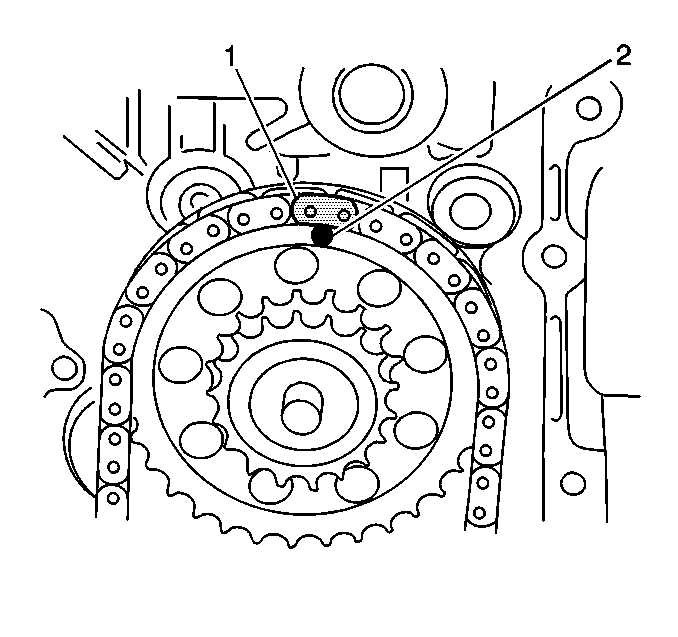
- Ensure that the yellow link of the crankshaft timing chain (2) is aligned with the crankshaft timing mark (1).
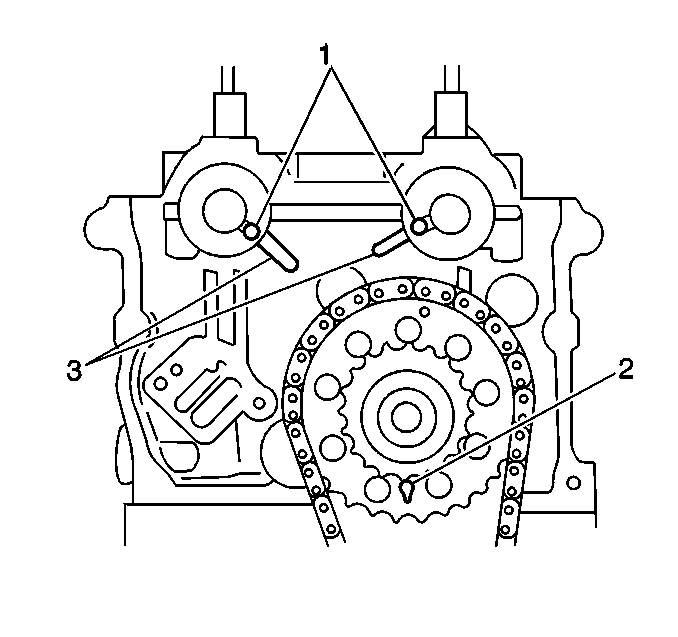
- Ensure that the idler sprocket arrow (2) is pointing upward.
- Ensure that the dowel pins (1) of the camshafts are aligned with the notches (3) on the cylinder head.
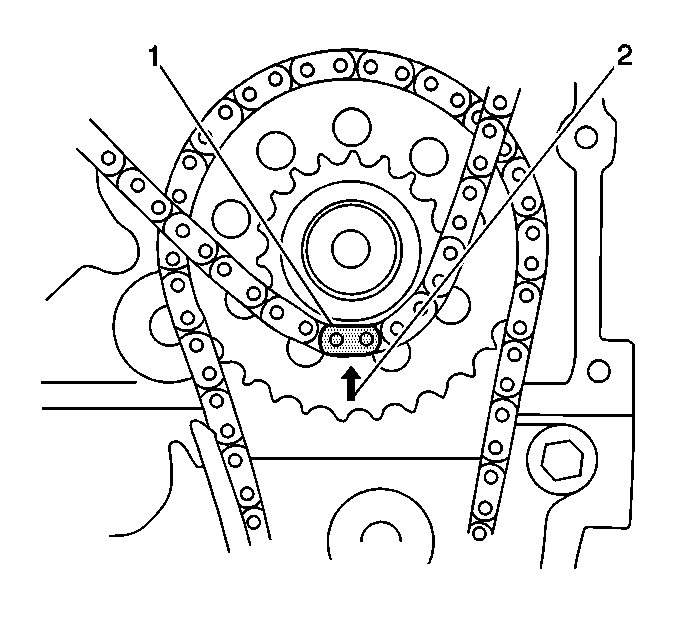
- Align the yellow link (1) of the camshaft timing chain with the arrows (2) on the idler sprocket.
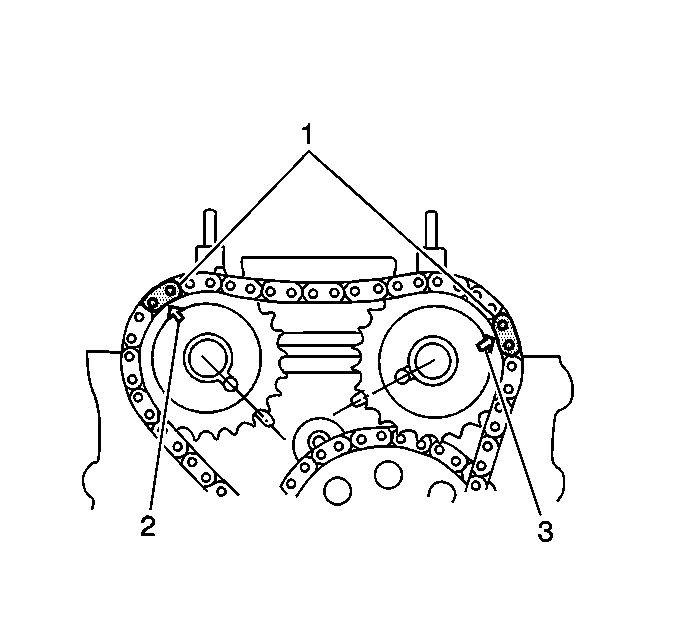
- Align the dark blue link (1) of the camshaft timing chain with the arrow (2,3) on the camshaft sprockets.
- Install the camshaft timing sprockets and chain.
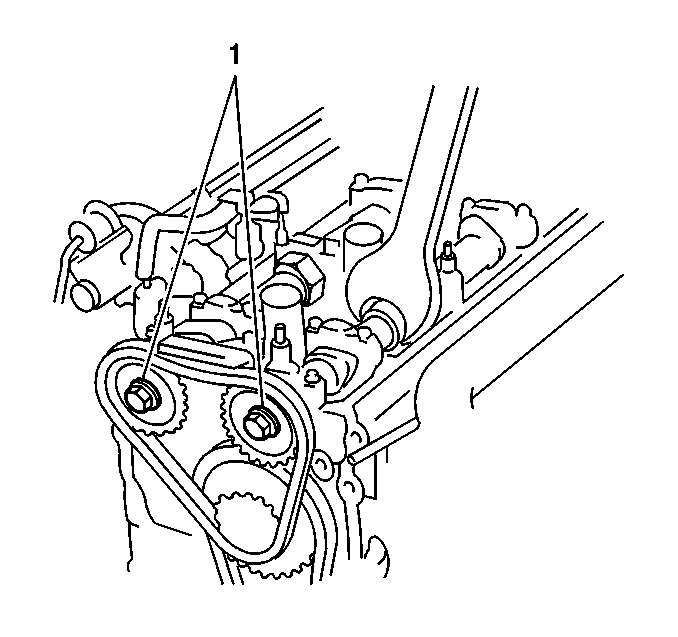
- Install the camshaft sprocket bolts (1).
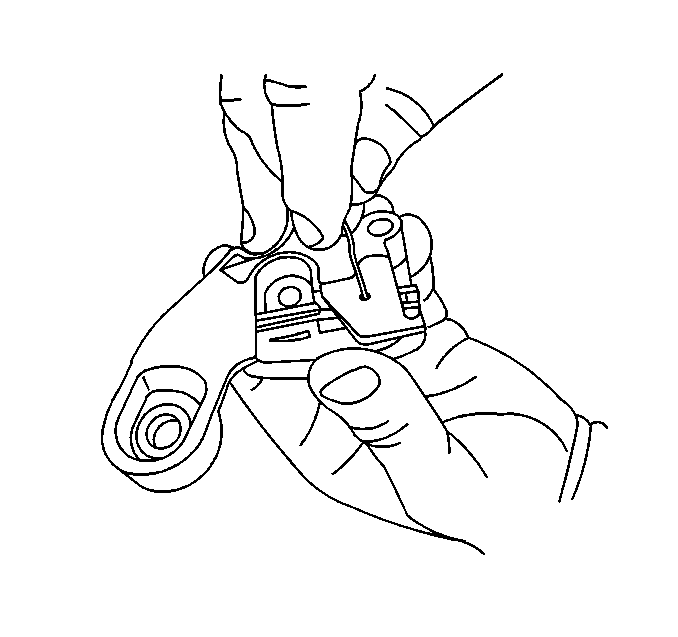
- Compress the camshaft tensioner plunger into the body. Insert a retainer (a paper clip or similar tool) through the hole in the body in order to hold the plunger in place.
- Install the gasket and the camshaft timing chain tensioner.
- Remove the retainer from the tensioner.
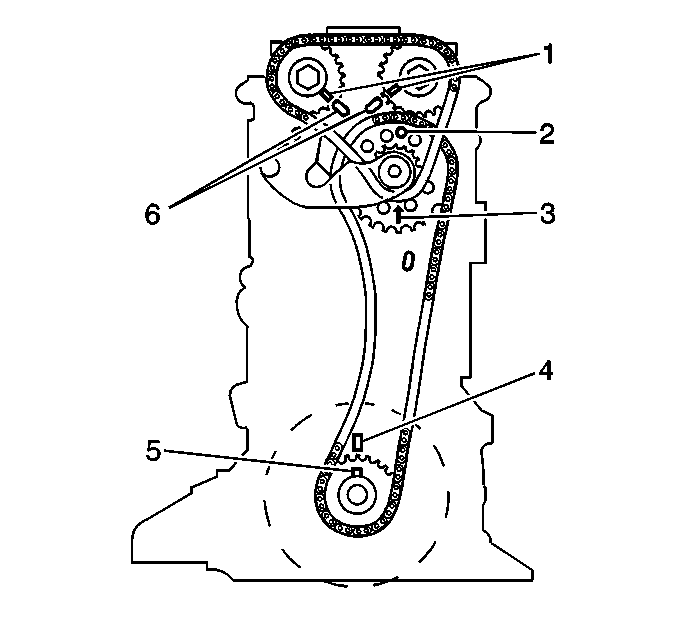
- Turn the crankshaft 2 revolutions realigning the keyway on the crankshaft (5) with the timing mark on the engine block (4).
- Ensure that the guide pins on the camshafts (1) are in line with the notches on the cylinder head (6).
- Apply engine oil to the following:
Notice: Use the correct fastener in the correct location. Replacement fasteners must be the correct part number for that application. Fasteners requiring replacement or fasteners requiring the use of thread locking compound or sealant are identified in the service procedure. Do not use paints, lubricants, or corrosion inhibitors on fasteners or fastener joint surfaces unless specified. These coatings affect fastener torque and joint clamping force and may damage the fastener. Use the correct tightening sequence and specifications when installing fasteners in order to avoid damage to parts and systems.
Tighten
Tighten the bolts to 80 N·m (58 lb ft).
Tighten
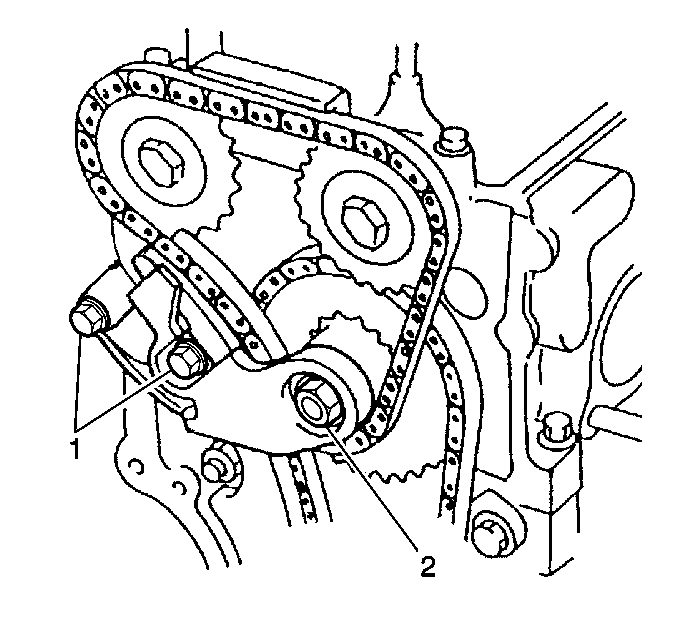
| • | Tighten the bolts (1) to 11 N·m (8 lb ft). |
| • | Tighten the nut (2) to 45 N·m (33 lb ft). |
| • | The timing chains |
| • | The tensioner |
| • | The guides |
| • | The sprockets |
Timing Chain and Sprocket Installation Crankshaft
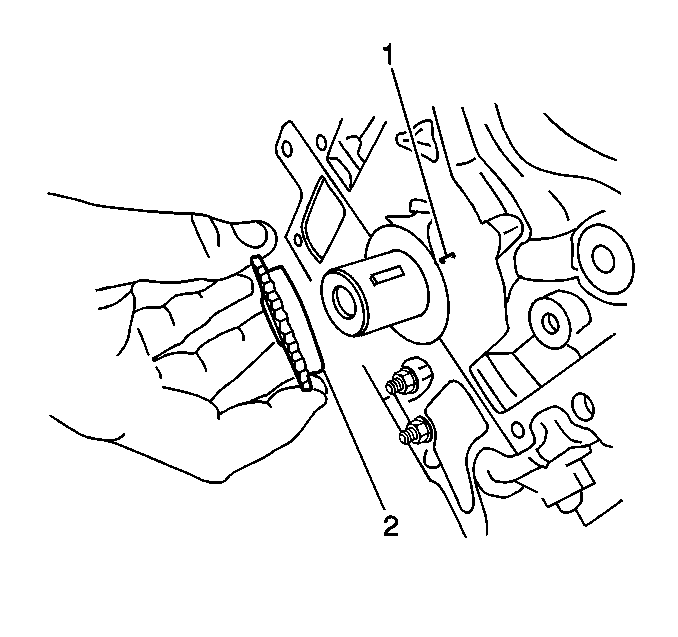
- Inspect that the timing mark on the engine block (1) is aligned with the crankshaft keyway.
- Install the crankshaft sprocket (2).
- Apply engine oil to the idler sprocket bushing.
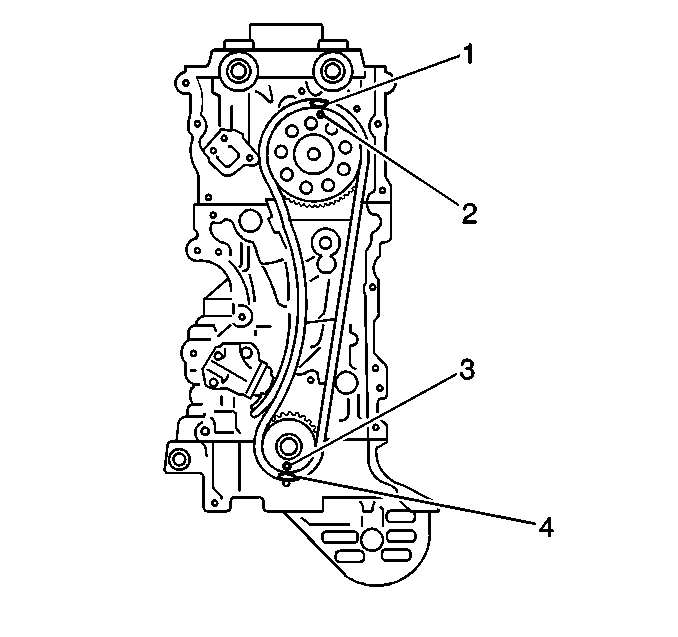
- Install the timing chain to the idler sprocket by aligning the dark blue link (1) of the timing chain with the mark on the sprocket (2).
- Install the timing chain to the crankshaft sprocket by aligning the yellow link (4) of the chain with the mark on the crankshaft sprocket (3).
- Install the idler sprocket.
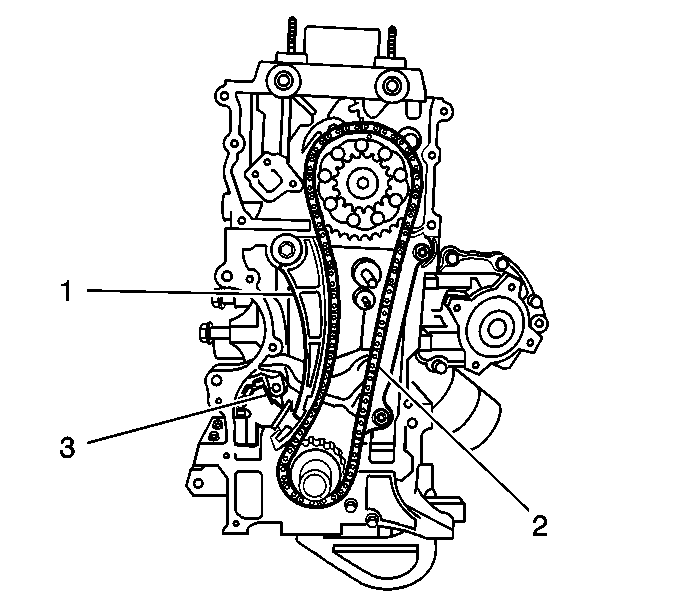
- Install the timing chain fixed guide (2).
- Install the timing chain adjustable guide (1).
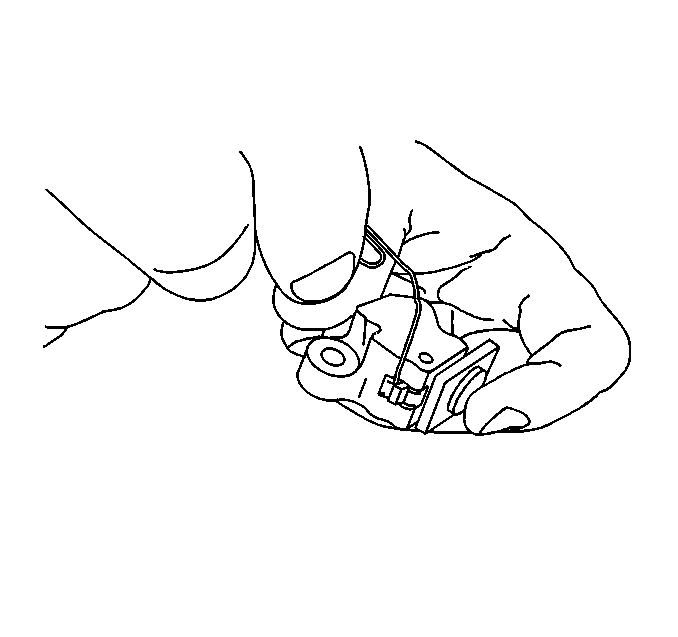
- Hold back the latch, compress the plunger and install a retainer (a paper clip or similar tool) to hold the plunger in place.
- Install the timing chain tensioner.
- Remove the retainer.
- Ensure that the crankshaft keyway is aligned with the mark on the engine block.
- Ensure that the yellow link of the crankshaft timing chain (2) is aligned with the crankshaft timing mark (1).
- Ensure that the guide pins (1) of the camshafts are aligned with the notches (3) on the cylinder head.
- Ensure that the idler sprocket arrow (2) is pointing upward.
- Ensure that the dark blue link of the timing chain is aligned with the mark on the idler sprocket.
Notice: Use the correct fastener in the correct location. Replacement fasteners must be the correct part number for that application. Fasteners requiring replacement or fasteners requiring the use of thread locking compound or sealant are identified in the service procedure. Do not use paints, lubricants, or corrosion inhibitors on fasteners or fastener joint surfaces unless specified. These coatings affect fastener torque and joint clamping force and may damage the fastener. Use the correct tightening sequence and specifications when installing fasteners in order to avoid damage to parts and systems.
Tighten
Tighten the 2 bolts to 9 N·m (62 lb in).
Tighten
Tighten the bolt to 25 N·m (19 lb ft).
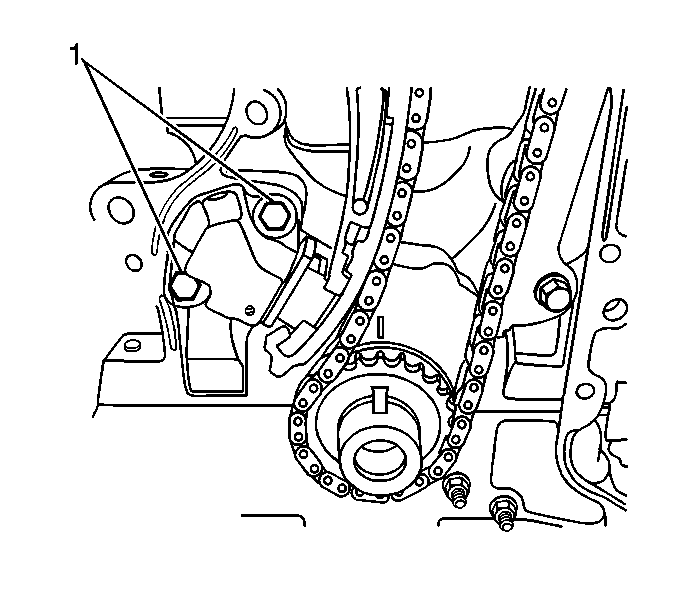
Tighten
Tighten the 2 bolts (1) to 11 N·m (97 lb in).


