Tools Required
| • | J 39032 Stationary
Glass Removal Tool |
| • | Urethane Adhesive Kit GM P/N 12346392 or Equivalent |
| • | Isopropyl Alcohol or Equivalent |
| • | Cartridge-type Caulking Gun |
| • | Commercial-type Utility Knife |
Removal Procedure
Important: The interior trim panels do not have to be removed to remove the bodyside window
frame.
- Ensure the body side window is in the full closed position. If not, the window
actuator will need to be adjusted.
- If the actuator is not being replaced, perform the following 2 steps.
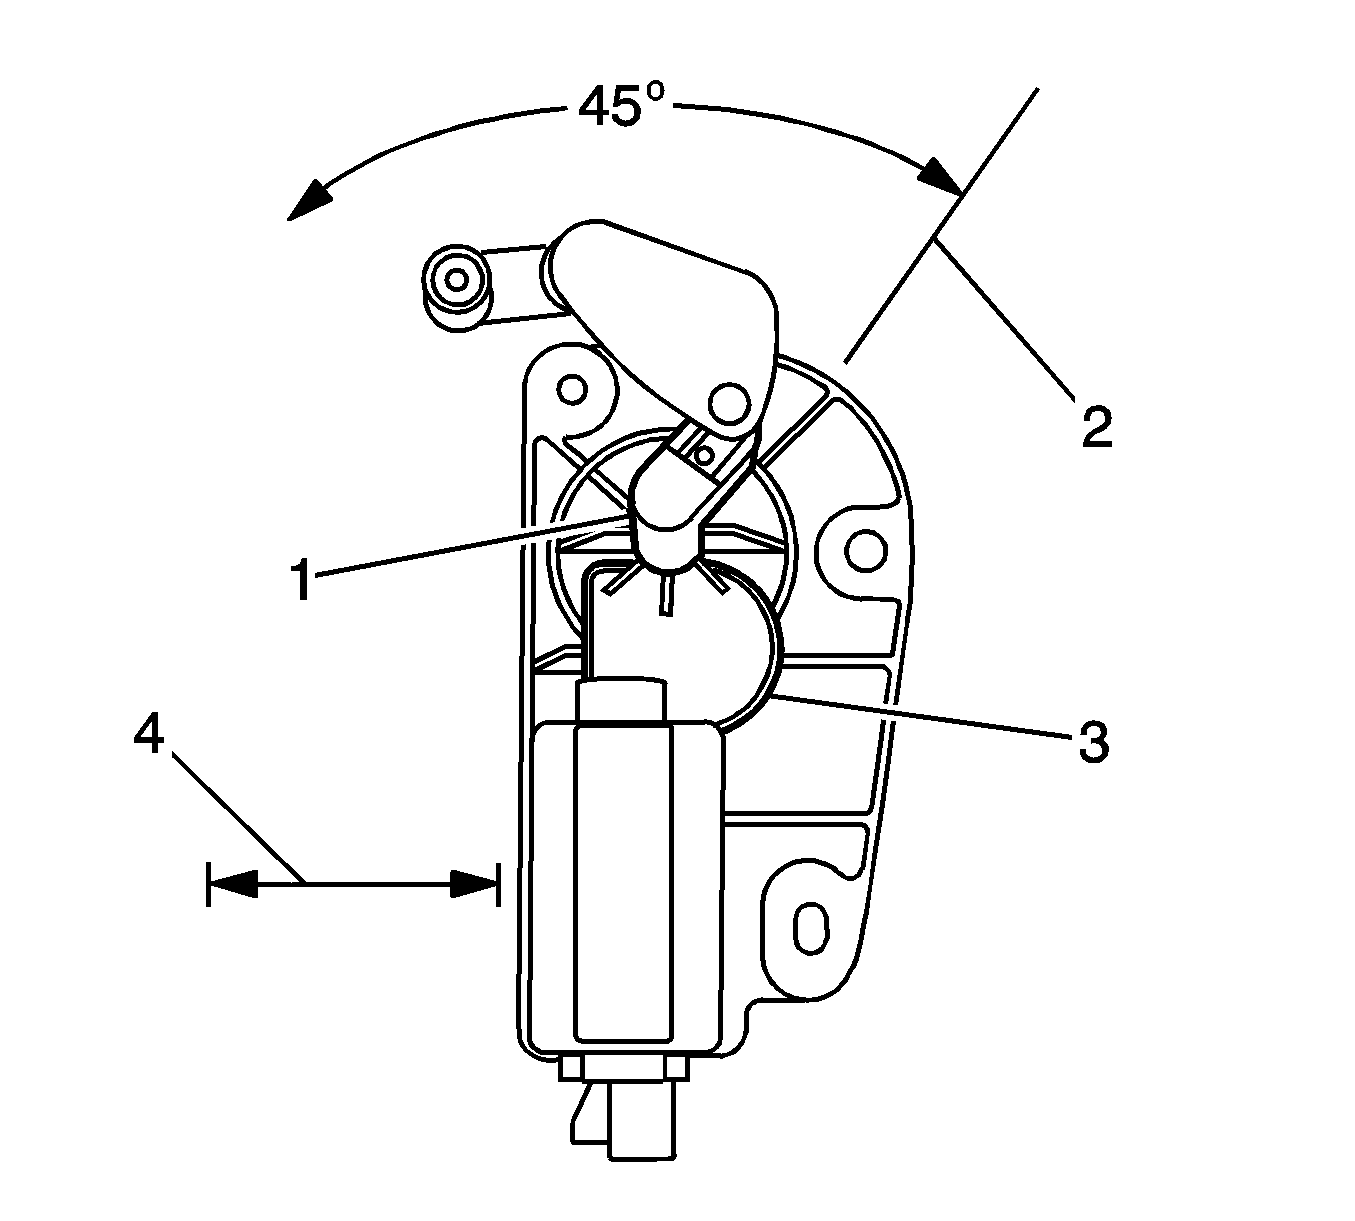
- Position the bellcrank (1) at a 45 degree
angle (2) compared to the vertical edge of the window side sheet metal (4).
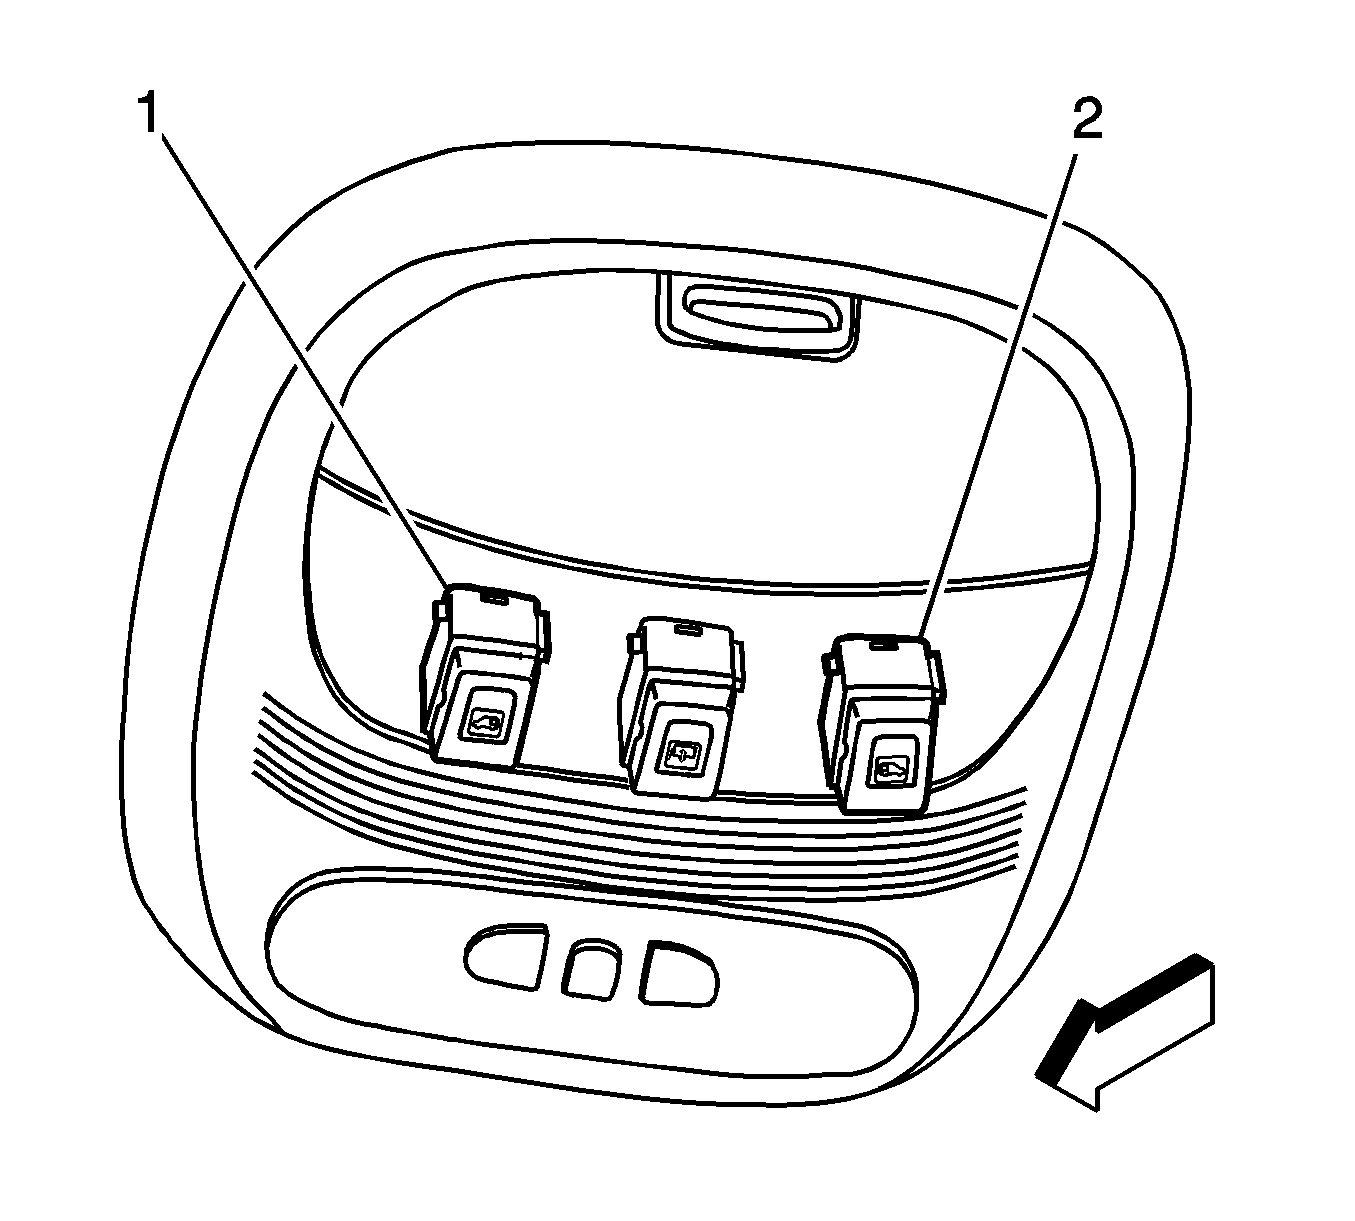
- Using the body side power window switches
(1 or 2) at the overhead console, push the switch in order to position
the bellcrank at a 45 degree angle to the sheet metal flange.
Caution: If a window is cracked but still intact, crisscross the window with
masking tape in order to reduce the risk of damage or personal injury.
Important: Before cutting out a body side window, apply a double layer of masking tape
around the perimeter of the painted surfaces and inner trim of the window.
- Open the rear doors.
- Cover to protect the following parts from broken glass if necessary:
| 6.1. | Defroster outlets and A/C outlets. |
| 6.2. | Seats and carpeting. |
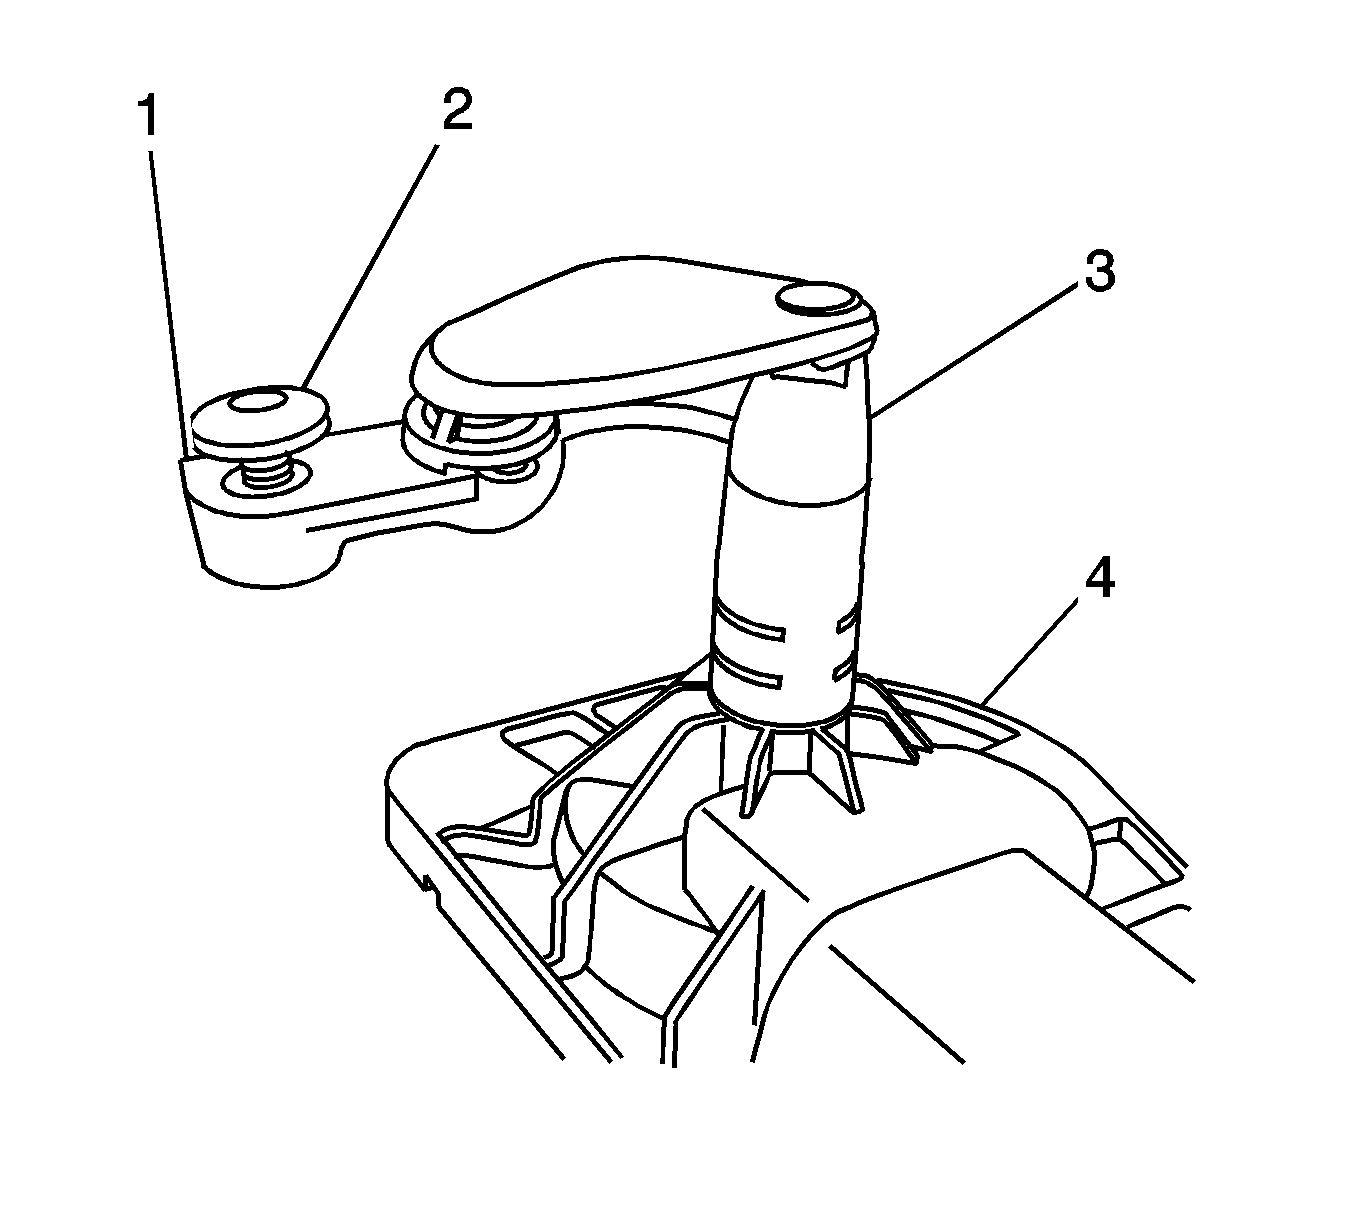
- Disconnect the window bracket to actuator
arm (1) by loosening screw (2).
Caution: When working with any type of glass or sheet metal with exposed or rough
edges, wear approved safety glasses and gloves in order to reduce
the chance of personal injury.
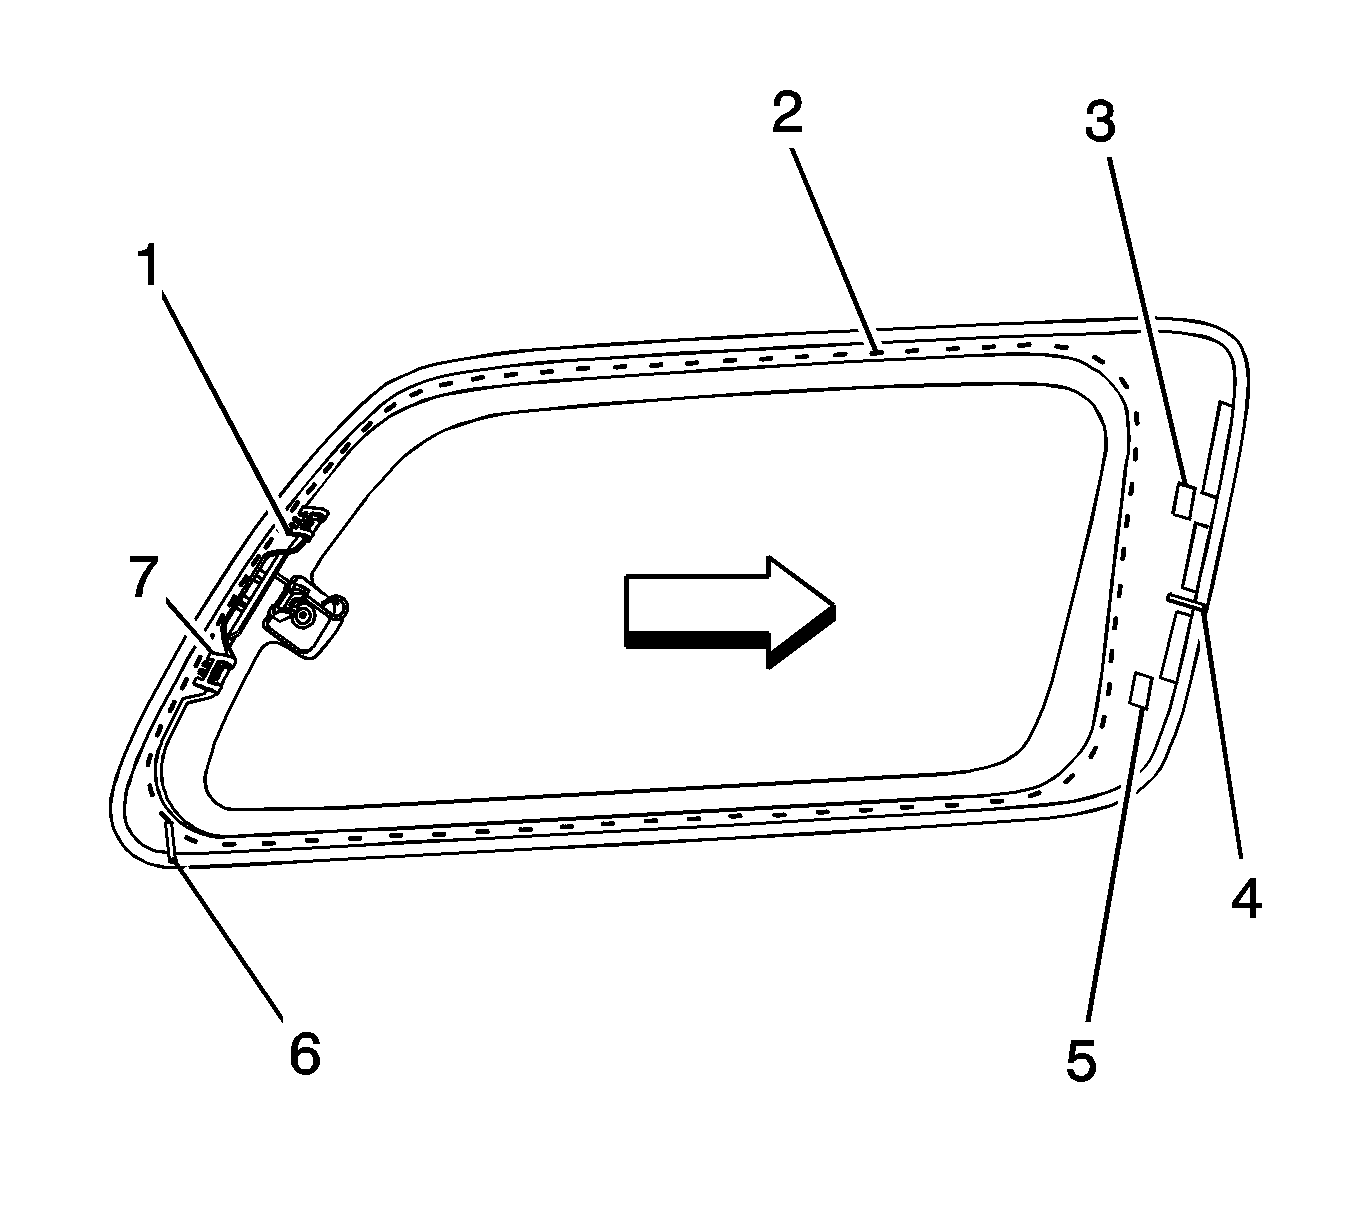
- From the exterior of the vehicle, wearing safety gloves and goggles,
pull the body side window outward and forward until the front body side window hinge
releases from the window frame (2). Discard the body side window.
Caution: When working with any type of glass or sheet metal with exposed or rough
edges, wear approved safety glasses and gloves in order to reduce
the chance of personal injury.
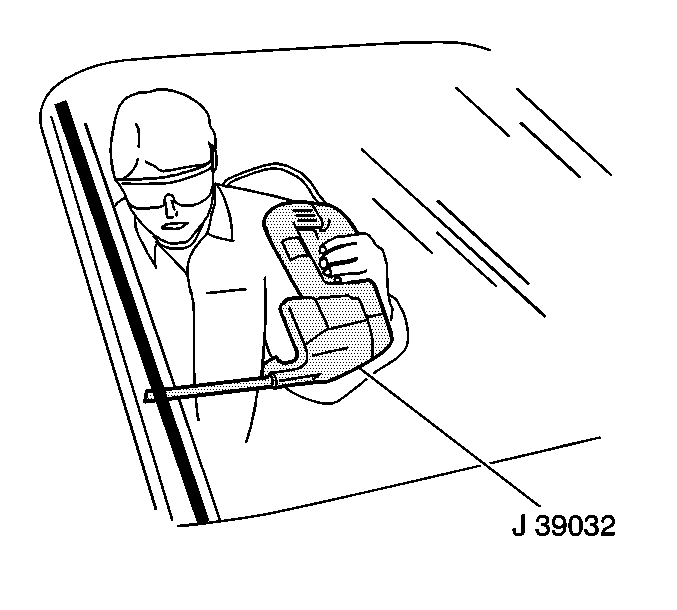
Important: Keep the cutting edge of the tool against the body side window frame . Do this
from outside side the vehicle.
- This will allow the urethane adhesive to be separated from the body side window
frame.
| • | Leave a base of urethane on the pinchweld flange. |
| • | The only suitable lubrication is clear water. |
| • | Use the J 39032
or
equivalent in order to remove the body side window frame. |
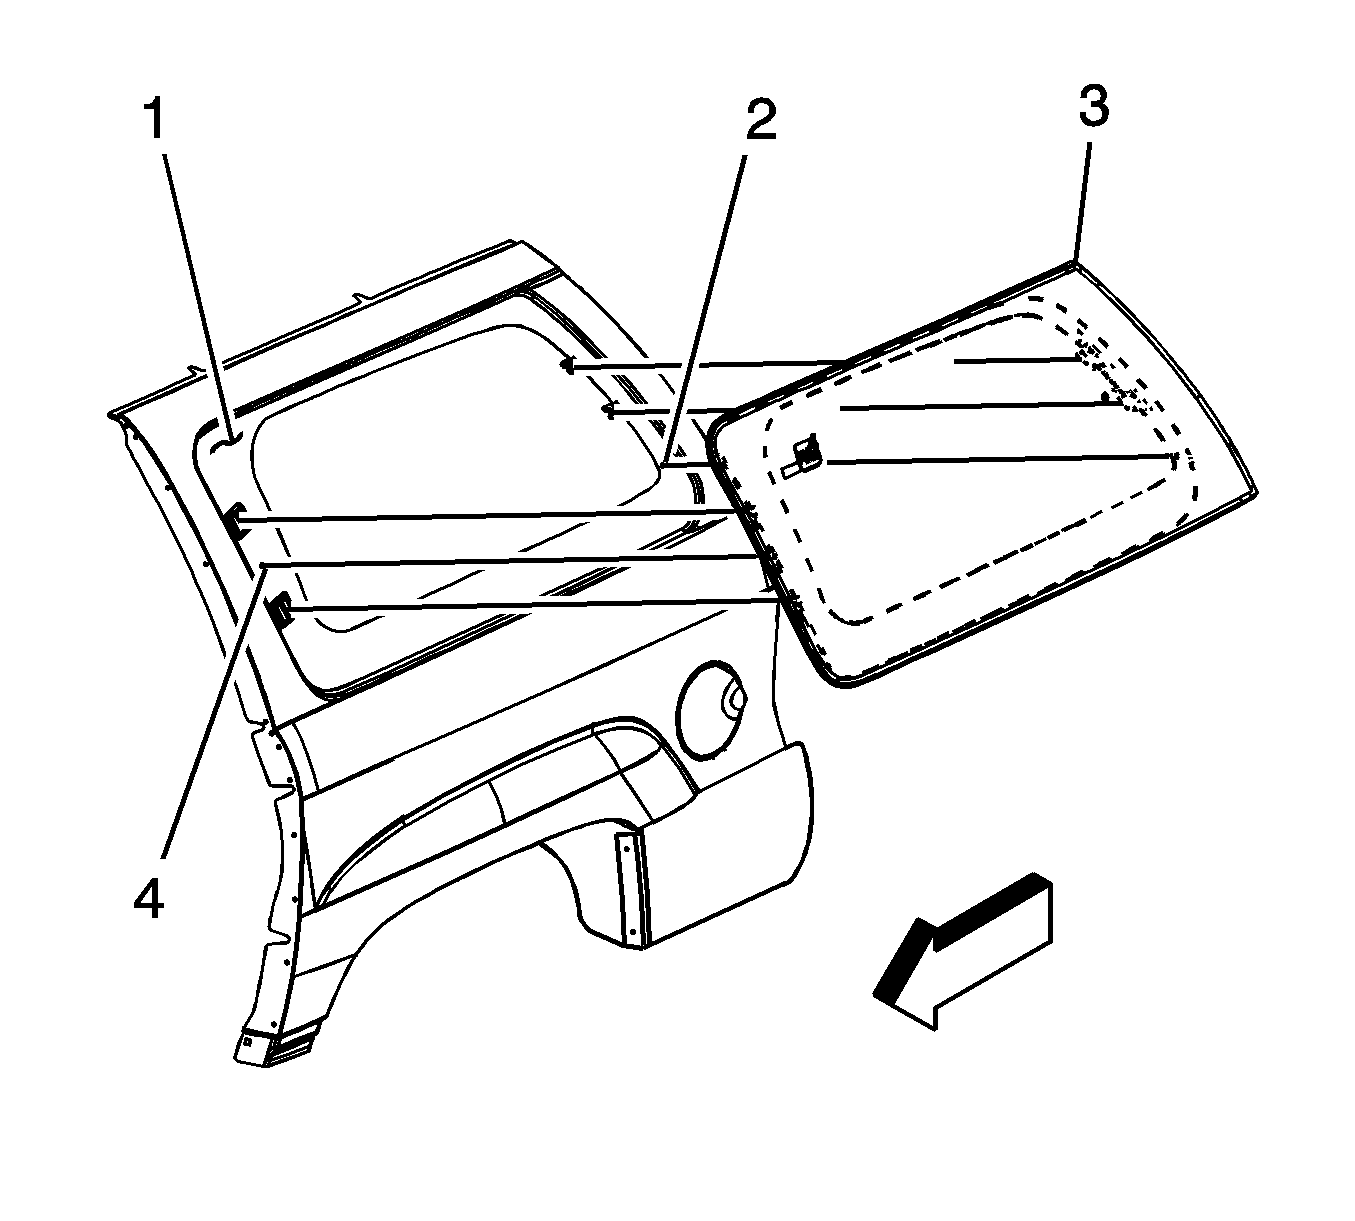
- Remove the window frame (1) from
the body side opening.
Installation Procedure
- Install the body side window into the opening. Refer to
Adhesive Installation of Bodyside Stationary Windows
.
- Remove the double layer of masking tape around the perimeter of the painted
surfaces and inner trim of the window.
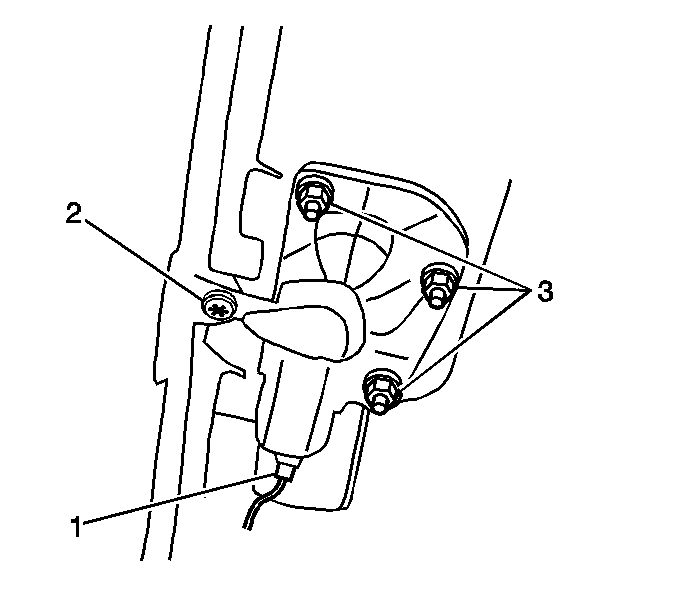
- Insert the actuator screw into the slot
on the window bracket.
Notice: Refer to Fastener Notice in the Preface section.
- Tighten the actuator screw.
Tighten
Tighten the screw to 5 N·m (44 lb in).
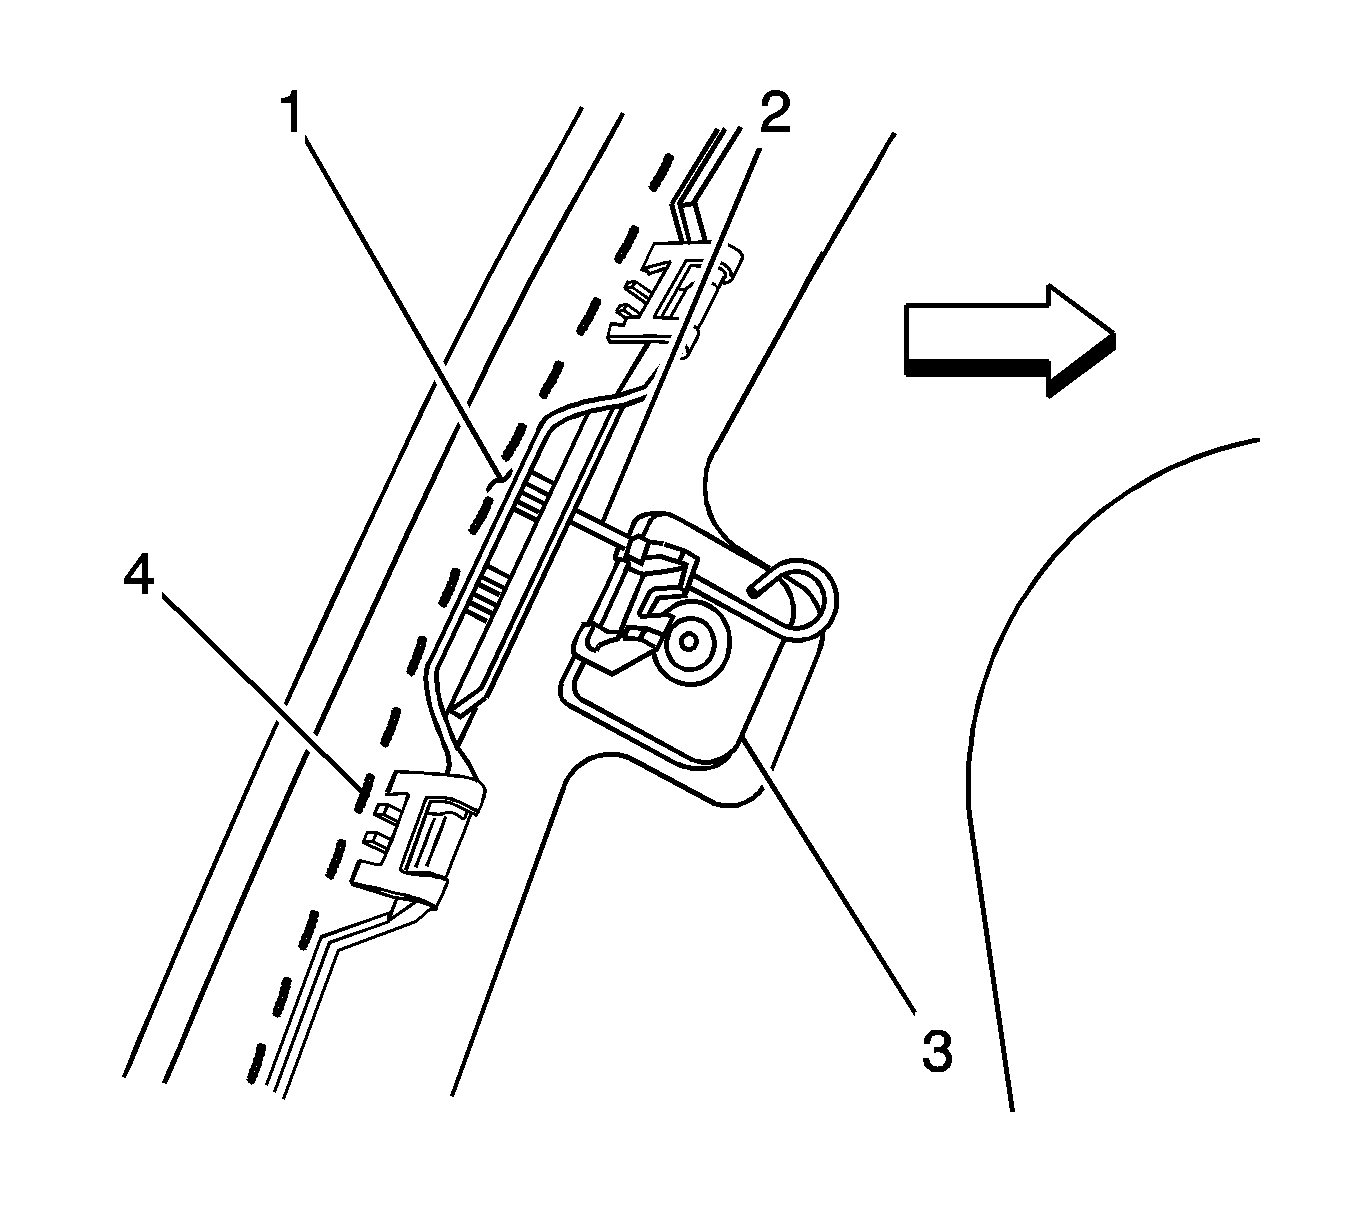
- Remove the window bracket (3) to
the window frame pin (1) prior to operating the body side window.
Caution: Insufficient curing of urethane adhesive may allow unrestrained occupants
to be ejected from the vehicle resulting in personal injury.
| • | For the moisture-curing type of urethane adhesive, allow a minimum
of 6 hours at 21°C (70°F) or greater and with at least 30 percent
relative humidity. Allow at least 24 hours for the complete curing
of the urethane adhesive. |
| • | For the chemical-curing type of urethane adhesive, allow a minimum
of 1 hour . |
Important: The actuator screw must be tightened and the window frame pin must be removed
for the window to function properly.


