For 1990-2009 cars only
Grille Replacement Envoy, Envoy XUV
Removal Procedure
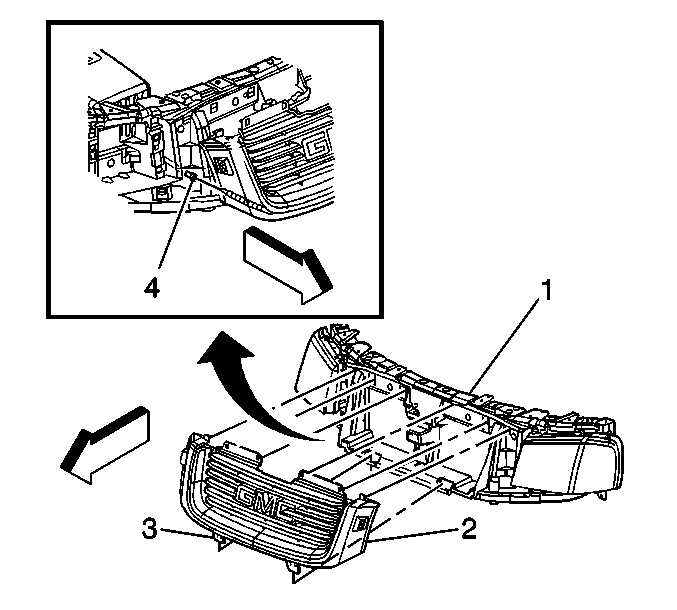
- Use a flat-bladed tool in order to release the clips that retain the top of the grille (2) to the headlamp housing panel.
- Lift the grille (2) out of position.
- Release the quick-connect (4) on the headlamp washer supply hose.
- Remove the grille from the vehicle.
- Place the grille on a clean, prepared surface.
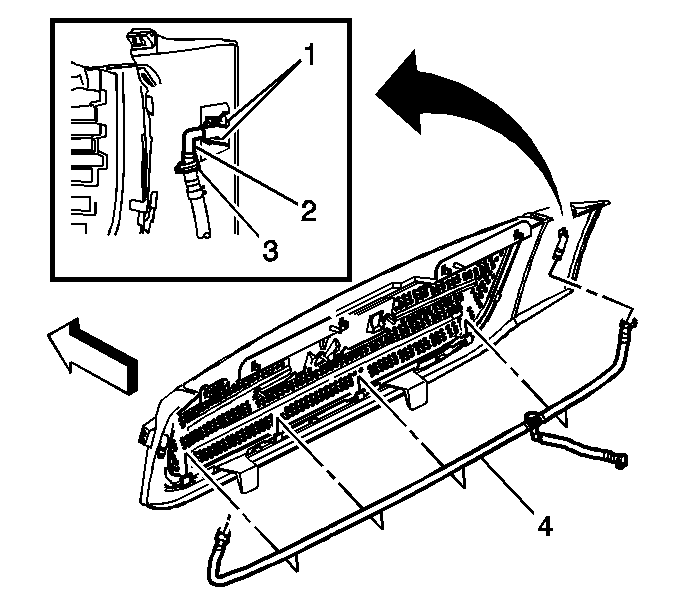
- Release the quick-connects (3) on the headlamp washer nozzle hoses.
- Spread the retaining tabs (1) on the grille in order to release the headlamp washer nozzle.
- Remove the headlamp washer nozzle from the front of the grille.
- Remove the headlamp washer hose (4) from the grille.
Installation Procedure
- Install the headlamp washer nozzle through the front of the grille.
- Push the washer nozzle (2) inward until fully seated in the retaining tabs (1).
- Install the headlamp washer supply hose (4) to the grille.
- Connect the quick-connects (3) to the headlamp washer nozzles.
- Position the grille to the headlamp housing panel.
- Position the grille (2) onto the headlamp housing panel (1) such that the lower locating tabs (3) are properly aligned.
- Connect the quick-connect (4) on the headlamp washer supply hose.
- Align the upper locating tabs of the grille (2) with the slots in the headlamp housing panel (1).
- Install and fully seat the retaining clips into the body.

Important: Install the quick-connect end first.

Grille Replacement TrailBlazer
Removal Procedure
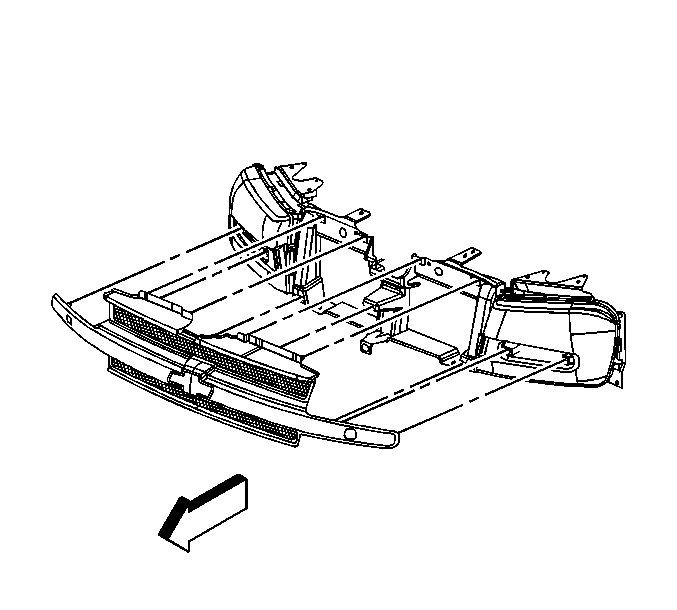
- Use a flat-bladed tool in order to release the clips that retain the grille to the headlamp housing panel.
- Remove the grille from the vehicle.
Installation Procedure
- Install the grille to the vehicle.
- Align the retaining clips on the grille with the slots in the headlamp housing panel.
- Fully install the retaining clips into the headlamp housing panel.

Grille Replacement Bravada
Removal Procedure
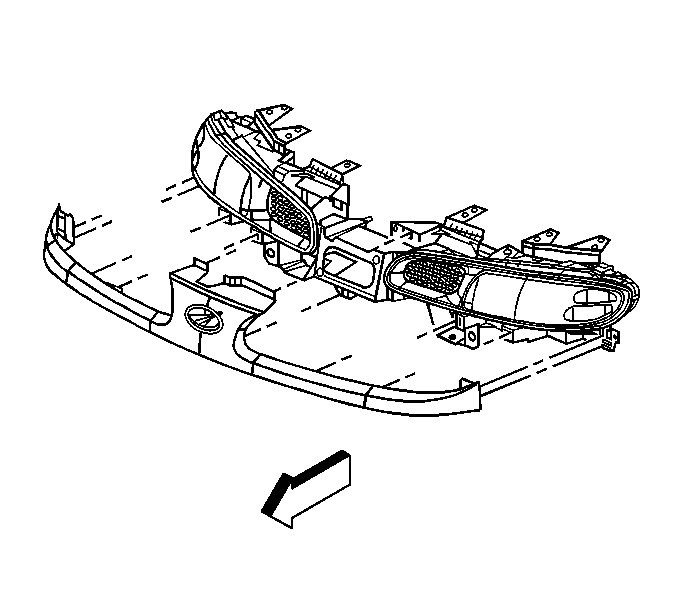
- Use a flat-bladed tool in order to release the clips that retain the grille to the headlamp housing panel.
- Remove the grille from the vehicle.
Installation Procedure
- Install the grille to the vehicle.
- Align the 11 retaining clips on the grille with the slots in the headlamp housing panel.
- Fully install the retaining clips into the headlamp housing panel.

Grille Replacement Rainier
Removal Procedure
- Use a flat-bladed tool in order to release the clips that retain the grille to the headlamp housing panel.
- Remove the grille from the vehicle.
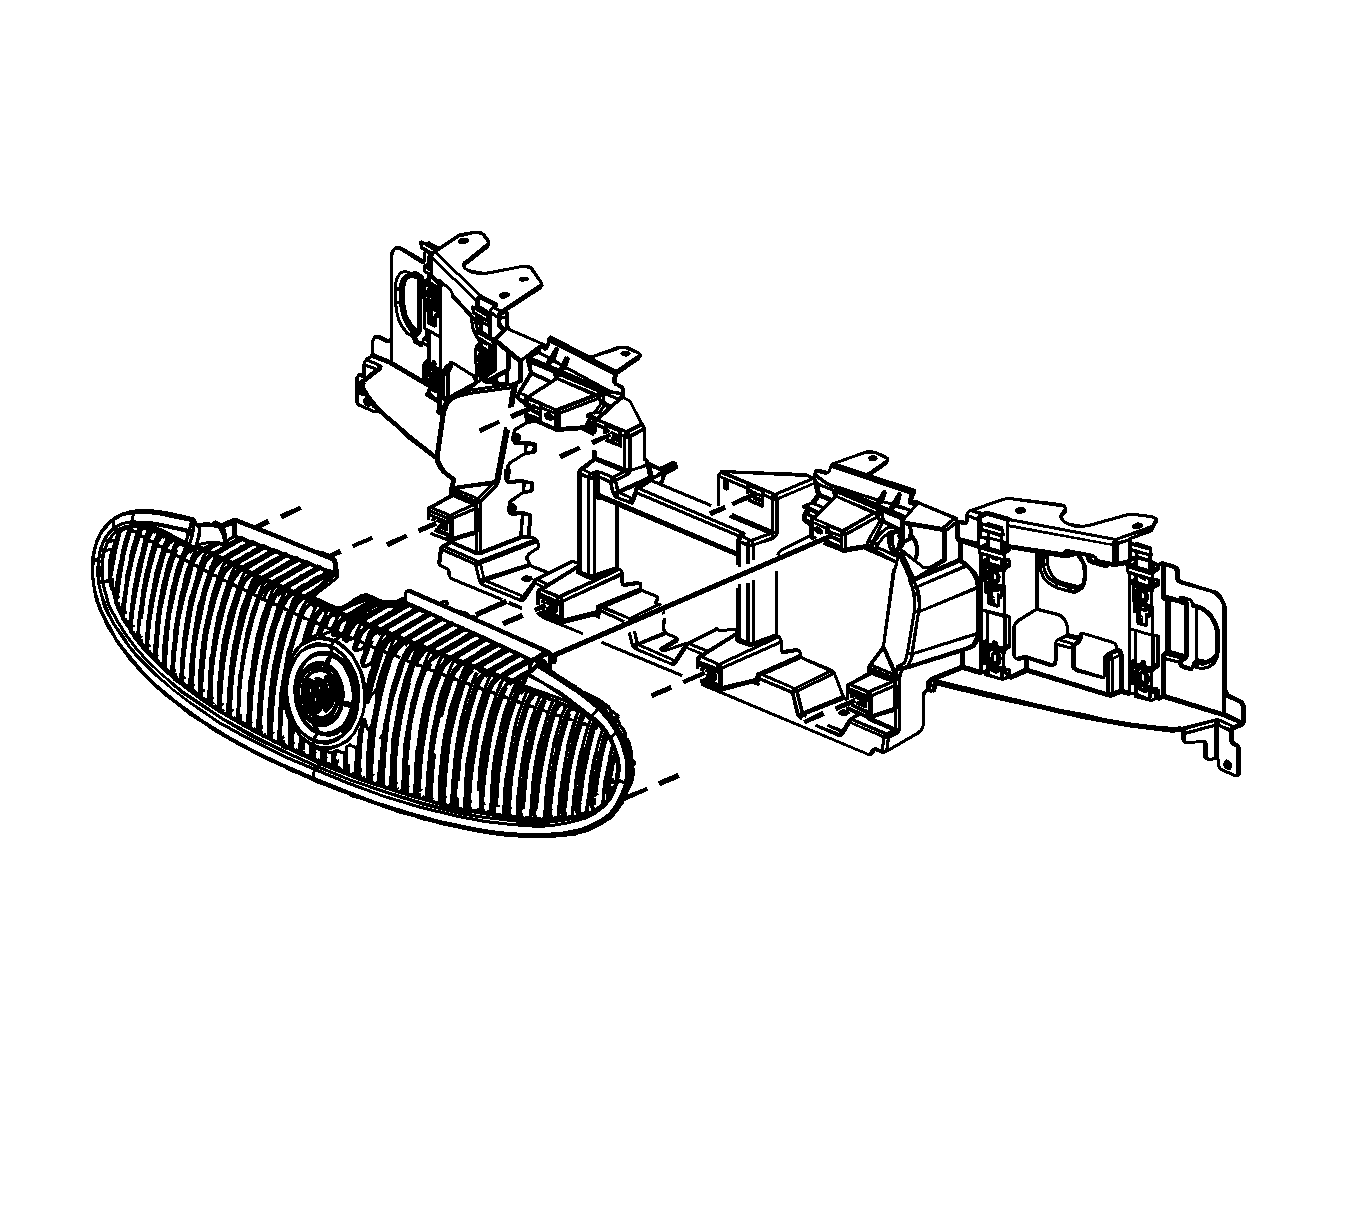
Installation Procedure
- Install the grille to the vehicle.
- Align the 8 retaining clips on the grille with the slots in the headlamp housing panel.
- Fully install the retaining clips into the headlamp housing panel.

