F/CMVSS Noncompliance - Windshield Urethane Adhesion

| Subject: | 05002 -- Windshield Urethane Adhesion |
| Models: | 2005 Buick Rainier |
| 2005 Chevrolet TrailBlazer |
| 2005 GMC Envoy |
Condition
General Motors has decided that certain 2005 model year Buick Rainier, Chevrolet TrailBlazer, and GMC Envoy vehicles fail to conform to Federal/Canada Motor Vehicle Safety Standard 212, Windshield Mounting. The windshield urethane bead on some of these vehicles may not have adhered to the body in certain areas during the cure process. In the event of a crash, the windshield may not be retained, increasing the risk of personal injuries to the vehicle occupants.
Correction
Dealers are to replace the windshield.
Vehicles Involved
Involved are certain 2005 model year Buick Rainier, Chevrolet TrailBlazer, and GMC Envoy vehicles built within these VIN breakpoints:
Year | Division | Model | From | Through |
|---|---|---|---|---|
2005 | Buick | Rainier | 52206047 | 52234384 |
2005 | Chevrolet | TrailBlazer | 52206042 | 52235018 |
2005 | GMC | Envoy | 52206044 | 52234545 |
Important: Dealers should confirm vehicle eligibility through GMVIS (GM Vehicle Inquiry System) before beginning recall repairs. [Not all vehicles within the above breakpoints may be involved.]
For US
For dealers with involved vehicles, a Campaign Initiation Detail Report containing the complete Vehicle Identification Number, customer name and address data has been prepared and will be loaded to the GM DealerWorld, Recall Information website. Dealers that have no involved vehicles currently assigned will not have a report available in GM DealerWorld.
For Canada
For dealers with involved vehicles, a Campaign Initiation Detail Report containing the complete Vehicle Identification Number, customer name and address data has been prepared and is being furnished to involved dealers. Dealers that have no involved vehicles currently assigned will not receive a Campaign Initiation Detail Report.
For Export
For dealers with involved vehicles, a Campaign Initiation Detail Report containing the complete Vehicle Identification Number, customer name and address data has been prepared and is being furnished to involved dealers. Dealers that have no involved vehicles currently assigned will not receive a report with the recall bulletin.
The Campaign Initiation Detail Report may contain customer names and addresses obtained from Motor Vehicle Registration Records. The use of such motor vehicle registration data for any other purpose is a violation of law in several states/provinces/countries. Accordingly, you are urged to limit the use of this report to the follow-up necessary to complete this program.
Parts Information
Parts required to complete this recall are to be obtained from General Motors Service Parts Operations (GMSPO). Please refer to your "involved vehicles listing" before ordering parts. Normal orders should be placed on a DRO = Daily Replenishment Order. In an emergency situation, parts should be ordered on a CSO = Customer Special Order.
Important: GM branded glass must be used for this repair. Dealers who sublet installations for this repair, please inform your installer of this information.
Part Number | Description | Qty/ Vehicle |
|---|---|---|
10367692 | Windshield (Chevy/GMC w/Rainsense™) (Exc. Export) | 1 |
10367694 | Windshield (Chevy/GMC w/o Rainsense™) (Exc. Export) | 1 |
10367693 | Windshield (Chevy/GMC Export w/Rainsense™) | 1 |
10367695 | Windshield (Chevy/GMC Export w/o Rainsense™) | 1 |
15212944 | Windshield (Buick) | 1 |
12346392 10952983 (Canada) | Adhesive Kit, Gls Urethane (or equivalent) | 1 |
15095432 | Molding, W/S Upr Rvl | 1 (if req'd) |
15061964 | Support, W/S | As Req'd |
89044634 | Retainer Kit, WSW Blade | As Req'd |
11589183 | Nut | As Req'd |
21075686 | Retainer | As Req'd |
11609411 | Nut | As Req'd |
Service Procedure
Tools Required
- J 24404-A Glass Sealant Remover (Cold Knife)
- J 39032 Stationary Glass Removal Tool
- Urethane Adhesive Kit GM P/N 12346392 (Canadian P/N 10952983) or equivalent
- Isopropyl Alcohol or equivalent
- Cartridge-type Caulking Gun
- Commercial-type Utility Knife
- Razor Blade Scraper
- Suction Cups
- Plastic Paddle
Important: Before cutting out a stationary window, apply a double layer of masking tape around the perimeter of the painted surfaces and the interior trim.
- Open the hood.
- Cover and protect the following parts from broken glass:
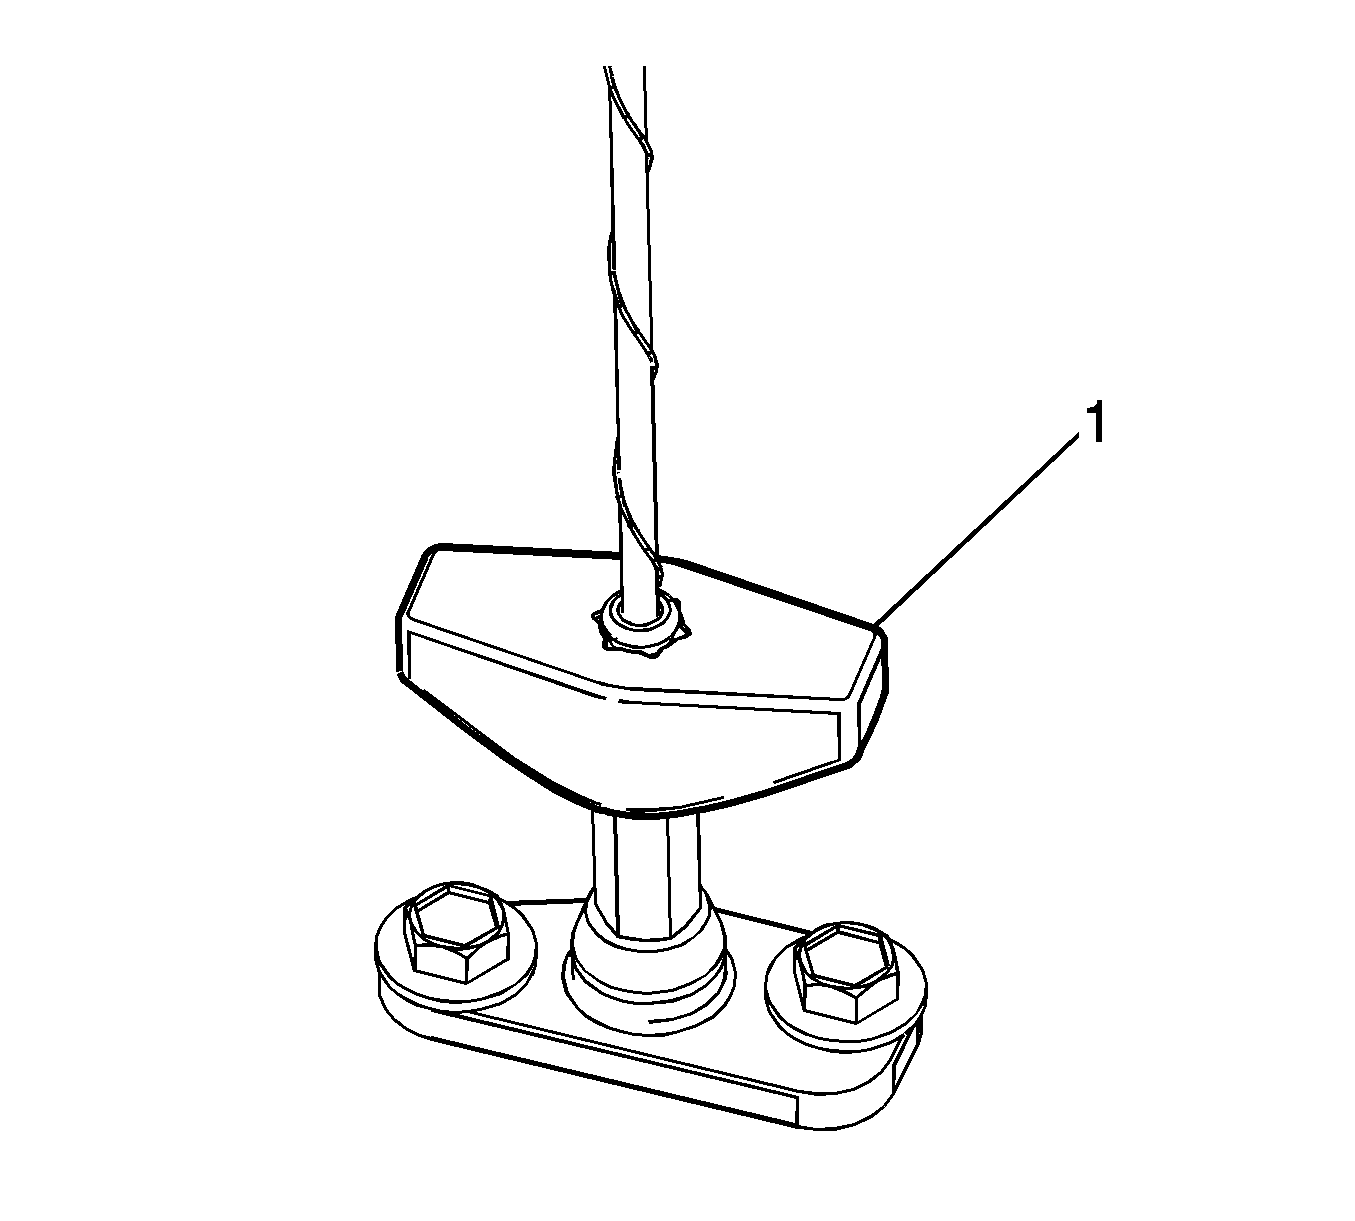
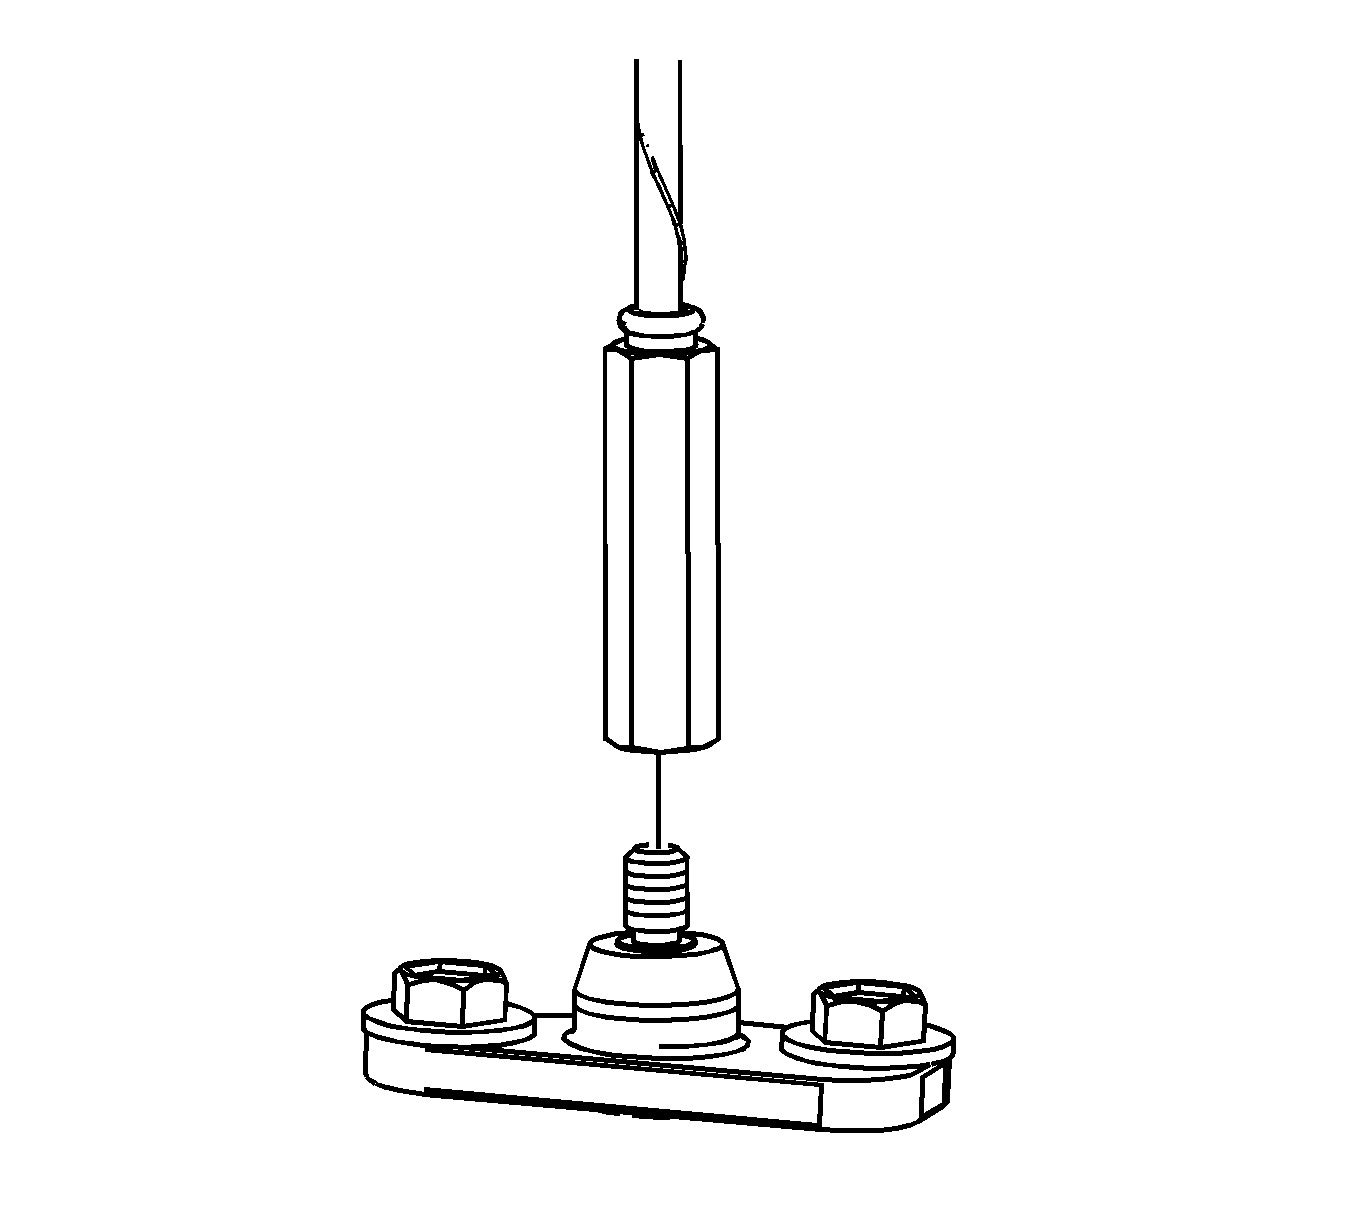
- Use the tool (1) provided with the vehicle to unscrew the antenna mast, if equipped.
- Remove the antenna mast from the antenna base, if equipped.
- Remove the cover from the nut on the wiper arm.
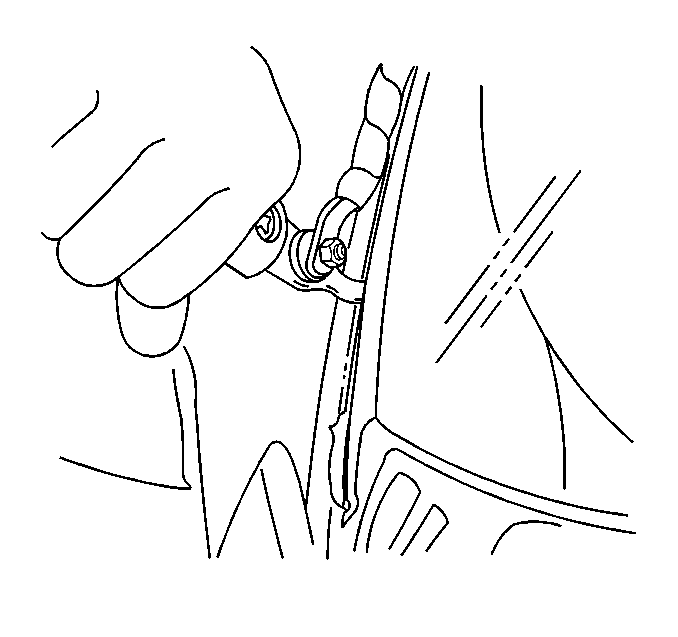
- Hold the wiper arm and remove the nut from the wiper arm.
- Push inward at the wiper arm pivot in order to loosen it from the drive shaft.
- Remove the wiper arm from the pivot shaft.
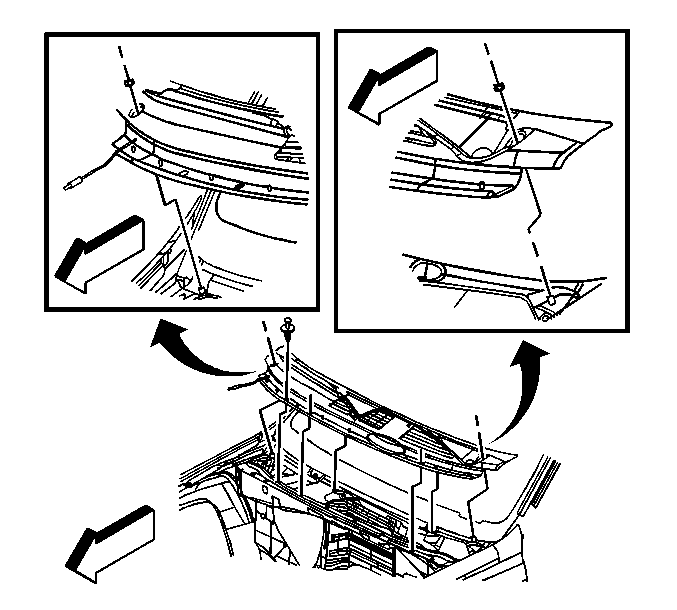
- Remove the air inlet grille panel retaining nuts.
- Remove the air inlet grille panel retainers.
- Disconnect the washer hose.
- Remove the air inlet grille panel from the vehicle by pulling upwards and to the rear in order to disengage the retaining clips.
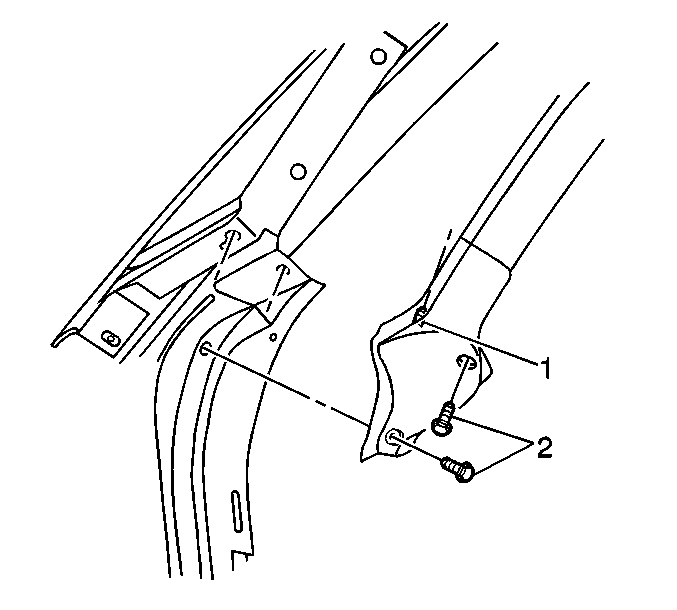
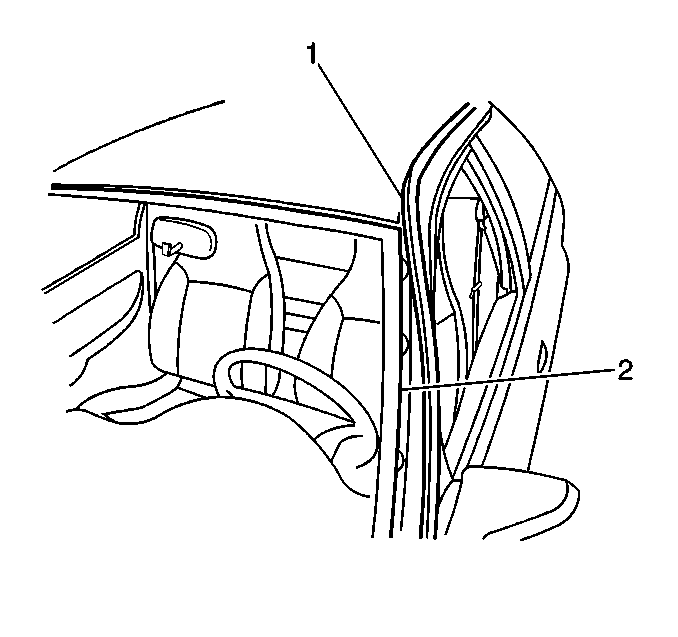
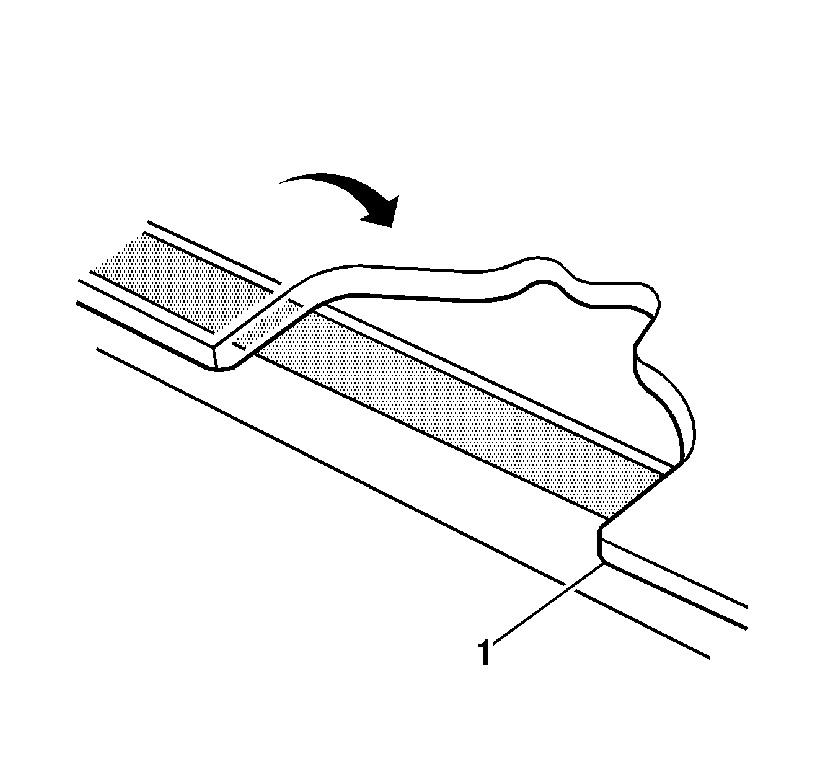
- Remove the push-pins (2) from the front door sealing weatherstrips (1) located at the base of the pillar.
- Reposition the front door sealing weatherstrips (1) in order to access the side reveal molding screws. It is not necessary to remove the front door sealing weatherstrip completely from the vehicle.
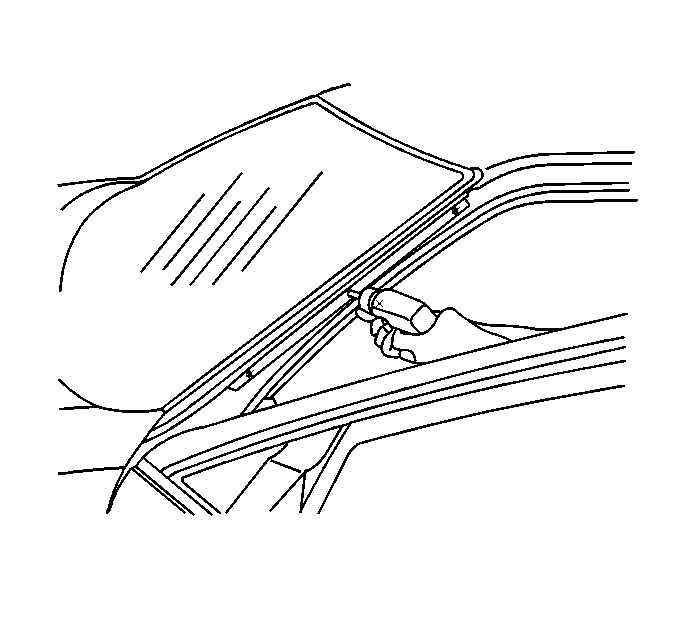
- Remove the side reveal molding screws.
- Remove the side of the reveal moldings.
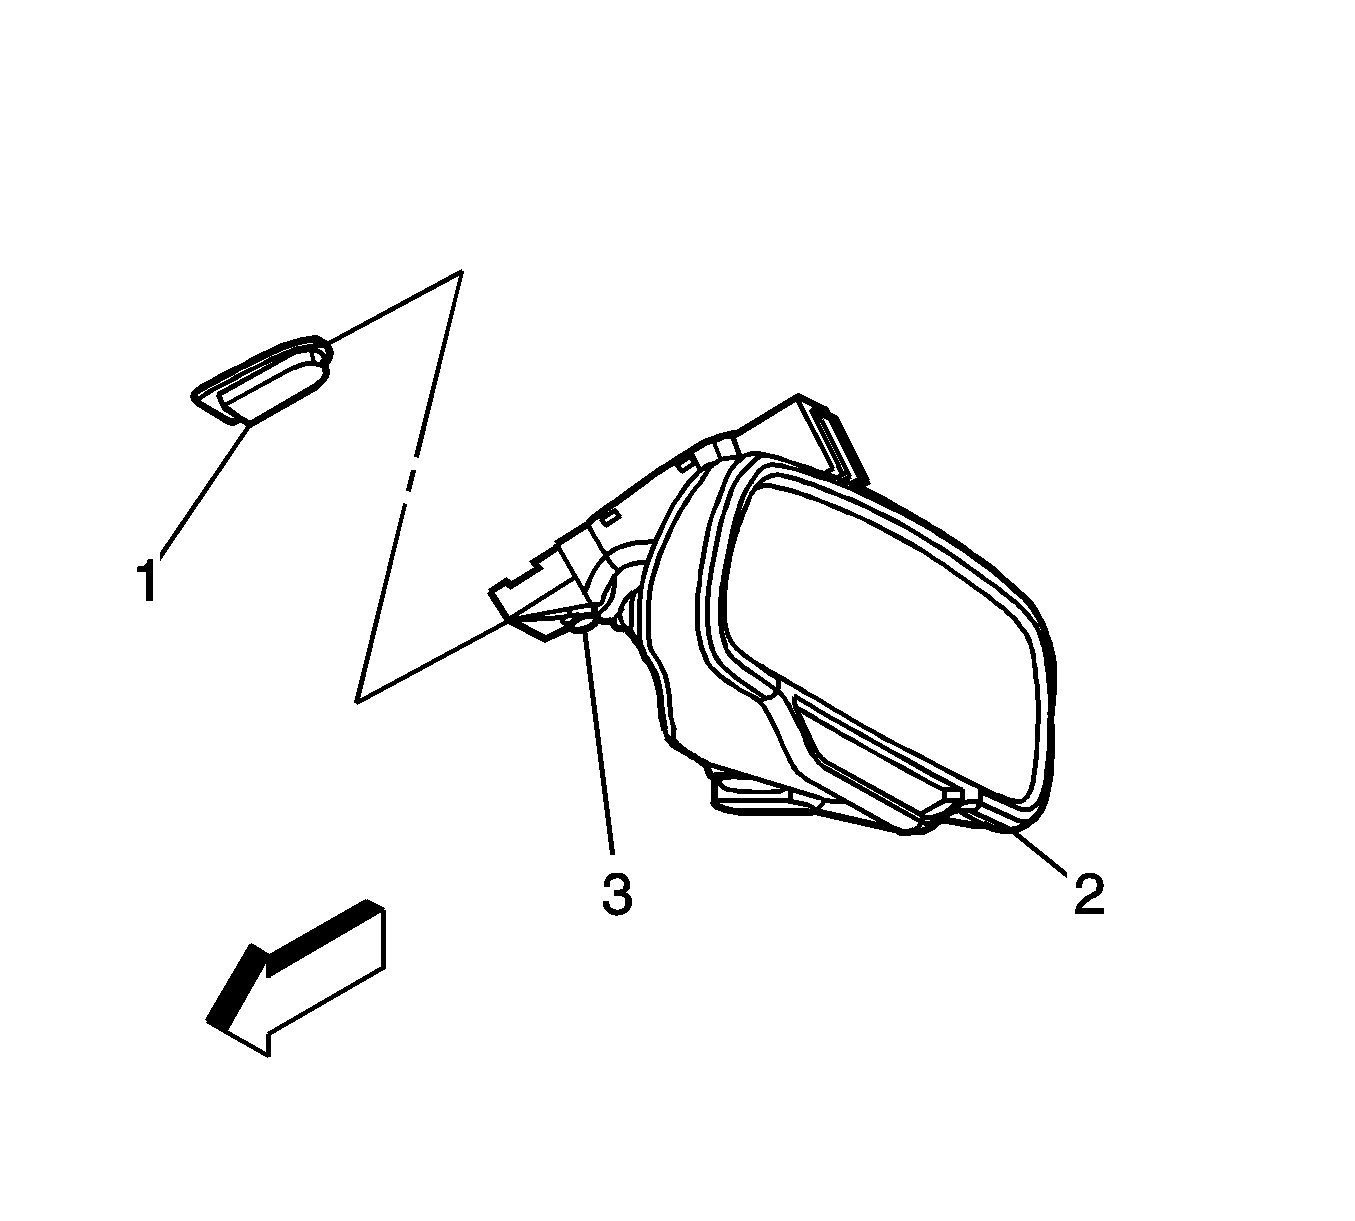
- Disconnect the wire cover from the upper mirror base.
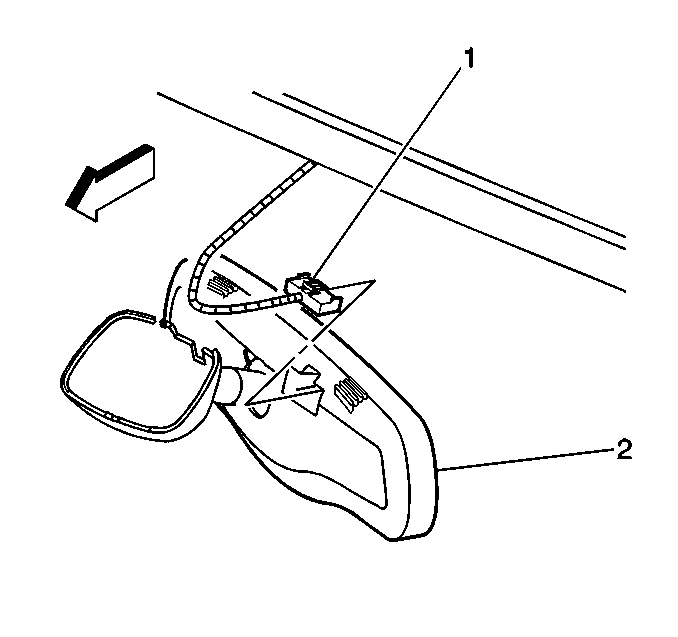
- Use a flat-bladed tool in order to disconnect the electrical connector (1) from the mirror (2), if equipped.
- Using a TORX® screwdriver, loose the set screw that holds the mirror base to the windshield button.
- Slide the mirror upward off of the rearview mirror button (1).
- Remove the rain sensor, if equipped.
- Disconnect the electrical connector from the rain sensor (1).
- Carefully pull downward on the sensor (1) to release it from the retaining ring (2).
- Remove the sensor from the vehicle.
- If the reveal molding is stretched or damaged, it cannot be reused. It must be replaced.
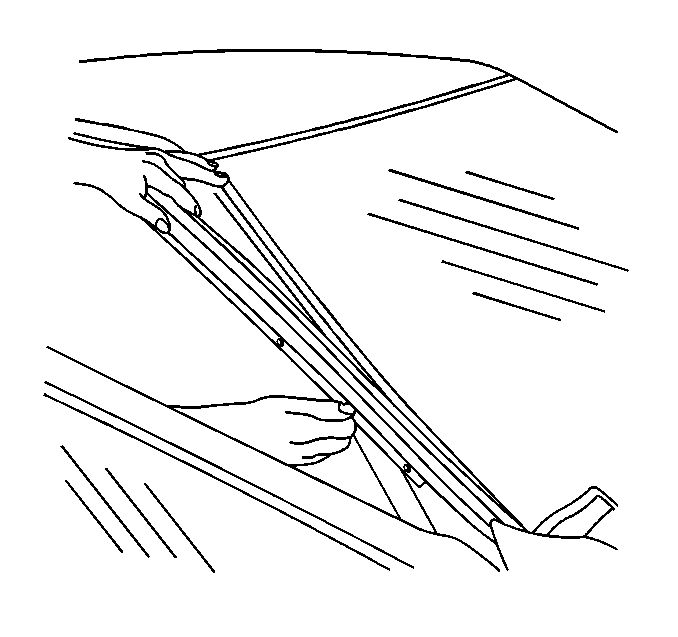
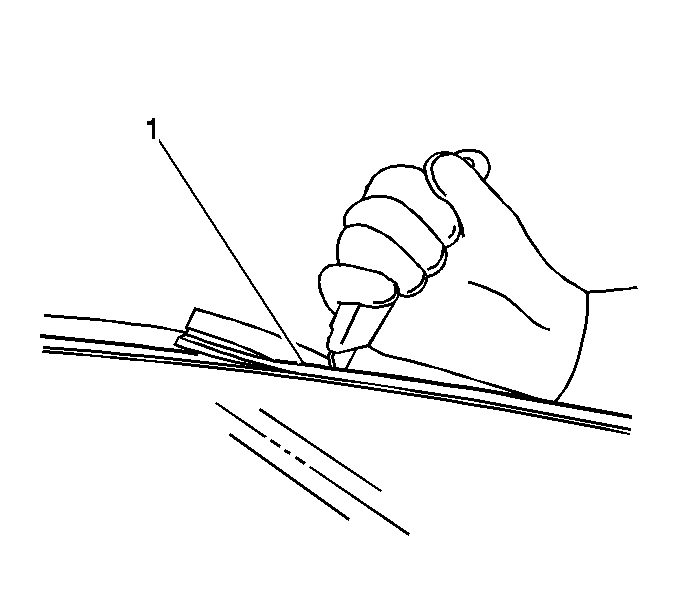
- Remove the upper windshield reveal molding (1). Grasp the lower control of the windshield reveal molding by hand and slowly pull the reveal molding away from the windshield.
- If the upper windshield reveal molding will not release, use a utility knife in order to cut around the windshield to remove the windshield reveal molding.
- Remove the windshield lower supports (1) by using a flat-bladed tool, lightly prying upward in the middle until it releases, if damaged.
- This will allow the urethane adhesive to be separated from the window.
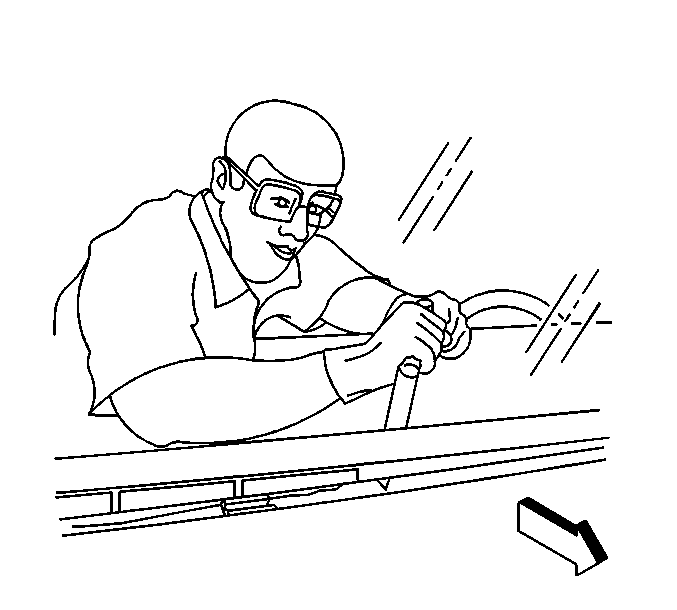
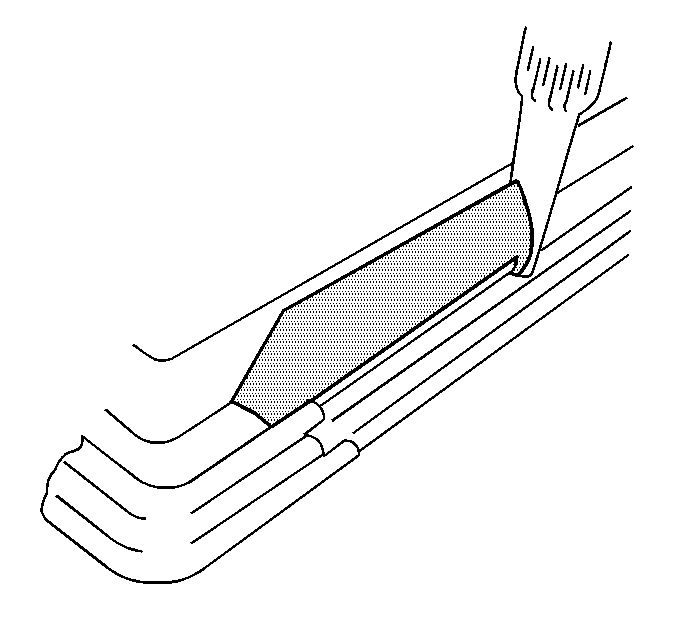
- Remove the bottom of the windshield from the urethane adhesive using a long utility knife or similar tool. Keep the cutting edge of the utility knife against the glass. Do this from inside the vehicle.
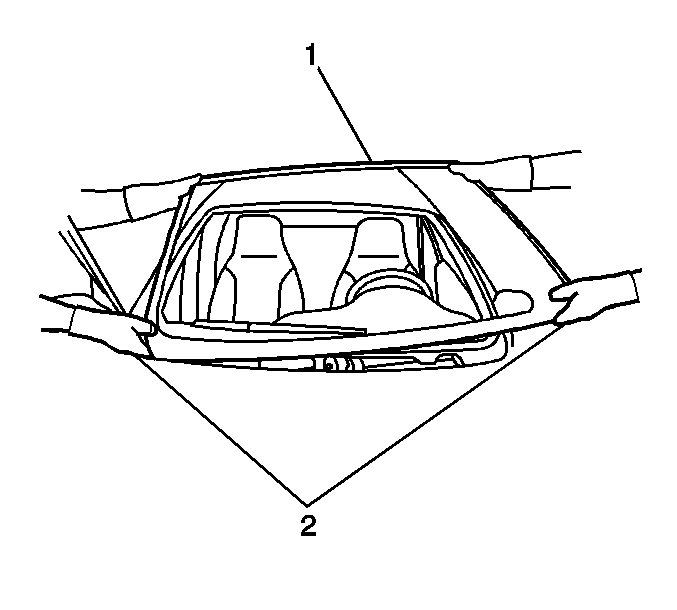
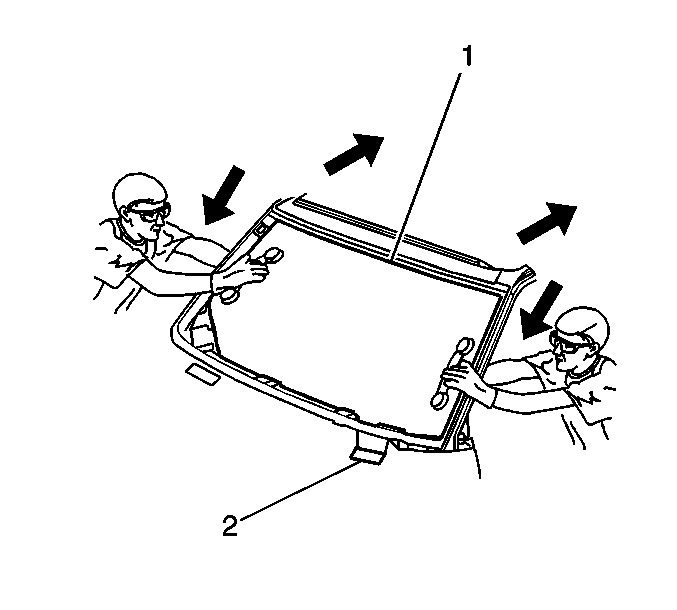
- With the aid of an assistant, remove the windshield (1) from the vehicle.
- Removal all pieces of urethane adhesive from the pinch-weld area.
- Inspect for any of the following problems in order to help prevent future breakage of the window.
- After repairing the opening as indicated, perform the following steps.
- Verify all primers and urethane adhesive are within expiration dates.
- Shake the pinch-weld primer black #3 for at least 1 minute.
- Use a new dauber in order to apply the primer to the surface of the pinch-weld flange.
- Allow the pinch-weld primer to dry for approximately 10 minutes.
- Install the windshield (1) and the VIN plate filler strip, if equipped.
- Install the window to the vehicle.
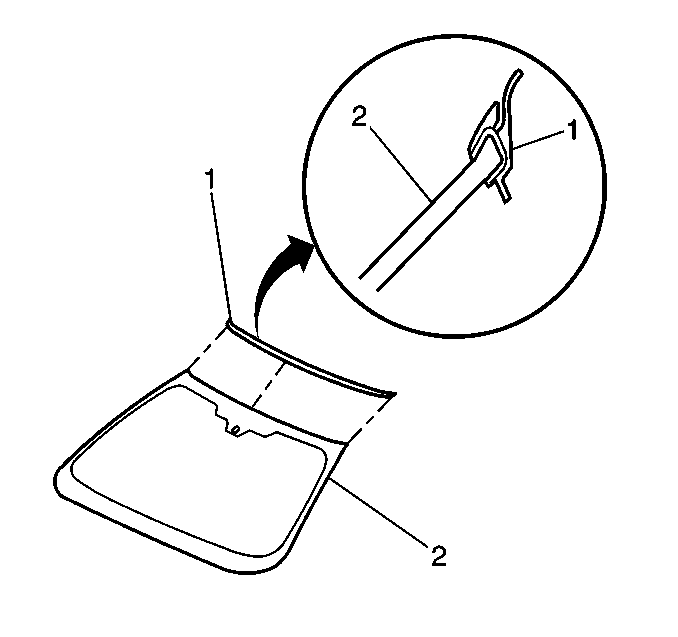
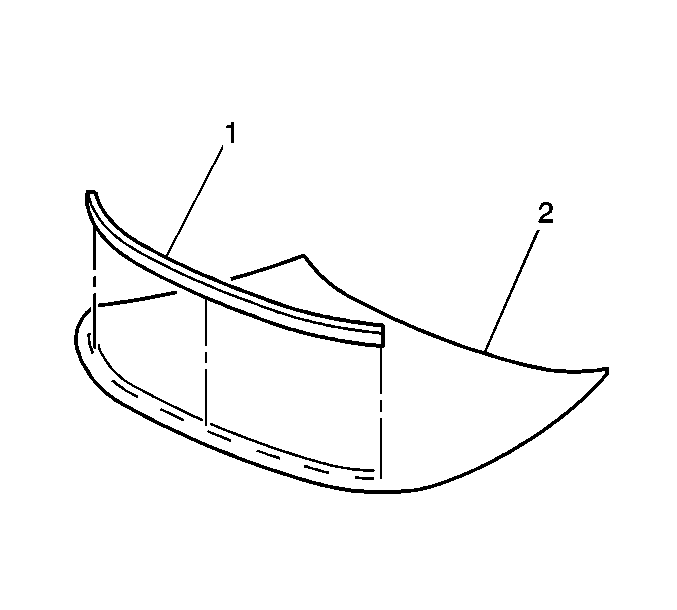
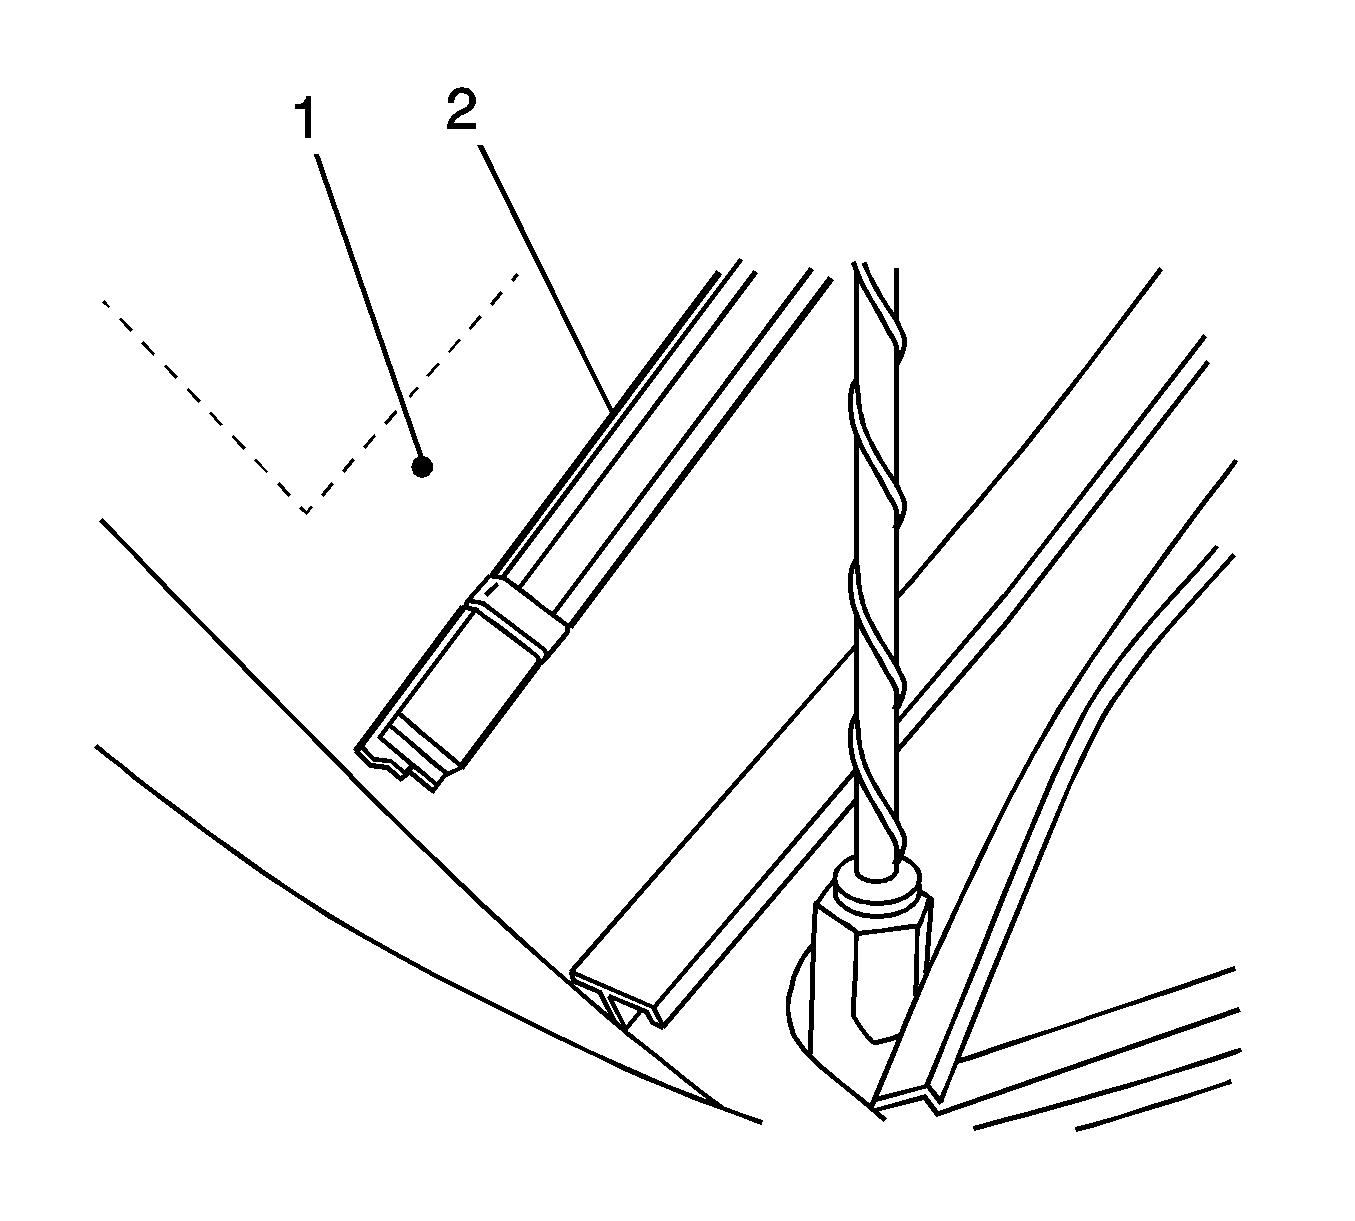
- Install the new windshield acoustic strip (1) to the windshield (2), if equipped or damaged. The acoustic strip aids in reducing noise
- If installing a new window reveal molding, start in the center and work toward each end pressing firmly into place.
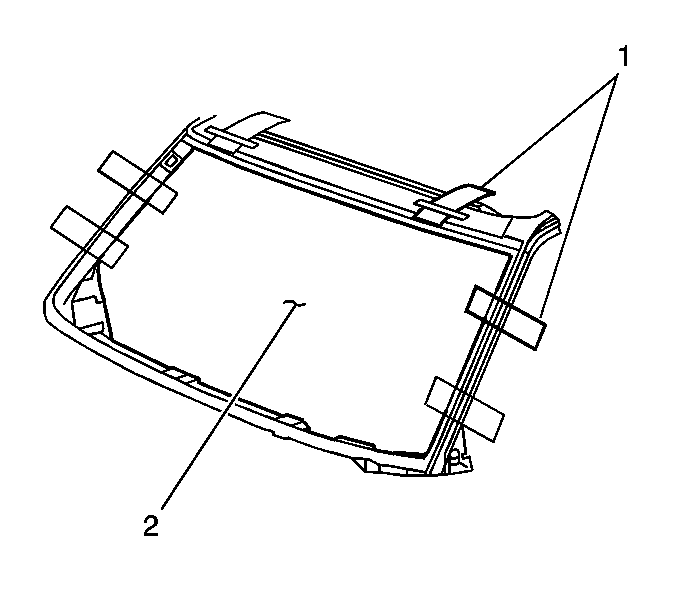
- With the aid of an assistant, dry fit the window (1) to the opening in order to determine the correct position.
- Use masking tape in order to mark the locations (1) of the window (2) in the opening.
- Cut the masking tape in the center and remove the window from the opening.
- Use a new dauber in order to apply glass prep clear #1 to the area approximately 10-16 mm (3/8-5/8 in) around the entire perimeter of the window inner surface. Immediately wipe the glass primed area using a clean, lint-free cloth.
- Apply a second coat of the glass prep clear #1 to the same area of the glass.
- Shake the glass primer black #2 for at least 1 minute.
- Use a new dauber in order to apply the glass primer black #2 to the same areas (2) that glass prep clear #1 was applied
- Allow the glass primer to dry for approximately 10 minutes
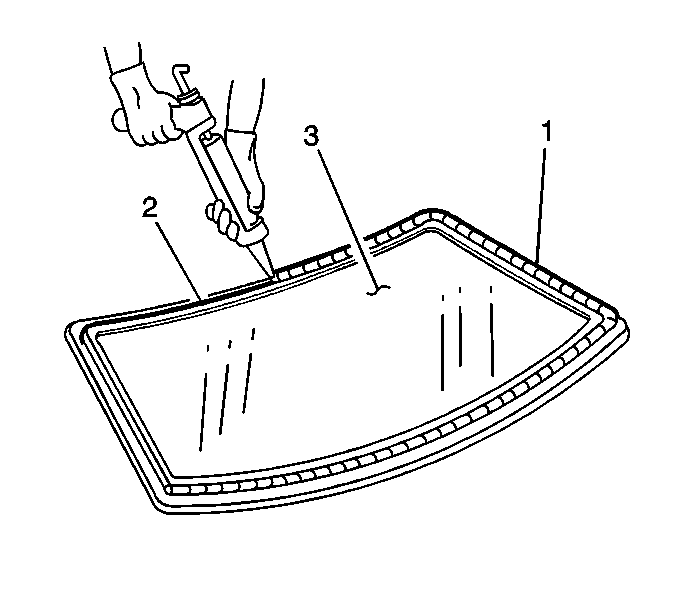
- Cut the applicator nozzle in order to provide a bead of 12.7 mm (1/2 in) wide and 12.7 mm (1/2 in) high.
- Use a cartridge-type caulking gun in order to apply a smooth, continuous bead of urethane adhesive.
- Use the edge of the window or the inside edge of the reveal molding as a guide for the nozzle in order to apply the urethane adhesive (1) to the inner surface of the window (3).
- With the aid of an assistant, place the window in the opening. Place the windshield on the lower supports (2), if equipped
- Align the masking tape (1) lines on the window (2) and the body
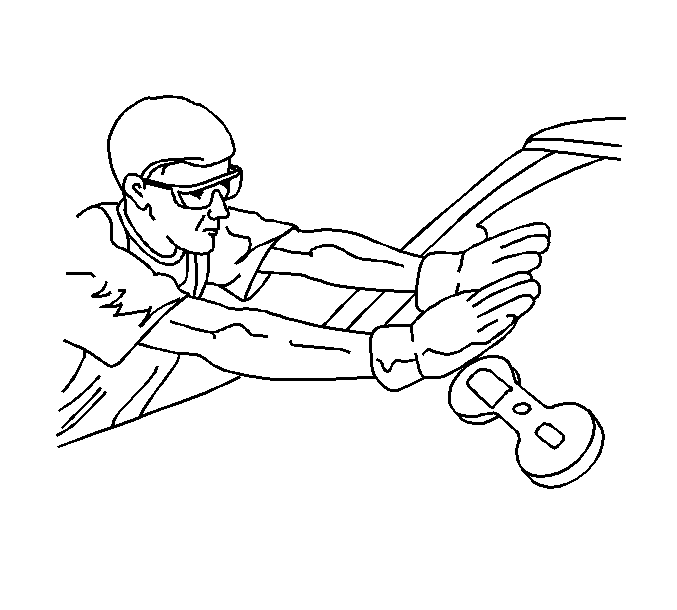
- Press the window firmly into place.
- Tape the window to the body in order to minimize movement until the urethane adhesive cures.
- Clean any excess urethane adhesive from the body.
- Use a soft spray of warm water in order to immediately water test the window.
- Inspect the window for leaks.
- If any leaks are found, use a plastic paddle in order to apply extra urethane adhesive at the leak point.
- Retest the window for leaks.
- Maintain the following conditions in order to properly cure the urethane adhesive:
- Install the windshield side reveal moldings.
- Install the windshield side reveal moldings screws.
- Reposition the front door sealing weatherstrips (1) to the pinch-weld flange.
- Install the push-pin retainers (2) to the front door sealing weatherstrips located at the base of the windshield pillar.
- Position the air inlet grille panel to the rear edge of the hood
- Push downward on the air inlet grille panel to seat the retaining clips.
- Connect the washer hose.
- Install the retainers and secure.
- Install the air inlet grille retaining nuts.
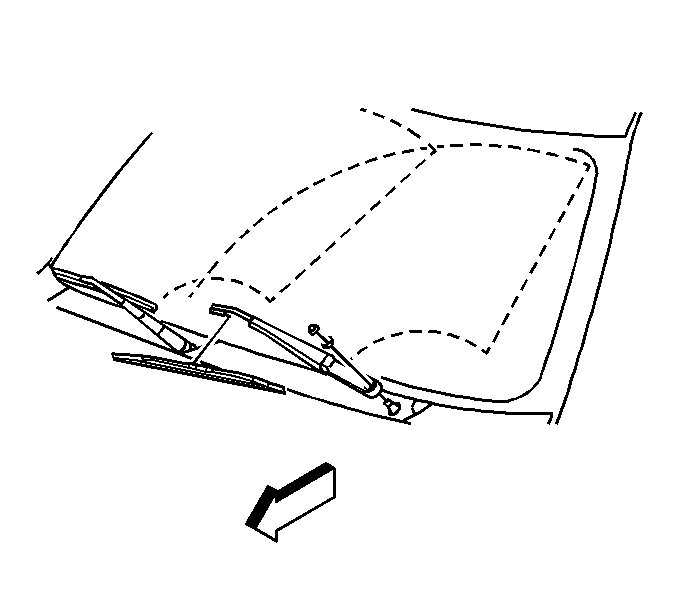
- Install the wiper arm onto the drive shaft.
- Hold the wiper arm blade (2) in position to the dots (1) in the windshield blackout area.
- Install the nut on the drive shaft.
- Install the cover on the nut.
- Install the antenna mast to the antenna base, if equipped.
- Using the mast tool, tighten the antenna mast (1) until fully seated to the antenna base (2), if equipped. Return the tool to the vehicle.
- Slide the mirror (2) onto the support button (1).
- Install the set screw.
- Connect the wire cover to the upper mirror base.
- Connect the electrical connector (1), if equipped.
- Reposition the mirror.
- Clean the mounting location for the moisture sensor on the windshield using a clean lint free cloth with isopropyl alcohol.
- Install the rain sensor (1) to the windshield.
- Connect the electrical connector to the rain sensor (1).
- Close the hood
- Remove the double layer of masking tape around the perimeter of the painted surfaces and the interior trim.
Caution: If broken glass falls into the defroster outlets, it can be blown into the passenger compartment and cause personal injury.
| - | Upper dash pad |
| - | Defroster outlets and A/C outlets |
| - | Seats and carpeting |
Important: Use a battery terminal puller to remove the wiper arm if rocking the wiper arm fails to loosen it from the driver shaft.
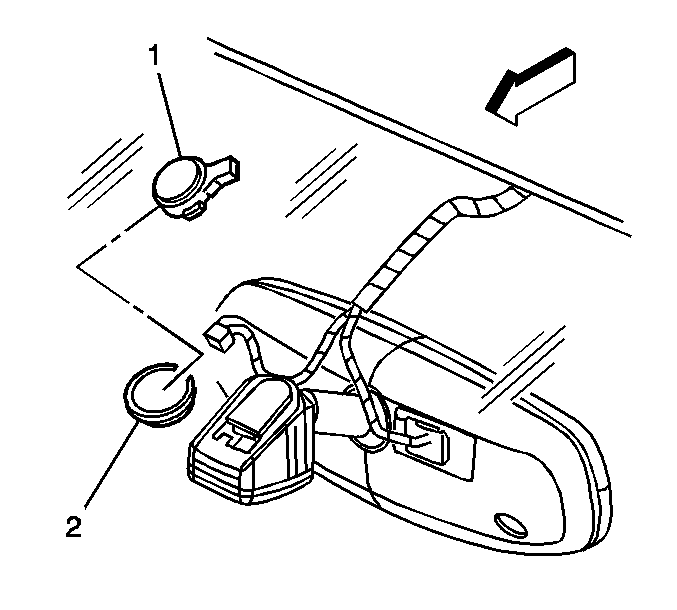
Important: The rain sensor-retaining ring is permanently mounted to the windshield and is not serviceable. Damage to the windshield or the retaining ring will occur if removed.
Important: Do not touch the surface of the sensor when it is removed from the glass.
Caution: When working with any type of glass or sheet metal with exposed or rough edges, wear approved safety glasses and gloves in order to reduce the chance of personal injury.
Important: The upper windshield reveal molding (1) fills the cavities between the body and windshield.
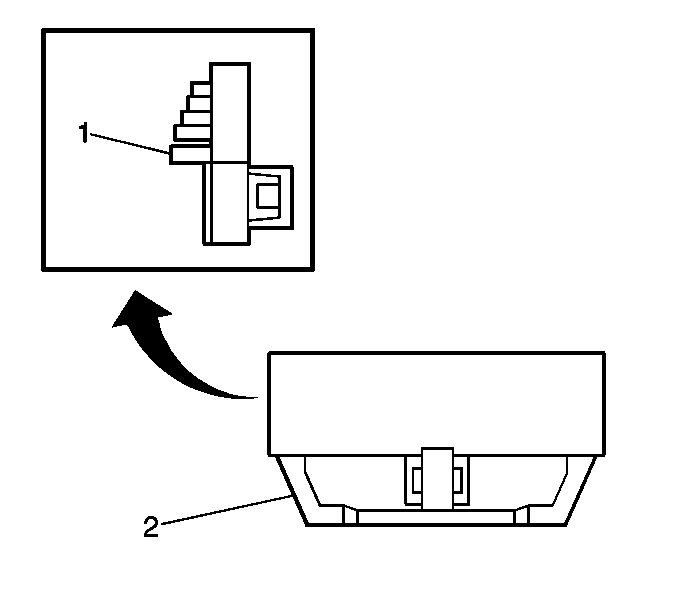
Important: The windshield lower supports (1) have molded in locks with an adhesive strip (2) on the backside. If the windshield lower stops have been removed, they must be replaced.
Important: Keep the cutting edge of the tool against the window.
| • | Leave a base of urethane on the pinch-weld flange. |
| • | The only suitable lubrication is clear water. |
| • | Use J 24402-A, J 39032 or equivalent in order to remove the window. |
Caution: When working with any type of glass or sheet metal with exposed or rough edges, wear approved safety glasses and gloves in order to reduce the chance of personal injury.
| • | High weld |
| • | Solder spots on the pinch-weld |
| • | Hardened sealer |
| • | Any other obstruction or irregularity in the pinch-weld flange |
Important: If corrosion of the pinch-weld flange is present or if sheet metal repairs or replacements are required, the pinch-weld flange must be refinished in order to restore the bonding area strength. If paint repairs are required, mask the flange bonding area prior to applying the color coat in order to provide a clean primer only surface. Materials such as BASF DE15®, DuPont 2610®, Sherwin-Williams PSE 4600 and NP70® and Martin-Semour 5120 and 5130® PPG DP90LF SPIES/HECKER 3688/8590 - 3688/5150 - 4070/5090 STANDOX 11158/13320 - 14653/14980 products are approved for this application.
| • | Remove all traces of broken glass from the outer cowl panel, seats, floor, and defroster ducts. |
| • | Clean around the edge of the inside surface of the window with a 50/50 mixture of isopropyl alcohol and water by volume on a dampened lint-free cloth. |
Caution: When replacing stationary windows, use Urethane Adhesive Kit GM P/N 12346392 (Canadian P/N 10952983), or a urethane adhesive system meeting GM Specification GM3651G, to maintain original installation integrity. Failure to use the urethane adhesive kit will result in poor retention of the window, which may allow unrestrained occupants to be ejected from the vehicle resulting in personal injury.
Those products currently recognized as meeting GM3651G are as follows: Dow Automotive (Essex) 400HV (one part and requires associated primers) Dow Automotive (Essex) U216 (two part and requires associated primers) Call Dow Automotive at 1-800-453-3779 for more information. 3M™ "Fast Cure" Auto Glass Urethane (one part and requires associated primers) Call 3M™ at 1-877-666-2277 for more information. Any use of these materials should be done as a system by the specific manufacturer. DO NOT intermix primers or adhesives from one manufacturer to another.Caution: Failure to prep the area prior to the application of primer may cause insufficient bonding of urethane adhesive. Insufficient bonding of urethane adhesive may allow unrestrained occupants to be ejected from the vehicle resulting in personal injury.
Important: Apply the primer only to the primed surfaces.
Notice: Do not use spacers when installing a windshield. The stress caused by the spacers may damage the windshield.
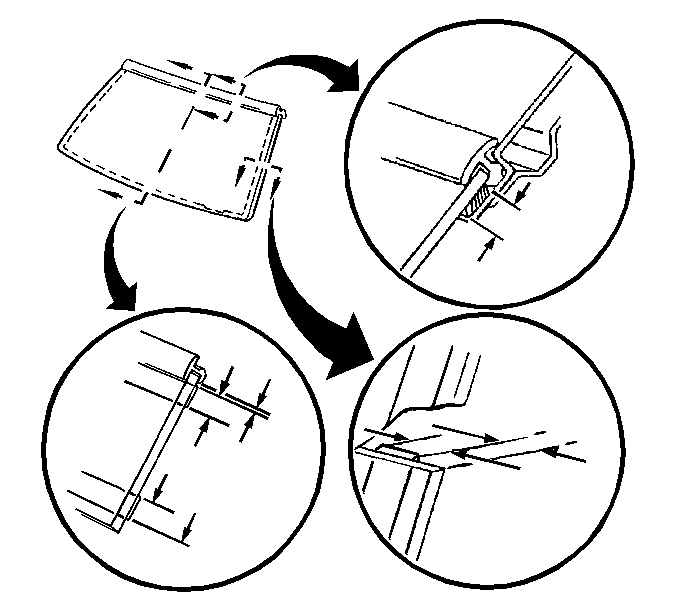

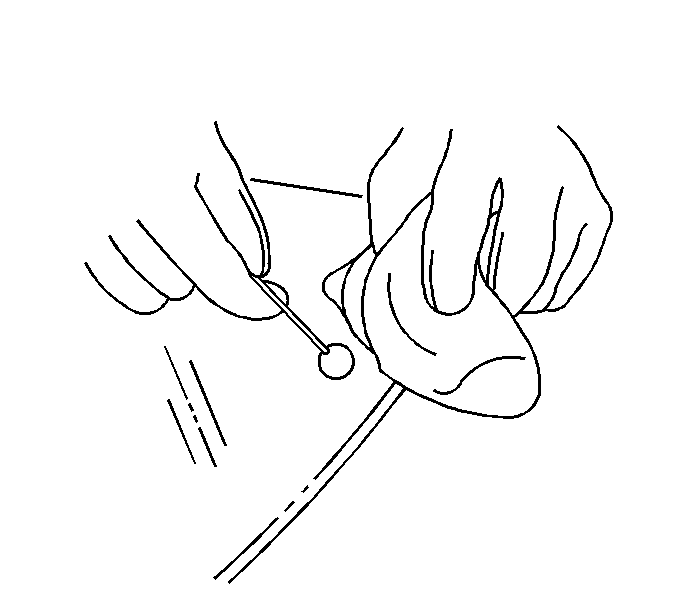
Important: Use care when applying glass prep clear #1 on the window. This primer dries almost instantly, and may stain the viewing area of the window if not applied evenly.
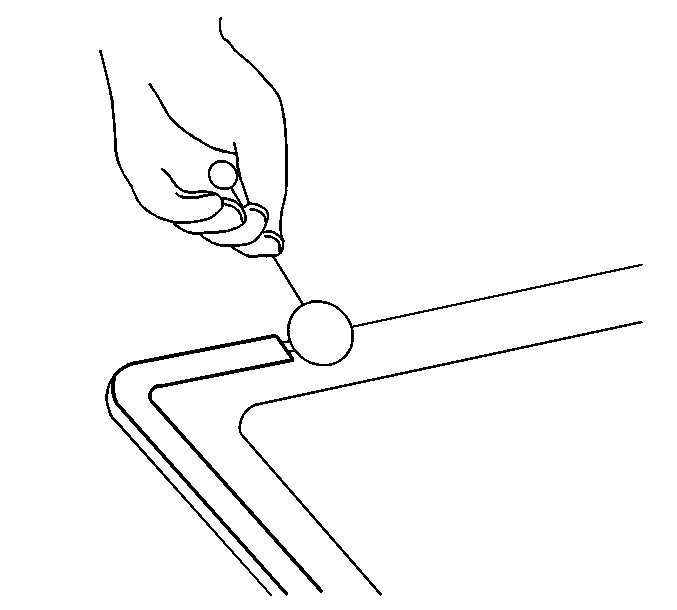
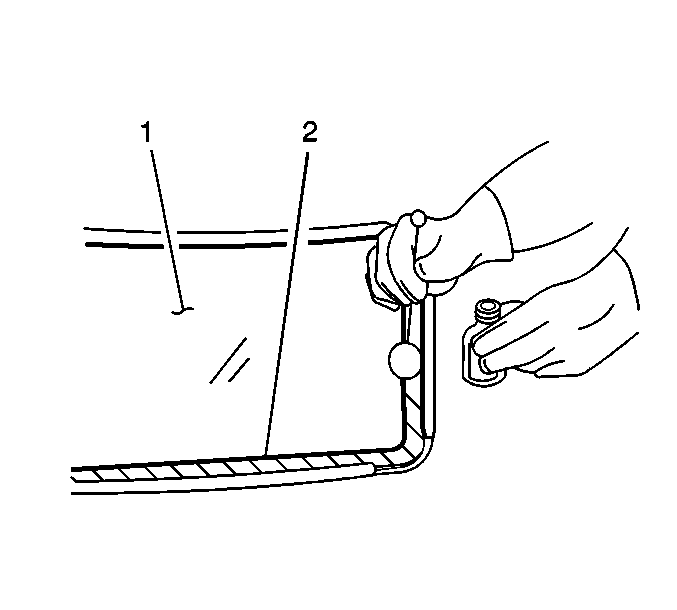
Important: The glass primer black #2 is effective up to 8 hours after applying it to the glass. The primed surface of the glass must be kept clean.
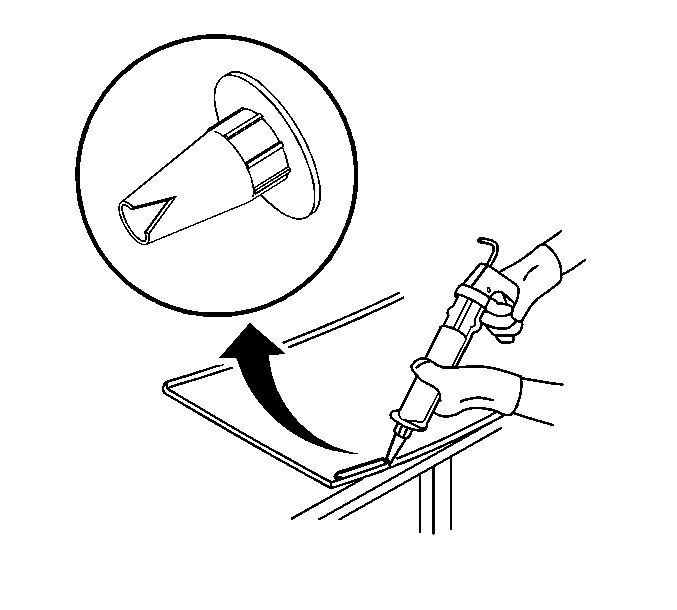

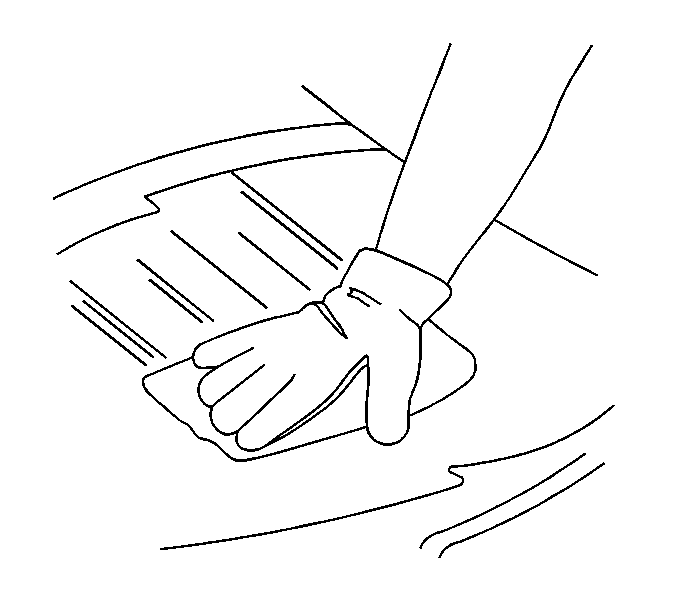
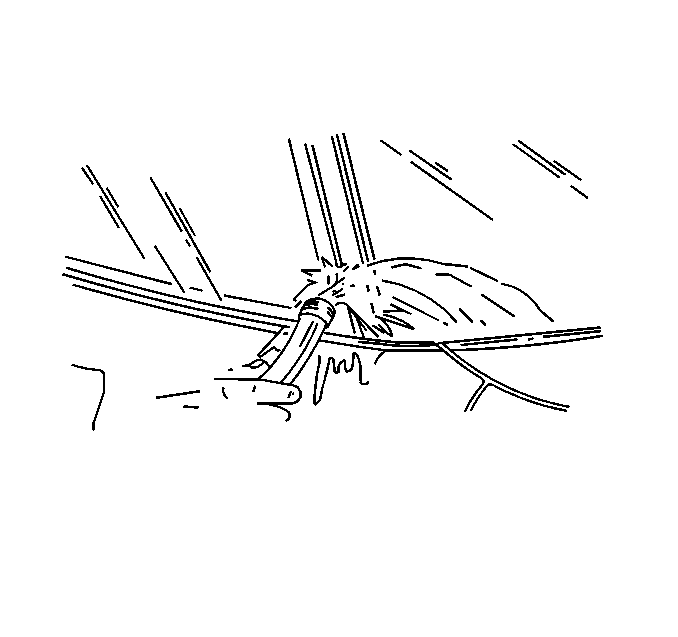
Important: Do not direct a hard stream of high pressure water to the freshly applied urethane adhesive.
Caution: Insufficient curing of urethane adhesive
may allow unrestrained occupants to be ejected from the vehicle resulting in personal
injury.
• For the moisture-curing type of urethane adhesive, allow a minimum of
6 hours at 21°C (70°F) or greater and with at least 30 percent relative humidity.
Allow at least 24 hours for the complete curing of the urethane adhesive. • For the chemical-curing type of urethane adhesive, allow a minimum of
1 hour.
| • | Partially lower a door window in order to prevent pressure buildups when closing doors before the urethane adhesive cures. |
| • | Do not drive the vehicle until the urethane adhesive is cured. Refer to the above curing times. |
| • | Do not use compressed air in order to dry the urethane adhesive. |


Tighten
Tighten the windshield side reveal moldings screws
to 2 N·m(18 lb in).


Tighten
Tighten the air inlet grille nuts to 4 N·m(35
lb in).
Tighten
Tighten the nut to 30 N·m(22 lb ft).

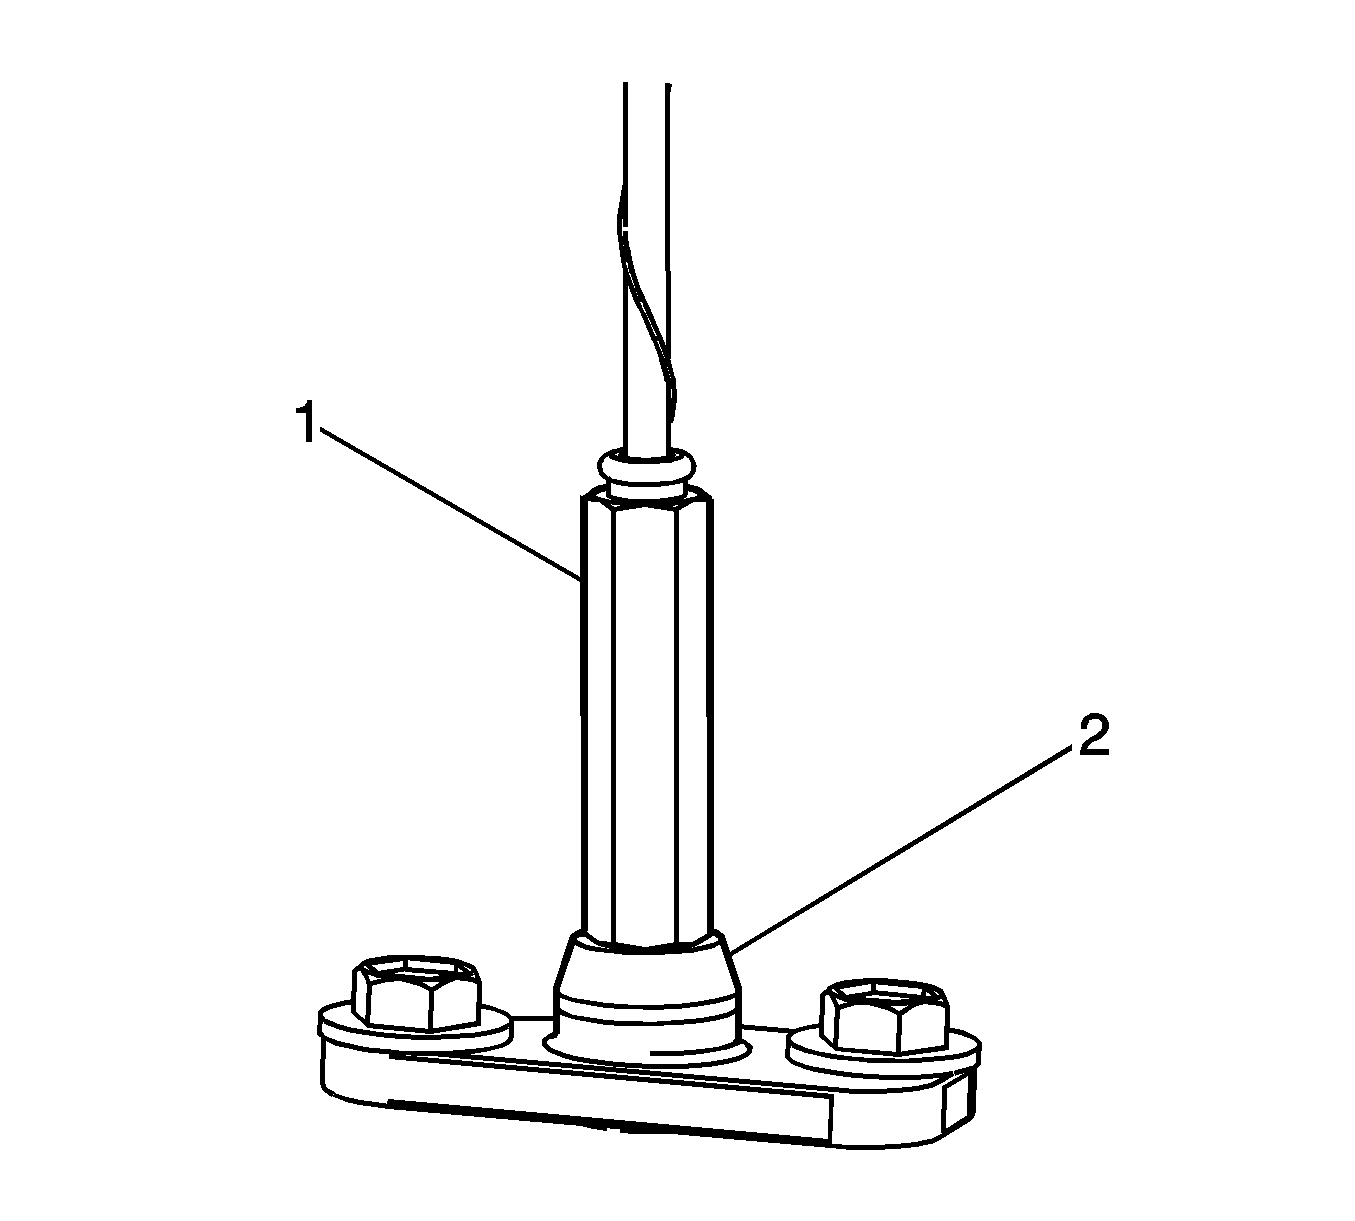
Important: Install the antenna mast using the mast tool. Ensure the antenna mast is fully seated to the antenna base.

Tighten
Tighten the set screw to 2 N·m(18 lb in).


Courtesy Transportation
The General Motors Courtesy Transportation Program is intended to minimize customer inconvenience when a vehicle requires a repair that is covered by the New Vehicle Limited Warranty. The availability of courtesy transportation to customers whose vehicles are within the warranty coverage period and involved in a product recall is very important in maintaining customer satisfaction. Dealers are to ensure that these customers understand that shuttle service or some other form of courtesy transportation is available and will be provided at no charge. Dealers should refer to the General Motors Service Policies and Procedures Manual for courtesy transportation guidelines.
Claim Information
Submit a Product Recall Claim with the information indicated below:
Repair Performed | Part Count | Part No. | Parts Allow | CC-FC | Labor Op | Labor Hours* | Net Item |
|---|---|---|---|---|---|---|---|
Install Windshield - Dealer Installed | -- | -- | * | MA-96 | V1316 | 1.2 | N/A |
Install Windshield -- Sublet | N/A | N/A | N/A | MA-96 | V1317 | 0.2** | *** |
Add: Dealer provided for movement of vehicle to and from sublet location | 0.3 | ||||||
Courtesy Transportation | N/A | N/A | N/A | MA-96 | **** | N/A | ***** |
* The "Parts Allowance" should be the sum total of the current GMSPO Dealer net price plus applicable Mark-Up or Landed Cost Mark-Up (for Export) for windshield & misc parts needed to complete the repair. ** Administrative Allowance for sublet repairs only. *** The amount identified in the "Net Item" column should represent the actual charge to replace the windshield using a sublet repair establishment. **** Submit courtesy transportation using normal labor operations for courtesy transportation as indicated in the GM Service Policies and Procedures Manual. ***** The amount identified in the "Net Item" column should represent the actual dollar amount for courtesy transportation. | |||||||
Refer to the General Motors WINS Claim Processing Manual for details on Product Recall Claim Submission.
Customer Notification - For US and CANADA
General Motors will notify customers of this recall on their vehicle (see copy of customer letter included with this bulletin).
Customer Notification - For EXPORT
Letters will be sent to known owners of record located within areas covered by the US National Traffic and Motor Vehicle Safety Act. For owners outside these areas, dealers should notify customers using the attached sample letter.
Dealer Recall Responsibility - For US and Export (US States, Territories, and Possessions)
The US National Traffic and Motor Vehicle Safety Act provides that each vehicle that is subject to a recall of this type must be adequately repaired within a reasonable time after the customer has tendered it for repair. A failure to repair within sixty days after tender of a vehicle is prima facie evidence of failure to repair within a reasonable time. If the condition is not adequately repaired within a reasonable time, the customer may be entitled to an identical or reasonably equivalent vehicle at no charge or to a refund of the purchase price less a reasonable allowance for depreciation. To avoid having these burdensome remedies, every effort must be made to promptly schedule an appointment with each customer and to repair their vehicle as soon as possible. In the recall notification letters, customers are told how to contact the US National Highway Traffic Safety Administration if the recall is not completed within a reasonable time.
This bulletin is notice to you that the new motor vehicles included in this recall may not comply with the standard identified above. Under Title 49, Section 30112 of the United States Code, it is illegal for a dealer to sell a new motor vehicle which the dealer knows does not comply with an applicable Federal Motor Vehicle Safety Standard. As a consequence, if you sell any of these motor vehicles without first performing the recall correction, your dealership may be subject to a civil penalty for each such sale.
Dealer Recall Responsibility - ALL
All unsold new vehicles in dealers' possession and subject to this recall MUST be held and inspected/repaired per the service procedure of this recall bulletin BEFORE customers take possession of these vehicles.
Dealers are to service all vehicles subject to this recall at no charge to customers, regardless of mileage, age of vehicle, or ownership, from this time forward.
Customers who have recently purchased vehicles sold from your vehicle inventory, and for which there is no customer information indicated on the dealer listing, are to be contacted by the dealer. Arrangements are to be made to make the required correction according to the instructions contained in this bulletin. This could be done by mailing to such customers a copy of the customer letter accompanying this bulletin. Recall follow-up cards should not be used for this purpose, since the customer may not as yet have received the notification letter.
In summary, whenever a vehicle subject to this recall enters your vehicle inventory, or is in your dealership for service in the future, please take the steps necessary to be sure the recall correction has been made before selling or releasing the vehicle.
March 2005Dear General Motors Customer:
This notice is sent to you in accordance with the requirements of the National Traffic and Motor Vehicle Safety Act.
Reason For This Recall
General Motors has decided that certain 2005 model year Buick Rainier, Chevrolet TrailBlazer, and GMC Envoy vehicles fail to conform to Federal/Canada Motor Vehicle Safety Standard 212, Windshield Mounting. The windshield urethane bead on some of these vehicles may not have adhered to the body in certain areas during the cure process. In the event of a crash, the windshield may not be retained, increasing the risk of personal injuries to the vehicle occupants.
What Will Be Done
Your GM dealer will replace the windshield. This service will be performed for you at no charge .
How Long Will The Repair Take?
This service correction will take approximately 7½ hours. However, due to service scheduling requirements, your dealer may need your vehicle for a longer period of time.
Contacting Your Dealer
To limit any possible inconvenience, we recommend that you contact your dealer as soon as possible to schedule an appointment for this repair. By scheduling an appointment, your dealer can ensure that the necessary parts will be available on your scheduled appointment date. Should your dealer be unable to schedule a service date within a reasonable time, you should contact the appropriate Customer Assistance Center at the listed number below. The Customer Assistance Center’s hours of operation are from 8:00 AM to 11:00 PM, EST, Monday through Friday.
Division | Number | Text Telephones (TTY) |
|---|---|---|
Buick | 1-866-608-8080 | 1-800-832-8425 |
Chevrolet | 1-800-630-2438 | 1-800-833-2438 |
GMC | 1-866-996-9463 | 1-800-462-8583 |
Puerto Rico - English | 1-800-496-9992 |
|
Puerto Rico - Español | 1-800-496-9993 |
|
Virgin Islands | 1-800-496-9994 |
|
Guam | 1-671-648-8650 |
|
If, after contacting the appropriate customer assistance center, you are still not satisfied that we have done our best to remedy this condition without charge and within a reasonable time, you may wish to write the Administrator, National Highway Traffic Safety Administration, 400 Seventh Street SW, Washington, DC 20590 or call 1-888-327-4236.
Customer Reply Form
The enclosed customer reply form identifies your vehicle. Presentation of this form to your dealer will assist in making the necessary correction in the shortest possible time. If you no longer own this vehicle, please let us know by completing the form and mailing it back to us.
Courtesy Transportation
If your vehicle is within the New Vehicle Limited Warranty your dealer may provide you with shuttle service or some other form of courtesy transportation while your vehicle is at the dealership for this repair. Please refer to your Owner’s Manual and your dealer for details on Courtesy Transportation.
Owner Center Online
This free online service offers vehicle and ownership related information and tools tailored to your specific vehicle. To get the most personalized information for your vehicle, visit www.mygmlink.com , and enter your vehicle's 17-character vehicle identification number (VIN) shown on the enclosed customer reply form.
Federal regulation requires that any vehicle lessor receiving this recall notice must forward a copy of this notice to the lessee within ten days.
We are sorry to cause you this inconvenience; however, we have taken this action in the interest of your safety and continued satisfaction with our products.
General Motors Corporation
Enclosure
05002
