For 1990-2009 cars only
Special Tools
| • | J 36660-A Torque Angle Meter |
| • | J 44219 Cover Alignment Pins |
| • | J 44227 Rear Seal Installer |
Removal Procedure
- Remove the transmission. Refer to Transmission Replacement.
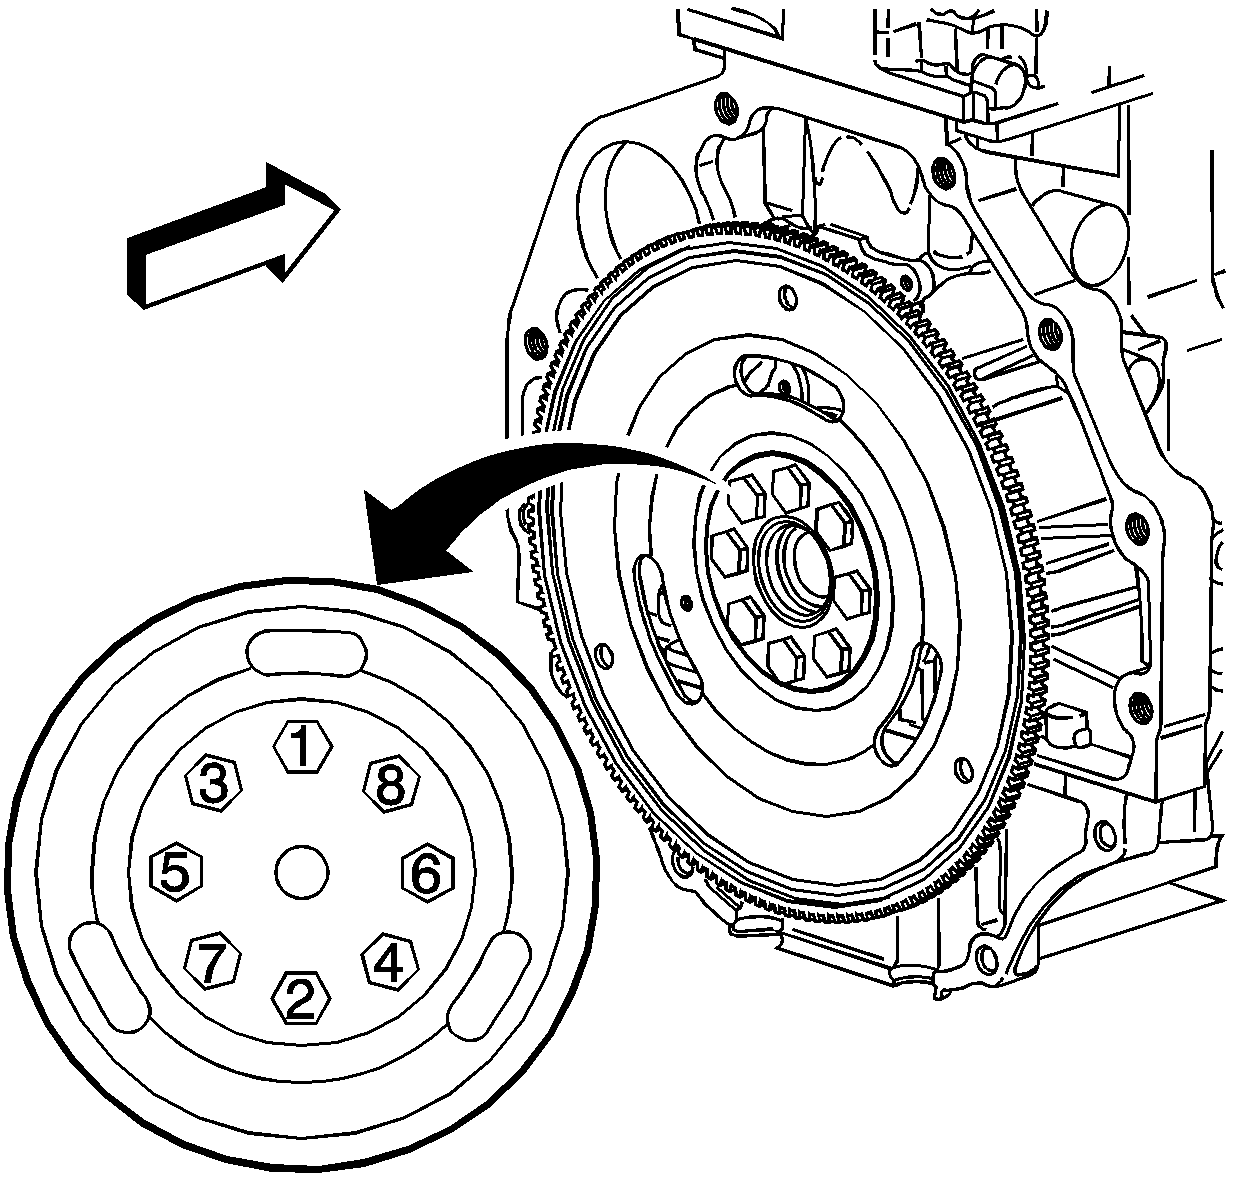
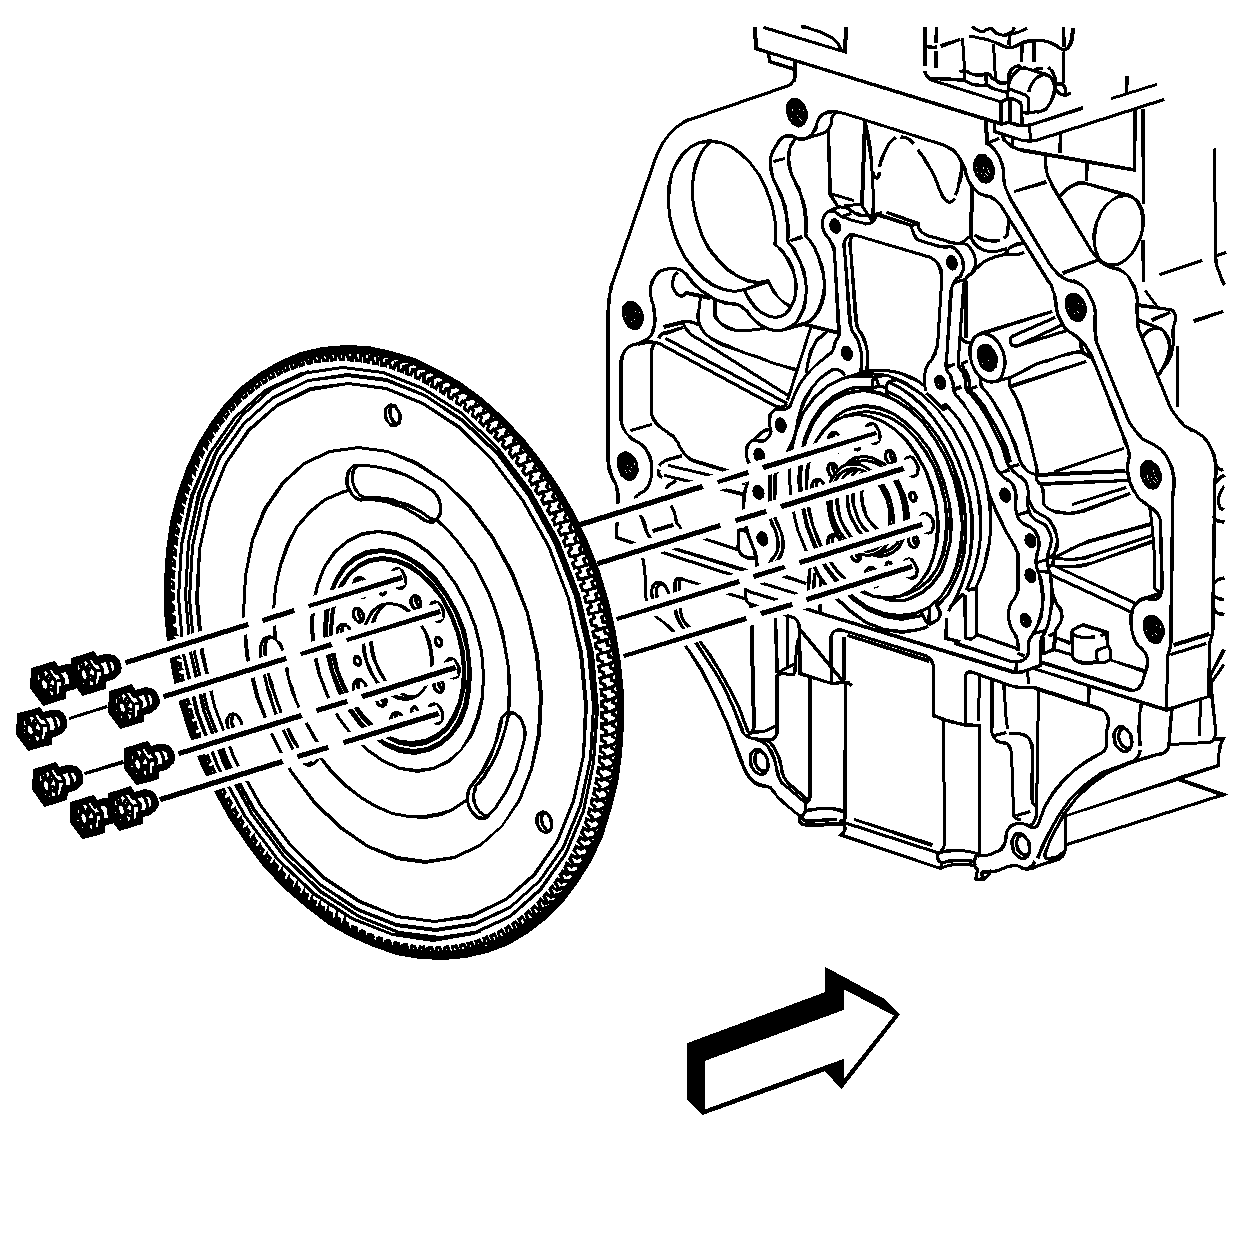
- Remove the flywheel bolts and remove the flywheel.
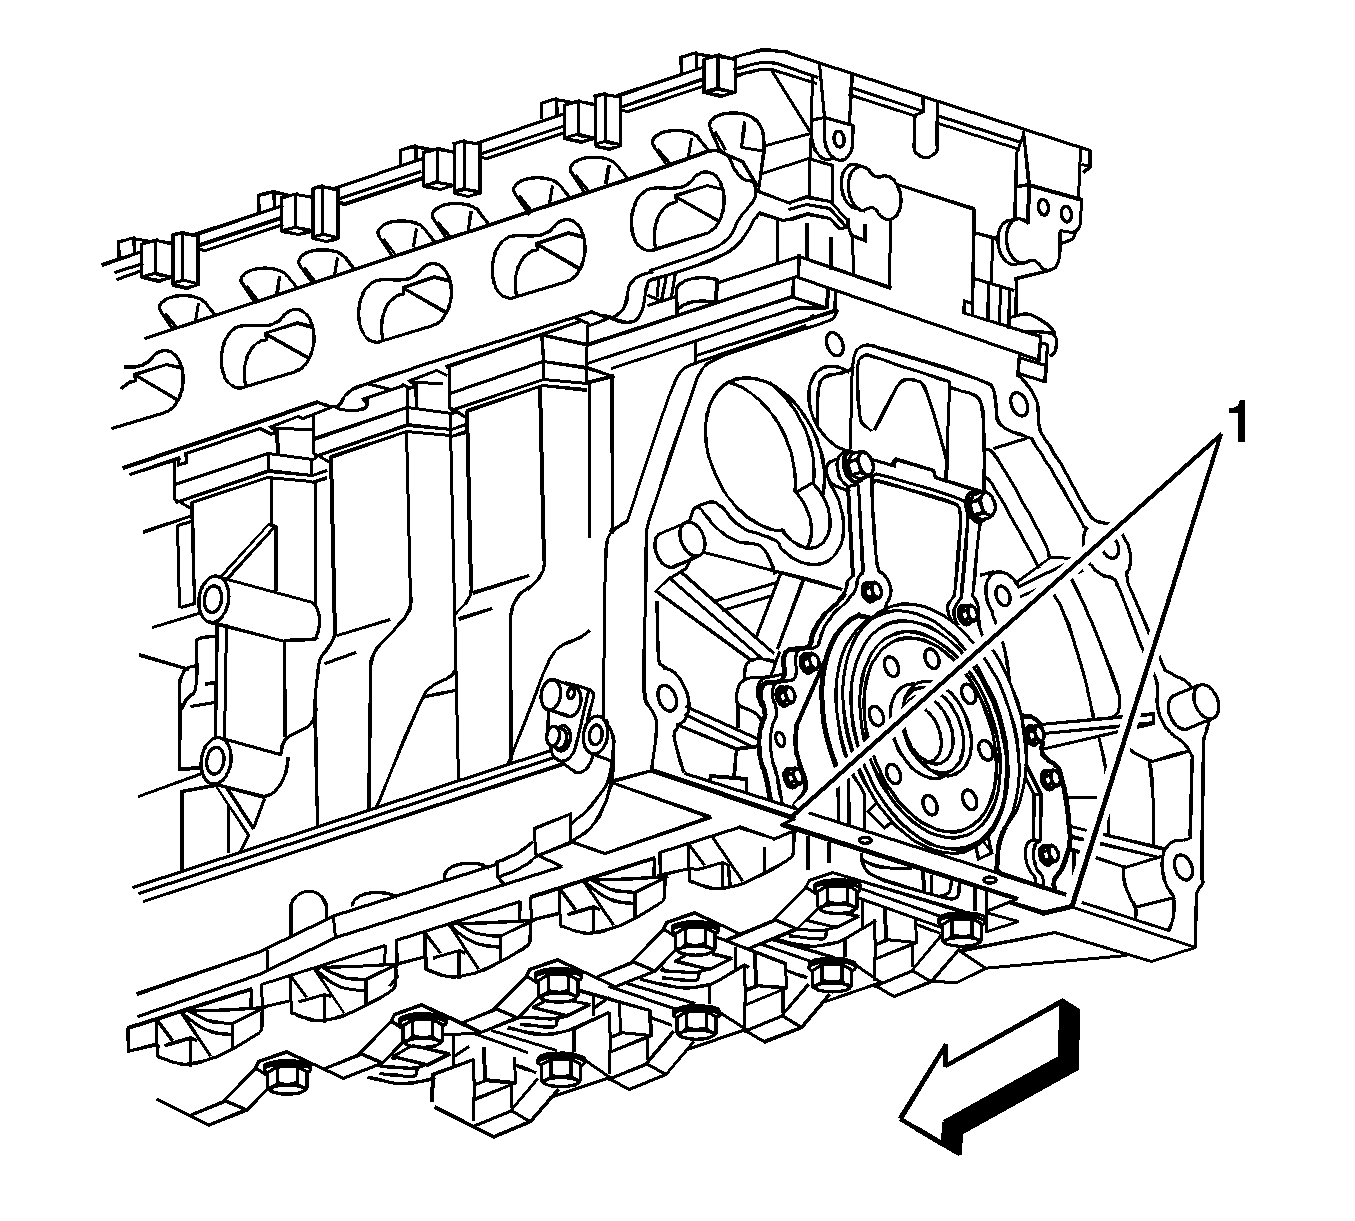
- Remove the crankshaft rear oil seal housing bolts.
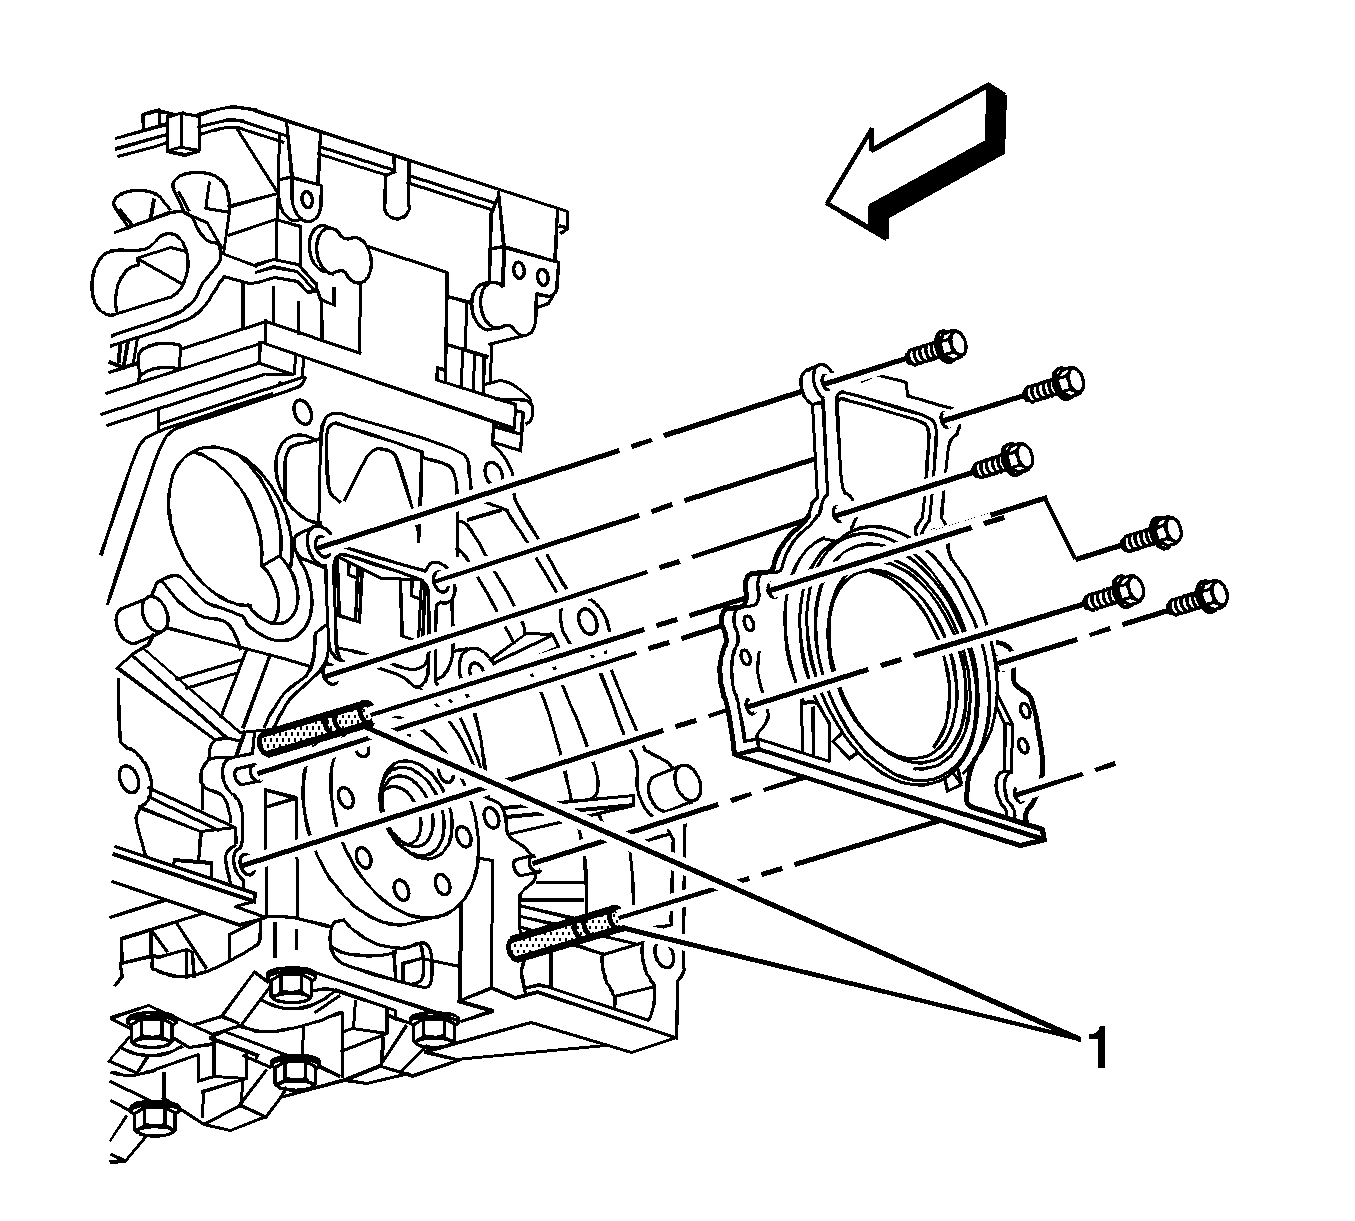
- Install 2 bolts into the jackscrew holes (1) to release the cover from the block.
- Remove the crankshaft and rear oil seal housing.
- Remove the oil seal from the crankshaft snout.
Installation Procedure
- Use the J 44227 to install the crankshaft rear oil seal.
- Remove the J 44227 .
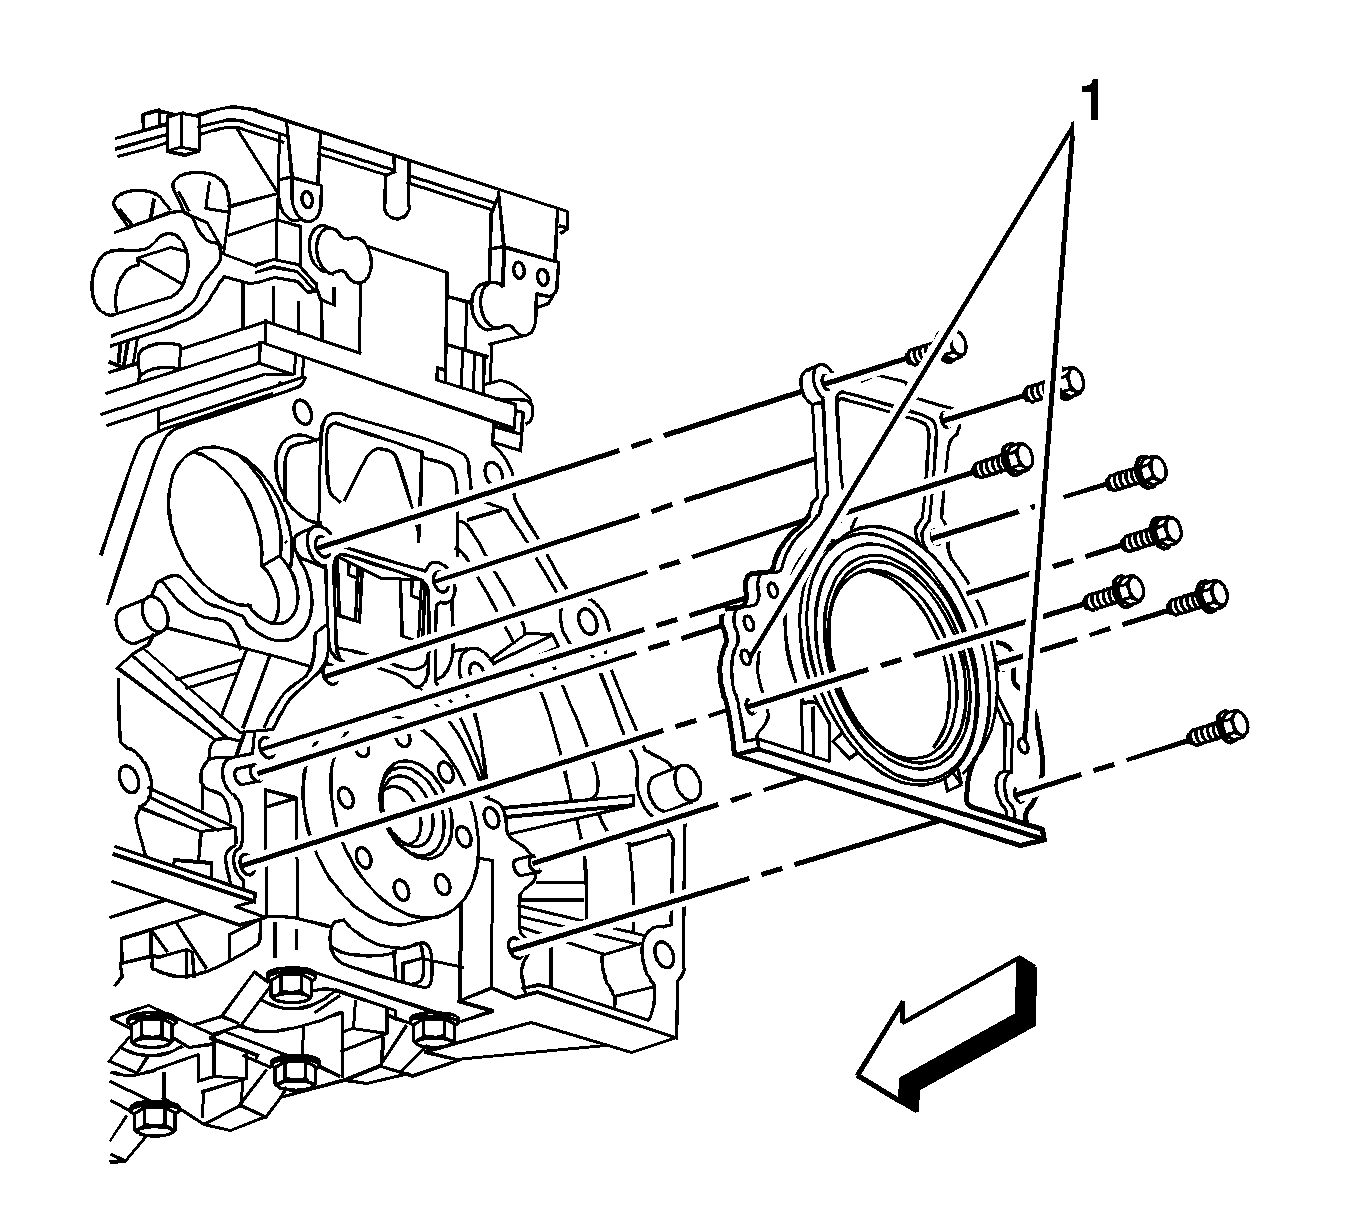
- Apply a 3 mm (0.12 in) bead of sealant (1) to the following:
- Install the J 44219 guide pins (1) into the block.
- Slide the crankshaft rear oil seal housing over the alignment pins J 44219 and crankshaft.
- Install the crankshaft rear oil seal housing bolts, except the 2 in place of the guide pins.
- Remove the J 44219 guide pins.
- Install the remaining 2 crankshaft rear oil seal housing bolts and tighten to 10 N·m (89 lb in).
- Wipe off any excess material from the bottom of the oil pan sealing area (1).
- Install the flywheel and secure with the bolts and tighten to 25 N·m (18 lb ft).
- Use the J 36660-A to tighten the bolts an additional 50 degrees.
- Install the transmission. Refer to Transmission Replacement.
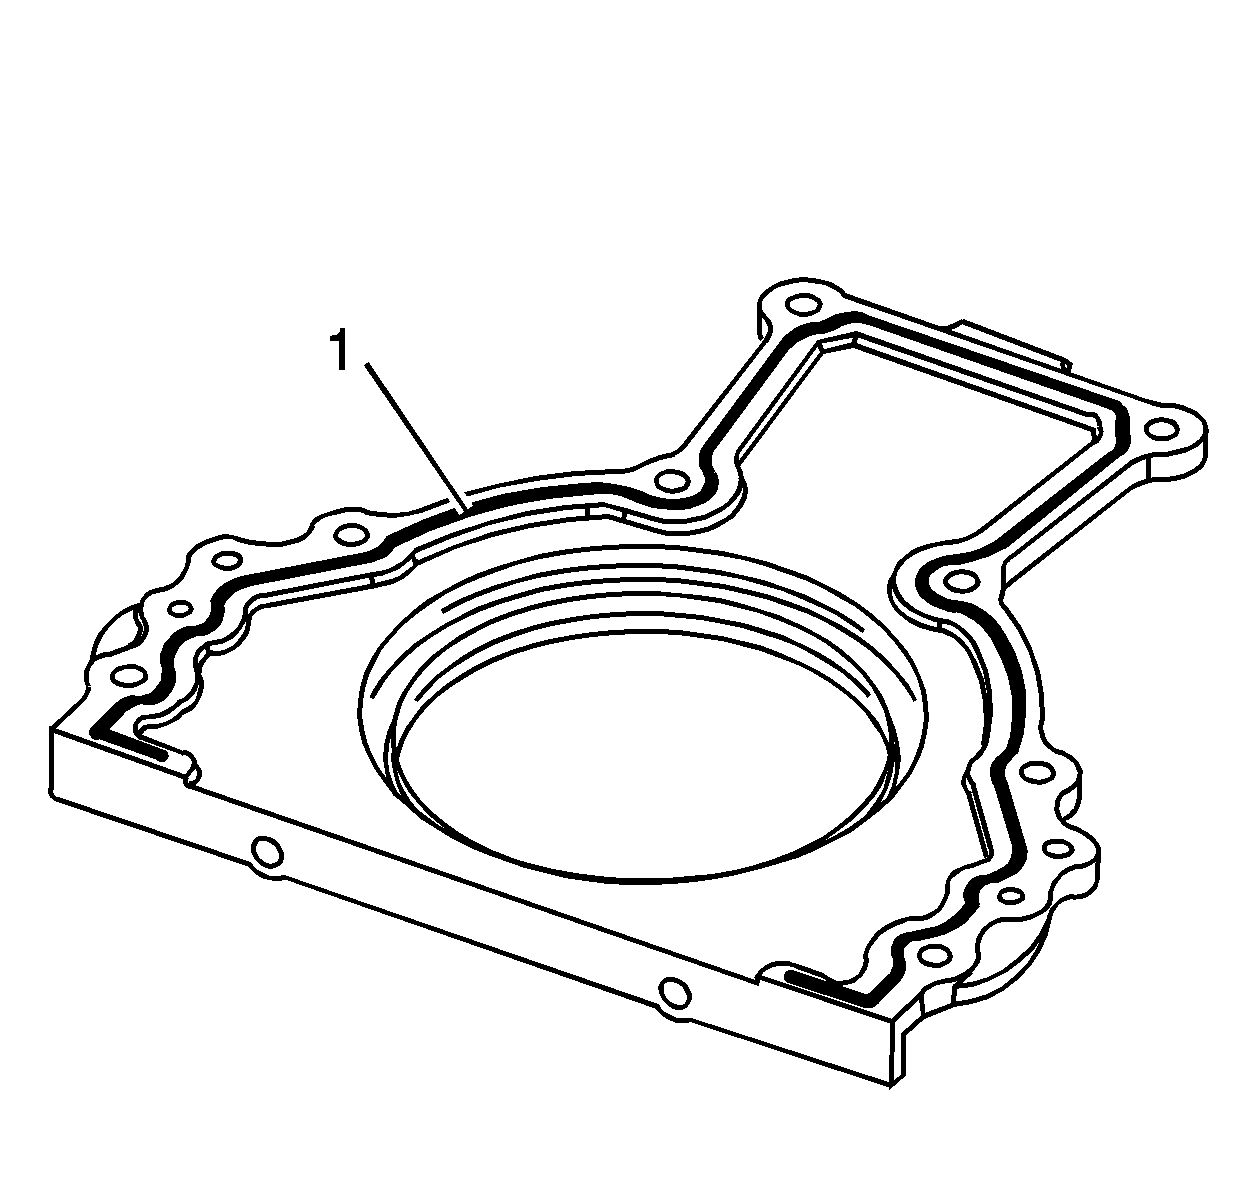
Note: The crankshaft rear oil seal housing must be installed within 10 minutes from when the sealer is applied.
| • | The crankshaft rear oil seal housing, where the housing meets the engine block |
| • | The surface of the crankshaft rear oil seal housing, where the housing meets the oil pan |
| • | The surface of the oil pan, where the oil pan meets the housing |
| • | Refer to Adhesives, Fluids, Lubricants, and Sealers for the correct part number. |
Note:
• When installing a new seal, use the plastic installation sleeve supplied with the new seal. • The seal installation sleeve should come off after the seal is installed. Discard the sleeve.
Caution: Refer to Fastener Caution in the Preface section.
