For 1990-2009 cars only
Removal Procedure
- Turn the ignition to the OFF position.
- Remove the right rear seat cushion. Refer to Rear Seat Cushion Replacement.
- Remove the communication interface module. Refer to Communication Interface Module Replacement.
- Remove the navigation control processor bracket. Refer to Navigation Control Processor Bracket Replacement.
- Pass the cellular telephone coax cable through the carpet opening.
- Remove the seat back, left and right side. Refer to Rear Seat Number 1 Back Replacement.
- Remove the front door sill plates. Refer to Front Side Door Sill Trim Plate Replacement.
- Remove the rear door sill plates. Refer to Rear Side Door Sill Trim Plate Replacement.
- Remove the center pillar trim panels. Refer to Center Pillar Garnish Molding Replacement.
- Remove the rear quarter upper trim panels. Refer to Quarter Upper Trim Panel Replacement.
- Remove the lower rear quarter trim panels. Refer to Rear Quarter Trim Panel Replacement - Left Side , or to Rear Quarter Trim Panel Replacement - Right Side.
- Remove the left coat hook. Refer to Coat Hook Replacement.
- Remove the tool kit carrier.
- Remove the child restraint tether anchors. Refer to Child Restraint Tether Anchor Replacement - Rear No. 1.
- Lift and fold the carpet over the bucket seats.
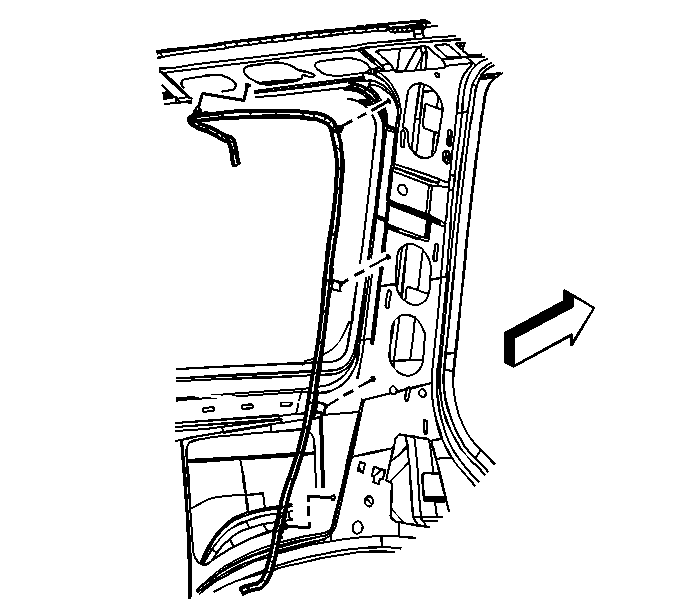
- Remove the coax cable fasteners from the floor panel.
- Remove the coax cable fasteners from the left third pillar.
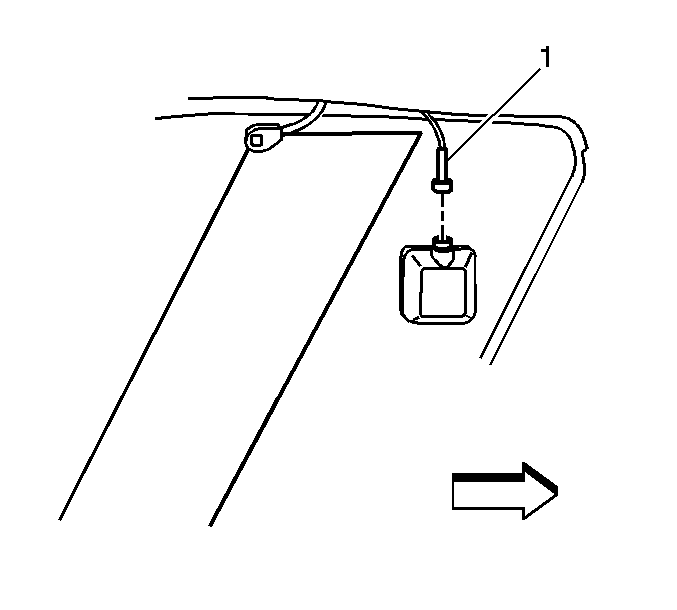
- Disconnect the coax cable (1) from the window mounted coupling.

Installation Procedure
- Connect the coax cable (1) to the window mounted coupling.
- Attach the coax cable fasteners to the left third pillar.
- Attach the coax cable fasteners to the floor panel.
- Position the carpet to the floor panel, aligning the holes in the carpet to the seat studs on the floor panel.
- Pass the cellular telephone coax cable through the carpet opening
- Install the child restraint tether anchors. Refer to Child Restraint Tether Anchor Replacement - Rear No. 1.
- Install the tool kit carrier.
- Install the 3 tool carrier nuts to the floor studs.
- Install the lower rear quarter trim panels. Refer to Rear Quarter Trim Panel Replacement - Left Side , or to Rear Quarter Trim Panel Replacement - Right Side.
- Install the rear quarter upper trim panels. Refer to Quarter Upper Trim Panel Replacement.
- Install the center pillar trim panels. Refer to Center Pillar Garnish Molding Replacement.
- Install the left coat hook. Refer to Coat Hook Replacement.
- Install the rear door sill plates. Refer to Rear Side Door Sill Trim Plate Replacement.
- Install the front door sill plates. Refer to Front Side Door Sill Trim Plate Replacement.
- Instal the seat back, right and left side. Refer to Rear Seat Number 1 Back Replacement.
- Install the navigation control processor bracket to the floor panel. Refer to Navigation Control Processor Bracket Replacement.
- Install the communication interface module. Refer to Communication Interface Module Replacement.
- Install the right rear seat cushion. Refer to Rear Seat Cushion Replacement.
- Adjust the right seat cushion to a passenger position.
Caution: Refer to Fastener Caution in the Preface section.
Tighten
Tighten the nuts to 7 N·m (62 lb in).
