GM Service Manual Online
For 1990-2009 cars only

Windshield Wiper Arm Replacement Traverse
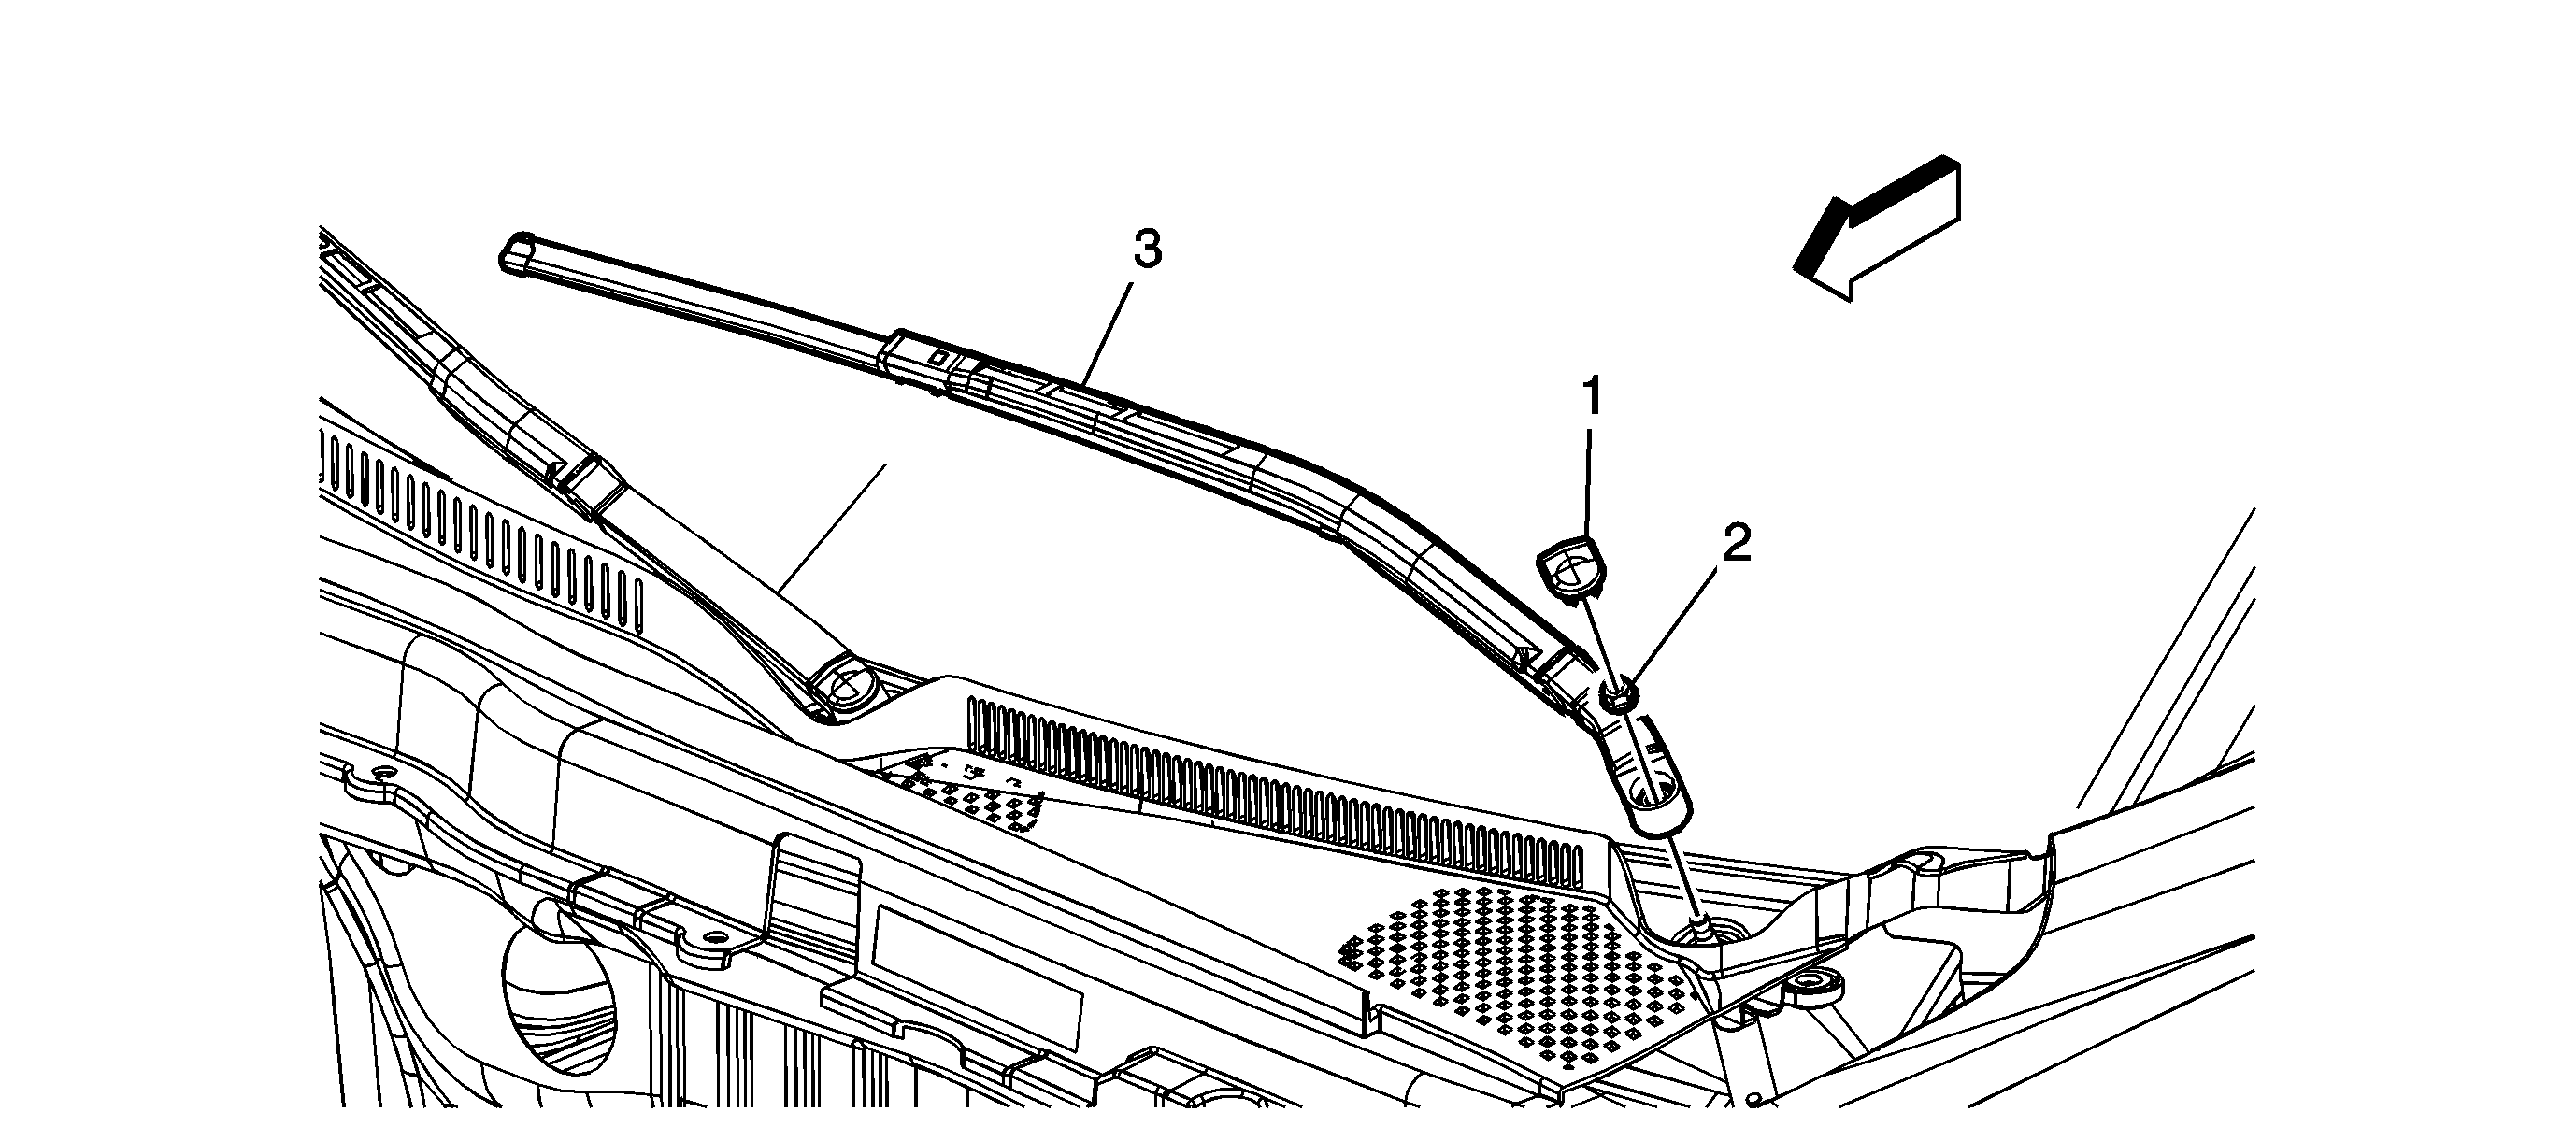

Object Number: 1847034  Size: SF

Callout

Component Name

1

Windshield Wiper Arm Finish Cap (Qty: 2)

2

Windshield Wiper Arm Nut (Qty: 2)

Caution: Refer to Fastener Caution in the Preface section.

Tighten
25 N·m(18 lb ft)

3

Windshield Wiper Arm Assembly

Procedure

  1. Clean the knurls on the wiper motor pivot shaft after the wiper arm has been removed.
  2. Hold and align the tips of the front wiper blades to the paint dots on the windshield while securing the nut.
  3. Perform a wet wipe and re-check the alignment, adjust if needed.

Windshield Wiper Arm Replacement Acadia


Object Number: 1847034  Size: SF

Callout

Component Name

1

Windshield Wiper Arm Finish Cap (Qty: 2)

2

Windshield Wiper Arm Nut (Qty: 2)

Caution: Refer to Fastener Caution in the Preface section.

Tighten
25 N·m(18 lb ft)

3

Windshield Wiper Arm Assembly

Procedure

  1. Clean the knurls on the wiper motor pivot shaft after the wiper arm has been removed.
  2. Hold and align the tips of the front wiper blades to the paint dots on the windshield while securing the nut.
  3. Perform a wet wipe and re-check the alignment, adjust if needed.

Windshield Wiper Arm Replacement Enclave
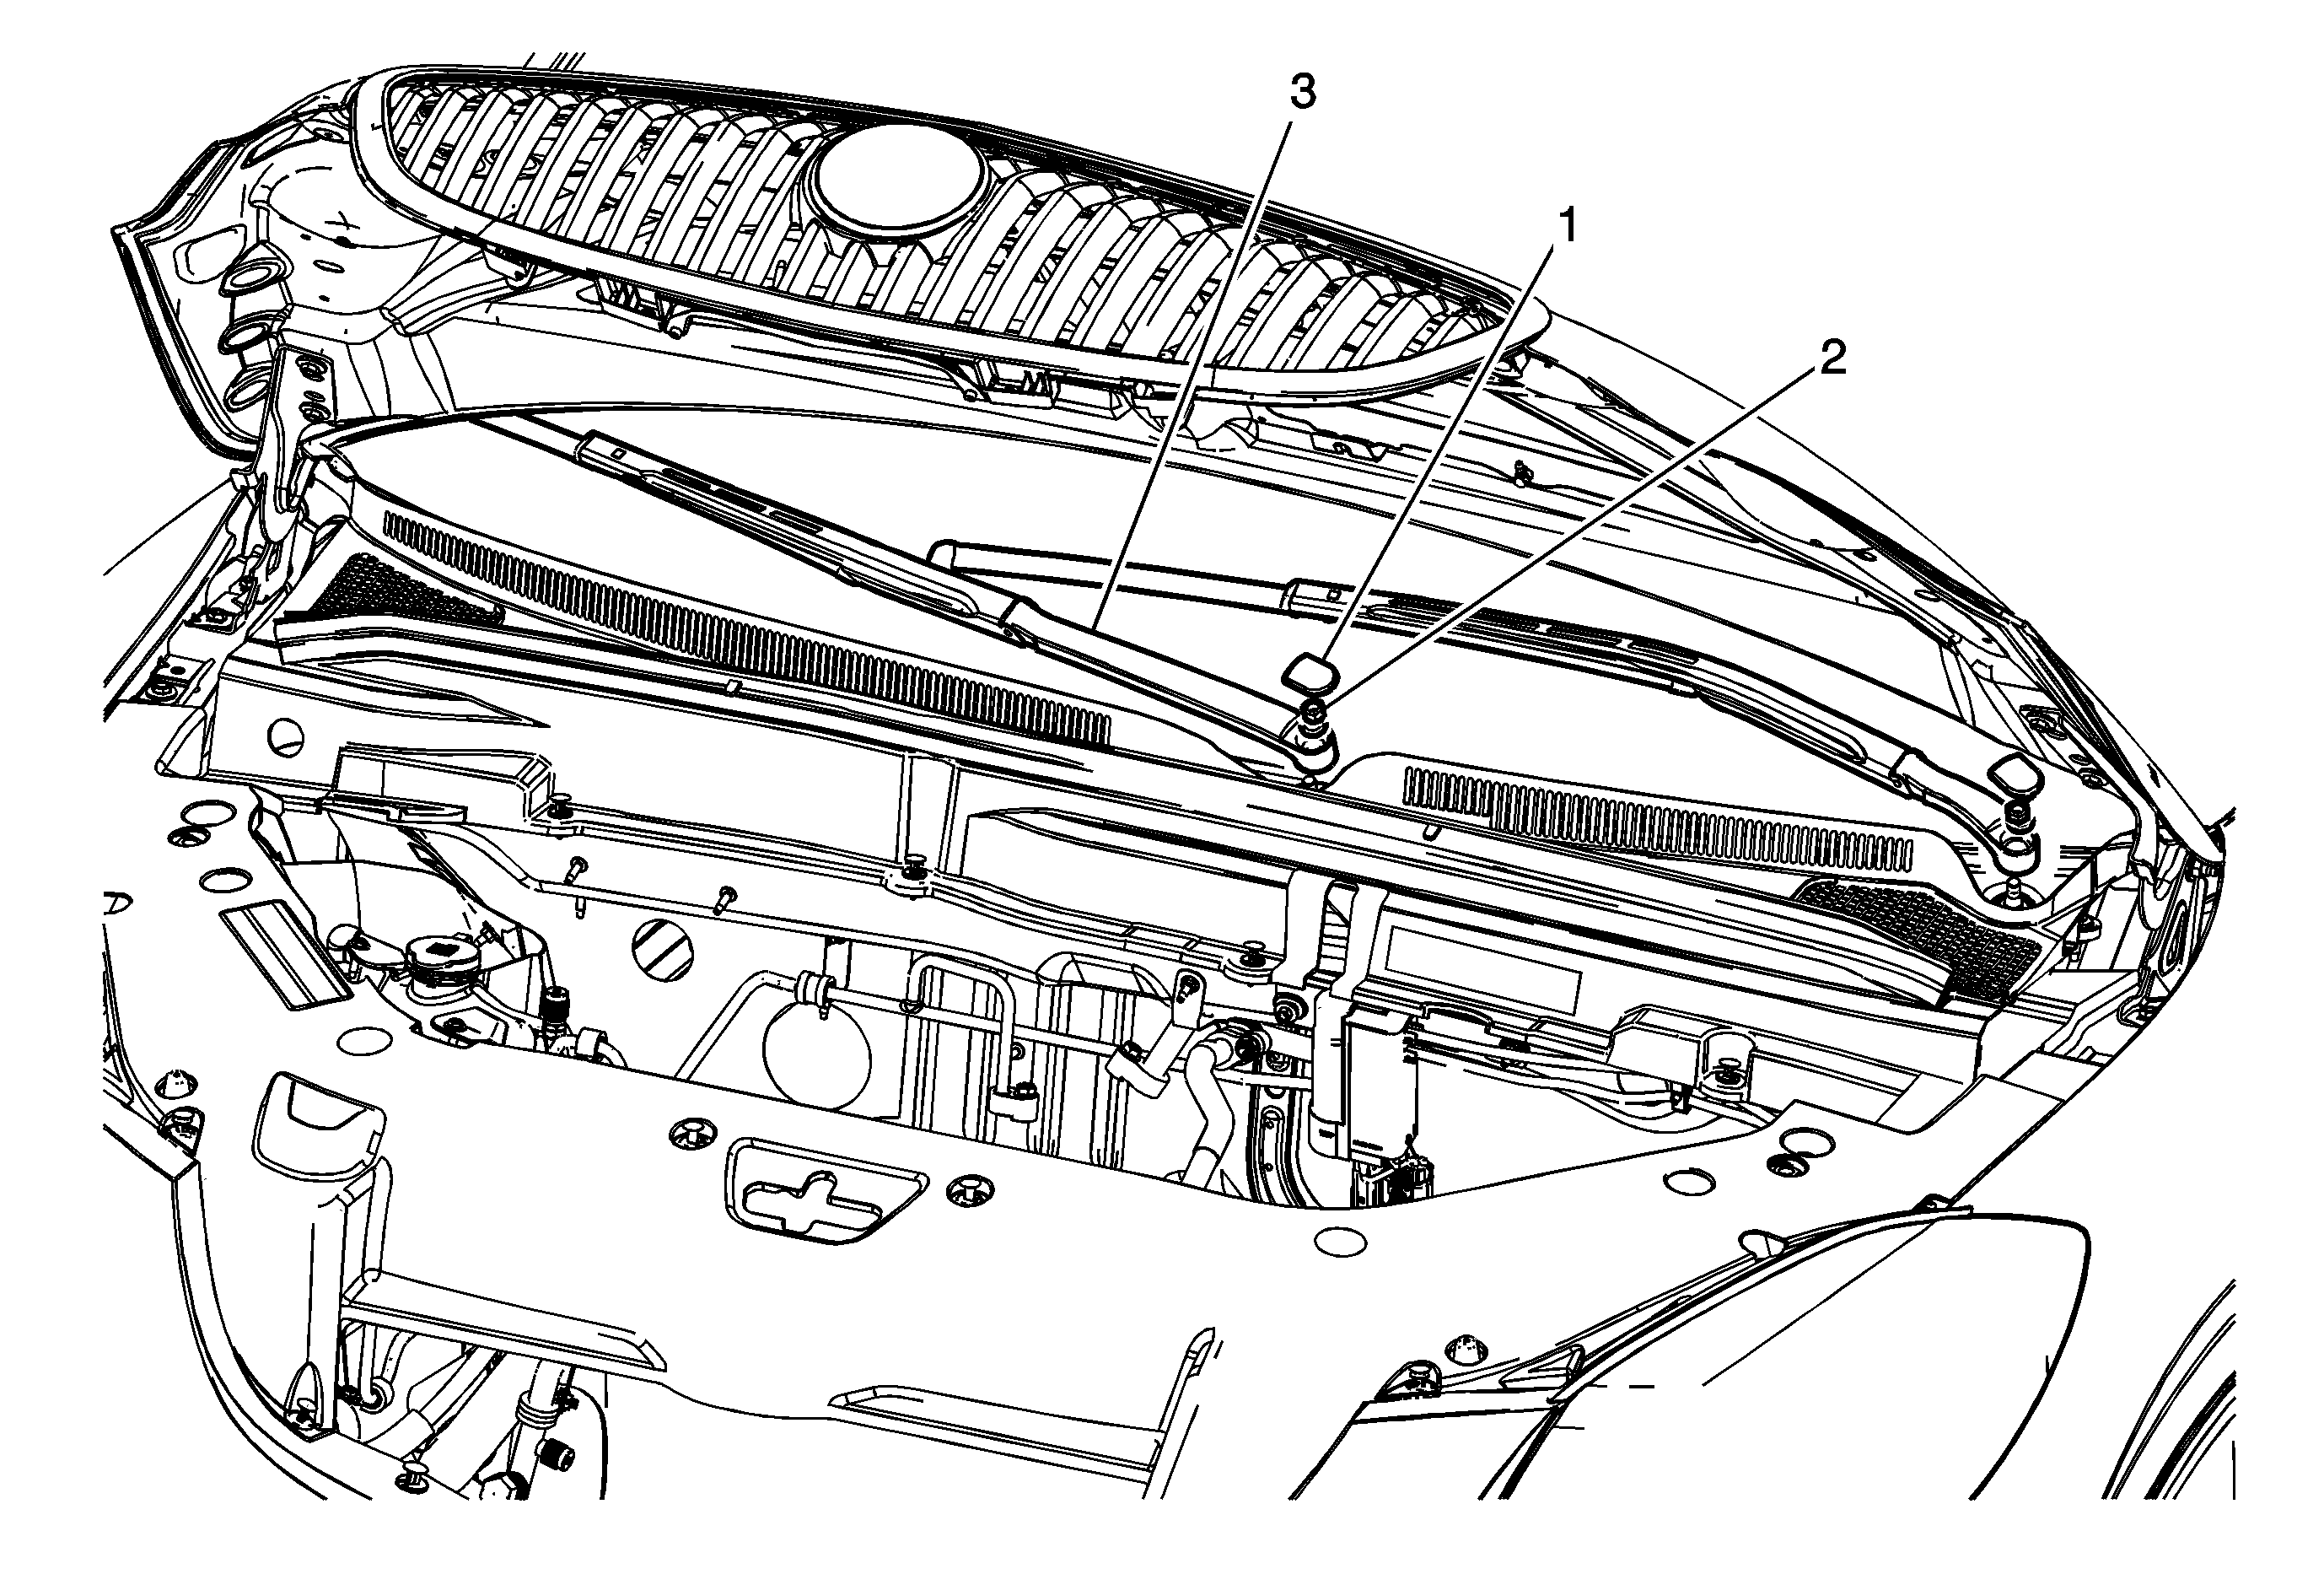

Object Number: 1870070  Size: MF

Callout

Component Name

1

Windshield Wiper Arm Finish Cap (Qty: 2)

Tip
Use a small flat-bladed tool to release the cap from the arm assembly.

2

Windshield Wiper Arm Nut (Qty: 2)

Caution: Refer to Fastener Caution in the Preface section.

Tighten
25 N·m(18 lb ft)

3

Windshield Wiper Arm Assembly

Procedure

  1. Clean the knurls on the wiper motor pivot shaft after the wiper arm has been removed.
  2. Hold and align the tips of the front wiper blades to the paint dots on the windshield while securing the nut.
  3. Perform a wet wipe and re-check the alignment, adjust if needed.

Windshield Wiper Arm Replacement OUTLOOK


Object Number: 1847034  Size: SF

Callout

Component Name

1

Wiper Arm Nut Cap (Qty: 2)

2

Windshield Wiper Arm Nut (Qty: 2)

Caution: Refer to Fastener Caution in the Preface section.

Tighten
25 N·m (18 lb ft)

3

Windshield Wiper Arm Assembly

Procedure

  1. Clean the knurls on the wiper motor pivot shaft after the wiper arm has been removed.
  2. Hold and align the front wiper blades to the paint dots on the windshield while securing the nut.
  3. Perform a wet wipe and re-check the alignment, adjust if needed.