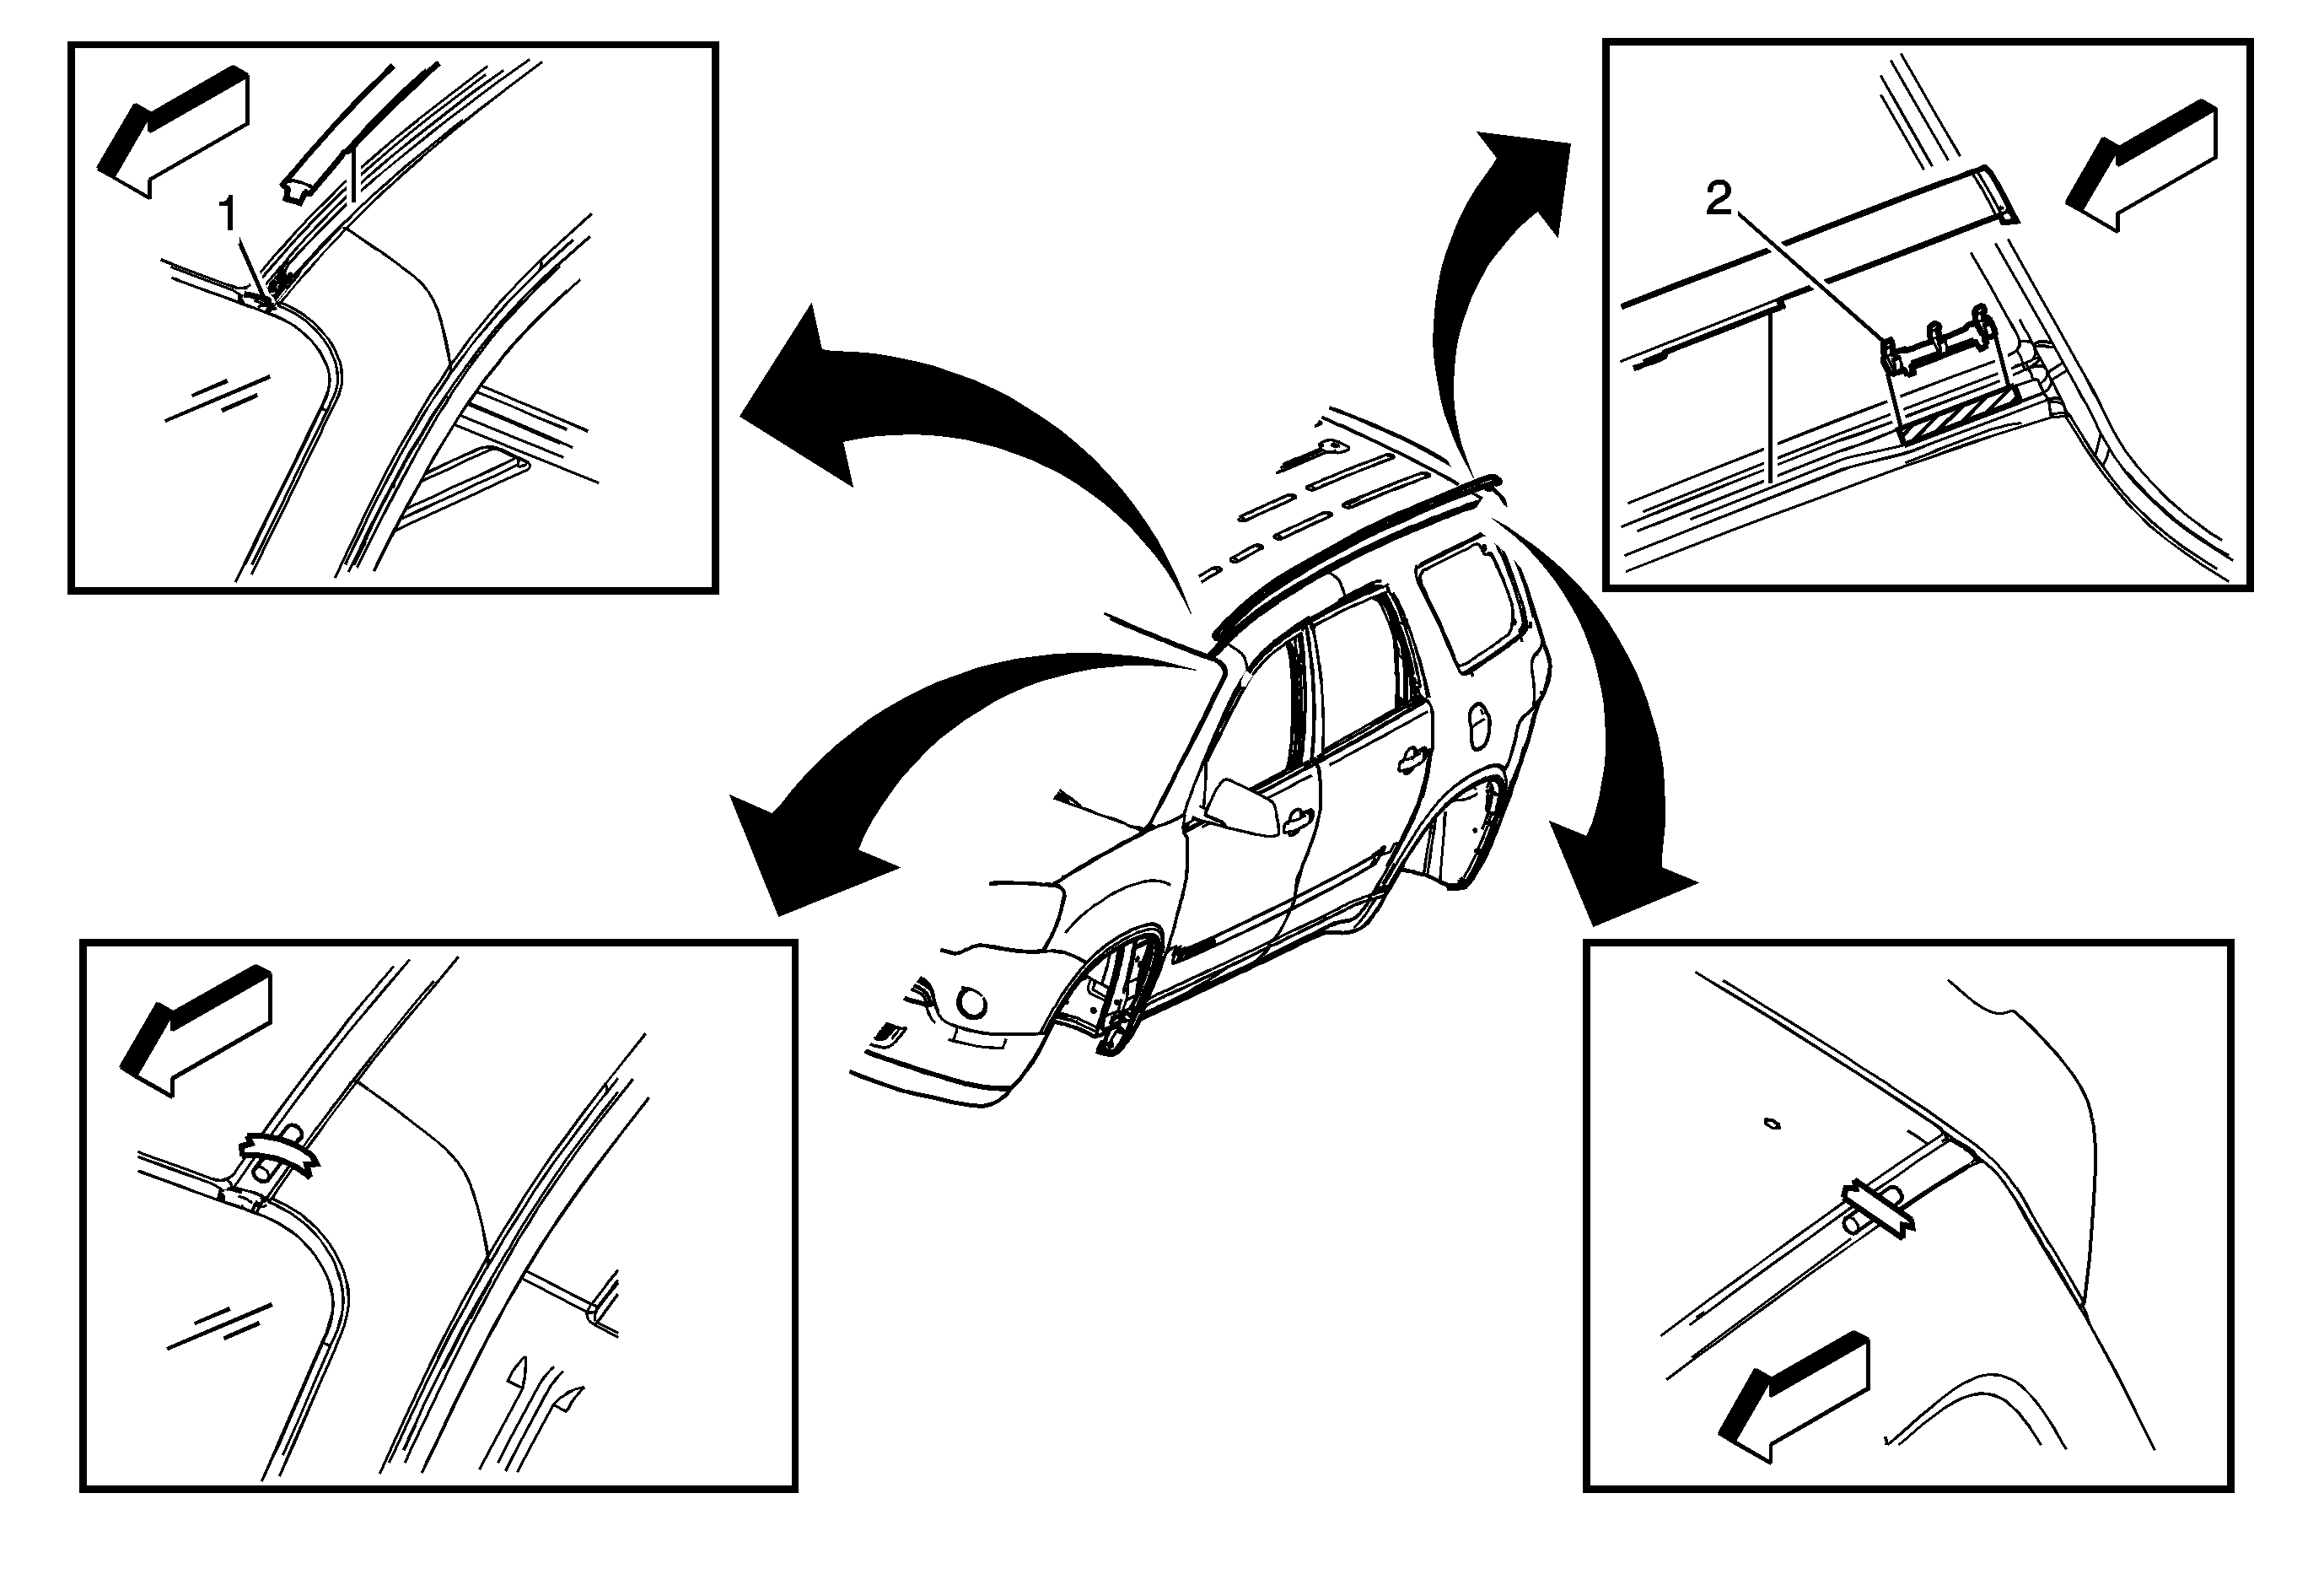
Callout
| Component Name
|
|
Caution: Refer to Tape Corners of Panel Caution in the Preface section.
Caution: Refer to Exterior Trim Emblem Removal Caution in the Preface section.
Preliminary Procedure
- Lift the roof panel molding in order to access the retainer clip.
- Carefully cut the epoxy bond at both edges of the retainer clip using a sharp tool.
- Cut far enough into the epoxy in order to help release the retainer clip and not damage the painted surface of the ditch.
- Protect the painted surface of the ditch using a clean towel when releasing the retainer from the ditch.
- Clean the remaining epoxy using a 50/50 mixture by volume of isopropyl alcohol and clean drinkable water.
- Use fine grit sand paper to scuff the bonding surface where the new retainer clip will be installed.
- Wipe the surface with the alcohol solution and let the solution evaporate prior to bonding the new clip.
- Position and secure the retainer clip with the molding attached.
- Press the ditch molding into the ditch to achieve proper positioning.
- Apply the epoxy to the underside of the retainer and clip into the final position.
- Ambient and body panel temperature should be at least 21°C (70°F) prior to bonding.
|
1
| Roof Panel Molding Retainer (Front)
Procedure
- The front retainer is placed 15-20 mm from the front edge of the window frame, centered side to side in the ditch channel.
- Place a small piece of wooden block or equivalent above the molding to gain downward pressure for proper clip position.
- Apply masking tape over the wooden block and secure to the body.
- Allow approximately 15 minutes to develop sufficient bond strength.
- Remove the masking tape after the bonding time has elapsed.
|
2
| Roof Panel Molding Retainer (Rear)
Procedure
- The rear retainer is placed 15-20 mm from the rear edge of the roof panel, centered side to side in the ditch channel.
- Place a small piece of wooden block or equivalent above the molding to gain downward pressure for proper clip position.
- Apply masking tape over the wooden block and secure to the body.
- Allow approximately 15 minutes to develop sufficient bond strength.
- Remove the masking tape after the bonding time has elapsed.
|

