Rear Side Door Lower Molding Replacement Acadia

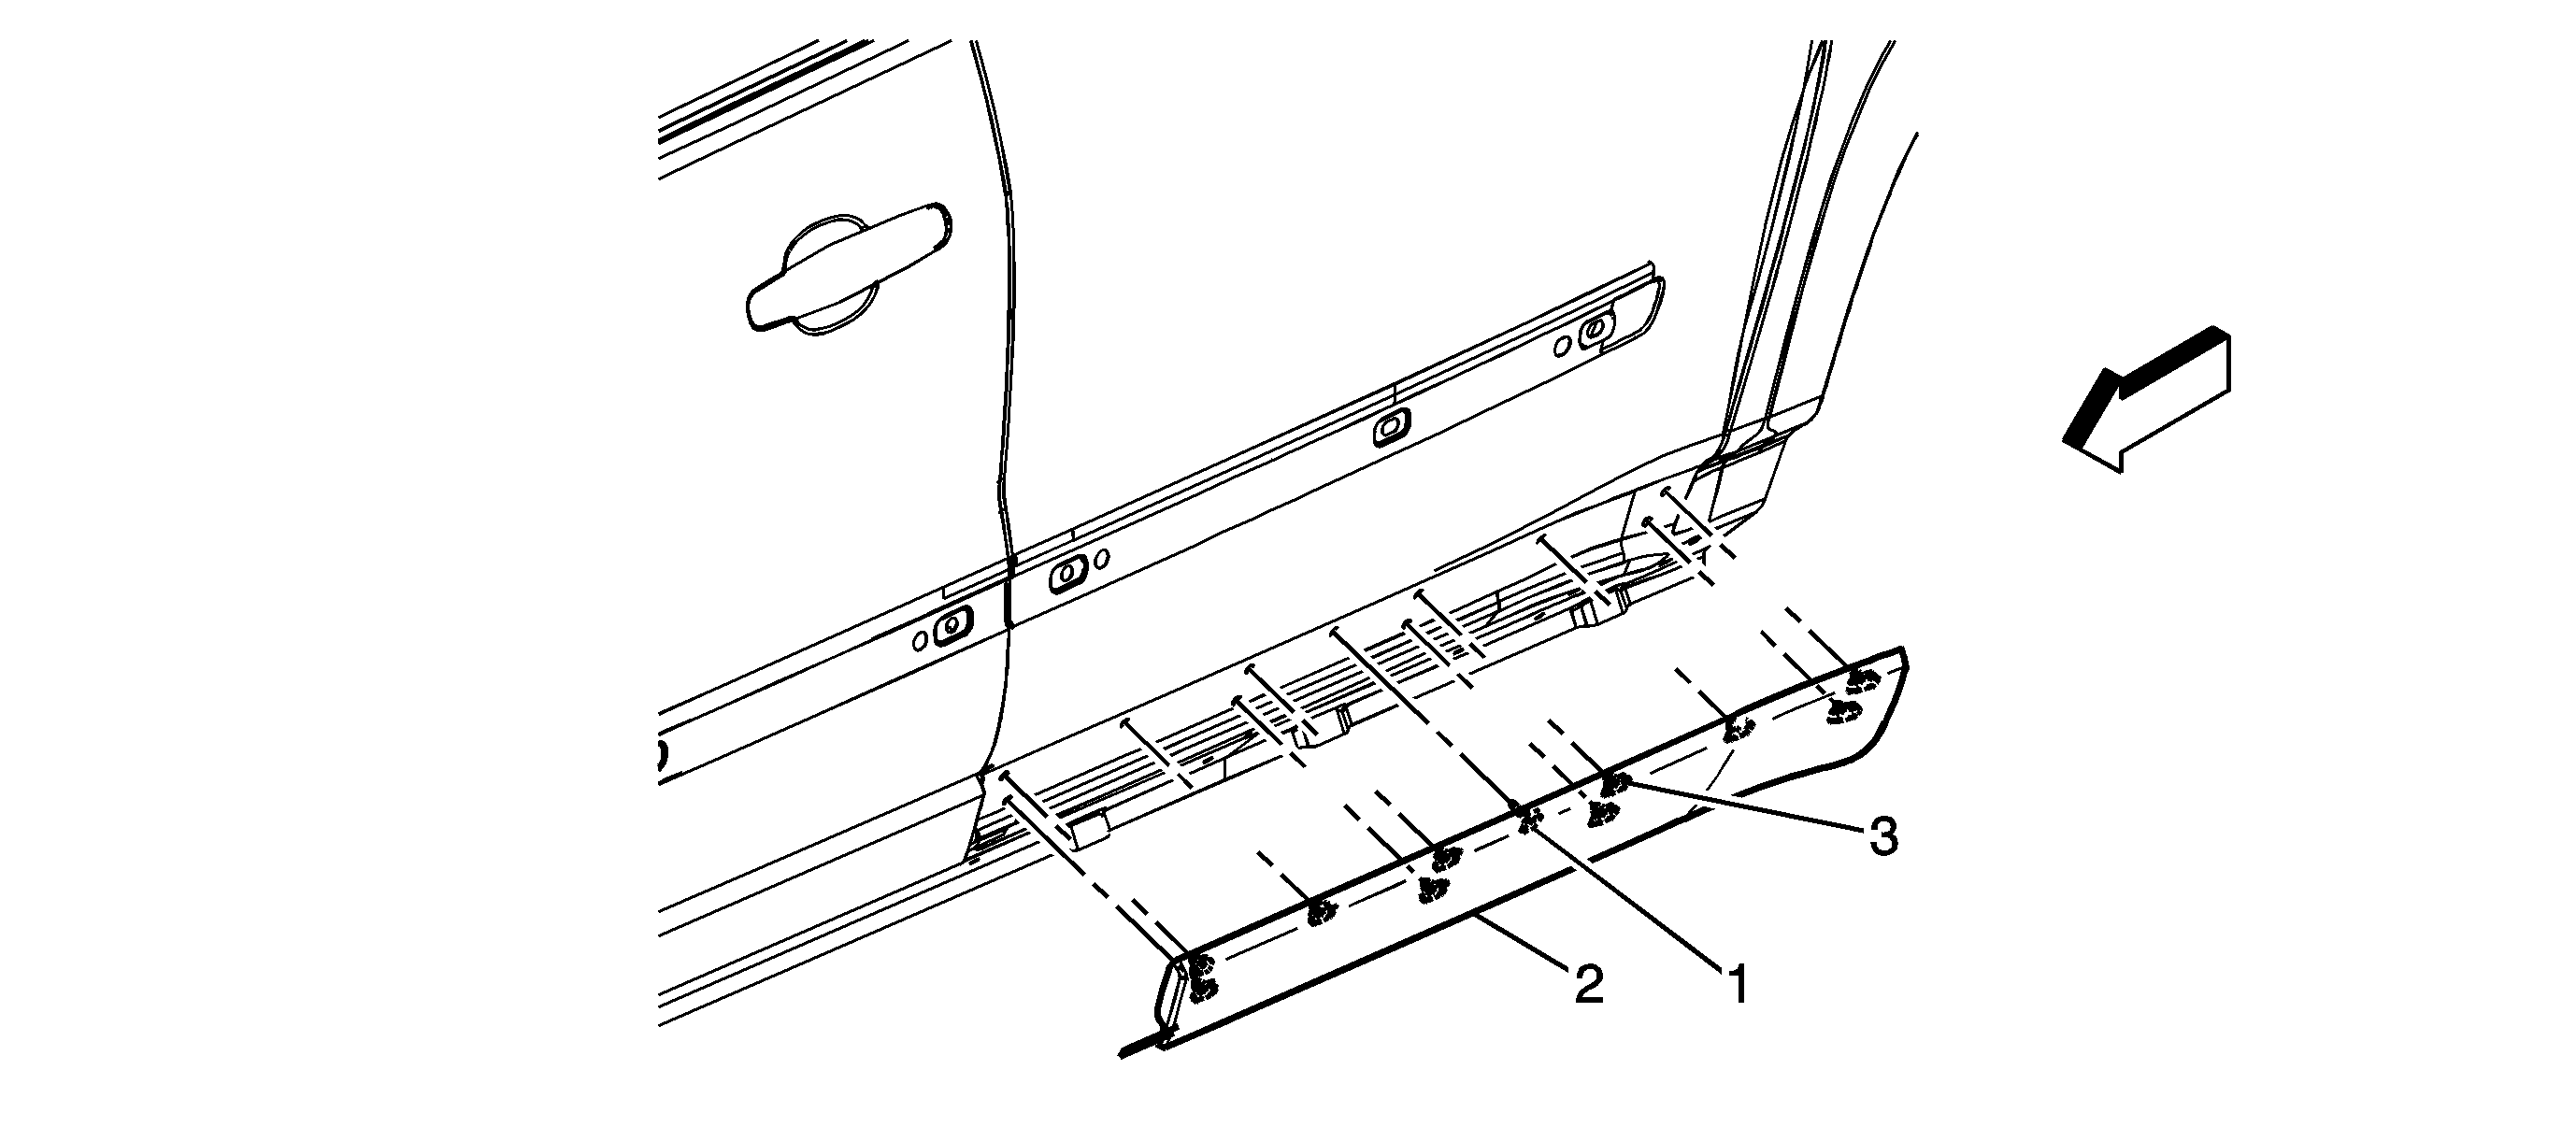
Callout | Component Name |
|---|---|
Preliminary ProcedureUsing a J 25070 Heat Gun in a circular motion, warm the front side door molding prior to removal. Carefully clean the body panel thoroughly prior to bonding the new lower body side molding to the door. | |
1 | Rear Side Door Lower Molding Locating Pin ProcedureAlign the pin to the center of the door prior to securing the retainers. |
2 | Lower Molding Integral Retainers (Qty: 10) |
3 | Rear Side Lower Door Molding ProcedureSecure the molding to the door and remove the protective liner on the backside of the molding after all of the retainers are secure. |
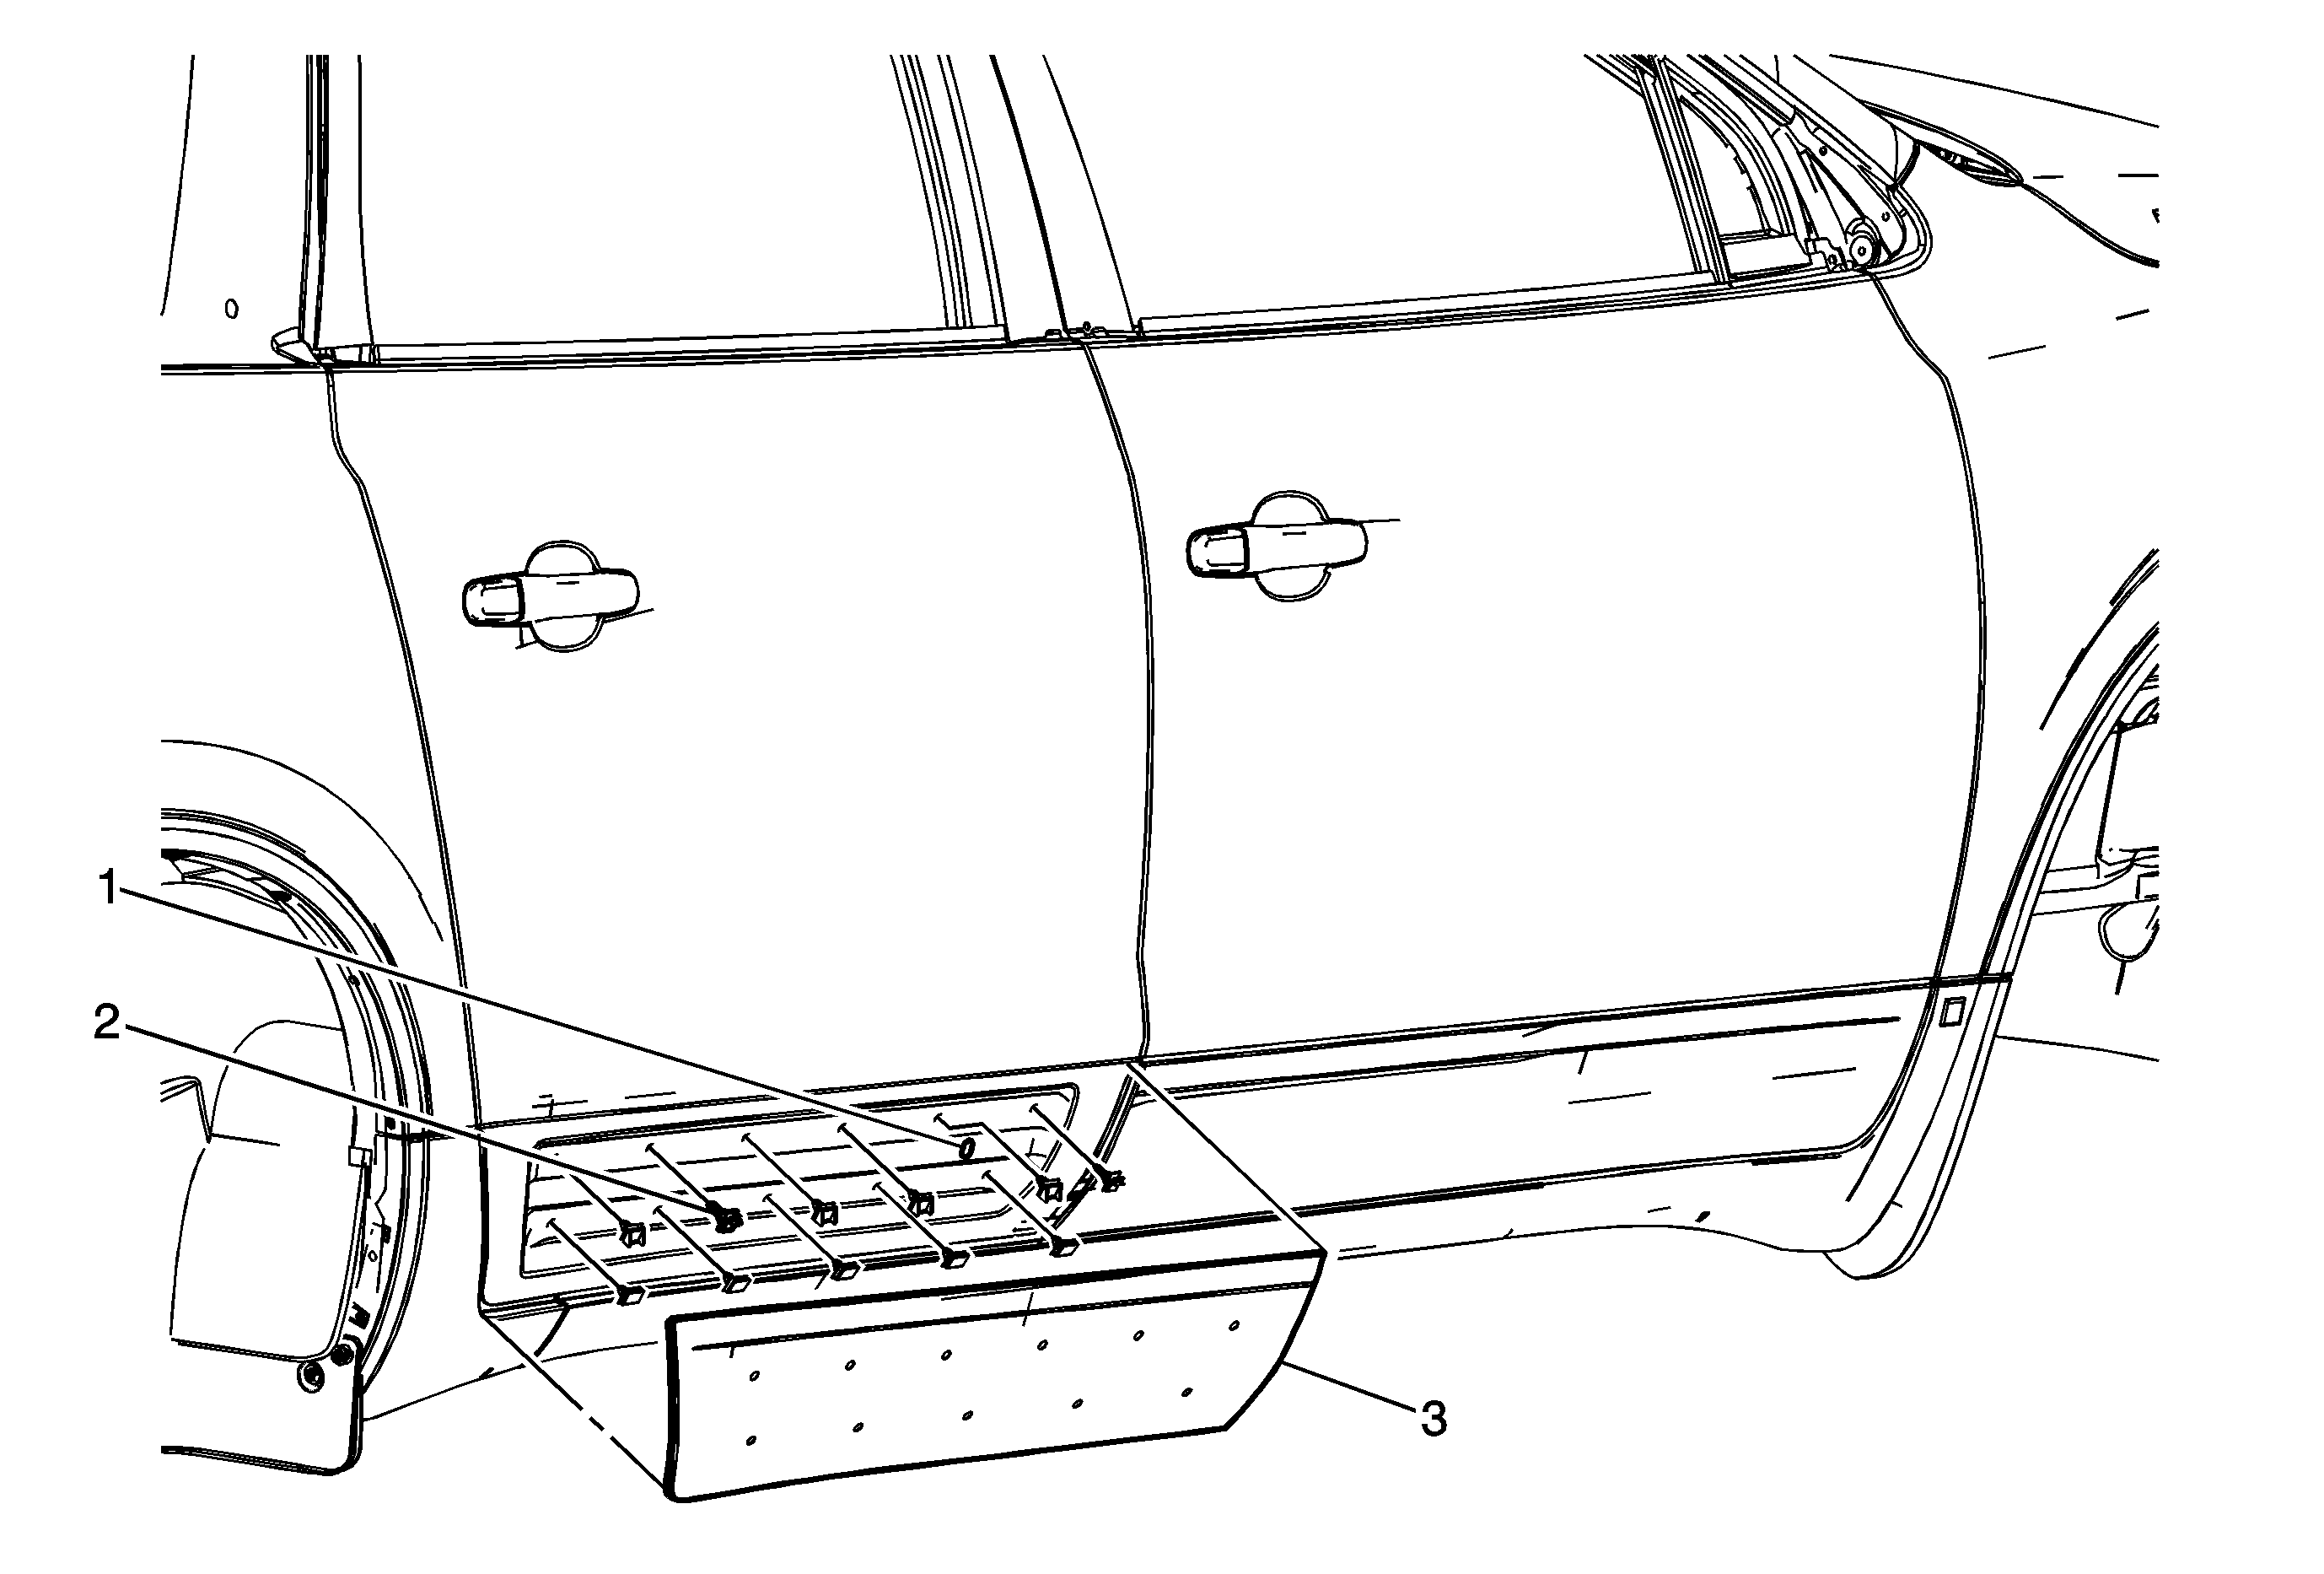
Rear Side Door Lower Molding Replacement Enclave

Callout | Component Name |
|---|---|
Preliminary ProcedureUsing a J 25070 Heat Gun in a circular motion, warm the rear side door molding prior to removal. Carefully clean the body panel thoroughly prior to bonding the new lower body side molding to the door. | |
1 | Rear Side Door Lower Molding Locating Hole ProcedureAlign the pin to the center of the door prior to securing the retainers. |
2 | Lower Molding Integral Retainers (Qty: 11) |
3 | Rear Side Lower Door Molding Procedure
|
Rear Side Door Lower Molding Replacement OUTLOOK

Callout | Component Name |
|---|---|
Preliminary ProcedureUsing a J 25070 Heat Gun in a circular motion, warm the front side door molding prior to removal. Carefully clean the body panel thoroughly prior to bonding the new lower body side molding to the door. | |
1 | Rear Side Door Lower Molding Locating Pin ProcedureAlign the pin to the center of the door prior to securing the retainers. |
2 | Lower Molding Integral Retainer (Qty: 10) |
3 | Rear Side Lower Door Molding ProcedureSecure the molding to the door and remove the protective liner on the backside of the molding after all of the retainers are secure. |
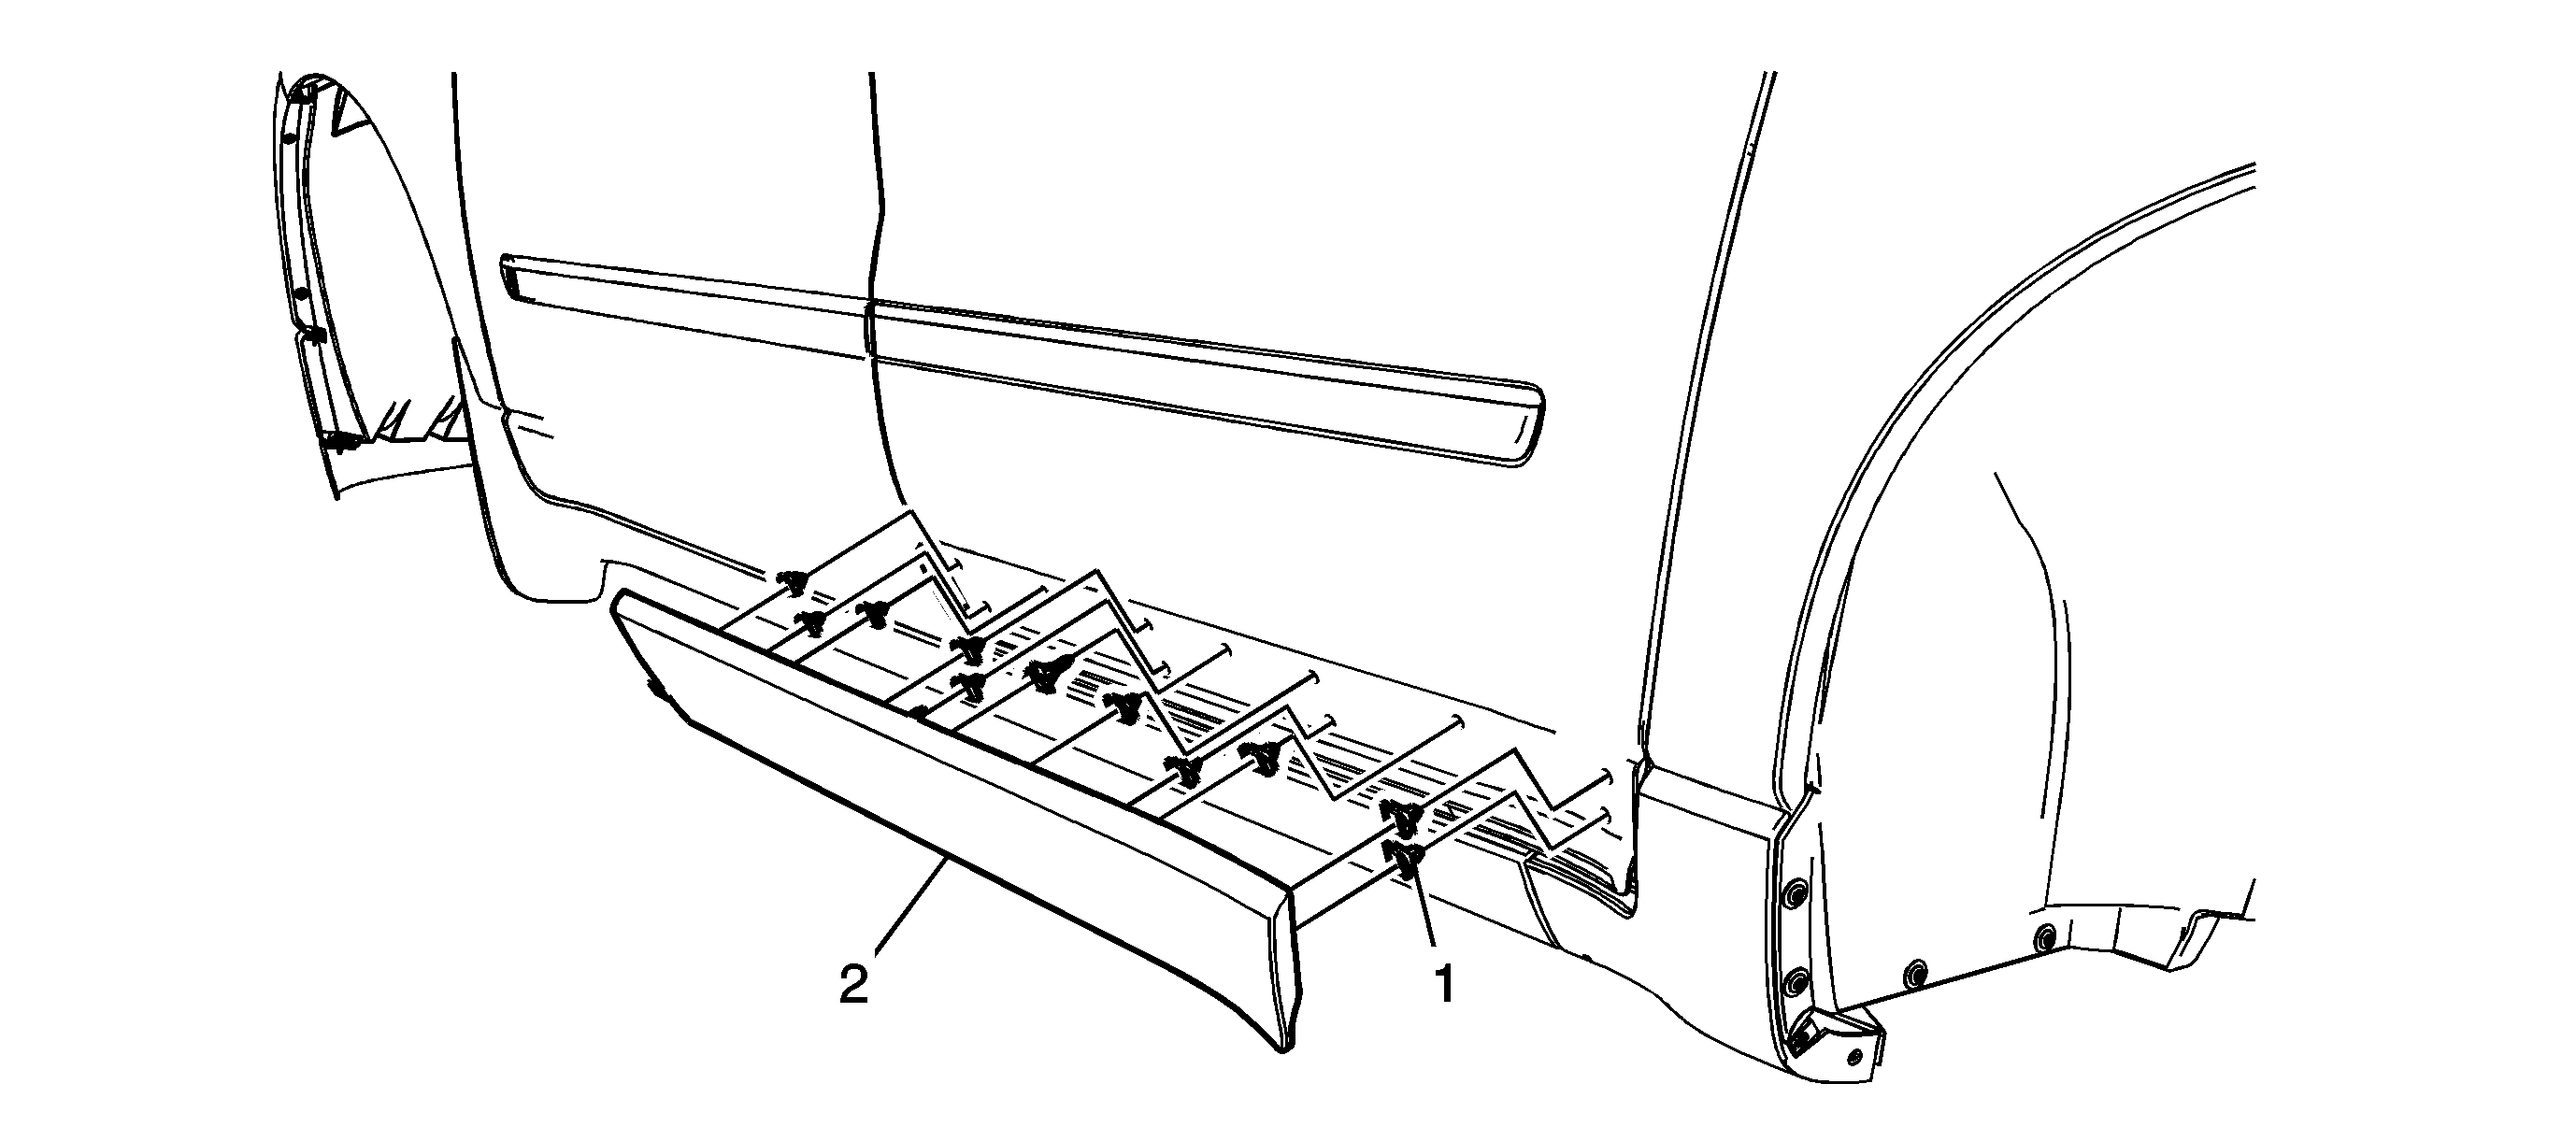
Rear Side Door Lower Molding Replacement Traverse

Callout | Component Name |
|---|---|
Preliminary ProcedureUsing a J 25070 Heat Gun in a circular motion, warm the front side of the lower rear door molding prior to removal. Carefully clean the body panel thoroughly prior to bonding the new lower body side molding to the door. | |
1 | Lower Molding Base Clip Retainers (Qty: 10) ProcedureUse a suitable trim removal tool to disengage the base clip retainers from the door panel. |
2 | Rear Side Lower Door Molding Assembly Procedure
|
