Removal Procedure
- Remove the HVAC module. Refer to HVAC Module Assembly Replacement .
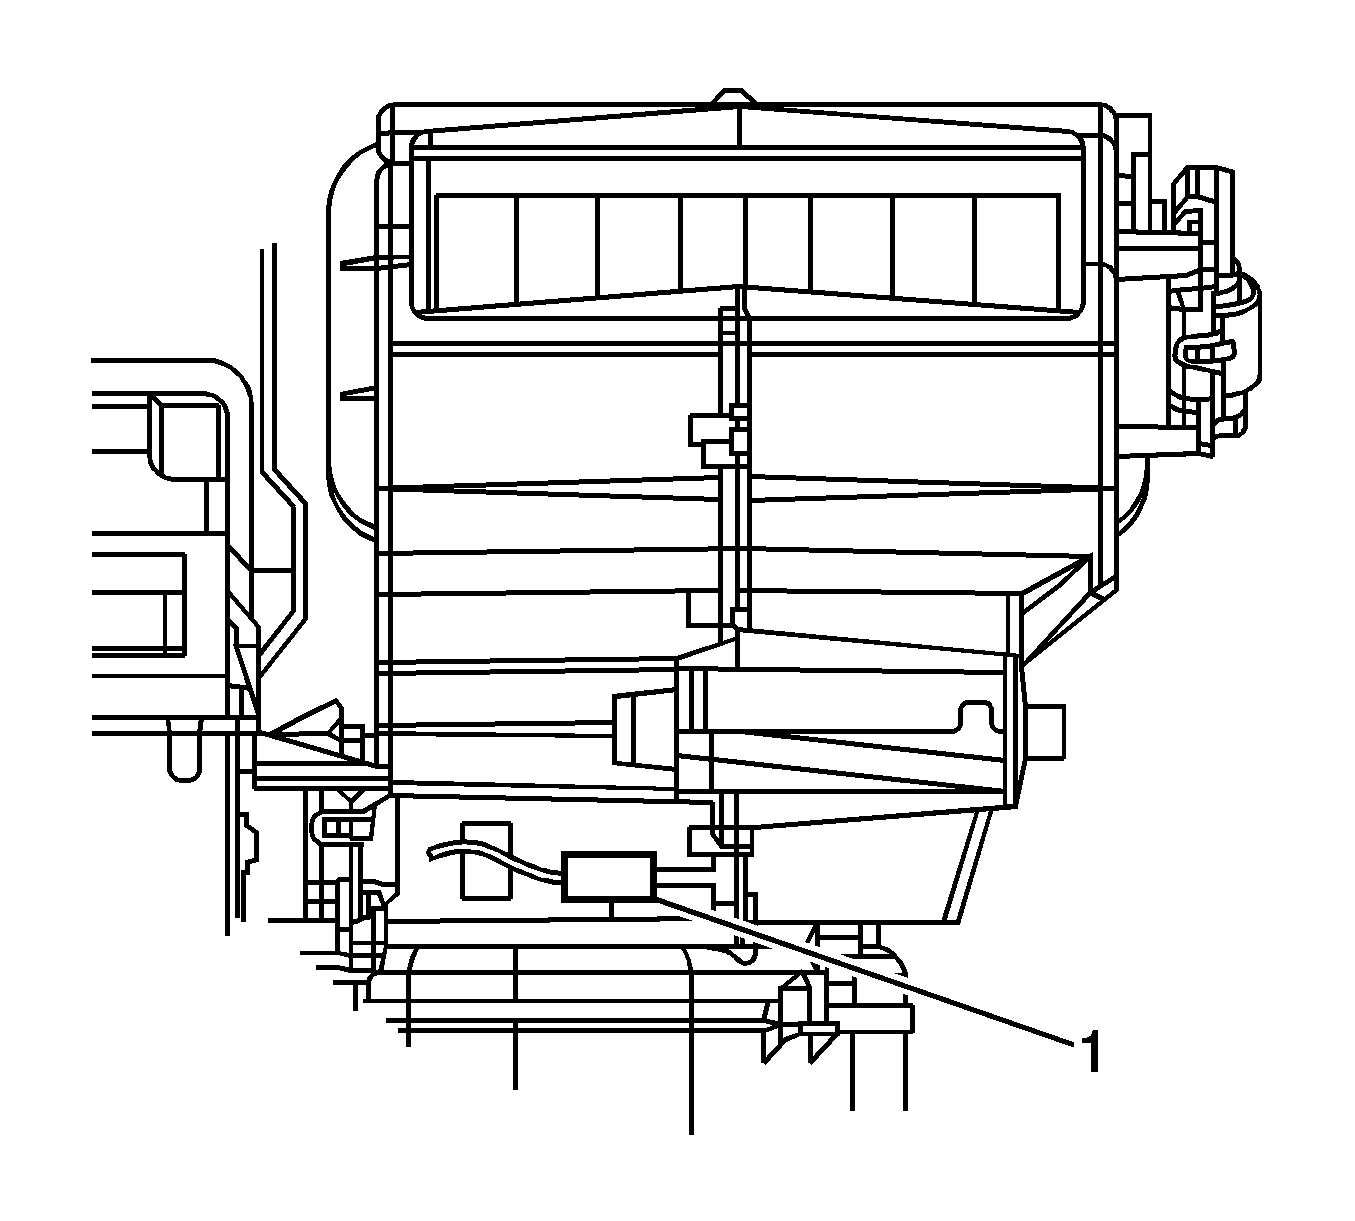
- Remove the evaporator temperature sensor connector (1) from the case.
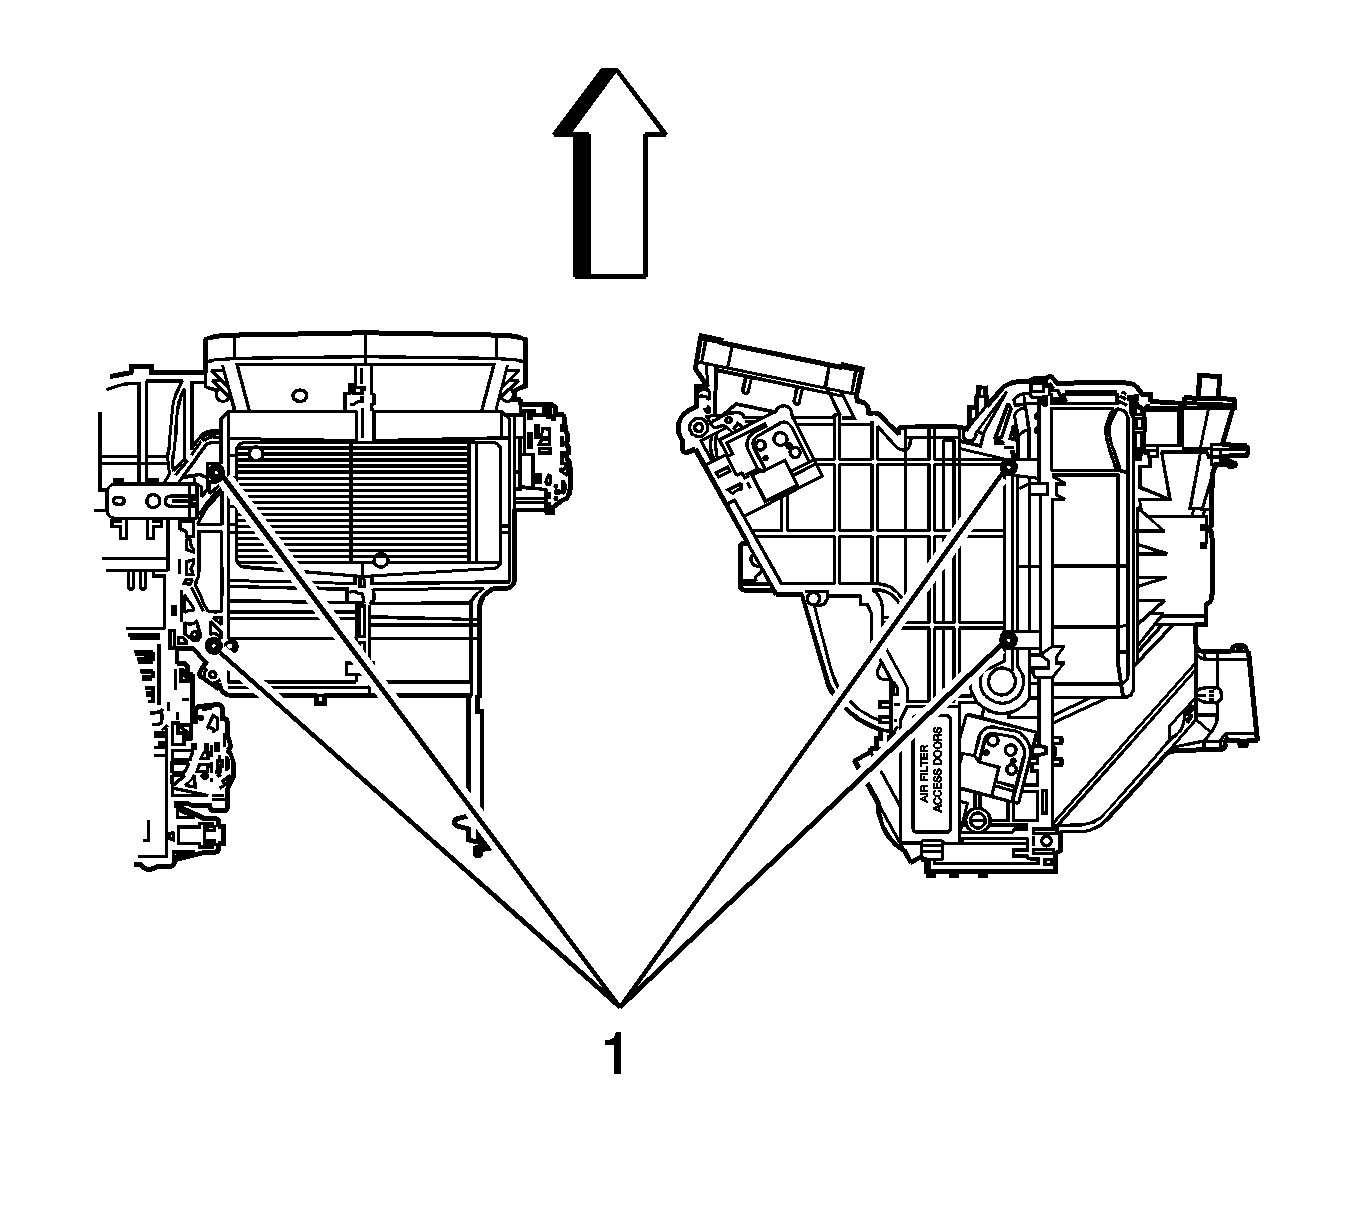
- Remove the air inlet housing bolts/screws (1).
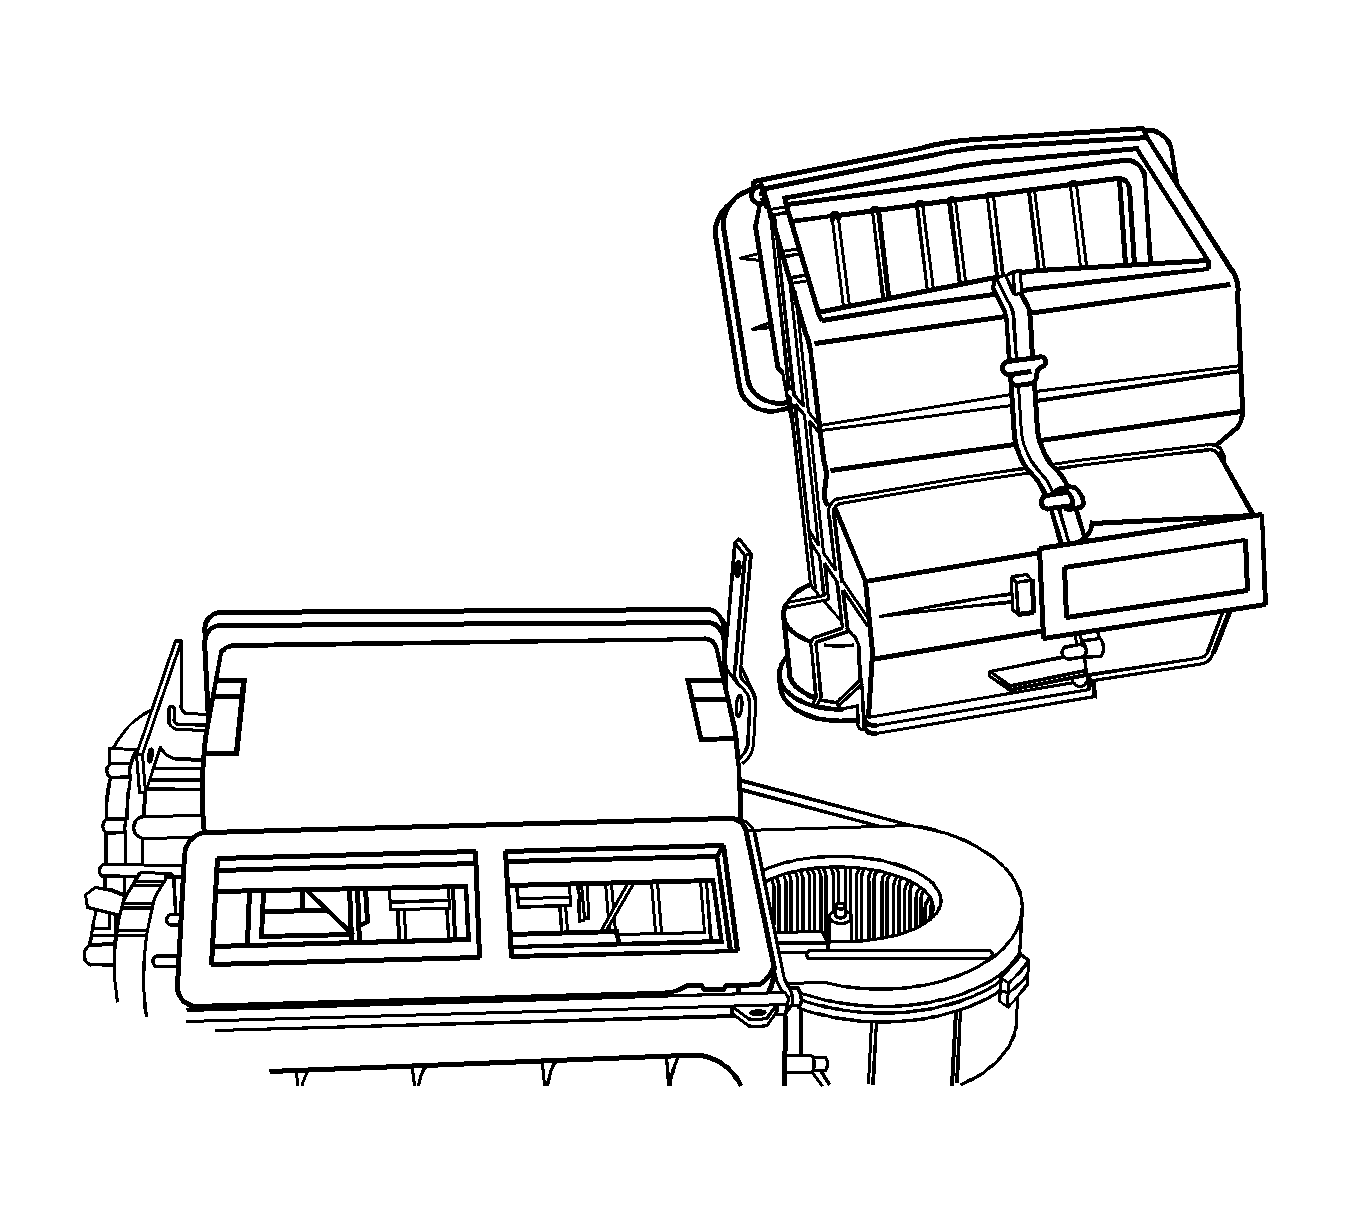
- Remove the air inlet housing.
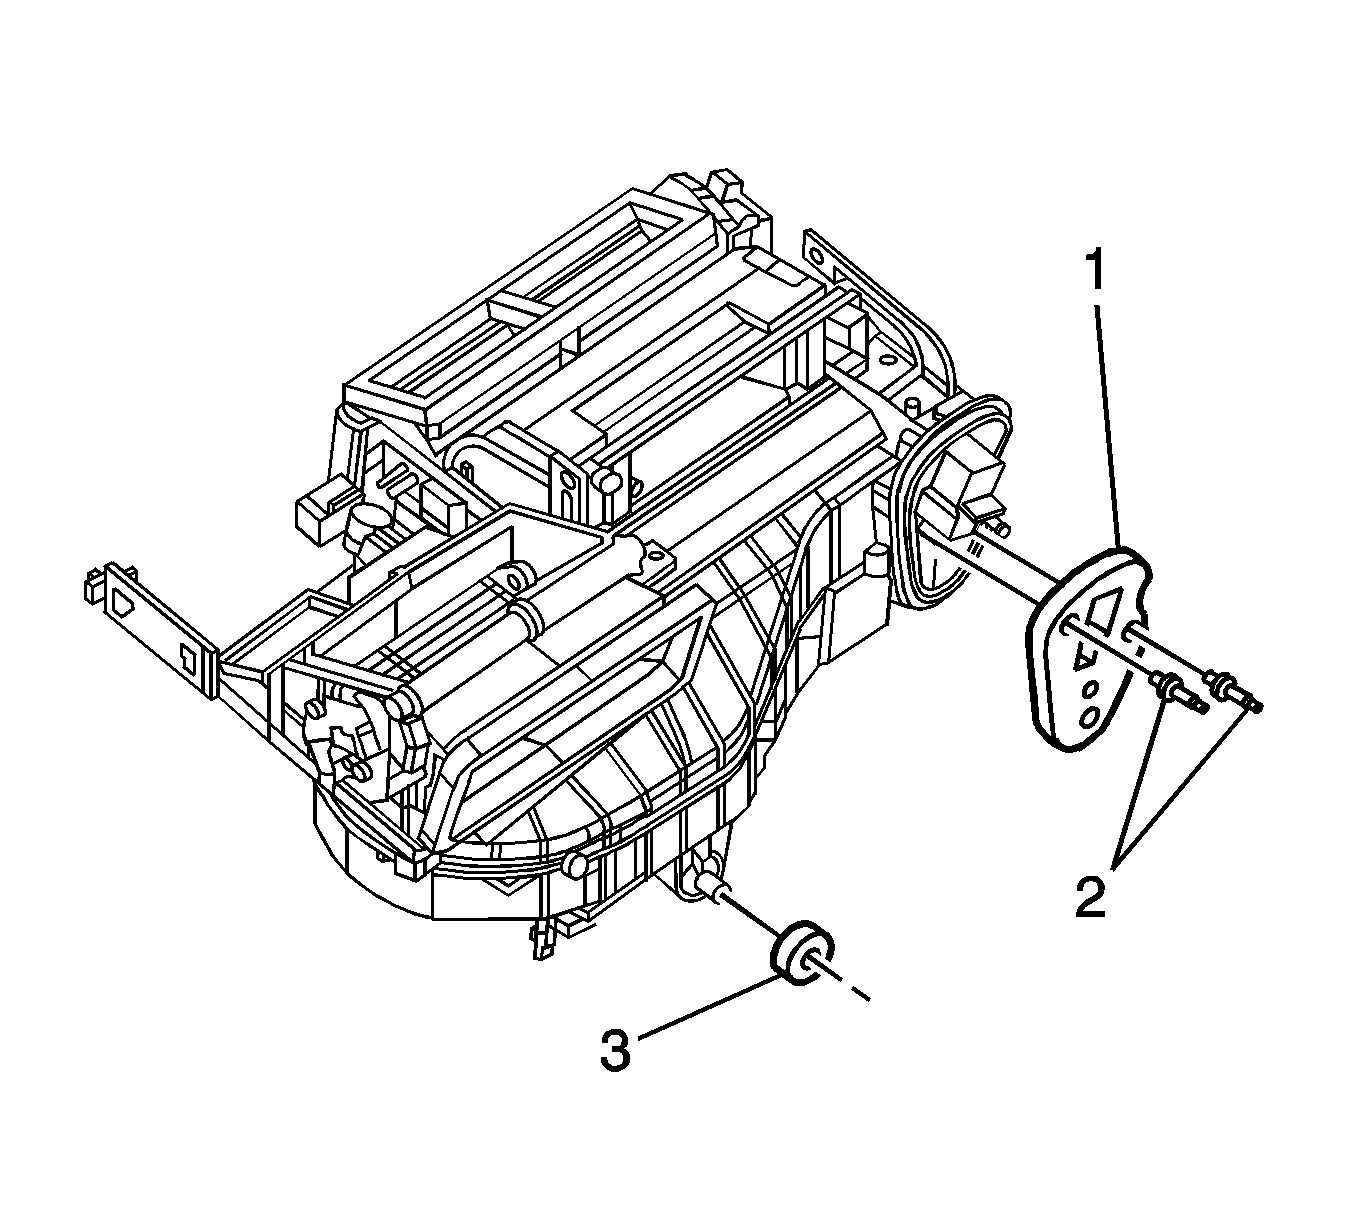
- Remove the right side HVAC module bracket bolts/screws (1).
- Remove the right side HVAC module bracket (2).
- Remove the upper HVAC module bolt/screw.
- Remove the HVAC module to dash panel sound barrier seal (1).
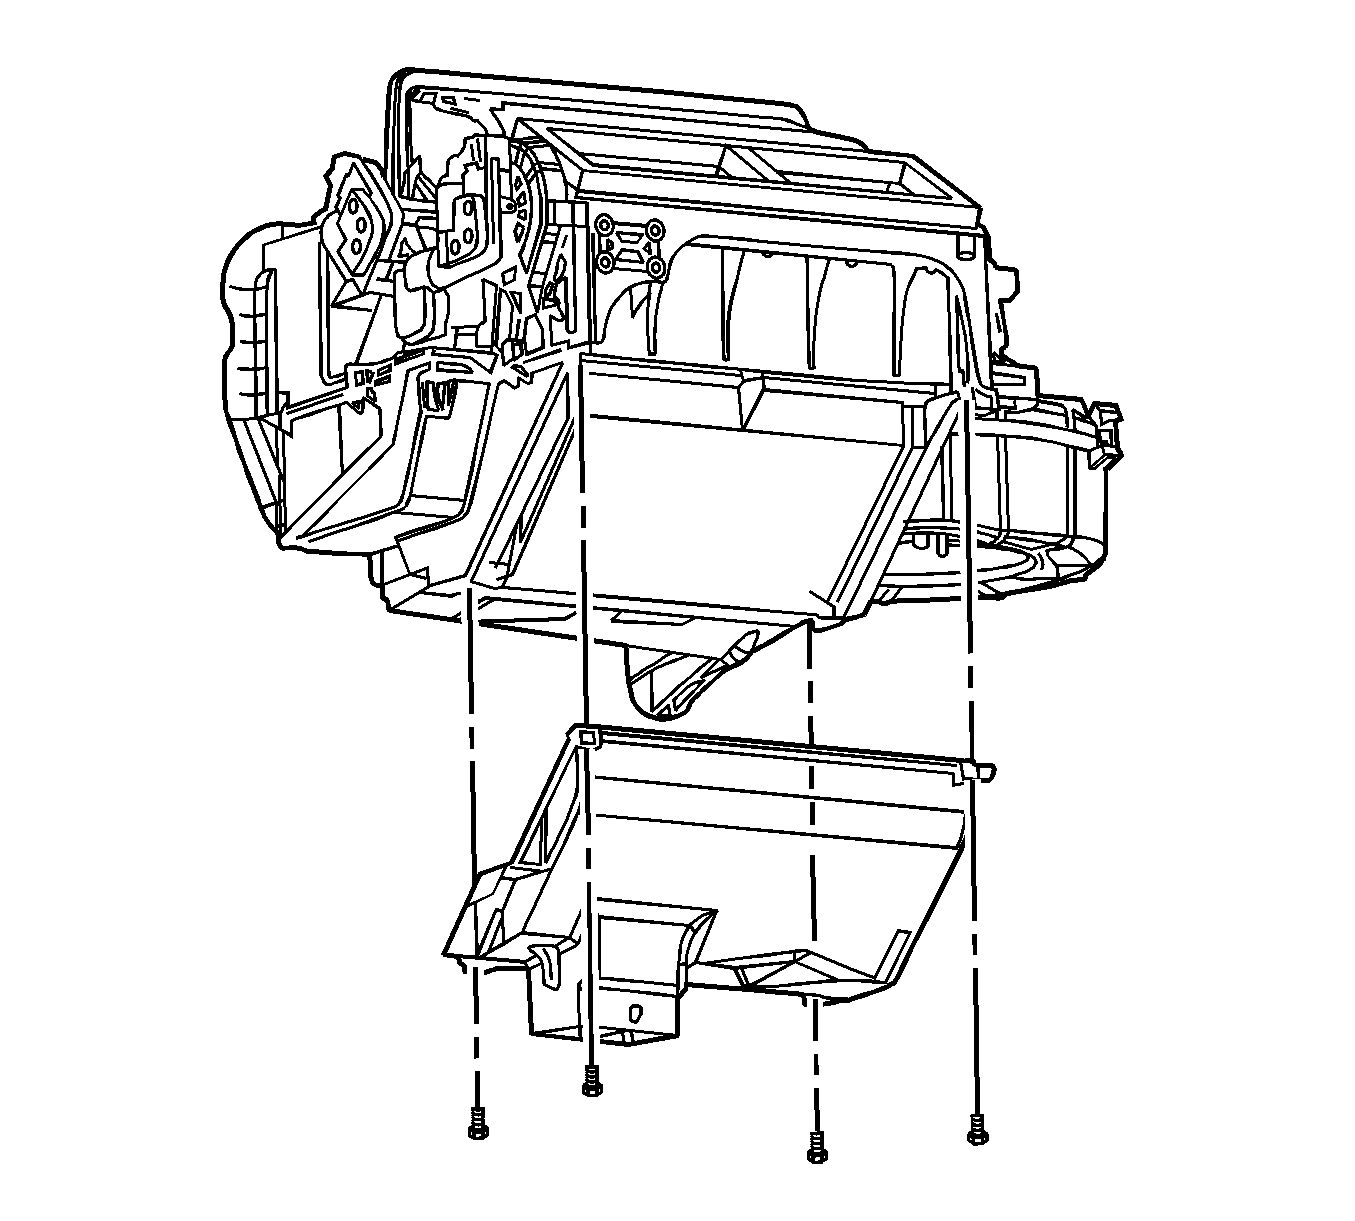
- Remove the heater outlet duct bolts/screws.
- Remove the heater outlet duct.
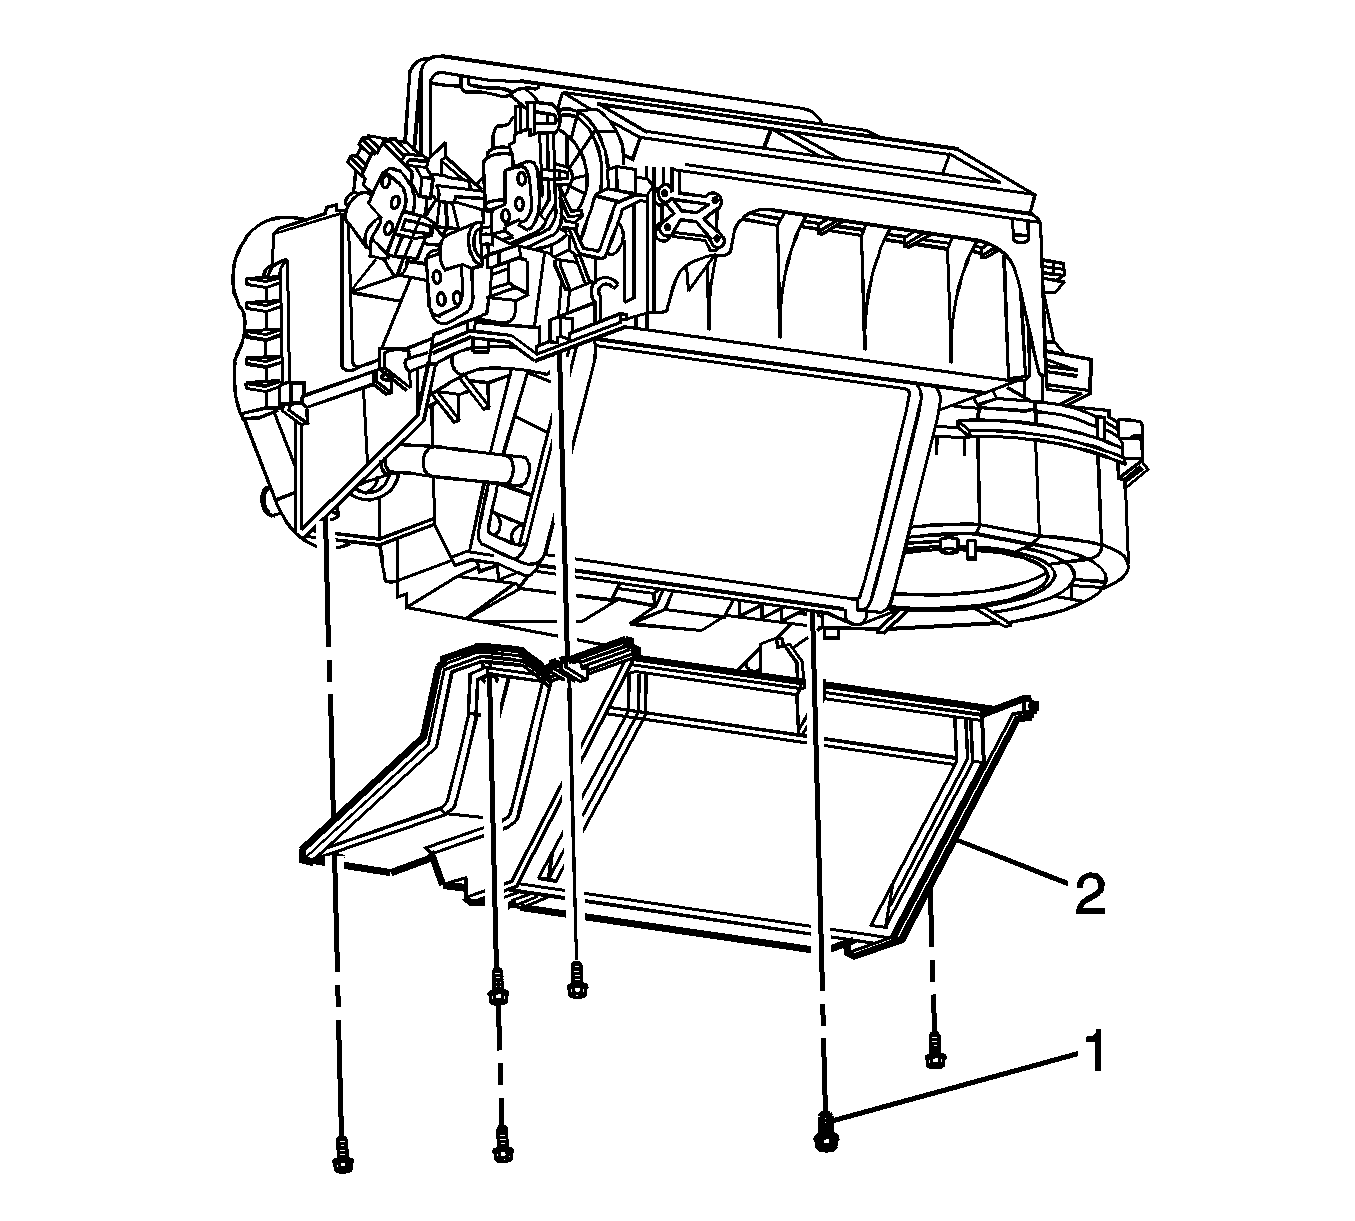
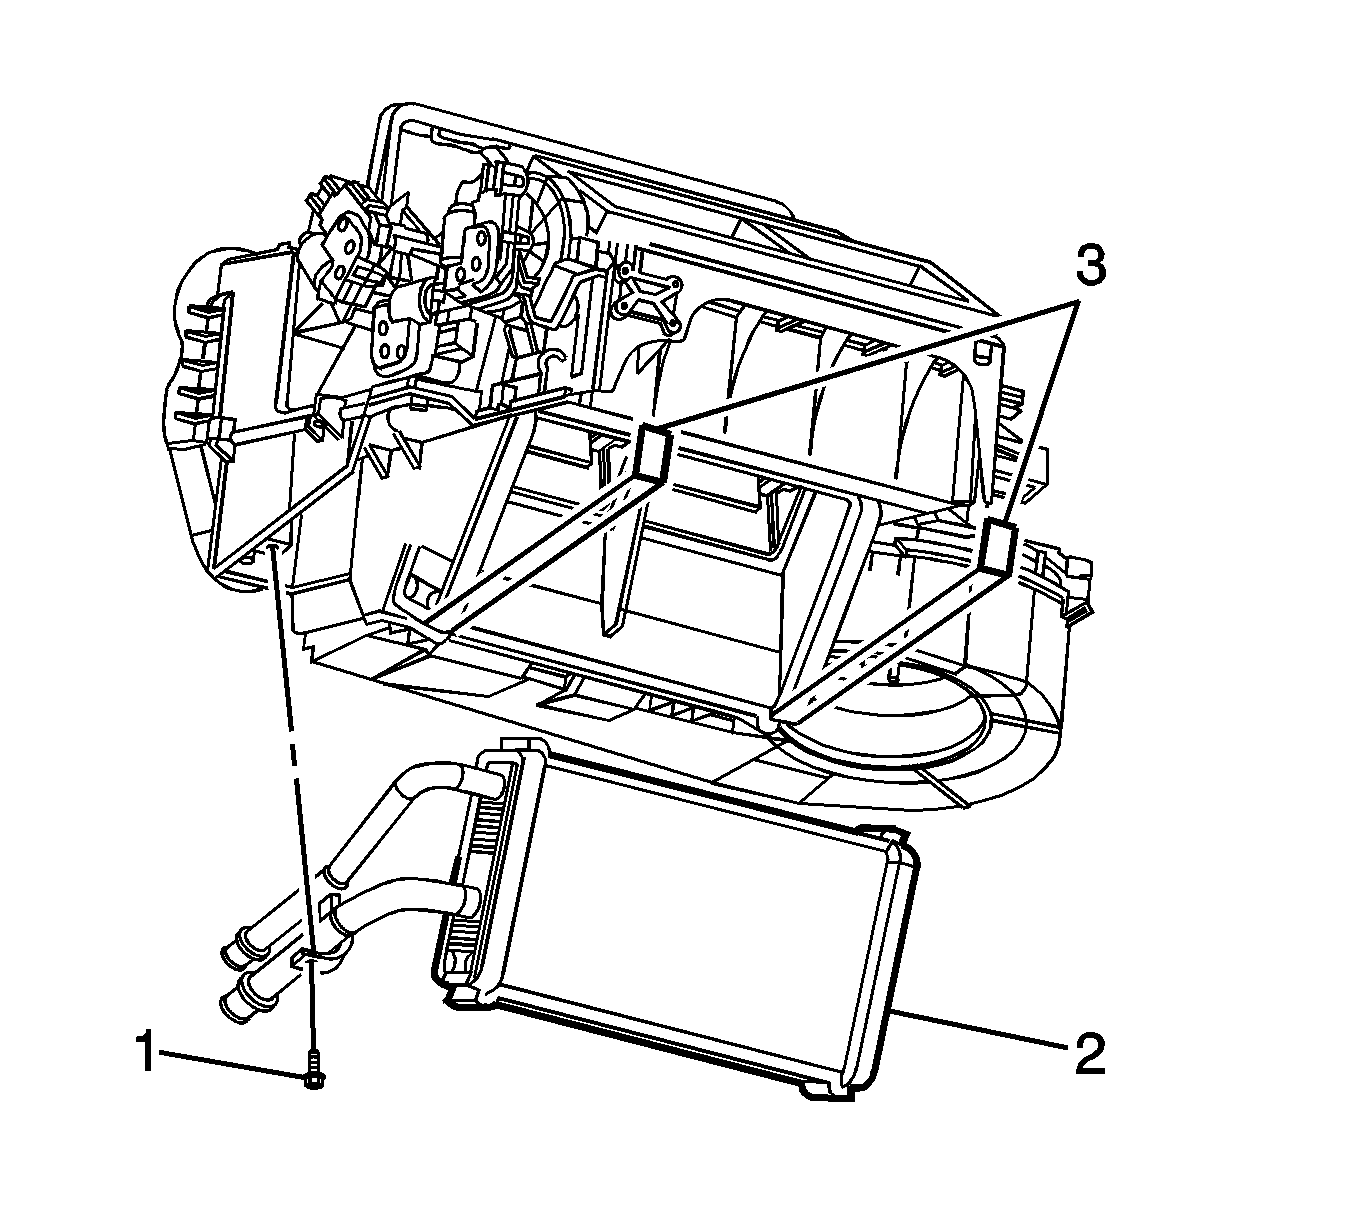
- Remove the heater core cover bolts/screws (1).
- Remove the heater core cover (2).
- Remove the heater core pipe bolt/screw (1).
- Remove the heater core (2).
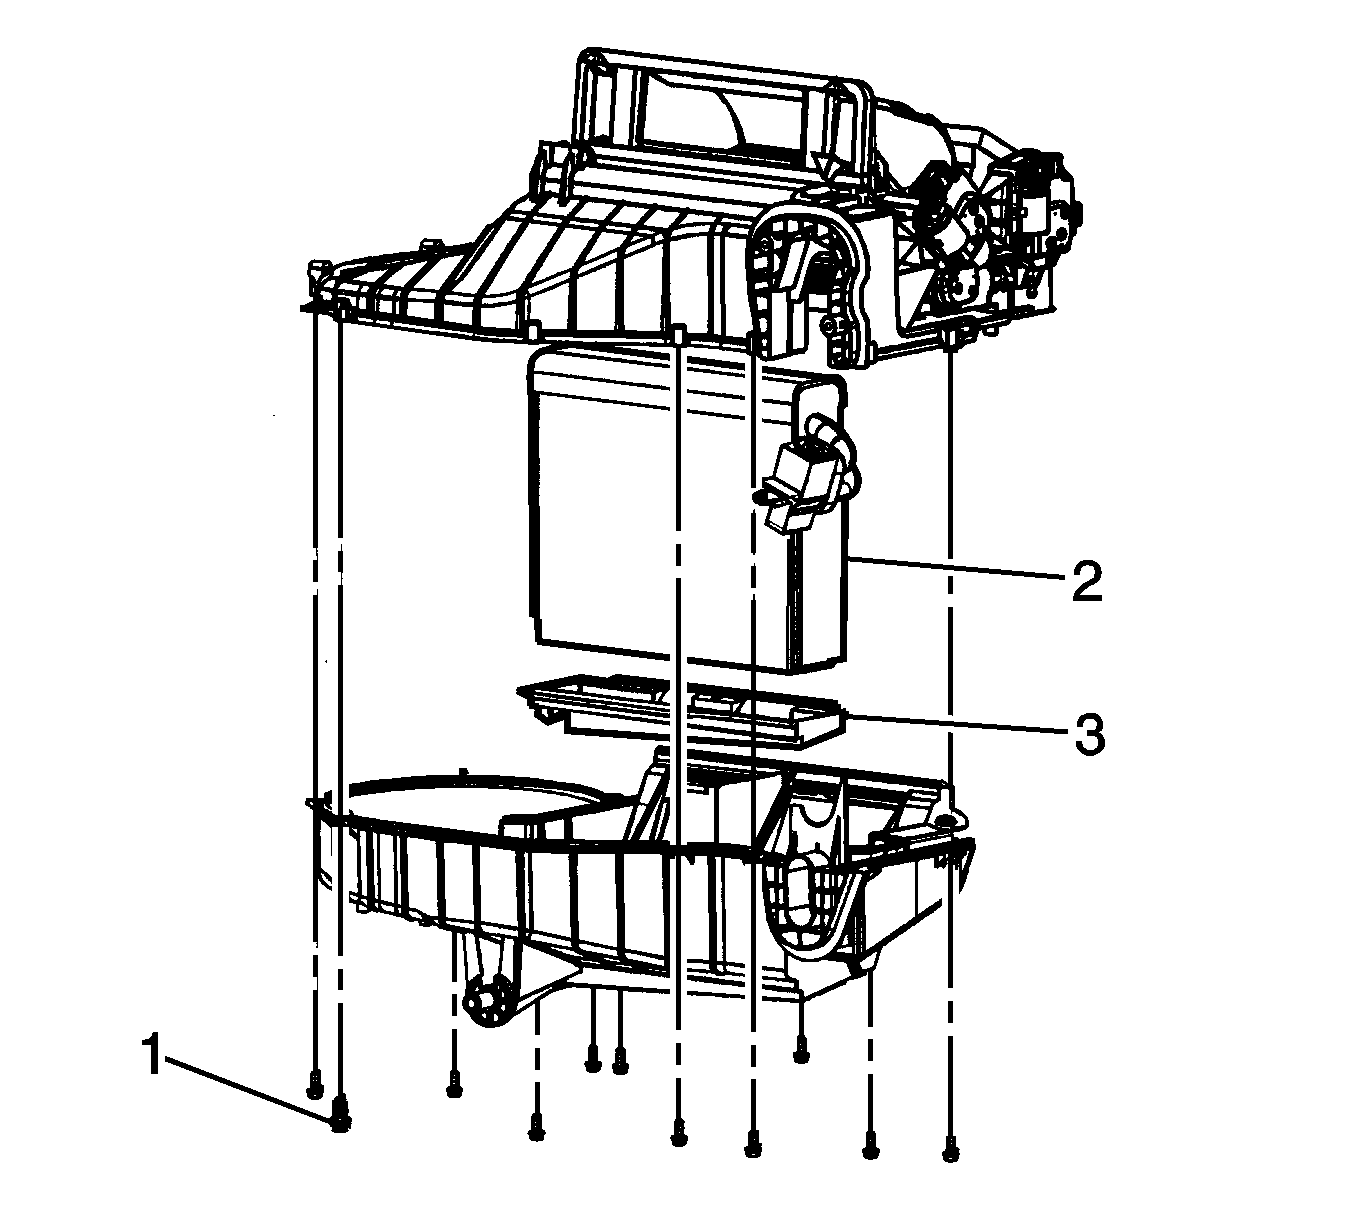
- Remove the lower HVAC module bolts/screws (1).
- Separate the HVAC module case halves.
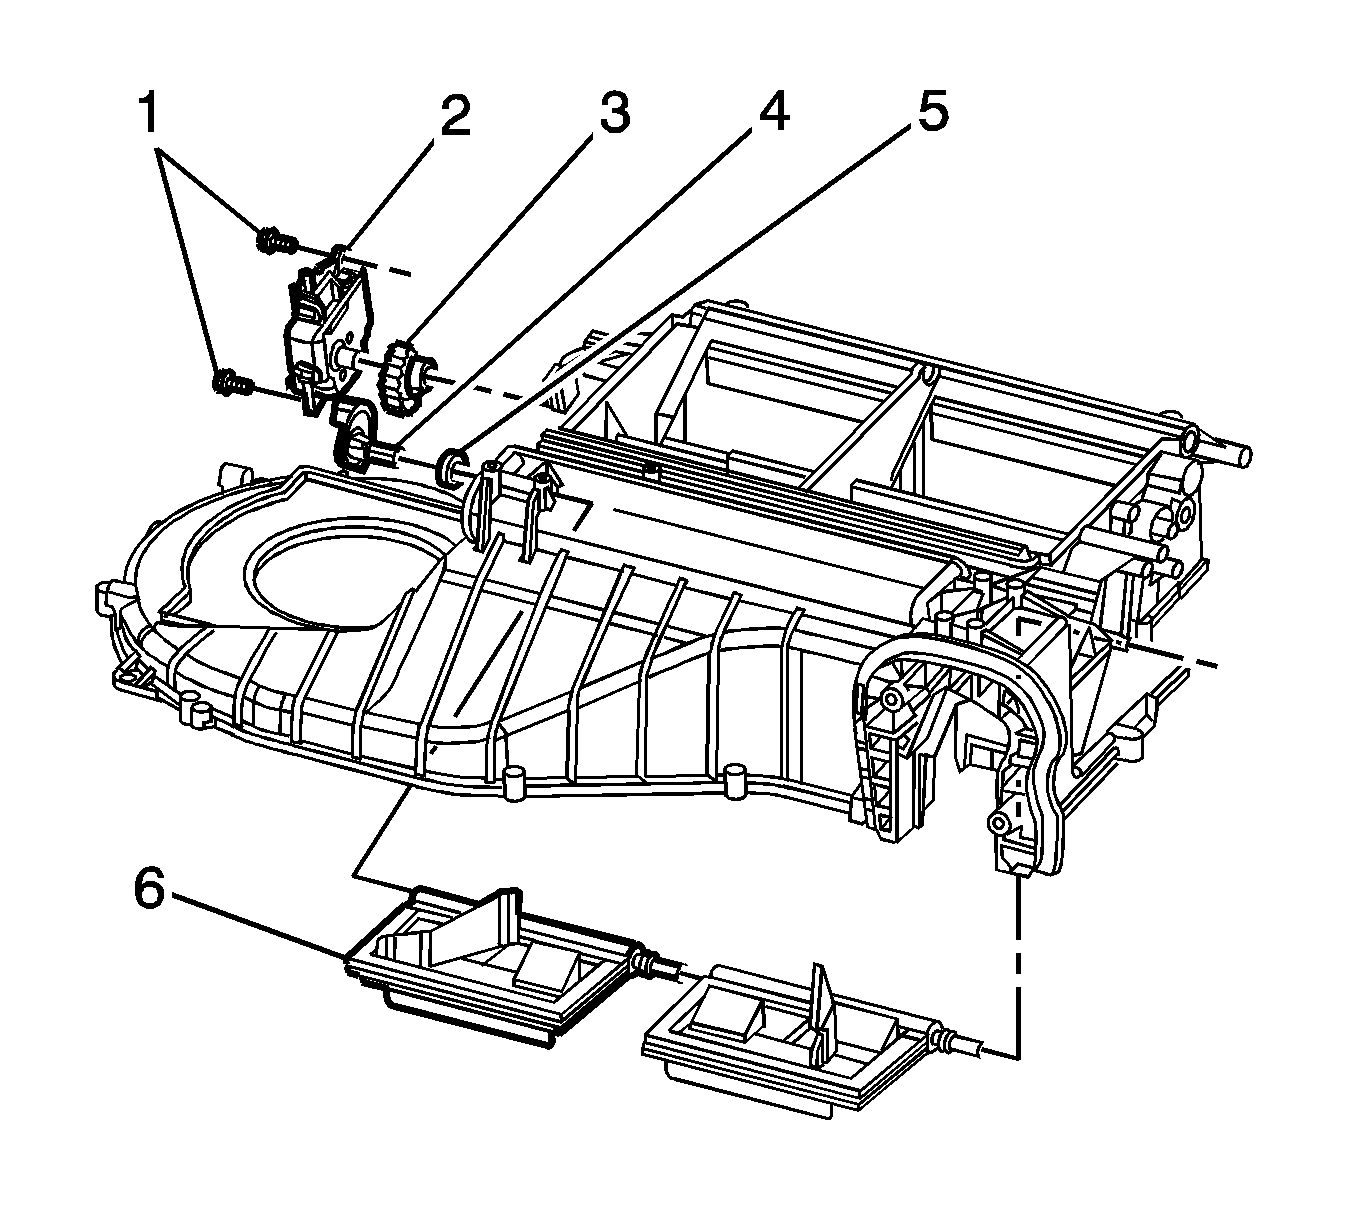
- Remove the ride side air temperature actuator bolts/screws (1).
- Remove the right side air temperature actuator (2).
- Remove the right side air temperature actuator levers (3, 4, 5).
- Remove the right side air temperature door (6).
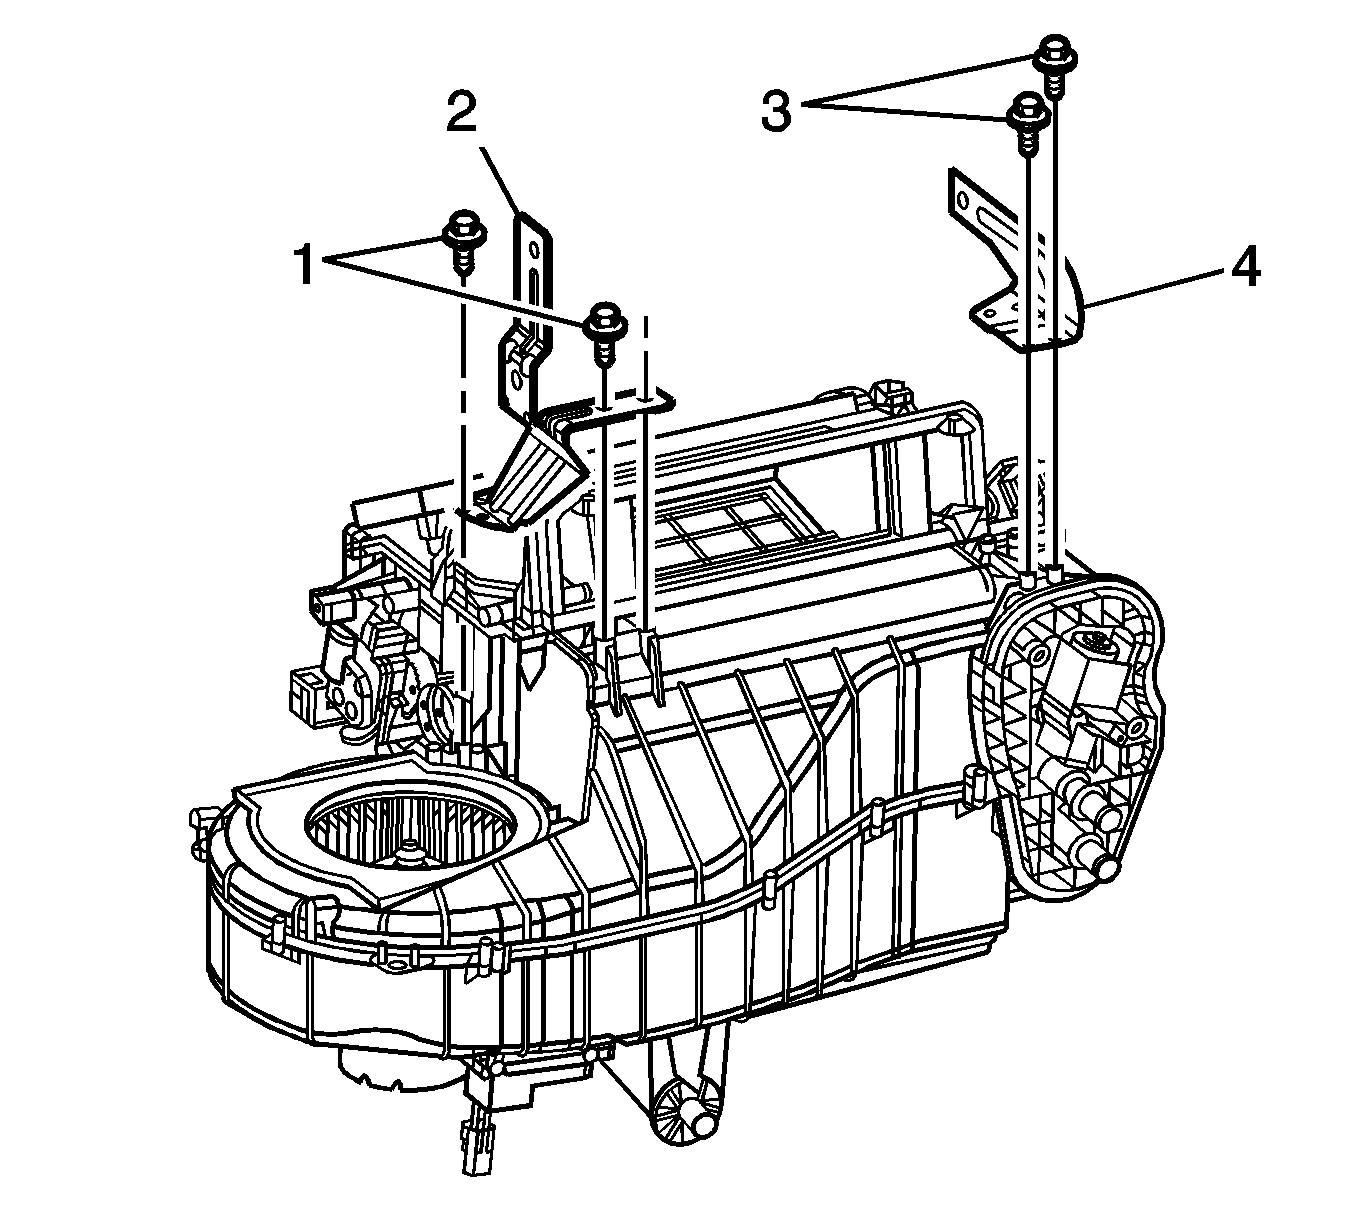
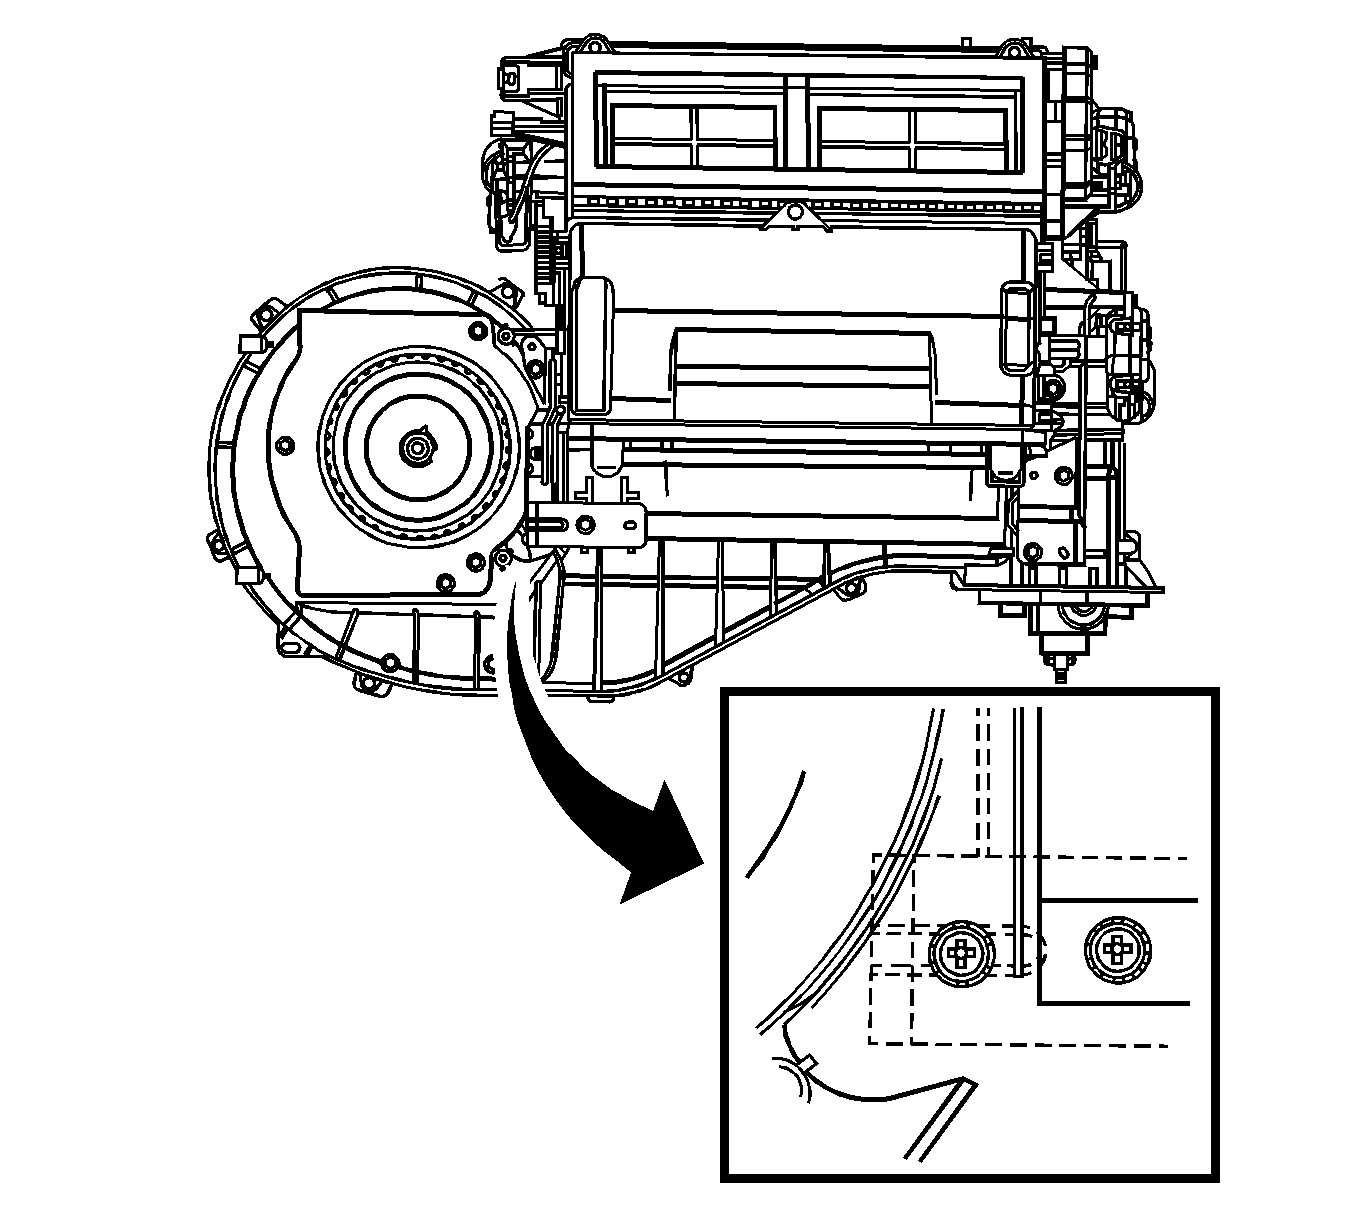
Important: The upper HVAC module bolt/screw is located under the right HVAC module bracket.
Installation Procedure
- Install the right side air temperature door (6).
- Install the right side air temperature actuator levers.
- Check and correct the engagement between the actuator levers (1, 2).
- Install the right side air temperature actuator (2).
- Install the ride side air temperature actuator bolts/screws (1).
- Align and install the upper module case to the lower module case.
- Install the lower HVAC module bolts/screws (1).
- Install the heater core (2).
- Install the heater core pipe bolt/screw (1).
- Install the heater core cover (2).
- Install the heater core cover bolts/screws (1).
- Install the heater outlet duct.
- Install the heater outlet duct bolts/screws.
- Install the HVAC module to dash panel sound barrier seal (1).
- Install the upper HVAC module bolt/screw.
- Install the right side HVAC module bracket (2).
- Install the right side HVAC module bracket bolts/screw (1).
- Install the air inlet housing.
- Install the air inlet housing bolts/screws (1).
- Install the evaporator temperature sensor connector (1) to the case.
- Install the HVAC module. Refer to HVAC Module Assembly Replacement .
- Re-calibrate the actuators. Refer to Actuator Recalibration .

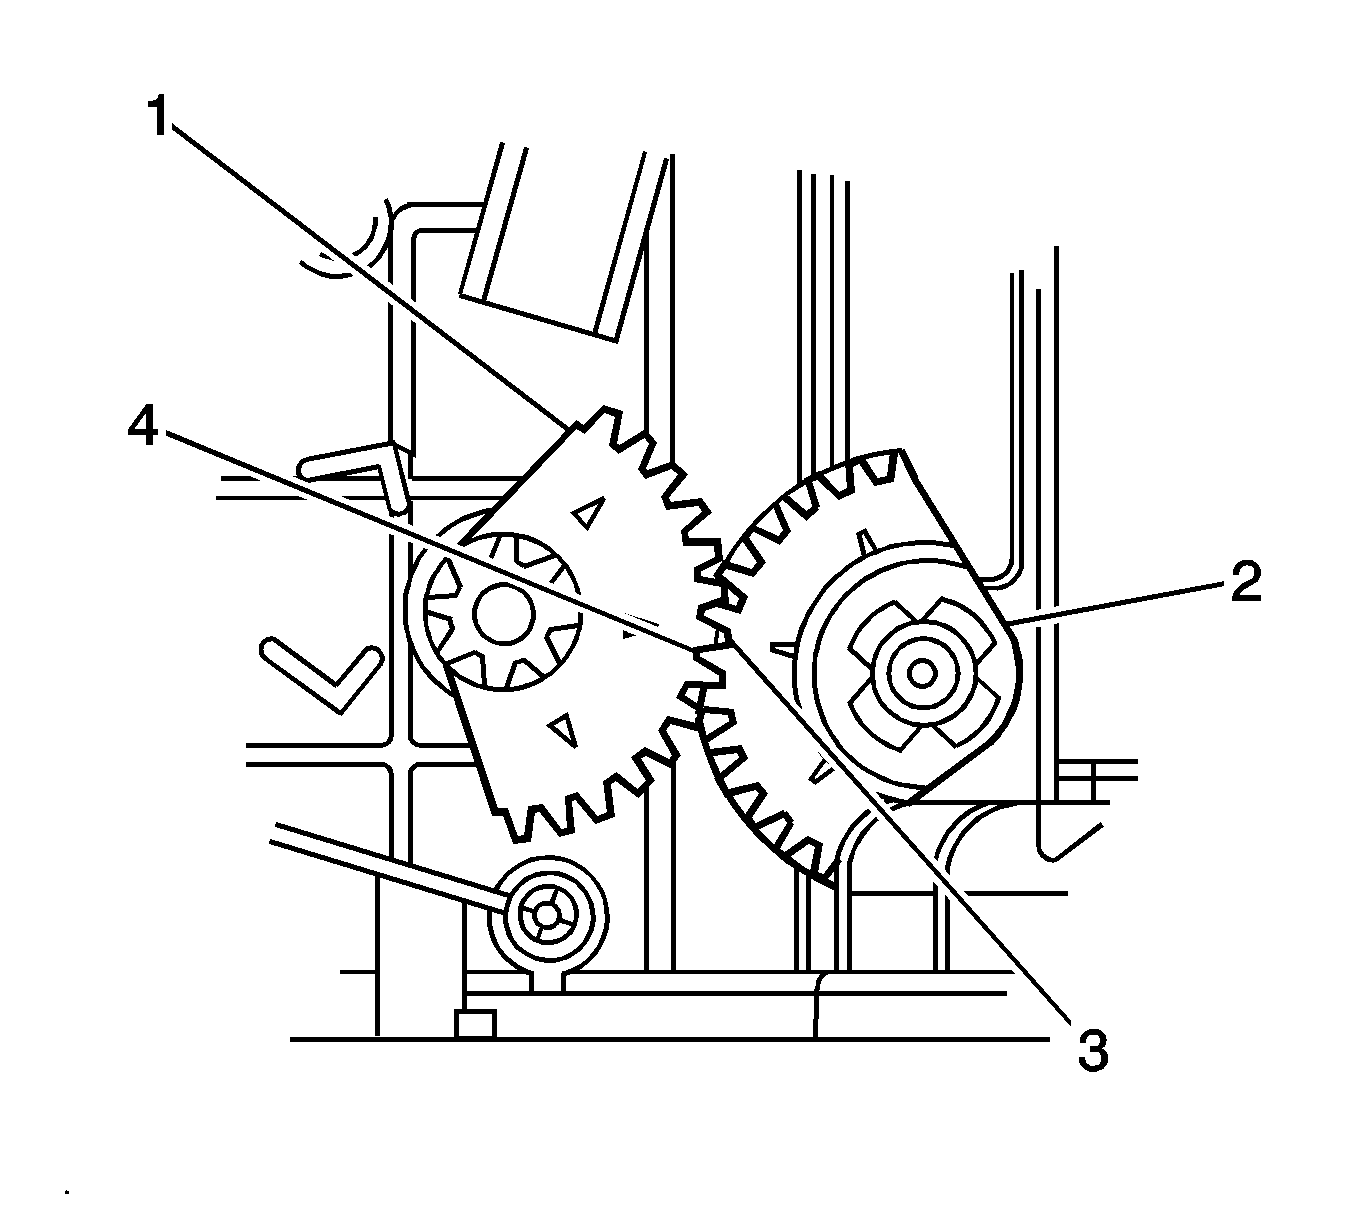
Important: The actuator lever (2) can only be inserted into the door one way.
| 3.1. | Install the actuator lever (2). |
| 3.2. | Align the primary tooth (4) of the actuator lever (1) with the gap (3) in the actuator lever (2). |

Notice: Refer to Fastener Notice in the Preface section.
Tighten
Tighten the bolts/screws to 1.2 N·m (11 lb in).

Important: Align the temperature sensor wire with the opening in the upper HVAC case. Improper alignment will pinch and/or cut the sensor wire.
Tighten
Tighten the bolts/screws to 1.2 N·m (11 lb in).

Tighten
Tighten the bolts/screws to 1.2 N·m (11 lb in).

Tighten
Tighten the bolts/screws to 1.2 N·m (11 lb in).

Tighten
Tighten the bolts/screws to 1.2 N·m (11 lb in).


Tighten
Tighten the bolt/screw to 1.2 N·m (11 lb in).

Tighten
Tighten the bolts/screws to 1.4 N·m (12 lb in).


Tighten
Tighten the bolt/screw to 1.2 N·m (11 lb in).

