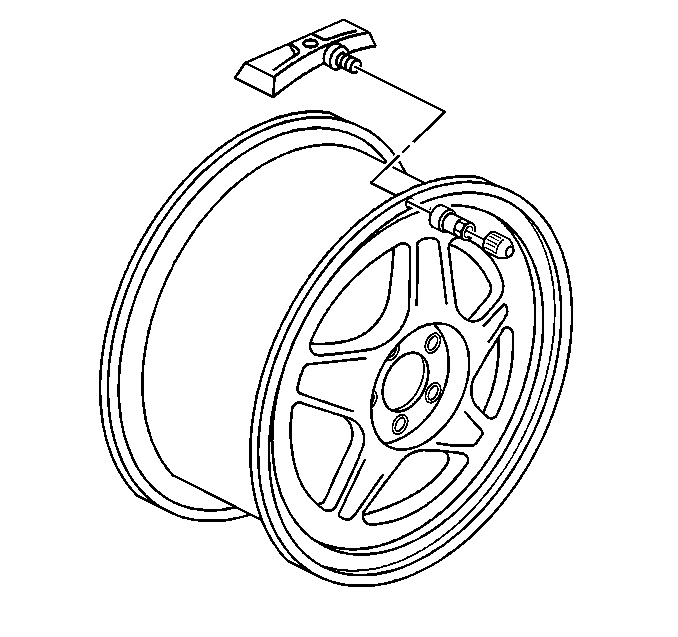
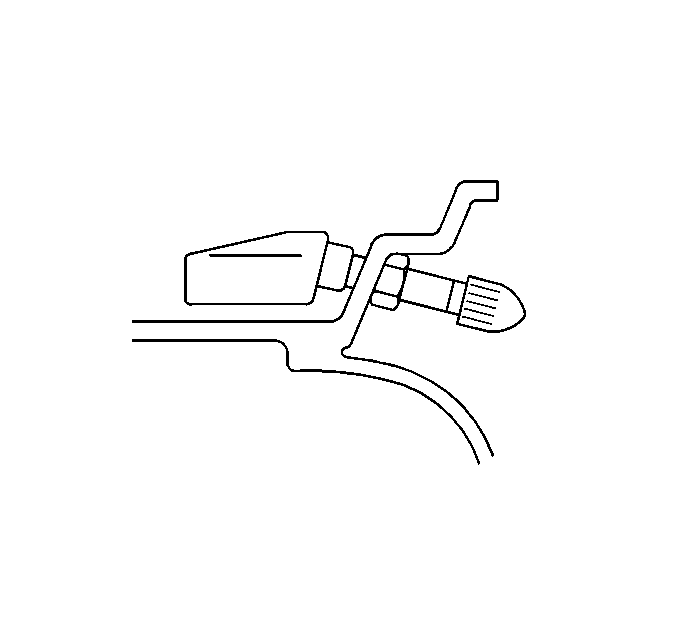
Removal Procedure
- Raise the vehicle on a suitable support. Refer to Lifting and Jacking the Vehicle .
- Remove the tire/wheel assembly from the vehicle. Refer to Tire and Wheel Removal and Installation .
- Remove the tire from the wheel. Refer to Tire Dismounting and Mounting .
- Remove the tire pressure sensor nut.
- Remove the tire pressure sensor.
Note: Before the tire is removed from the wheel, note the following items to avoid tire pressure sensor damage upon tire dismounting.
• Place the sensors cap and valve on a dry clean surface after removal. The cap is aluminum and the valve is nickel plated to prevent corrosion and are not to be substituted with a cap or valve made of any other material. • When separating the tire bead from the wheel, position the bead breaking fixture 90 degrees from the valve stem. • Position the mounting/dismounting head so the tire iron, or pry bar, can be inserted slightly clockwise of the sensor body when prying the tire bead up and over the mounting/dismounting head. • Using the tire machine, rotate the tire/wheel assembly clockwise when transferring the tire bead to the outside of the wheel rim. • Repeat items for inner bead.

Note: If any tire sealant is noted upon tire dismounting, remove all residual liquid sealant from the inside of the tire and wheel surfaces.
Installation Procedure
- Clean any dirt or debris from the grommet sealing area.
- Insert the sensor in the wheel hole with the air passage facing away from the wheel.
- Install the sensor nut and position the sensor body parallel to the inside wheel surface while tightening. Tighten the sensor nut to 7 N·m (62 lb in) .
- Install the tire on the wheel. Refer to Tire Dismounting and Mounting .
- Install the tire/wheel assembly on the vehicle. Refer to Tire and Wheel Removal and Installation .
- Lower the vehicle.
- Learn the tire pressure sensors. Refer to Tire Pressure Sensor Learn .

Caution: Refer to Fastener Caution in the Preface section.
Caution: Replacement components must be the correct part number for the application. Components requiring the use of the thread locking compound, lubricants, corrosion inhibitors, or sealants are identified in the service procedure. Some replacement components may come with these coatings already applied. Do not use these coatings on components unless specified. These coatings can affect the final torque, which may affect the operation of the component. Use the correct torque specification when installing components in order to avoid damage.
Note: Before reinstalling the tire on the wheel, note the following items to avoid tire pressure sensor damage upon tire mounting.
• Position the mounting/dismounting head 180 degrees from the valve stem. • Position the bead transition area 45 degrees counterclockwise of the valve stem. • Using the tire machine, rotate the tire/wheel assembly clockwise when transferring the tire bead to the inside of the wheel rim. • Repeat items for the outer bead.
Note: A service replacement tire pressure sensor is shipped in OFF mode. In this mode the sensors unique identification code cannot be learned into the antenna modules memory. The sensor must be taken out of OFF mode by spinning the tire/wheel assembly above 32 km/h (20 mph) in order to close the sensors internal roll switch for at least 10 seconds.
