For 1990-2009 cars only
Removal Procedure
- Remove the heating, ventilation and air conditioning (HVAC) module assembly. Refer to HVAC Module Assembly Replacement .
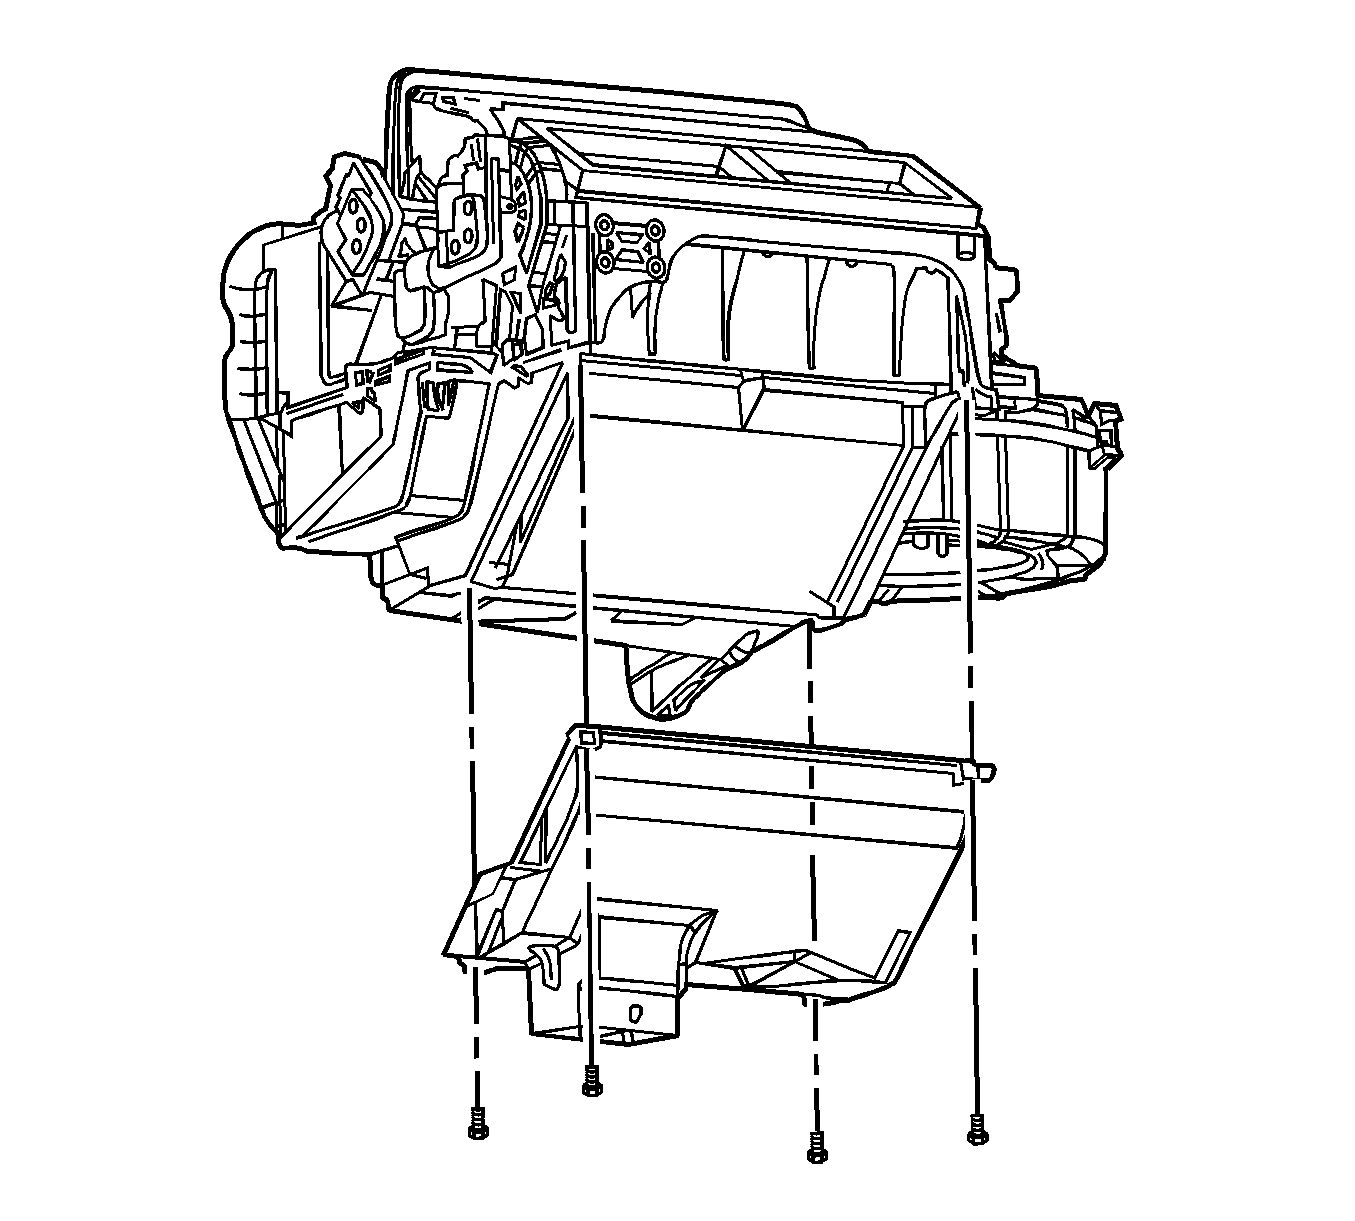
- Remove the heater outlet duct screws.
- Remove the heater outlet duct.
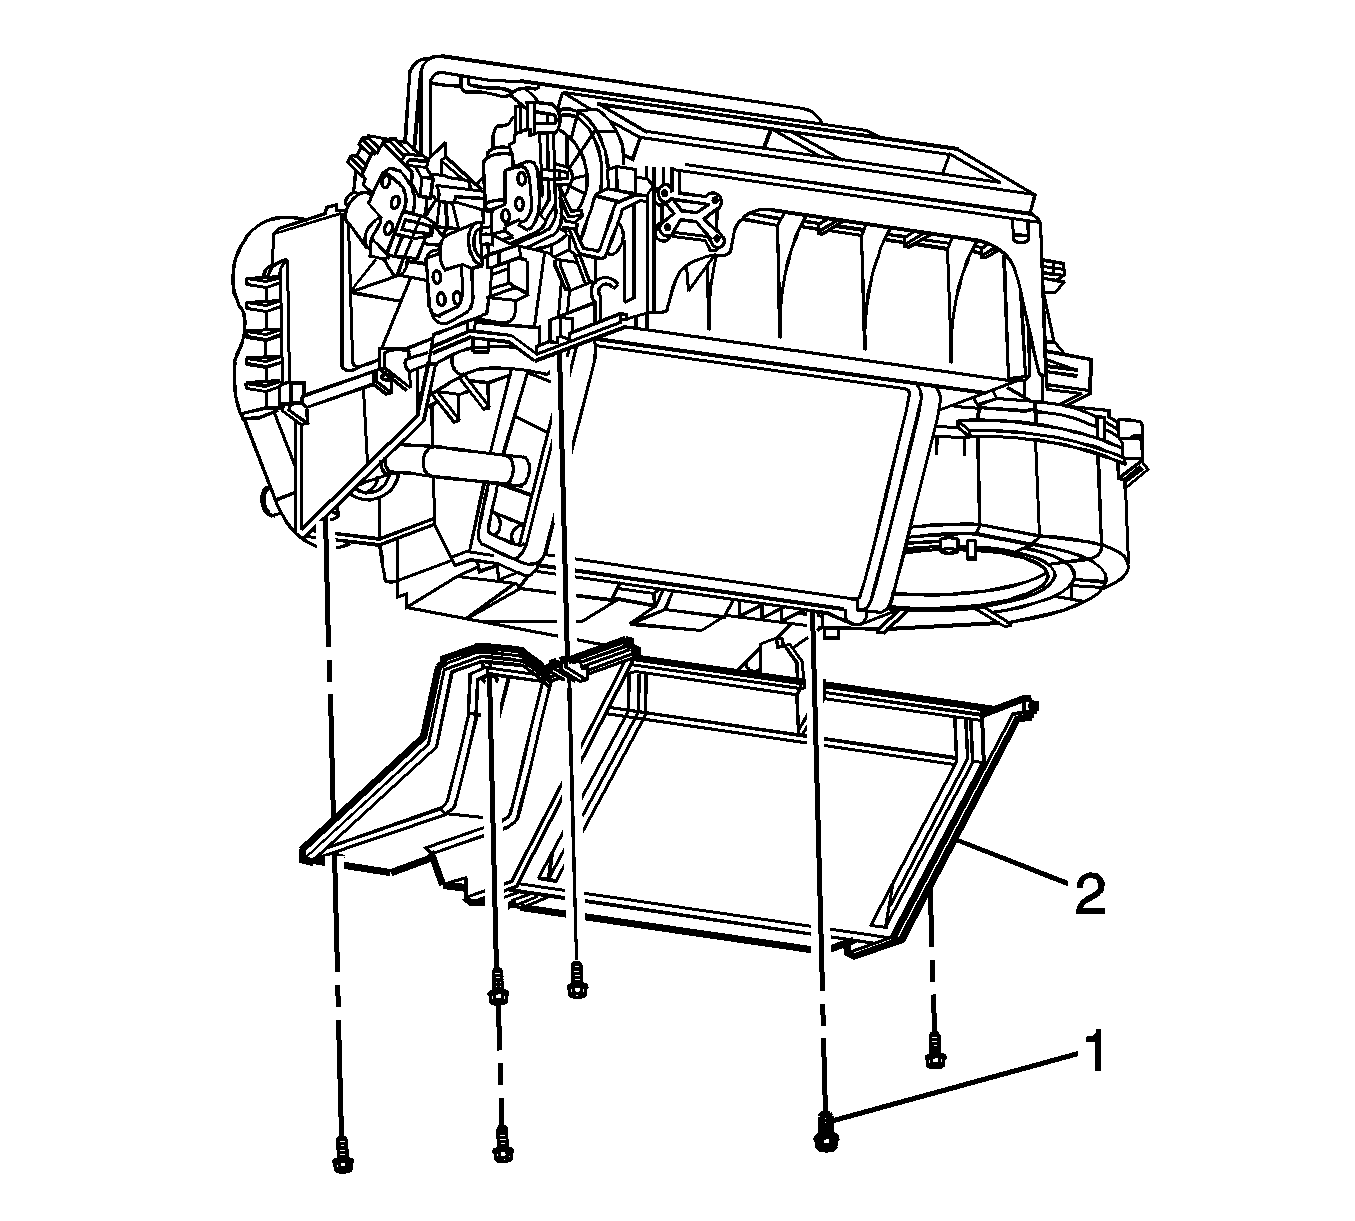
- Remove the heater core cover screws (1).
- Remove heater core cover (2).
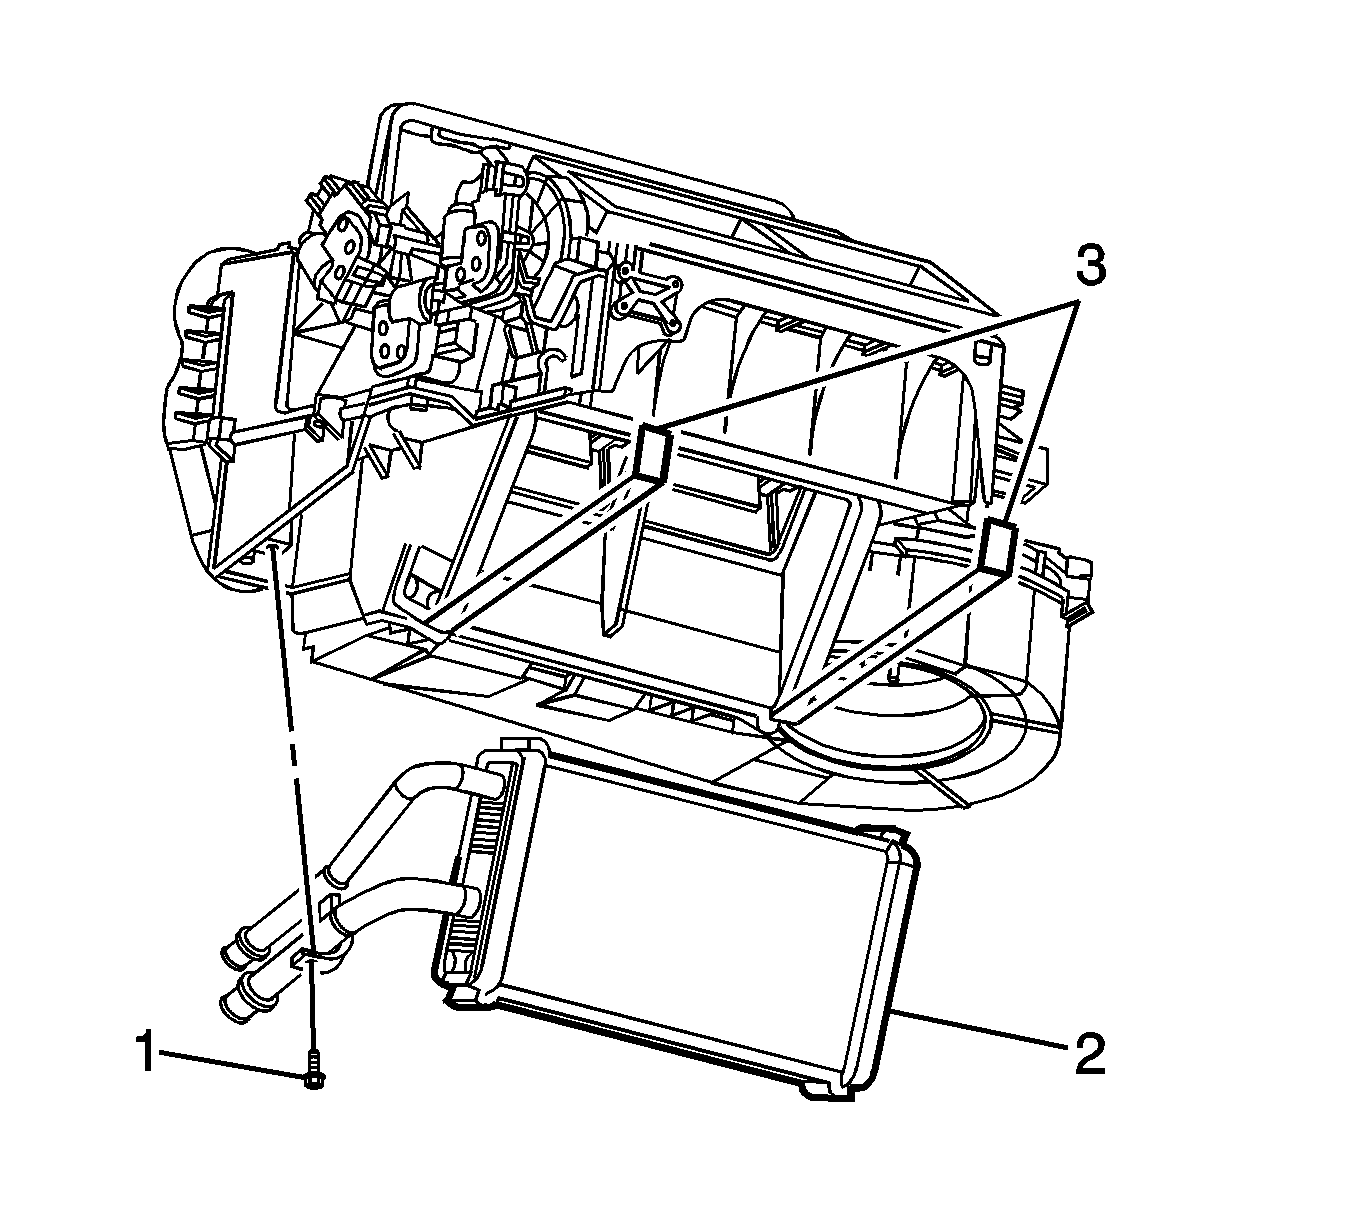
- Remove the heater core pipe screw (1).
- Remove the heater core (2).
- Remove the HVAC module to dash panel sound barrier seal.
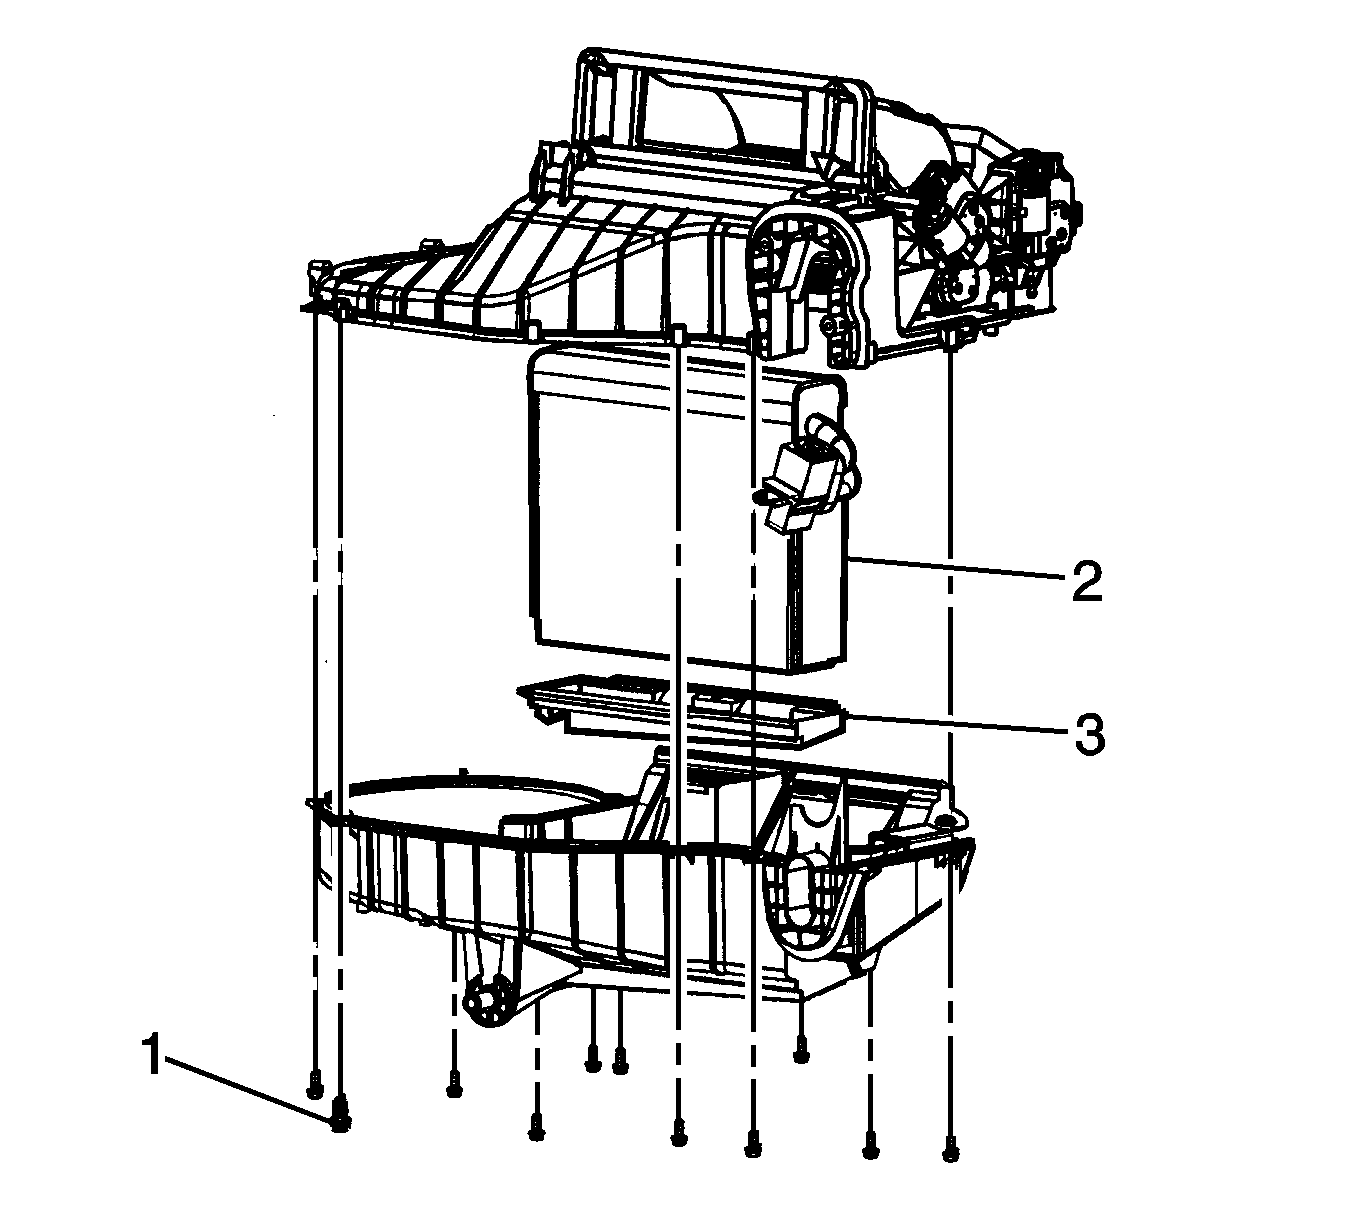
- Remove the lower HVAC module screws (1).
- Separate the upper and lower HVAC module halves.
- Remove the evaporator core.
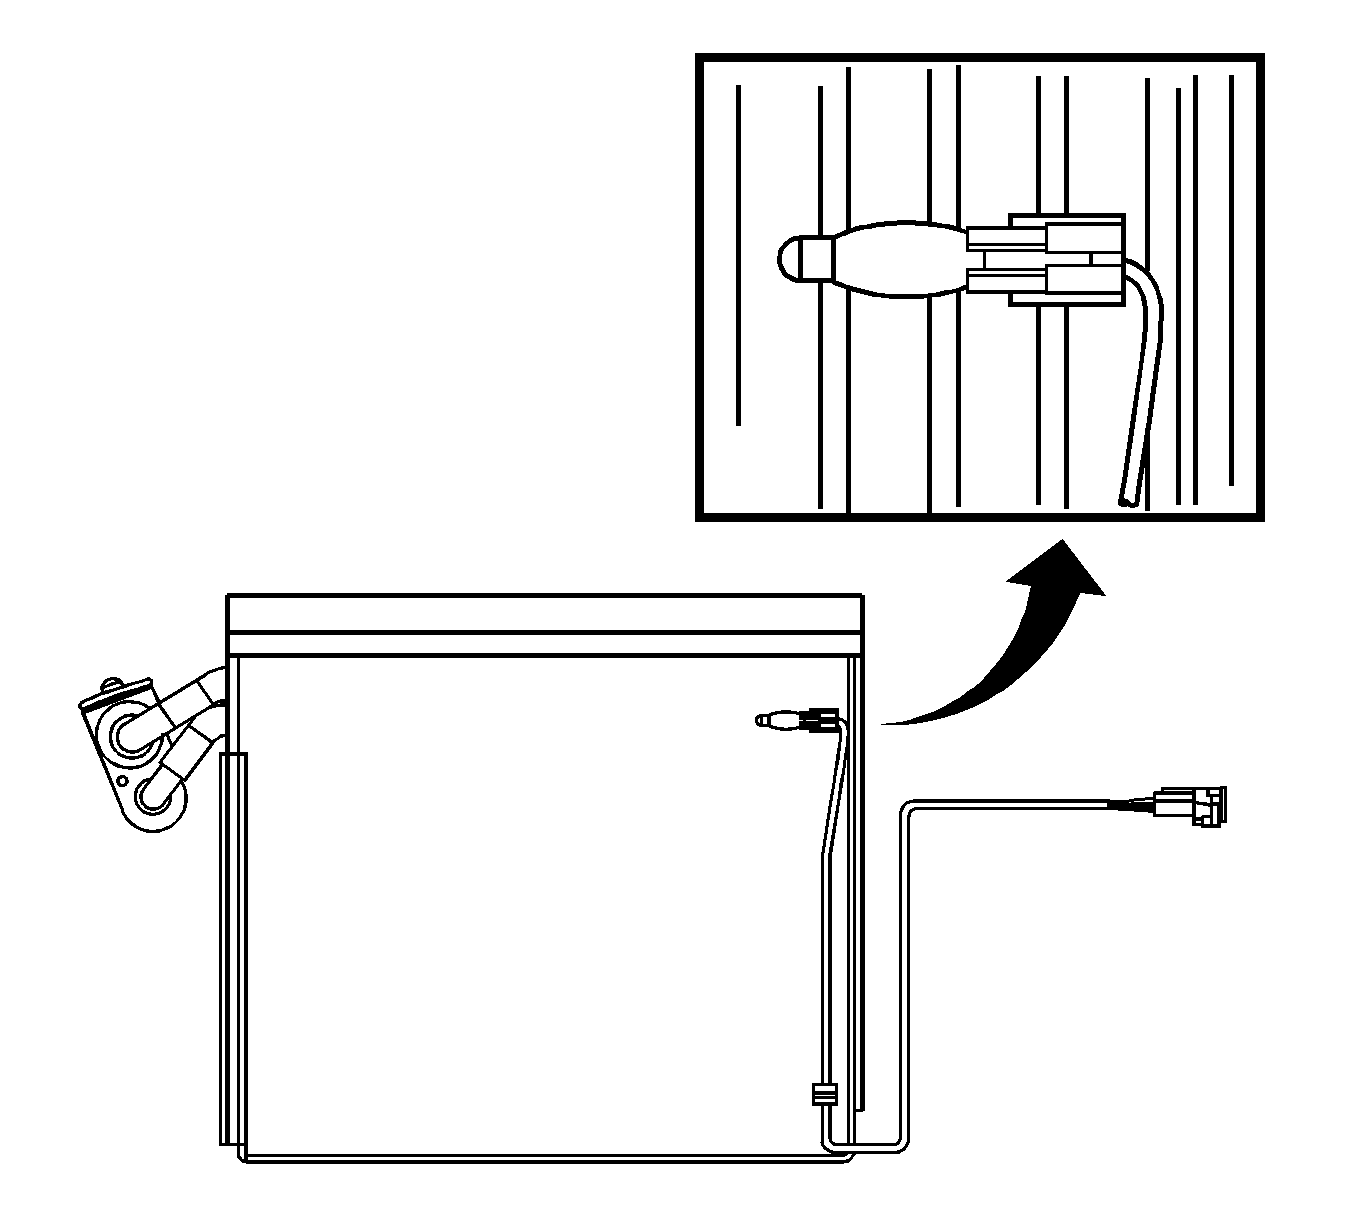
- Remove the evaporator temperature sensor.
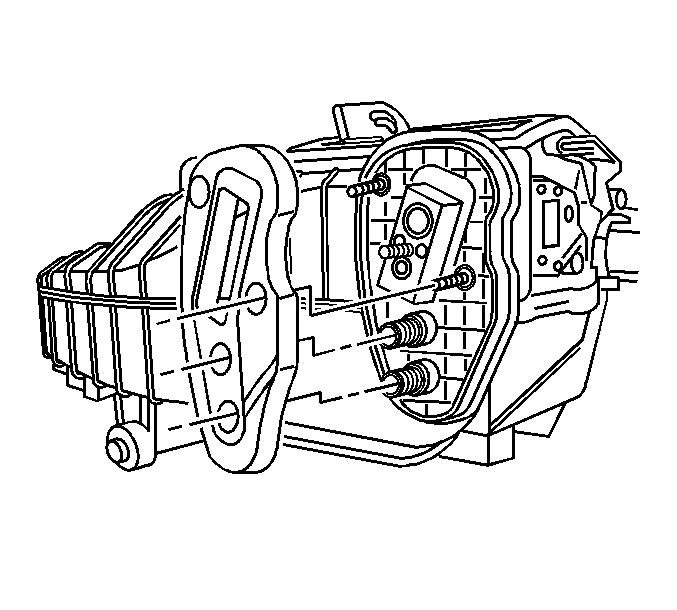
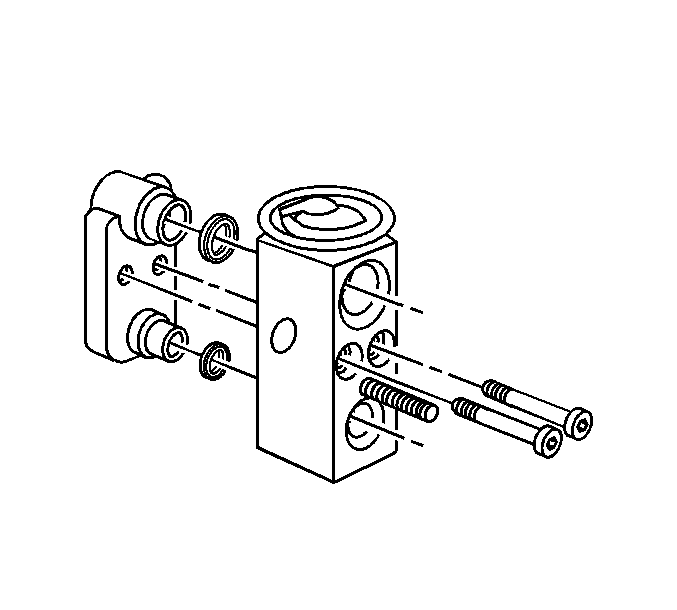
- Remove the thermal expansion valve (TXV) screws.
- Remove the TXV from the evaporator core.
- Remove and discard the sealing washers.
Installation Procedure
- If replacing the evaporator core add the specified amount of polyalkylene glycol (PAG) oil directly to the evaporator core. Refer to Refrigerant System Capacities .
- Install the new sealing washers onto the evaporator line. Refer to Sealing Washer Replacement .
- Install the TXV to the evaporator core.
- Install the TXV mounting screws and tighten to 3.2 N·m (28 lb in) .
- Install the evaporator temperature sensor.
- Install the evaporator core.
- Align and install the upper case to the lower case.
- Install the lower HVAC module screws (1) and tighten to 1.2 N·m (11 lb in) .
- Install the HVAC module to dash panel sound barrier seal.
- Install the heater core (2).
- Install the heater core pipe screw (1) and tighten to 1.2 N·m (11 lb in) .
- Install heater core cover (2).
- Install the heater core cover screws (1) and tighten to 1.2 N·m (11 lb in) .
- Install the heater outlet duct.
- Install the heater outlet duct screws and tighten to 1.2 N·m (11 lb in) .
- Install the HVAC module assembly. Refer to HVAC Module Assembly Replacement .

Caution: Refer to Fastener Caution in the Preface section.


