Your vehicle may have a third row seat. It is a full bench seat and may come with the convenience center. See Convenience Center for more information. The third row seat can be removed and replaced, or with the seatback folded, it will lie flat with the convenience center.
Folding the Seatback(s)
Notice: Folding a rear seat with the safety belts still fastened may cause damage to the seat or the safety belts. Always unbuckle the safety belts and return them to their normal stowed position before folding a rear seat.
To fold down either side of the 50/50 split bench seat, lift the lever located on the back of the seat you want to fold, and push the seatback down.
Returning the Seatback to an Upright Position
Caution: If either seatback is not locked, it could move forward in a sudden stop or crash. That could cause injury to the person sitting there. Always push and pull on the seatbacks to be sure they are locked.
To raise the seatback, do the following:
- Move the second row seat completely forward by using the manual adjustment bar under either the front or rear of the seat cushion.
- Open the liftgate.
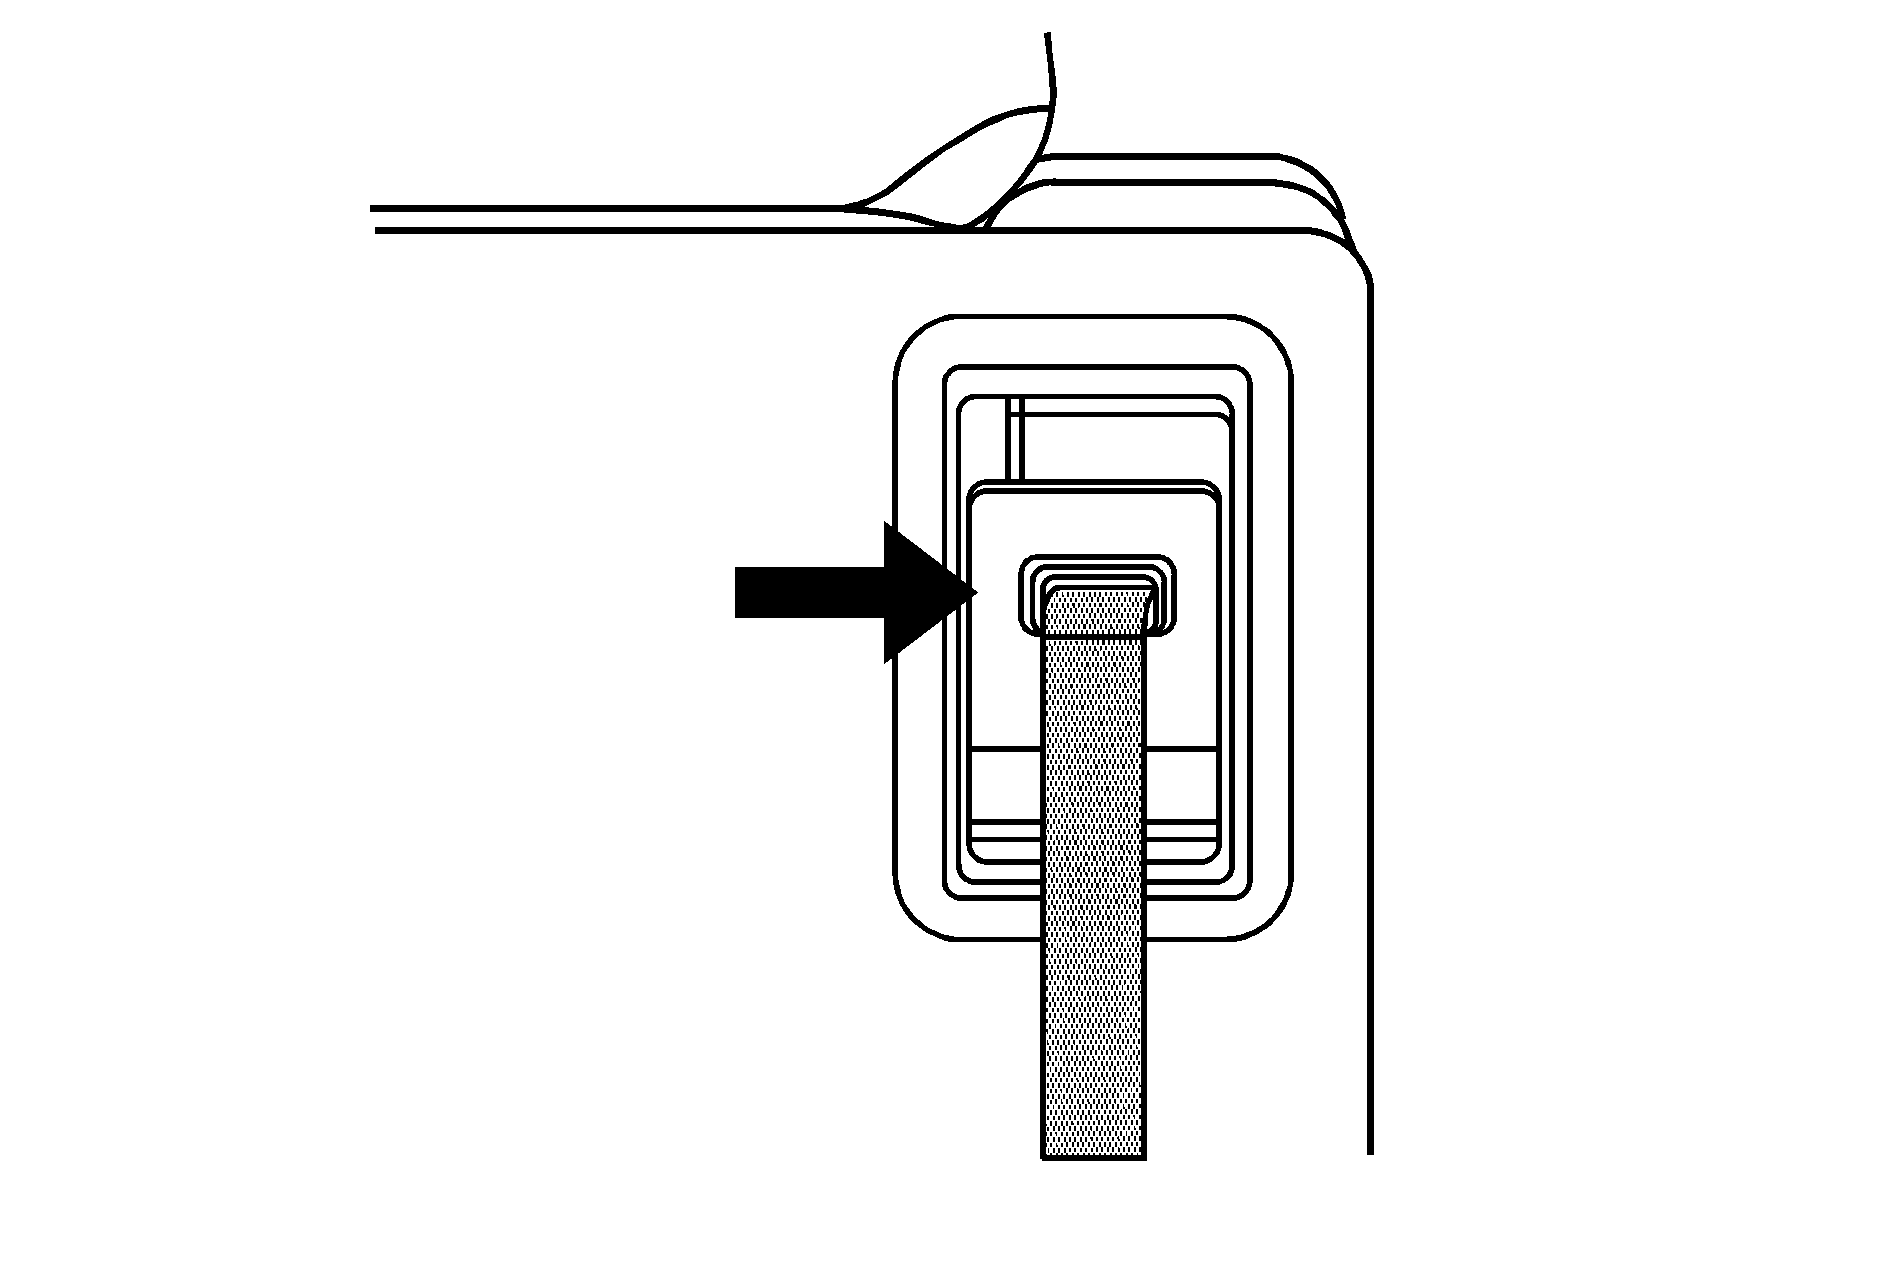
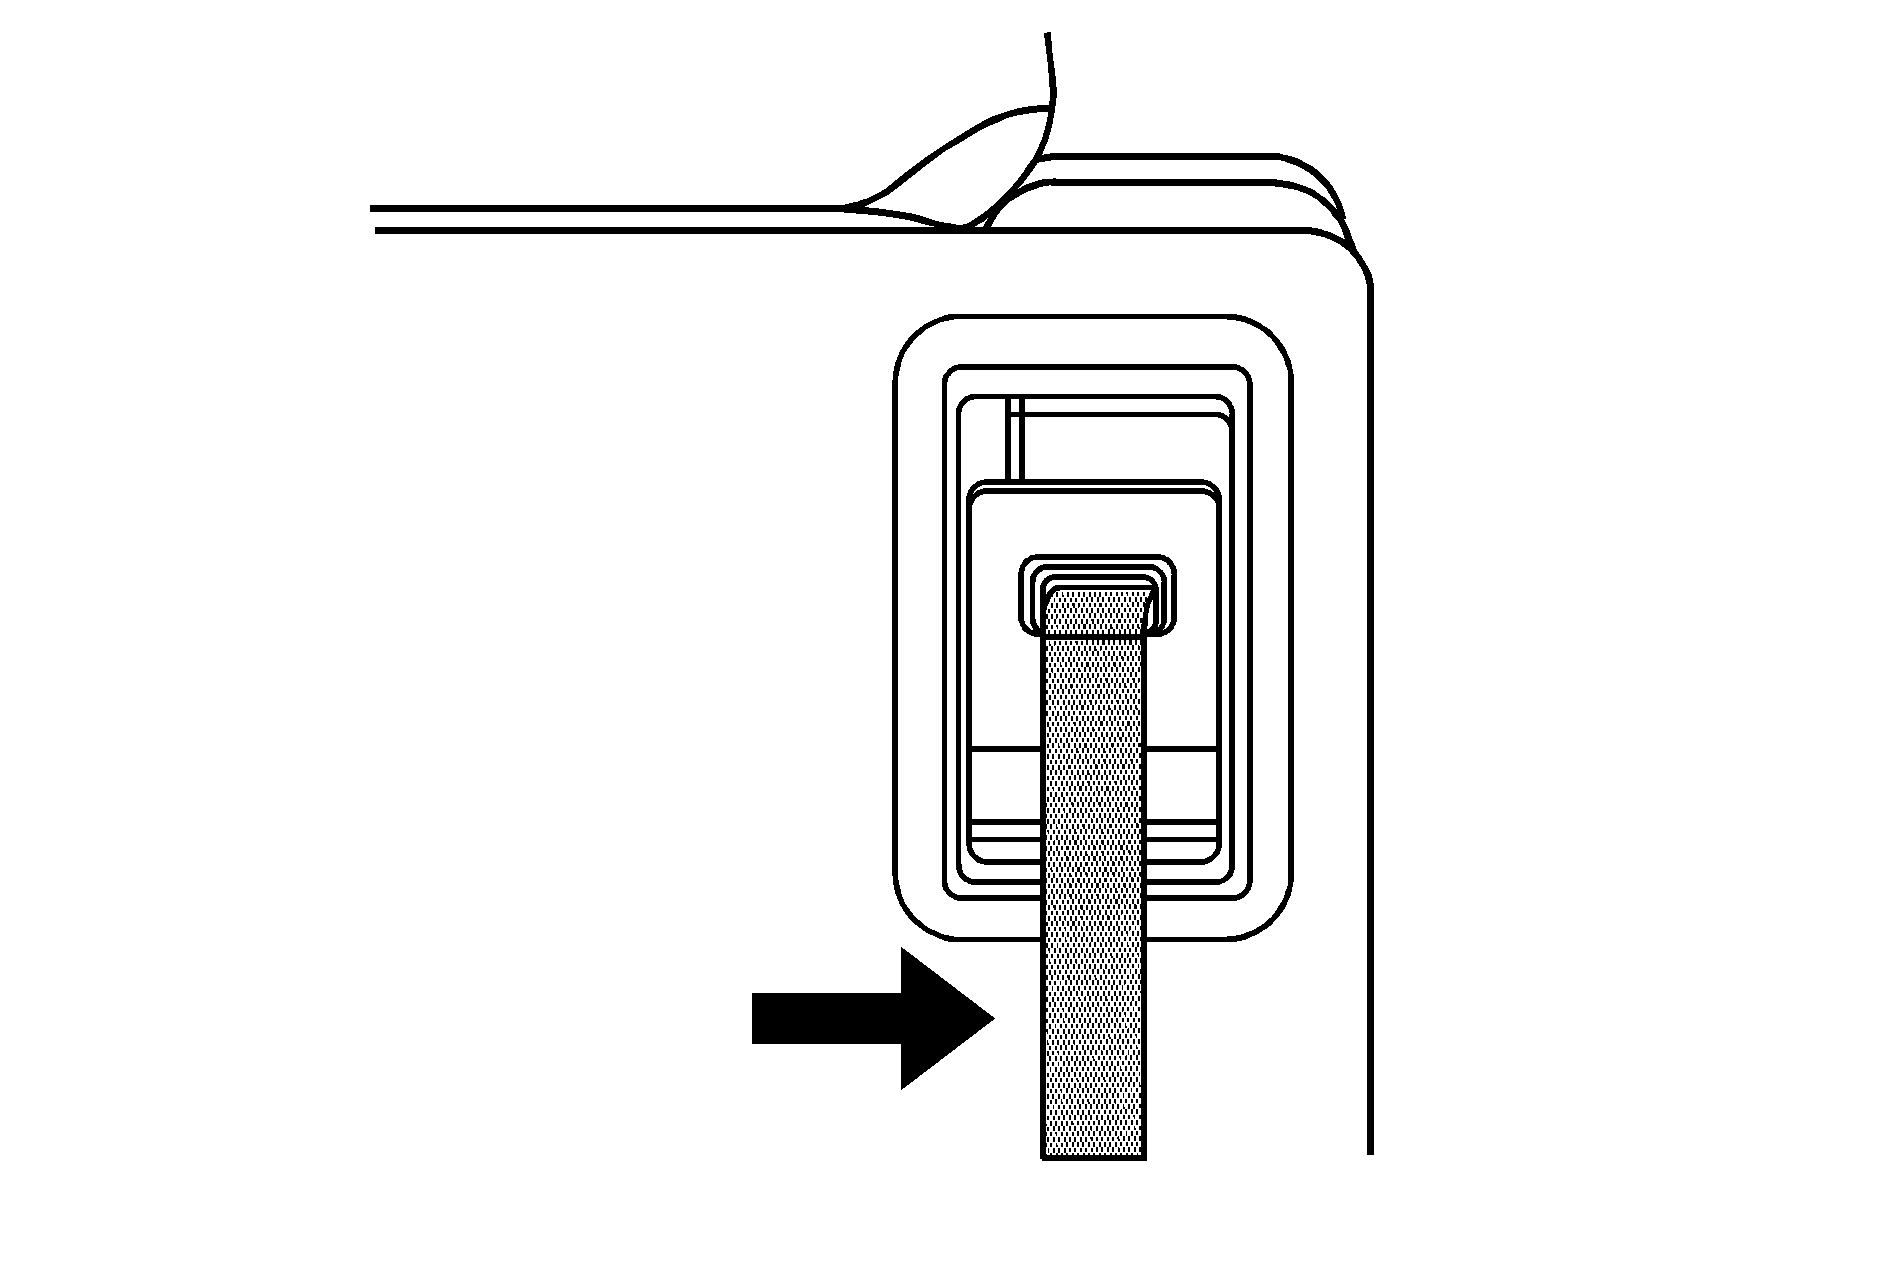
- From the rear of the vehicle, locate the pullstrap attached to the lever on the back of the seat and pull it to raise the seat.
- Push and pull on the seatback to make sure that it is locked into place.
Removing the Third Row Seat
- Remove the convenience center, if equipped. See Convenience Center for more information.
- Make sure all items are off the seat.
- Put the seatback in its folded position before removing the seat. See "Folding the Seatback(s)" earlier in this section.
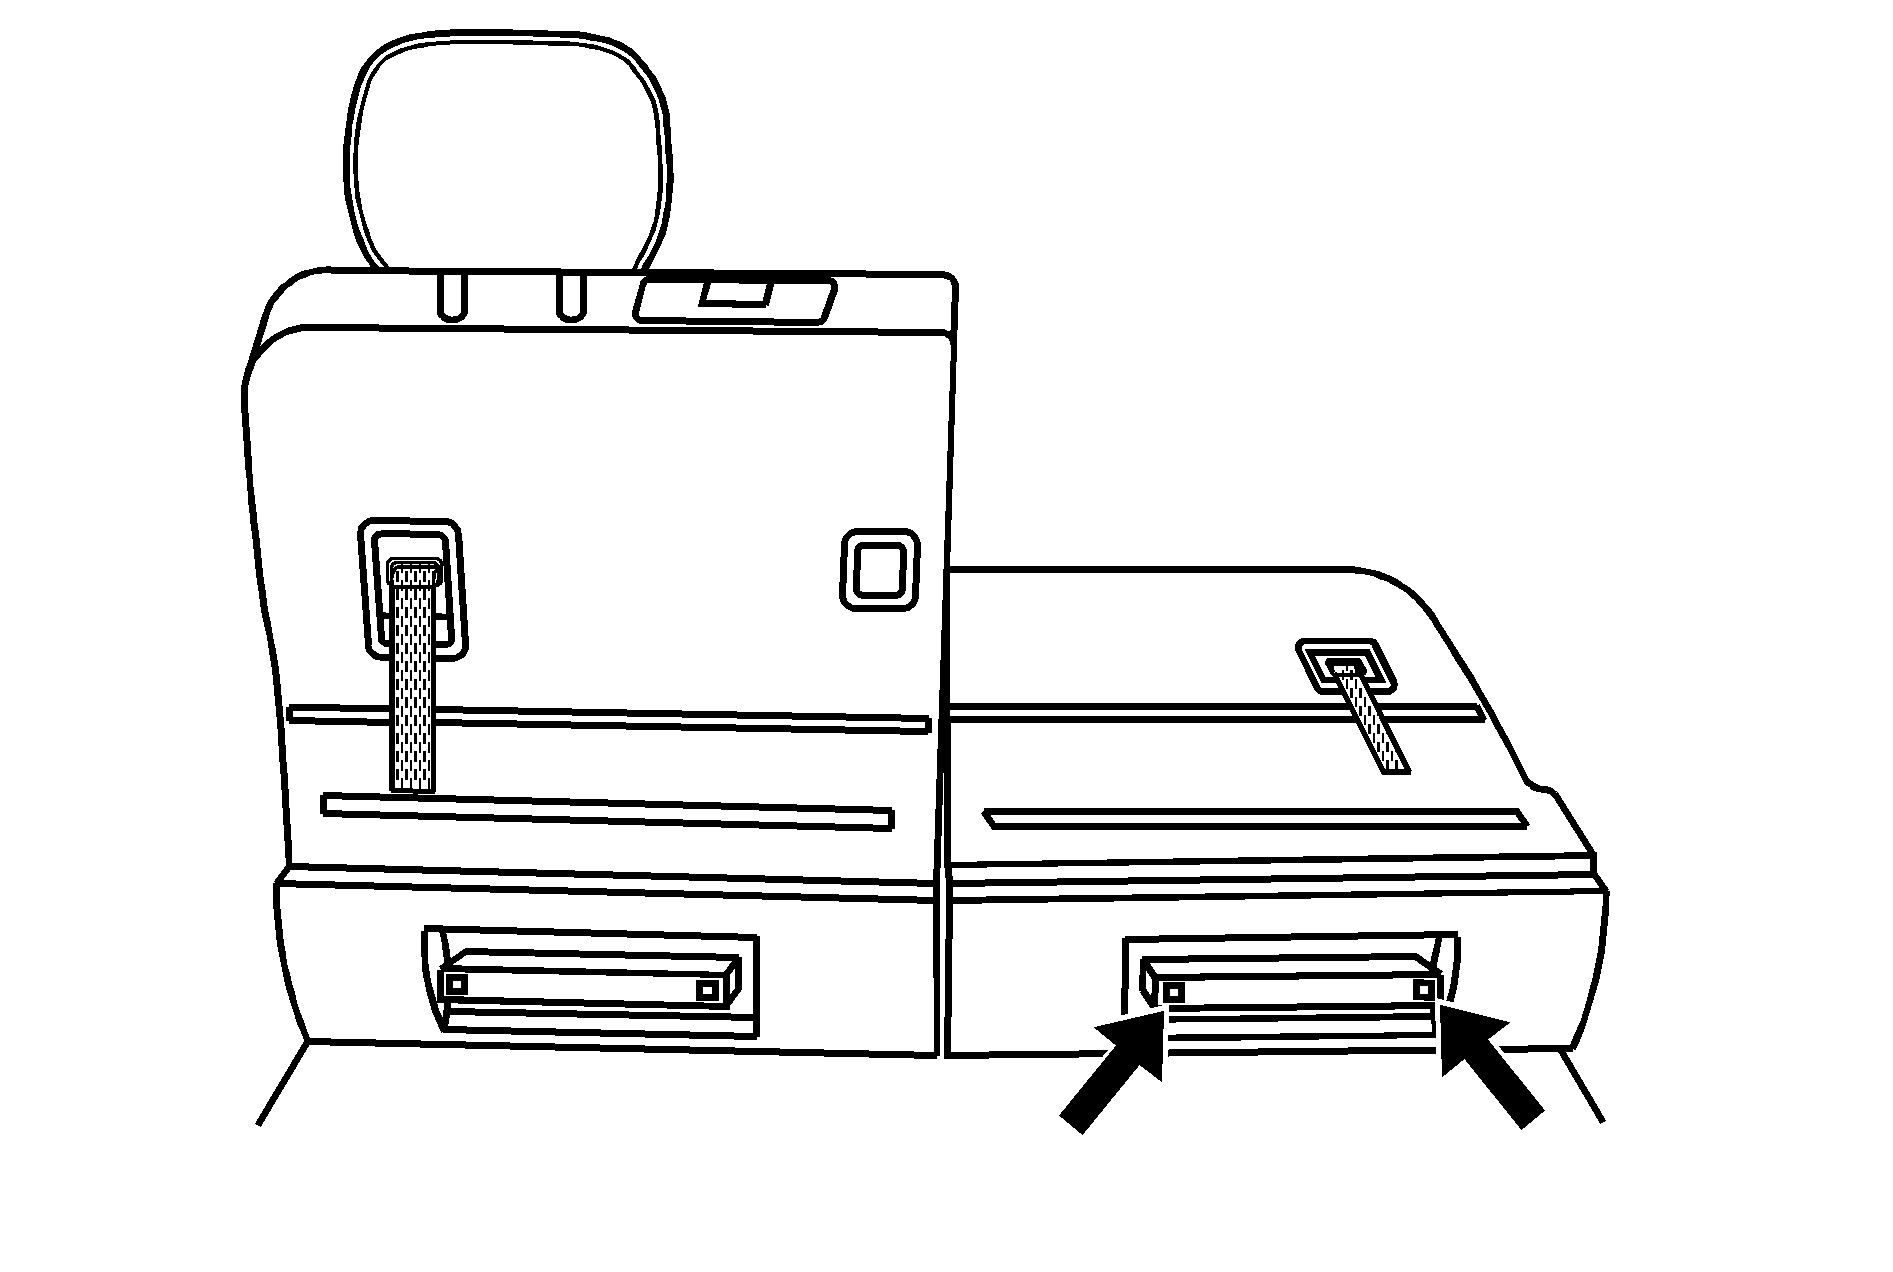
- From behind the seat, squeeze the release handle until the pin indicators are fully out. This indicates that the rear latches are released from the floor. For ease of removing the seat, squeeze the handle with the palm of your hand up.
- Lift the seat slightly from the floor to ensure the latches are clear of the floor pins.
- Pull the seat rearward and out of the vehicle. The release handle can be used to carry the seat.
Notice: Folding a rear seat with the safety belts still fastened may cause damage to the seat or the safety belts. Always unbuckle the safety belts and return them to their normal stowed position before folding a rear seat.
Installing the Third Row Seat
Caution: A safety belt that is improperly routed, not properly attached, or twisted will not provide the protection needed in a crash. The person wearing the belt could be seriously injured. After installing the seat, always check to be sure that the safety belts are properly routed and attached, and are not twisted.
Do not put the third row seat in so it faces rearward because it will not latch that way. The seat needs to be installed before the convenience center. See Convenience Center for more information.
Notice: Folding a rear seat with the safety belts still fastened may cause damage to the seat or the safety belts. Always unbuckle the safety belts and return them to their normal stowed position before folding a rear seat.
For ease of installing the seat, put the seat in the folded position before beginning this procedure.
- From the rear of the vehicle, place the front hooks of the seat onto the front floor pins in the third row. To do this, the seat will need to be angled approximately 8-10 inches (20-25 cm) from the floor so the front hooks clear the rear floor pins and rear floor cups. Use the release handle to guide the seat into place.
- Firmly push the rear latches into the rear floor pins by pushing down on the rear of the seat.
- Try to raise the seat to make sure that it is locked down. The indicator pins will no longer stick out when the seat is properly latched into place.
- Return the seatback to its upright position. See "Returning the Seatback to an Upright Position" earlier in this section.
If the front hooks are not attached correctly, the rear latches will not attach to the rear set of floor pins.
Caution: A seat that is not locked into place properly can move around in a collision or sudden stop. People in the vehicle could be injured. Be sure to lock the seat into place properly when installing it.
Caution: If either seatback is not locked, it could move forward in a sudden stop or crash. That could cause injury to the person sitting there. Always push and pull on the seatbacks to be sure they are locked.
