Special Tools
| • | J 8059 Snap Ring Pliers |
| • | J 23327 Clutch Spring Compressor |
| • | J 25018-A Clutch Spring Compressor Adapter |
| • | J 37361 Input Clutch Inner Piston Seal Protector |
| • | J 37362 Third Clutch Inner Piston Seal Protector |
For equivalent regional tools, refer to
Special Tools.
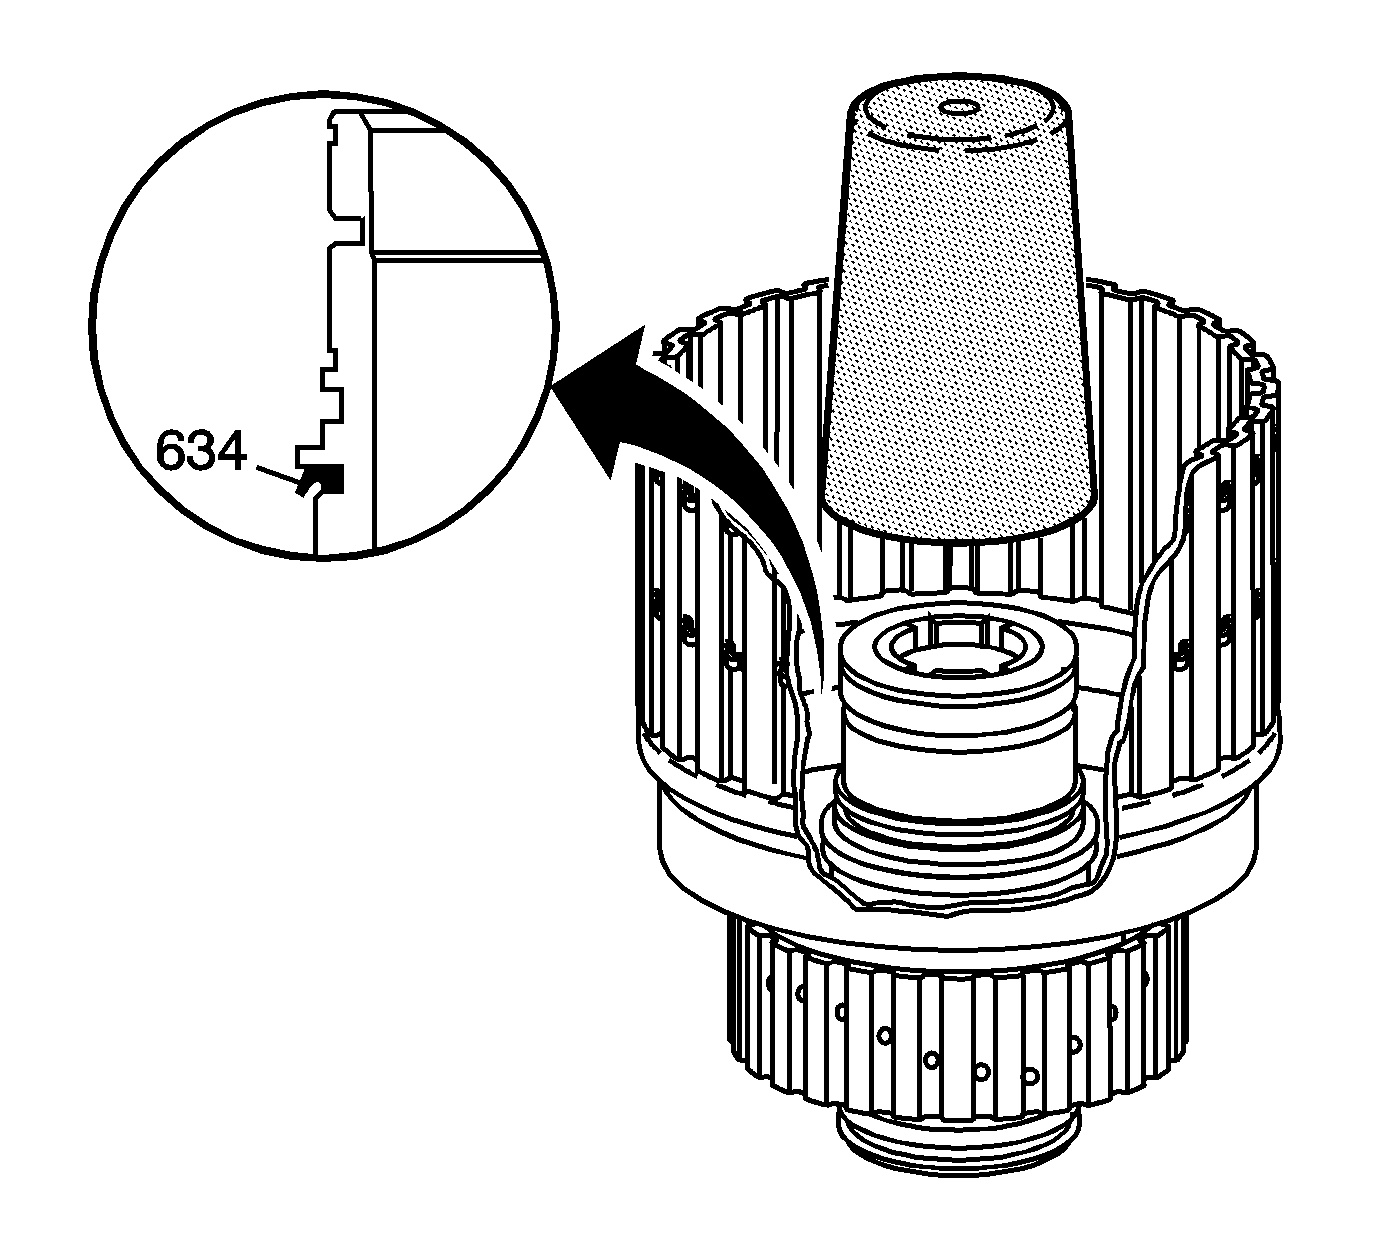
- Use transmission fluid in order to lubricate the new input clutch piston inner seal (634).
- Use
J 37361 seal protector
in order to install the new seal.
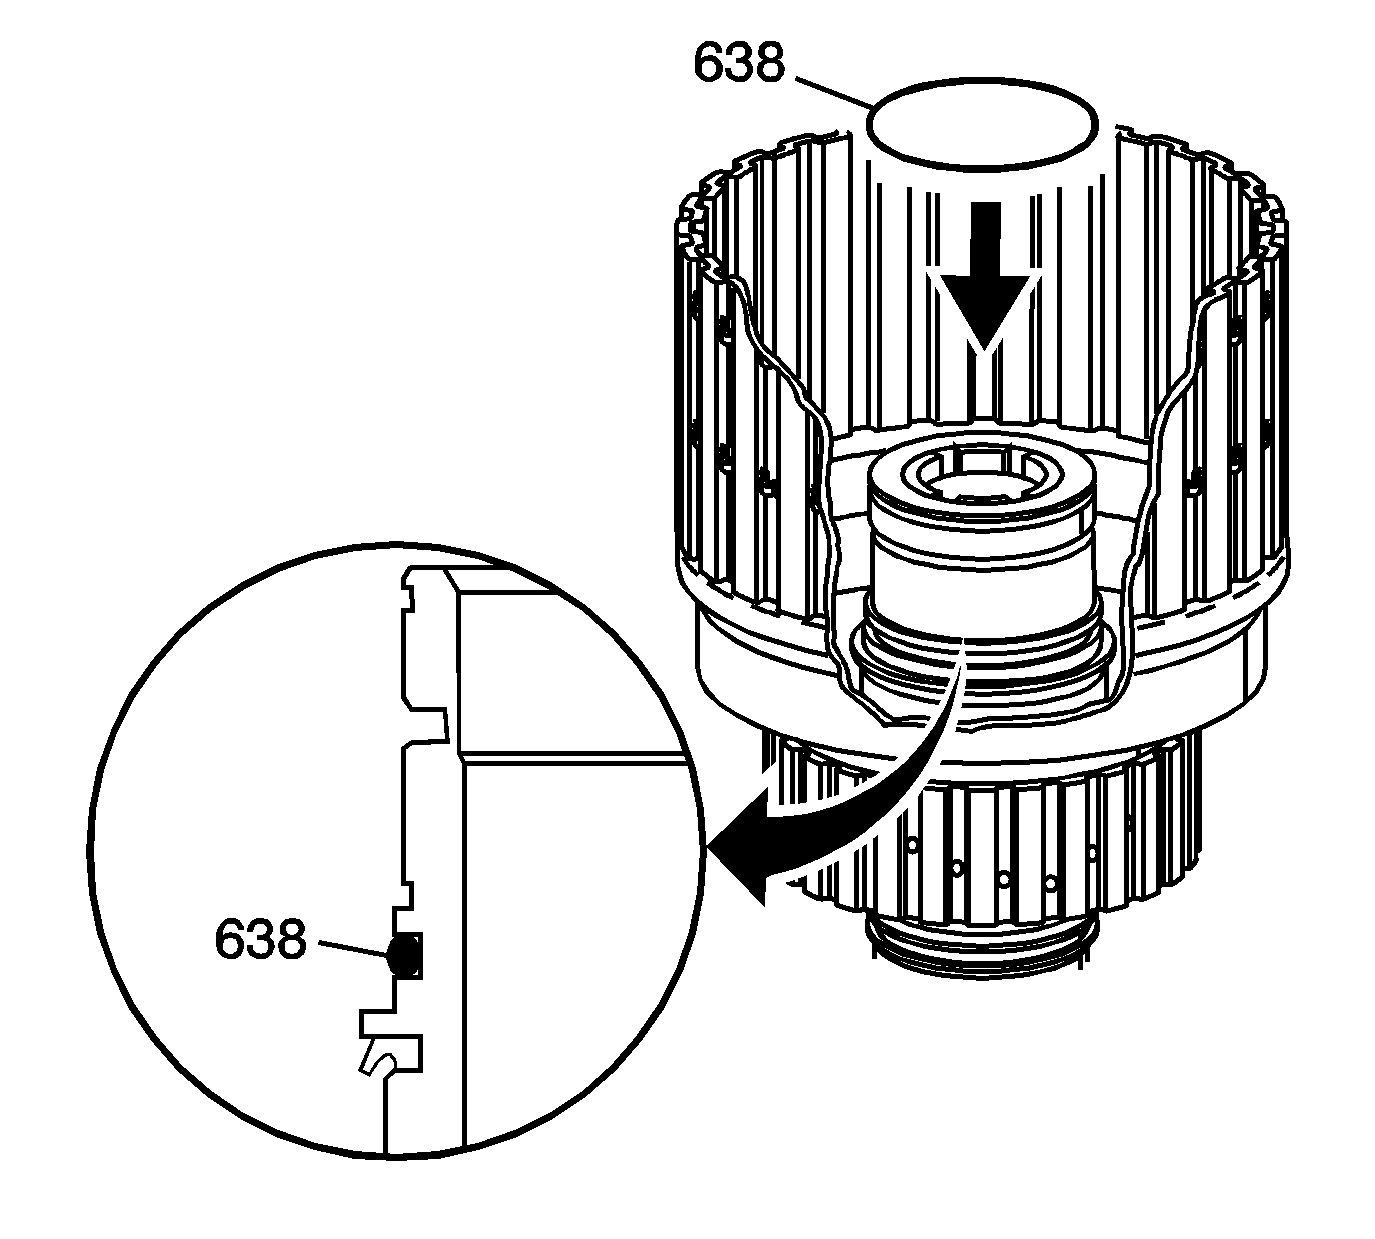
- Insert a new third clutch housing O-ring seal (638) in the input shaft and housing assembly.
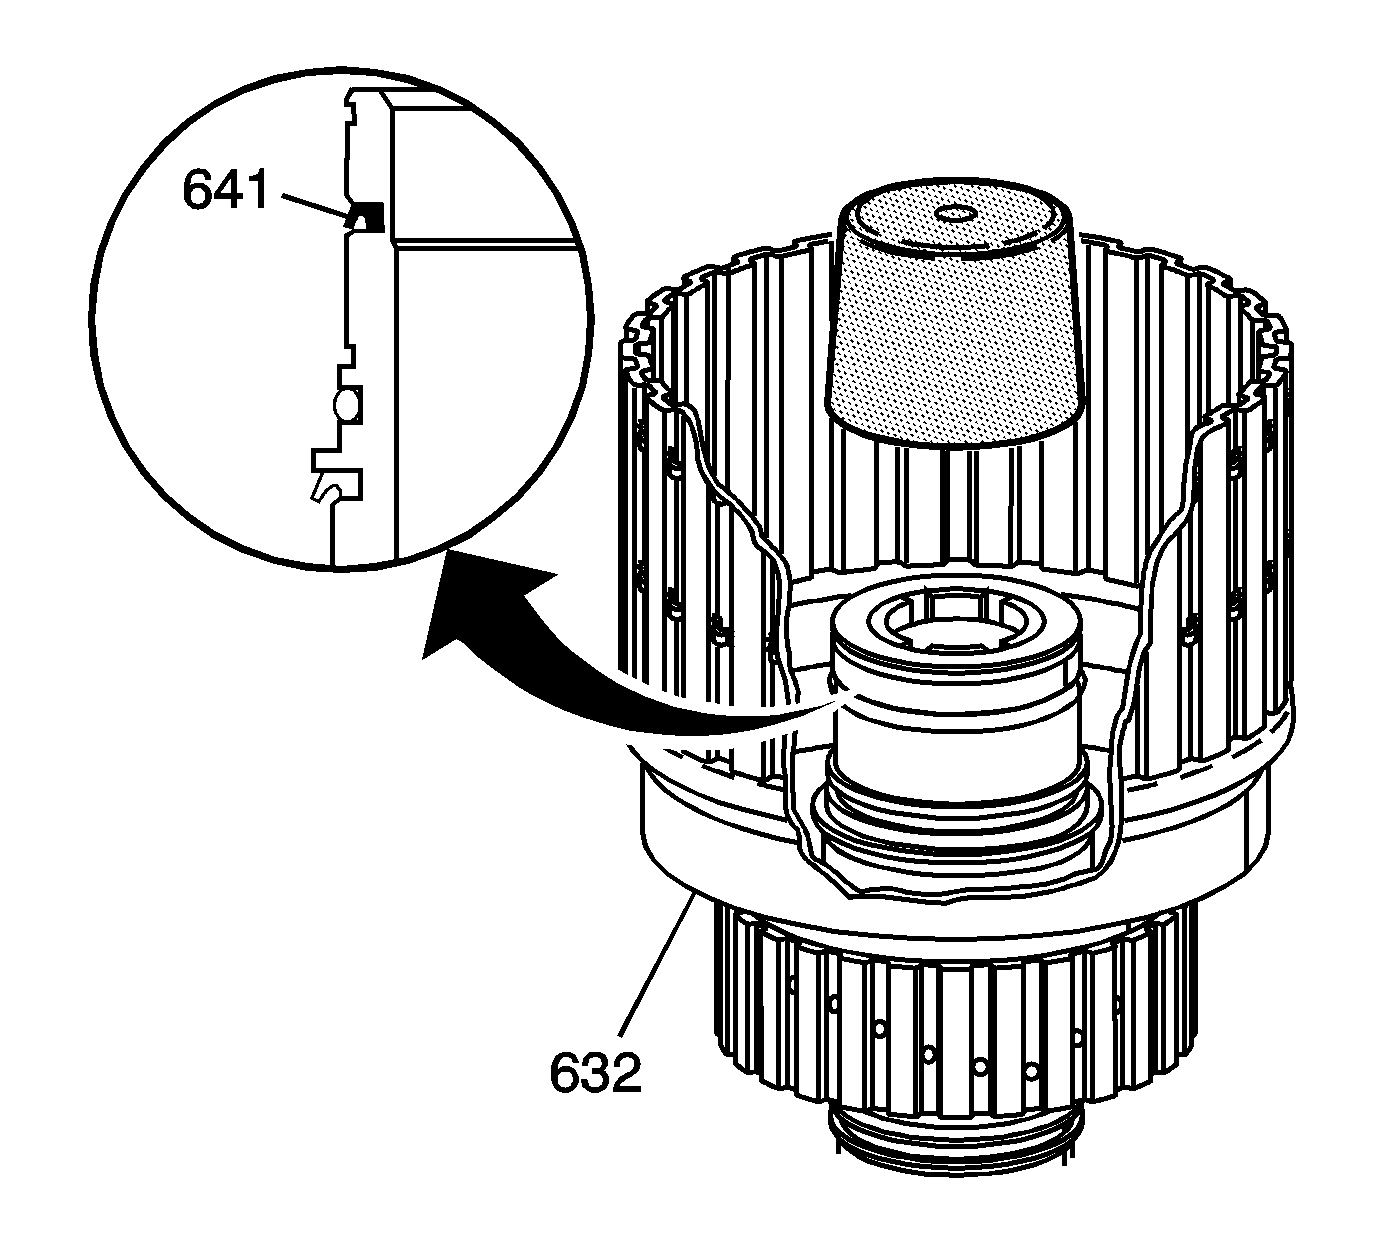
- Use transmission fluid in order to lubricate the new third clutch piston inner seal (641).
- Use
J 37362 seal protector
in order to install the seal in the input shaft and housing assembly (632).
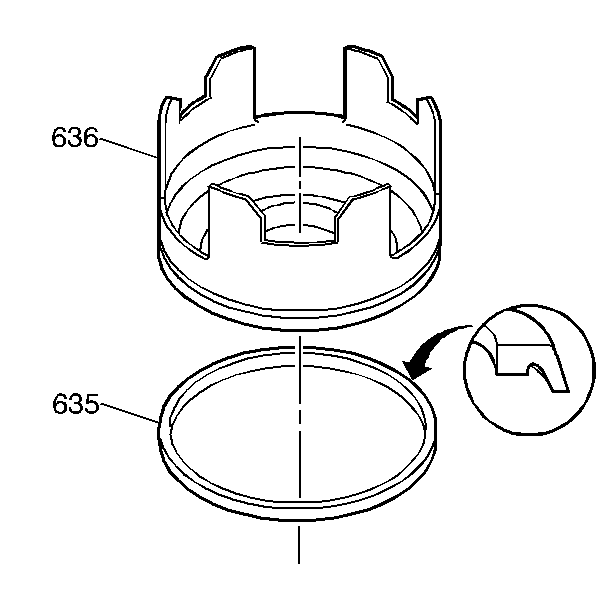
- Use transmission fluid in order to lubricate the new input clutch piston outer seal (635).
- Insert the new seal onto the input clutch piston assembly (636).
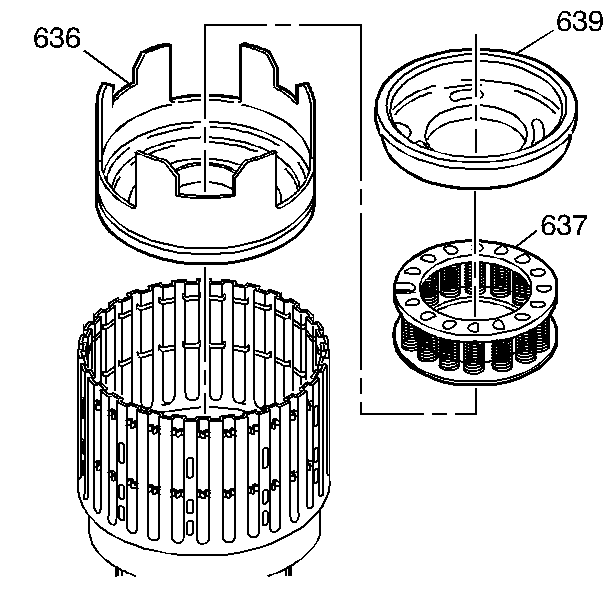
- Install the input clutch piston assembly (636) into the input shaft and housing assembly.
- Install the input clutch spring and retainer assembly (637) into the input shaft and housing assembly.
- Install the third clutch piston housing (639) into the input shaft and housing assembly.
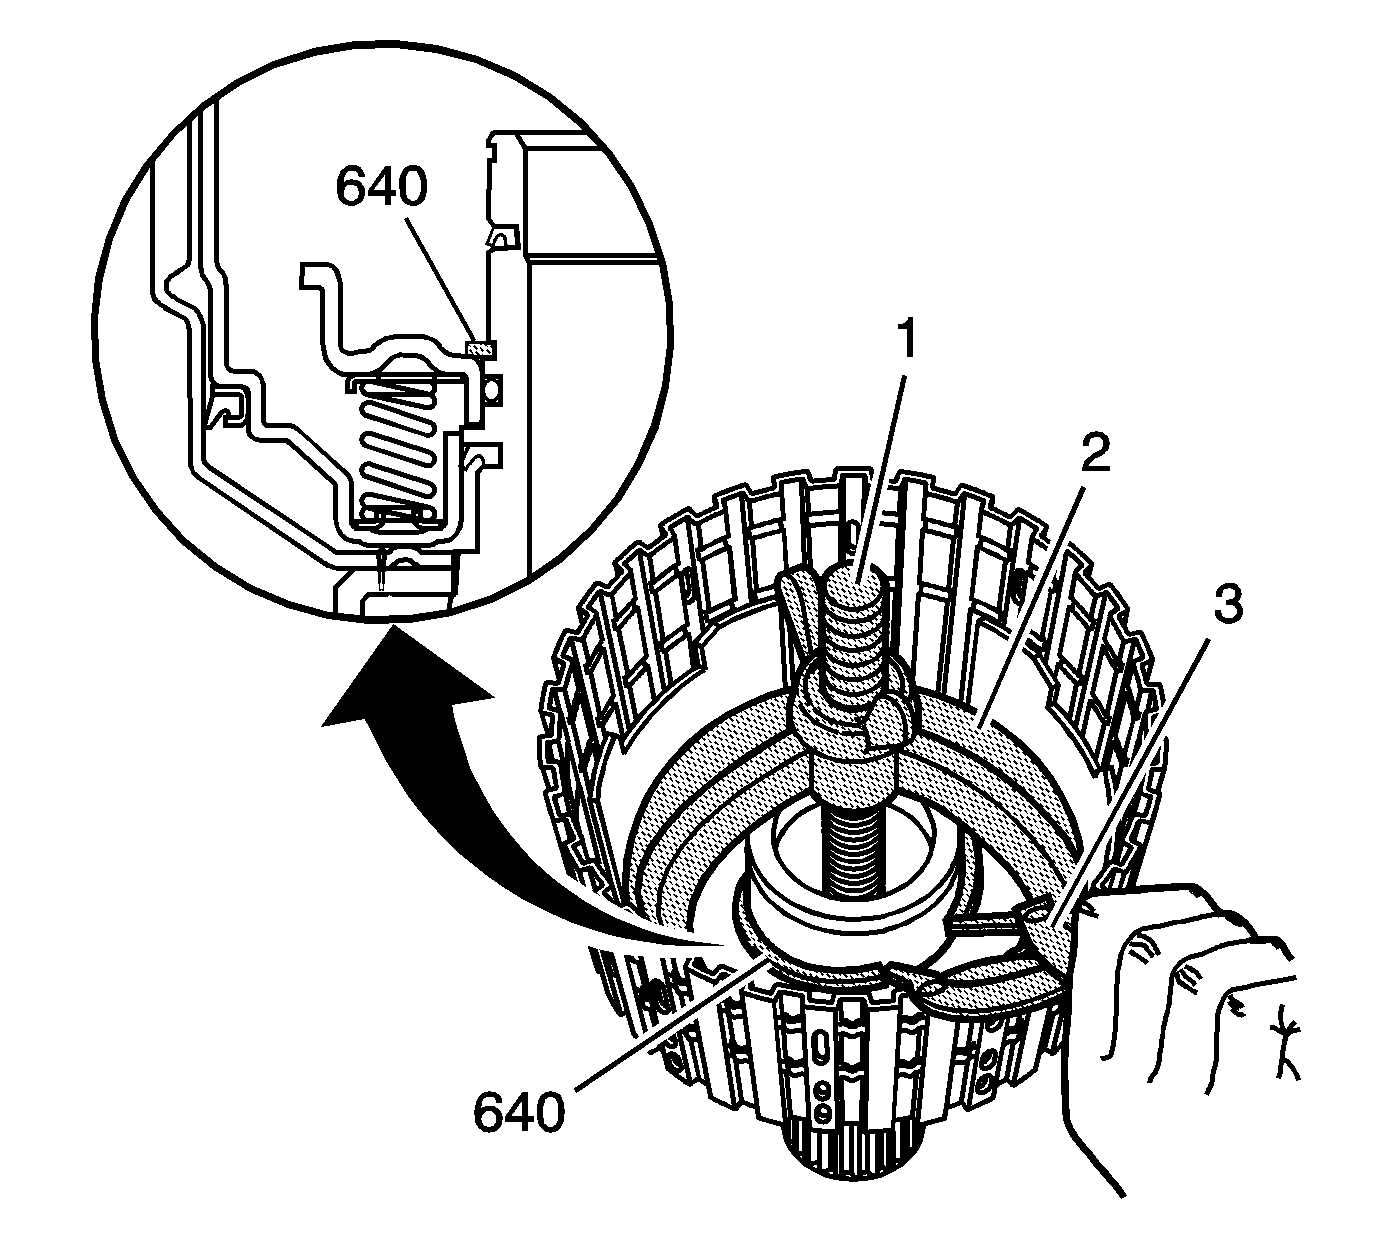
- Use
J 23327 spring compressor
(1,2) and
J 8059 snap ring pliers
(3)
in order to install the third clutch piston housing retaining ring (640) in the input shaft and housing assembly.
- Remove the
J 23327 spring compressor
(1,2).
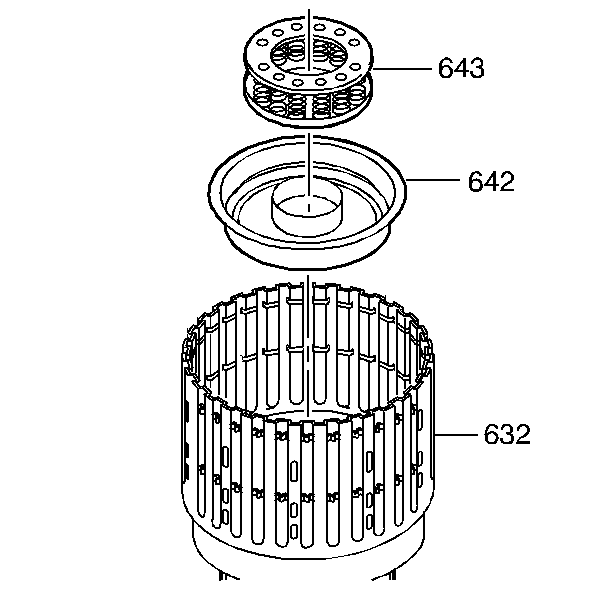
- Use transmission fluid in order to lubricate the new third clutch piston and seal assembly (642). Install the third clutch piston and seal assembly (642) into the input shaft and housing assembly (632).
- Install the third clutch spring retainer and guide assembly (643) into the input shaft and housing assembly (632).
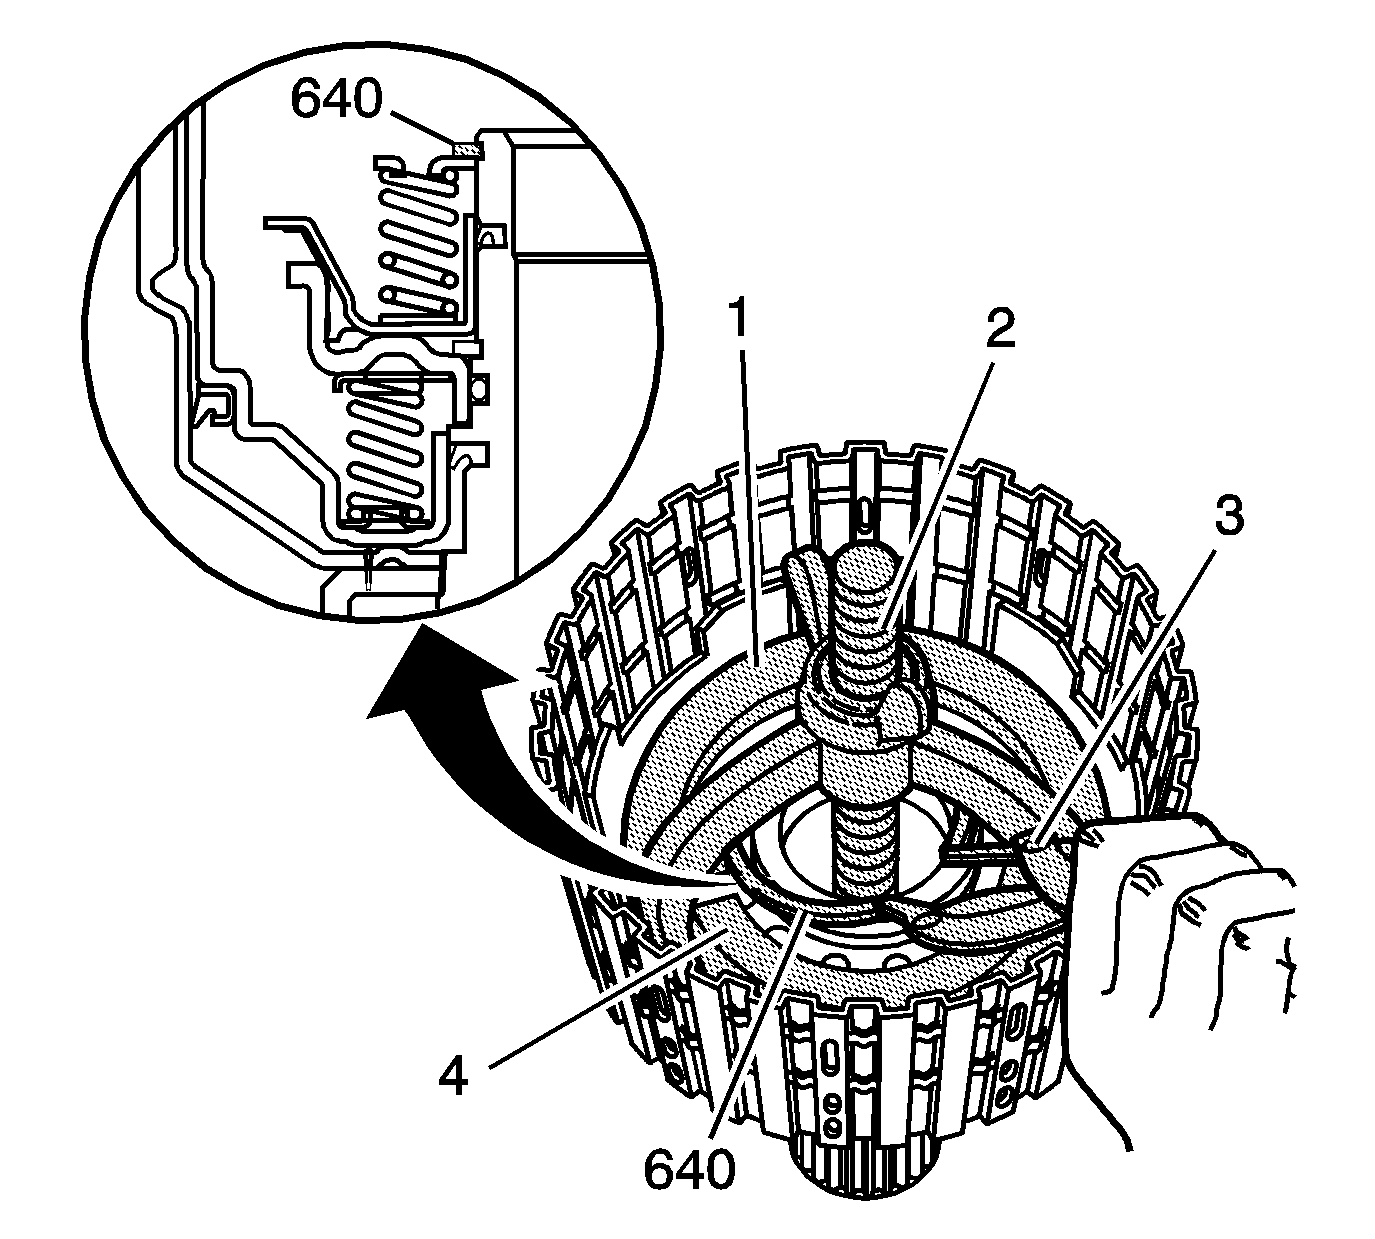
- Use
J 23327 spring compressor
(1,2),
J 25018-A compressor adapter
(4),
and
J 8059 snap ring pliers
(3) in order to install the third clutch spring retainer and guide assembly retaining ring (640).
- Remove the
J 23327 spring compressor
(1,2).
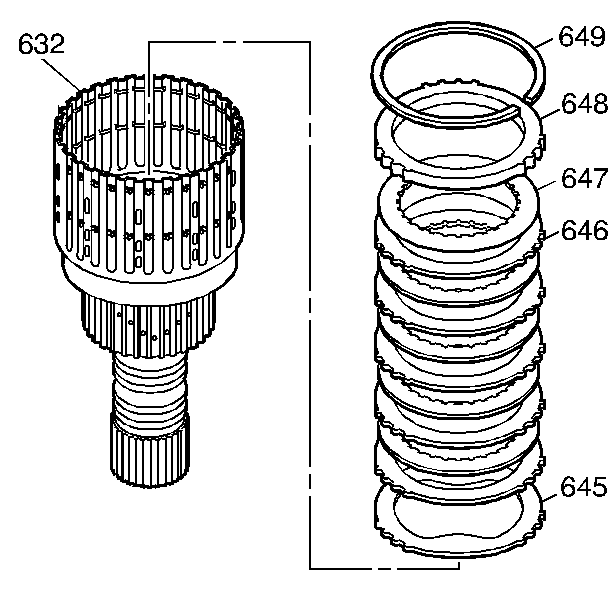
- Insert the third clutch waved plate (645) into the input shaft and housing assembly (632).
Note: Place the first externally splined plate with its steel side against the waved plate. Place the fiber side of all plates face upward.
- Insert the third clutch plates assemblies into the input housing. Start by inserting a third clutch plate (646) with external splines. Alternate with the internally splined clutch plates (647).
- Insert the third clutch backing plate (648) with the word UP facing upward.
- Insert the retaining ring (649) into the input shaft and housing assembly (632).
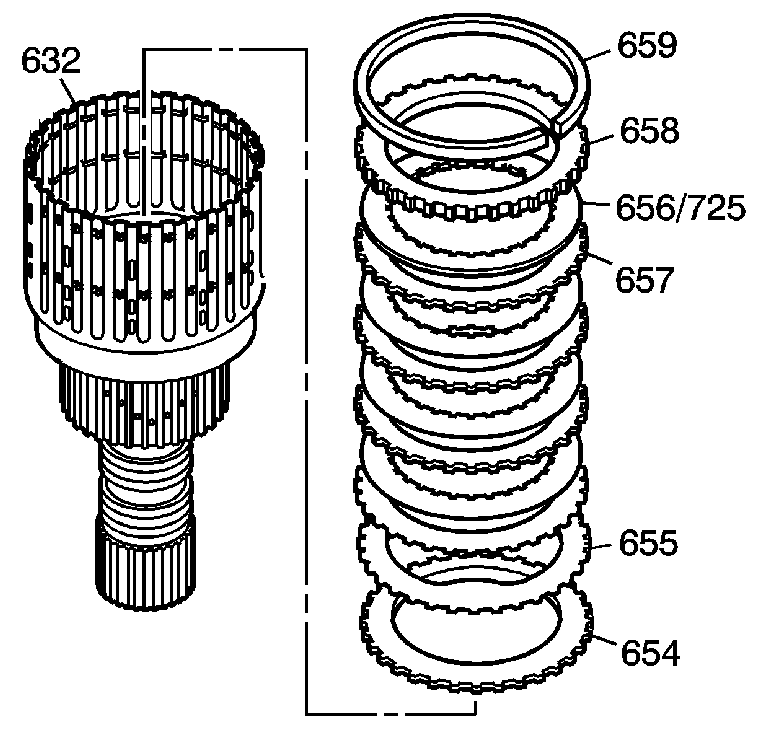
Note: Models using the input clutch pawl assembly requires specific clutch plates (725), with 30 teeth. The sprag clutch assembly plates (656) have 32 teeth.
- Insert the input clutch apply plate (654) into the input shaft and housing assembly (632), so that the notched side of the teeth are facing downward against the retaining ring on the third clutch backing plate.
- Install the input clutch waved plate (655).
- Install the input clutch plates (656/725, 657) starting with an input clutch steel plate (657) and alternating with input clutch fiber plate assemblies (656).
- Insert the input clutch backing plate (658) with the tapered side of the teeth facing downward.
- Insert the retaining ring (659) in the input shaft and housing assembly (632).
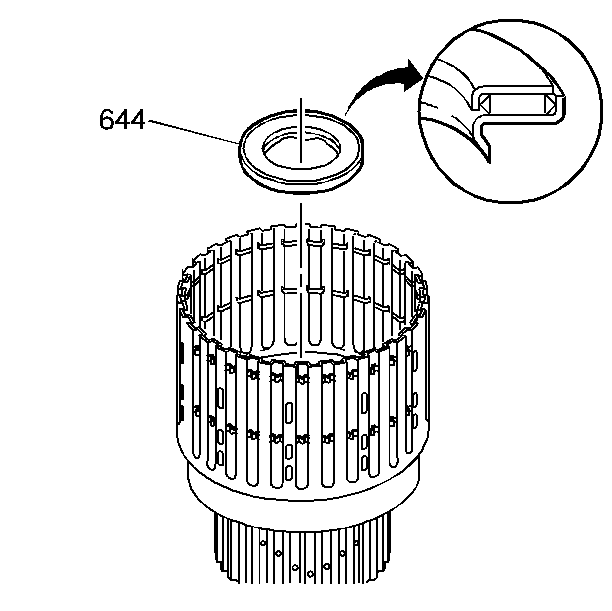
- Insert the input shaft thrust bearing assembly (644).


