For 1990-2009 cars only
Special Tools
J-39400-A Halogen Leak Detector
Removal Procedure
- Remove the auxiliary HVAC module assembly. Refer to Auxiliary HVAC Module Replacement.
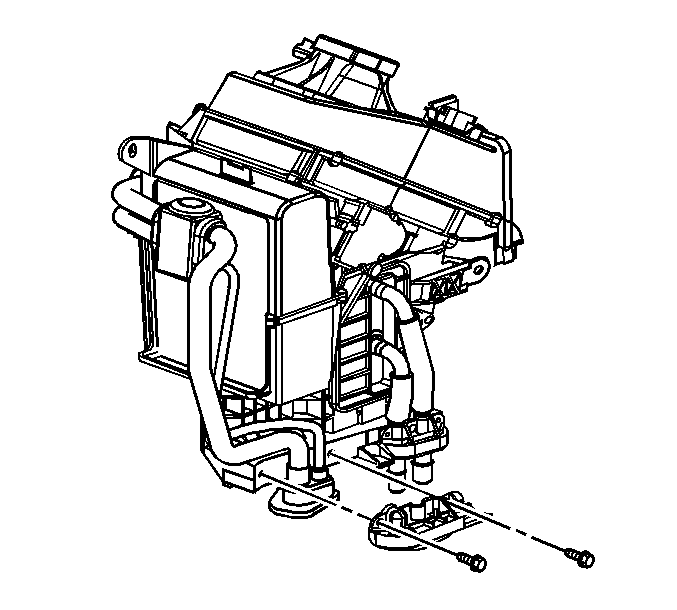
- Remove the auxiliary thermal expansion valve (TXV) line clamp screws.
- Remove the auxiliary TXV line clamp from the HVAC module assembly.
- Remove the TXV insulation.
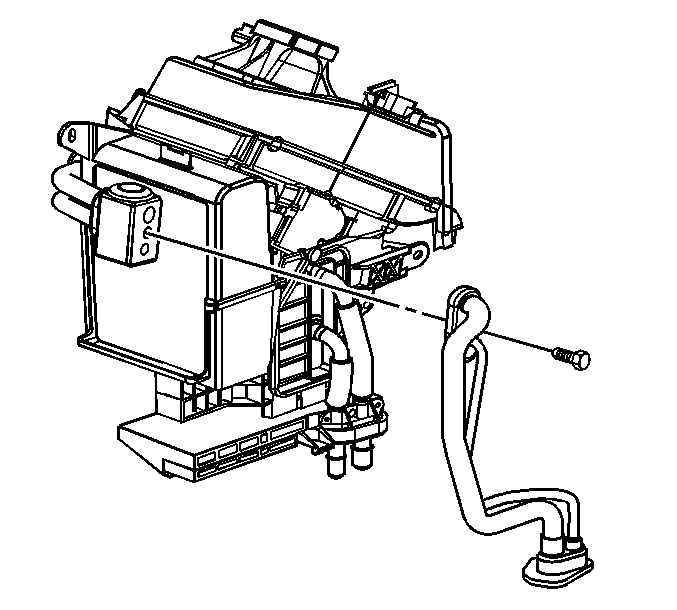
- Remove the bolt from the auxiliary TXV line block fitting.
- Disconnect the A/C lines from the auxiliary TXV.
- Remove and discard the sealing washers.
- Cap or tape the A/C lines.
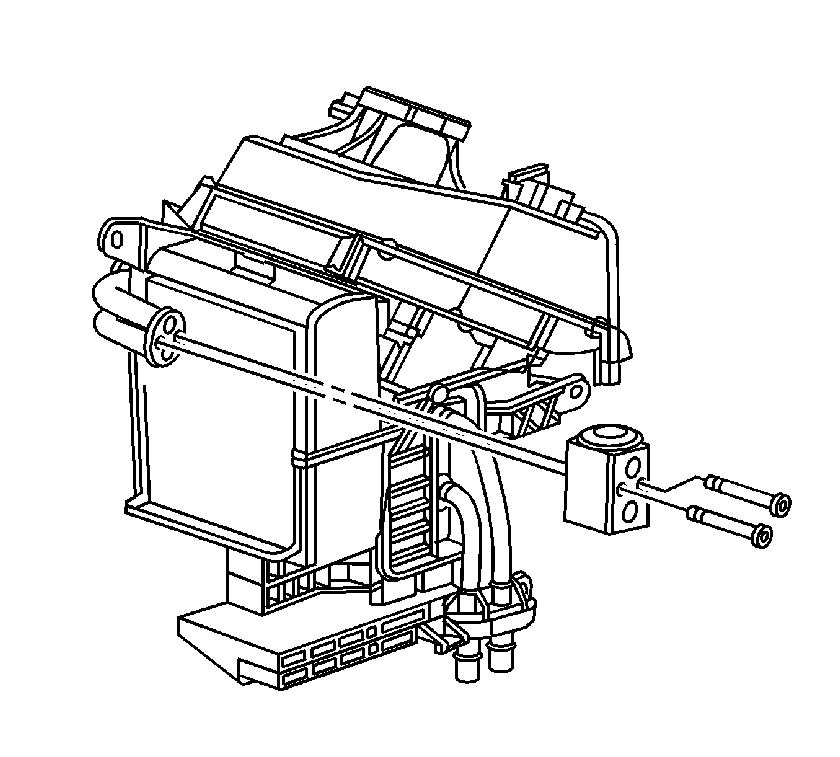
- Remove the auxiliary TXV to auxiliary evaporator core bolts.
- Remove the auxiliary TXV from the auxiliary evaporator core.
- Remove and discard the sealing washers.
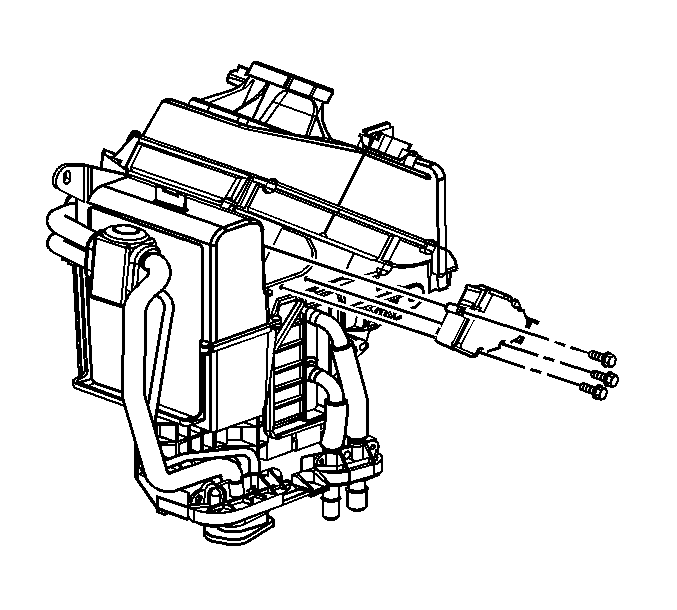
- Remove the auxiliary temperature actuator screws.
- Remove the auxiliary temperature actuator from the auxiliary HVAC module.
- Remove the auxiliary blower motor housing screws.
- Remove the auxiliary blower motor housing from the HVAC module.
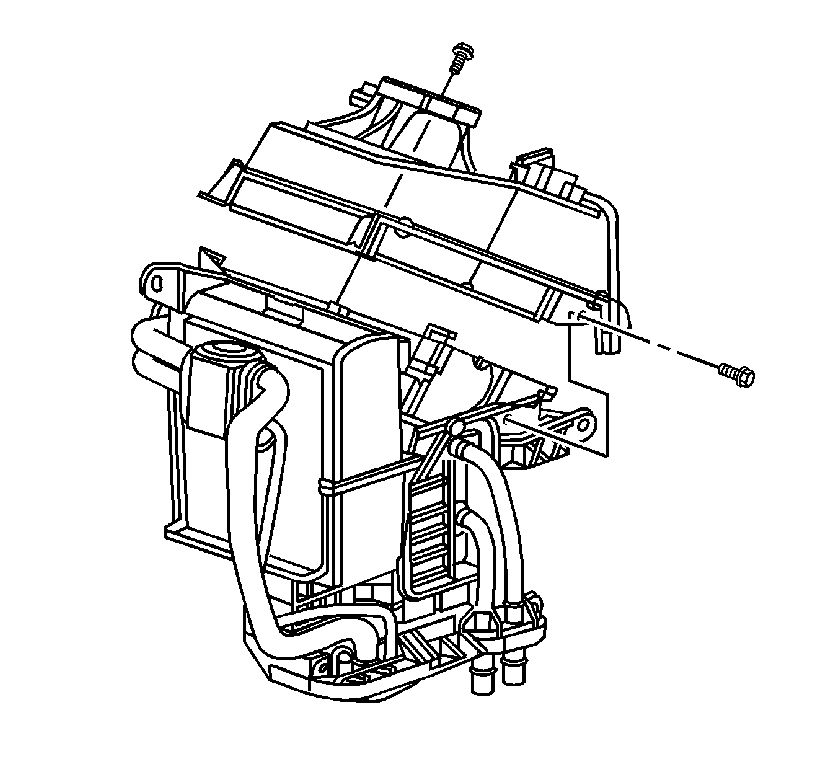
- Remove the auxiliary HVAC module case screws.
- Separate the auxiliary HVAC module case halves.
- Remove the auxiliary evaporator core from the lower HVAC module case.
Note: Cap or tape the open A/C lines immediately to prevent system contamination.
Installation Procedure
- If replacing the auxiliary evaporator core add the specified amount of PAG oil directly to the auxiliary evaporator core. Refer to Refrigerant System Capacities.
- Install the auxiliary evaporator core into the lower HVAC module case.
- Assemble the auxiliary HVAC module case halves.
- Install the auxiliary HVAC module case screws and tighten to 1.6 N·m (14 lb in).
- Install the auxiliary blower motor housing to the HVAC module.
- Install the auxiliary blower motor housing screws and tighten to 1.6 N·m (14 lb in).
- Install the auxiliary temperature actuator to the auxiliary HVAC module.
- Install the auxiliary temperature actuator screws and tighten to 1.6 N·m (14 lb in).
- Install new sealing washers to the auxiliary evaporator core. Refer to Sealing Washer Replacement.
- Remove cap or tape from the A/C lines.
- Install the auxiliary TXV to the auxiliary evaporator core.
- Install the auxiliary TXV to the auxiliary evaporator core mounting bolts and tighten to 3.5 N·m (31 lb in).
- Install new sealing washers onto the auxiliary TXV line block fitting. Refer to Sealing Washer Replacement.
- Connect the auxiliary TXV line block fitting to the auxiliary evaporator core.
- Install the auxiliary TXV line block fitting retaining bolt and tighten to 11 N·m (97 lb in).
- Install the new TXV insulation.
- Install the auxiliary TXV line clamp to the HVAC module assembly.
- Install the auxiliary TXV line clamp screws and tighten to 1.6 N·m (14 lb in).
- Install the auxiliary HVAC module assembly. Refer to Auxiliary HVAC Module Replacement.
- Leak test the fittings of the component using J-39400-A detector .
Caution: Refer to Fastener Caution in the Preface section.


