For 1990-2009 cars only
Removal Procedure
- Remove the front seats. Refer to Front Seat Replacement - Bucket.
- Remove the door sill plates. Refer to Door Sill Plate Replacement.
- Remove the instrument panel (I/P) insulator panel right and left side. Refer to Instrument Panel Insulator Panel Replacement.
- Remove the cowl side panels. Refer to Cowl Side Trim Panel Replacement.
- Remove the center console front cover and side covers.
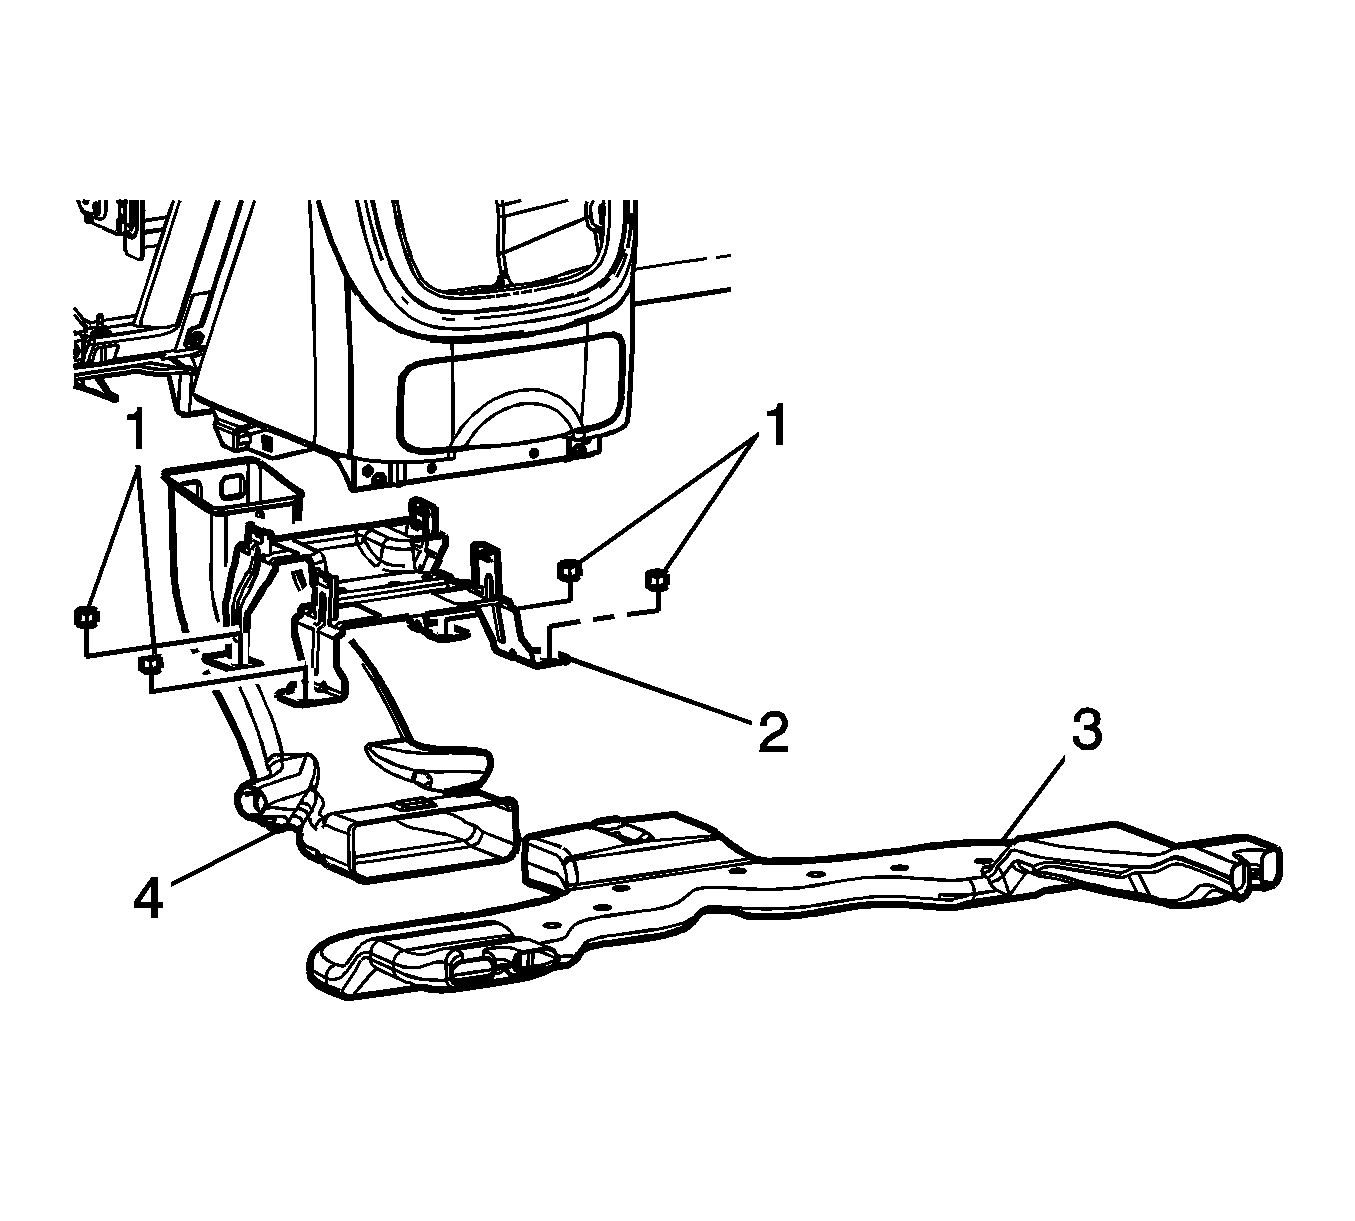
- Remove the floor duct (3) from the center floor duct (2).
- Remove the console reinforcement.
- Reposition the front of the carpet rearward.
- Remove the floor duct brace nuts (1).
- Remove the floor duct brace (2).
- Remove the center floor duct (2).

Installation Procedure
- Install the center floor duct (2).
- Install the floor duct brace (2).
- Install the floor duct brace nuts (1) and tighten to 10 N·m (89 lb in) .
- Install the floor duct (3) to the center floor duct (2).
- Install the console reinforcement.
- Install the center console front cover and side covers.
- Position the front of the carpet forward.
- Install the front cowl panel. Refer to Cowl Side Trim Panel Replacement.
- Install the I/P insulators. Refer to Instrument Panel Insulator Panel Replacement.
- Install the door sill panels. Refer to Door Sill Plate Replacement .
- Install the front seats. Refer to Front Seat Replacement - Bucket .

Caution: Refer to Fastener Caution in the Preface section.
