Tools Required
| • | J 36660-A Torque Angle Meter |
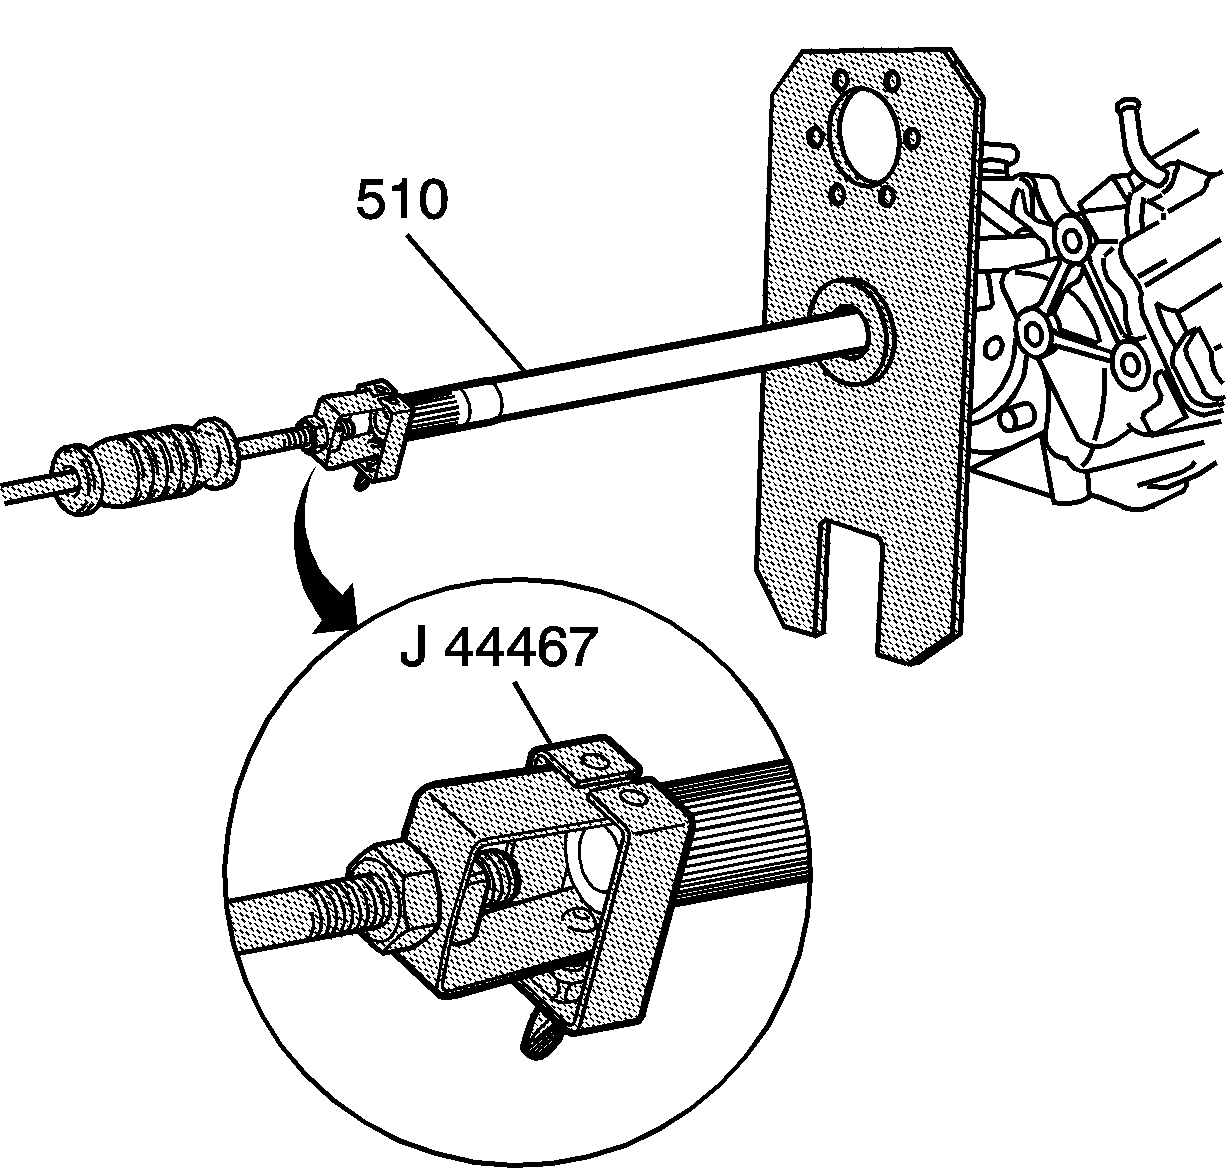
| • | J 44467 Slide Hammer |
| • | J 6125-1B Slide Hammer Adapter |
| • | J 44755 Holding Fixture |
Removal Procedure
Important: Transmission oil circulates between the transmission and the transfer case. In situations where transmission failures circulate debris into the transfer case, the transfer case must be disassembled, cleaned, and inspected for damage. Refer to Transfer Case Transmission Fiber Material Cleaning in Unit Repair.
- Raise and support the vehicle. Refer to Lifting and Jacking the Vehicle in General Information.
- Remove the propeller shaft. Refer to Propeller Shaft Replacement in Propeller Shaft.
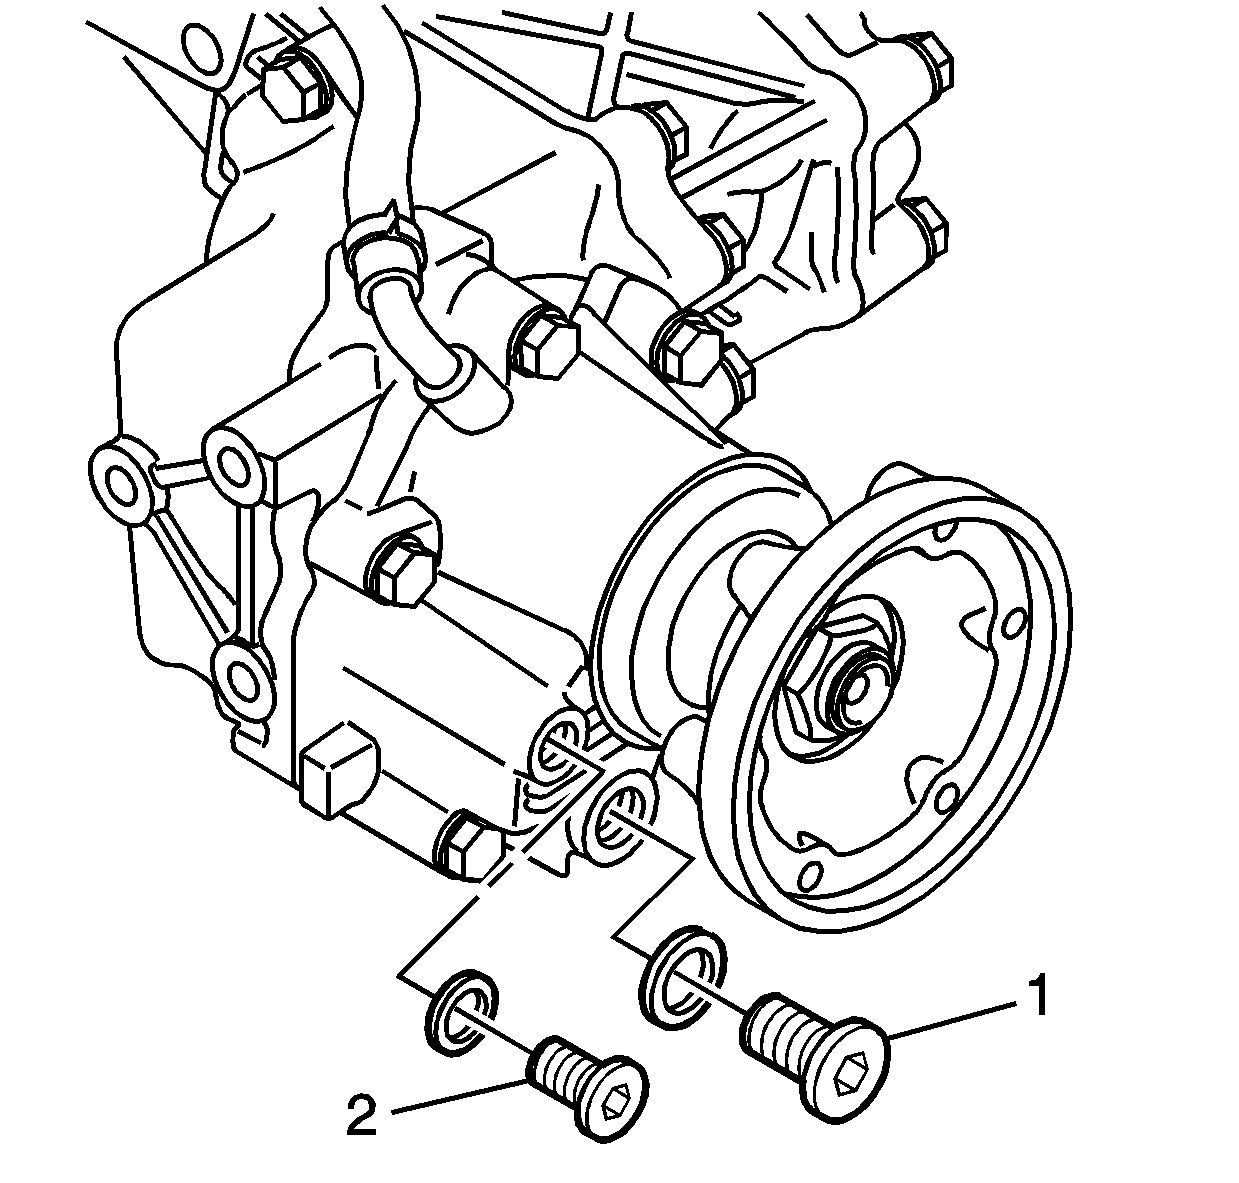
- Remove the drain plug (1) drain the transfer case oil.
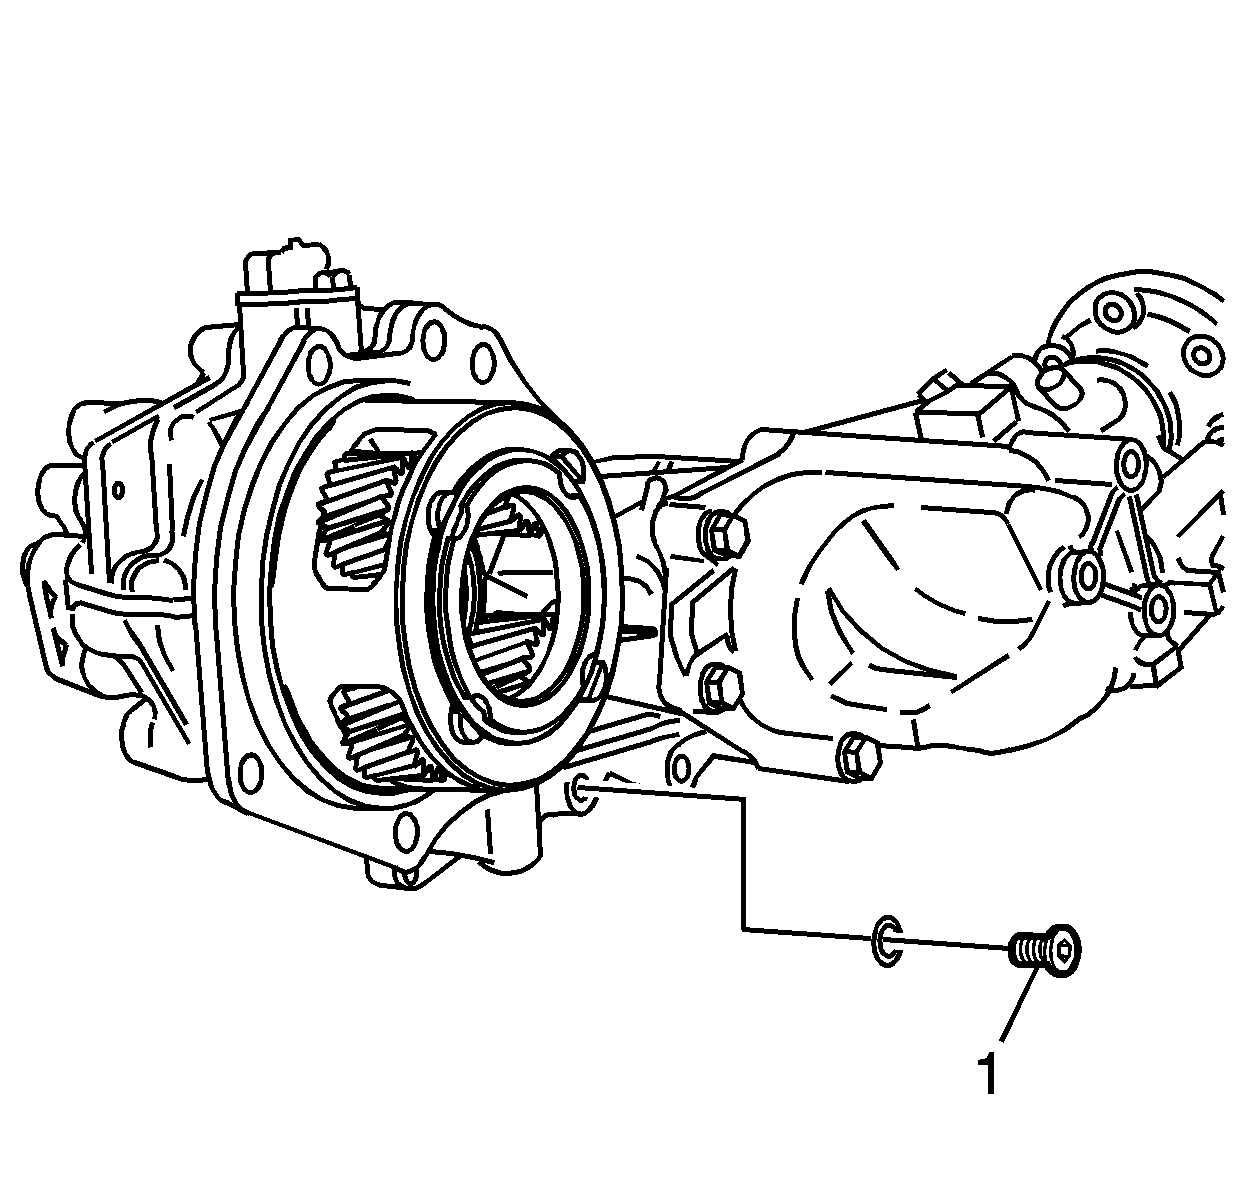
- Remove the drain plug (1) in order to drain the transmission fluid.
- Disconnect the vehicle speed sensor electrical connector.
- Remove the transfer case brace. Refer to Support Brace Replacement .
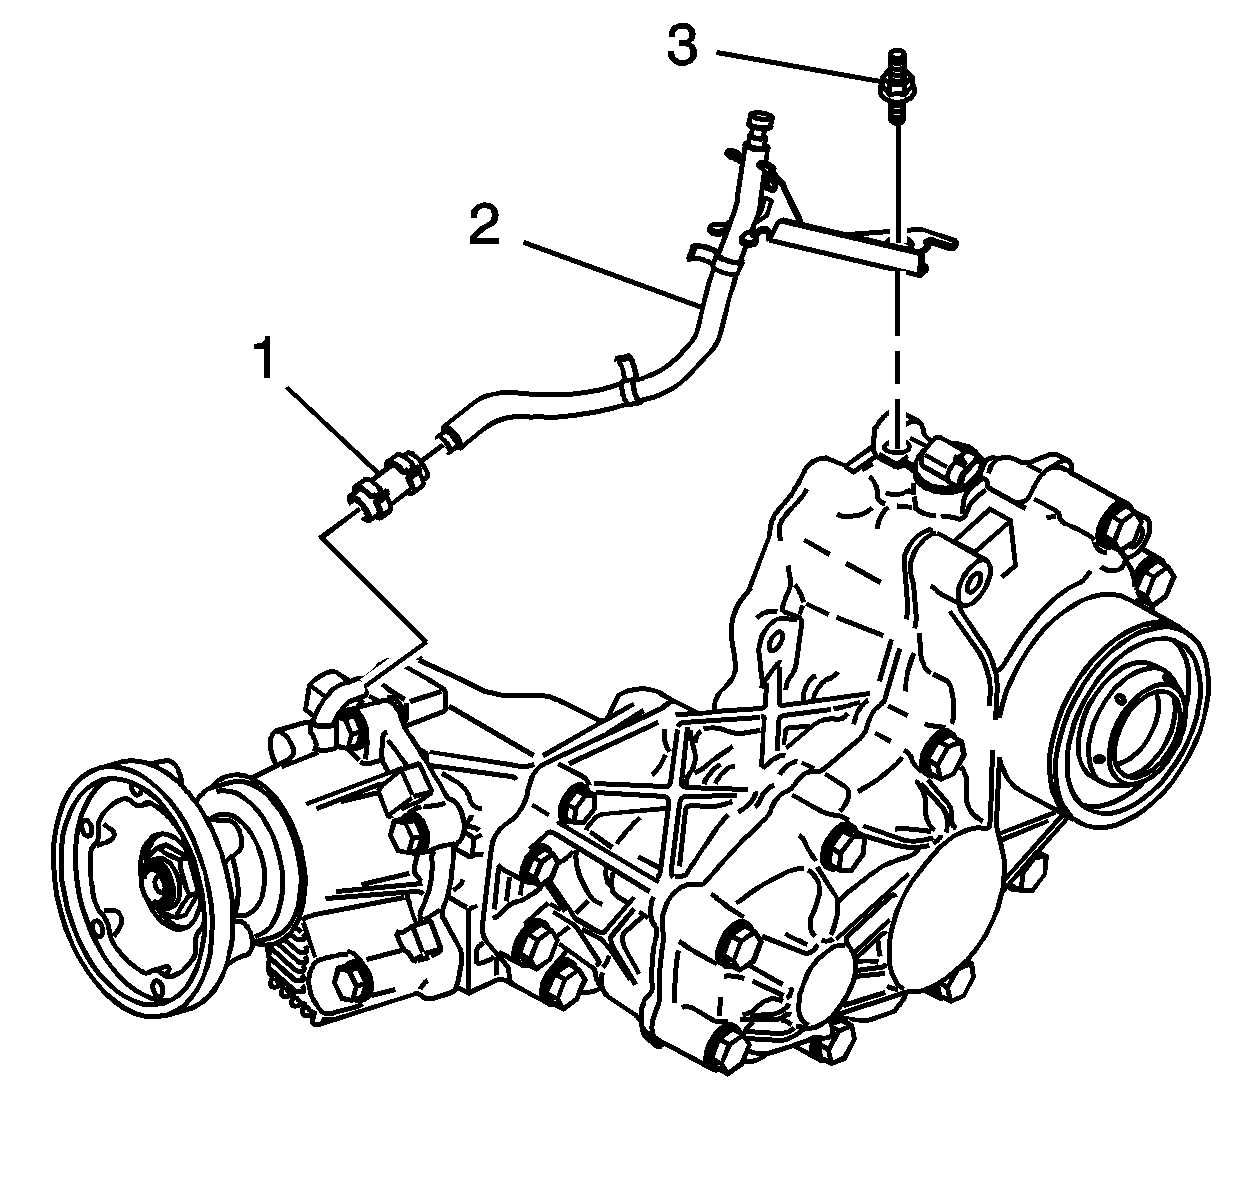
- Remove the vent tube clamp (1).
- Separate the vent tube from the vent tube bracket.
- Remove the vent tube from the transfer case.
- Remove the transfer case with the transaxle. Refer to Transmission Replacement in Automatic Transaxle - 4T65-E.
- Install the transaxle to the transmission support fixture. Refer to Transmission Support Fixture Assemble for the 4T65-E transaxle in Unit Repair.
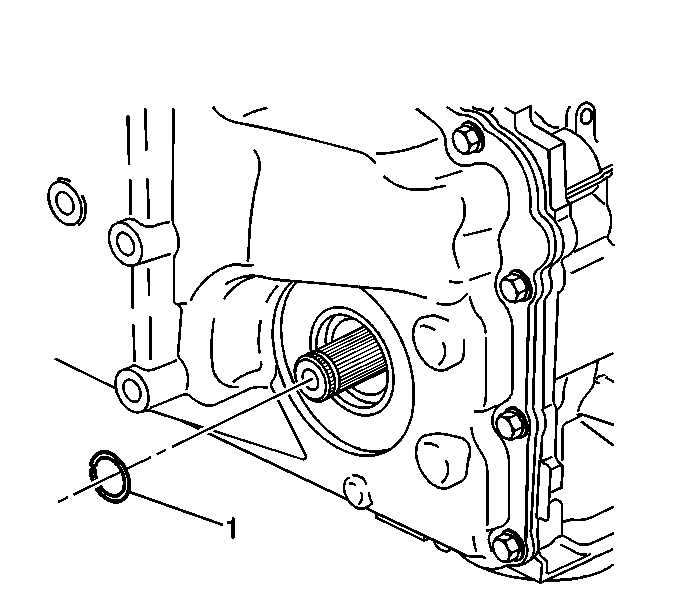
- Remove and discard the left output shaft retaining ring (1).
- Rotate the transaxle 90 degrees so that the transmission side cover is facing down.
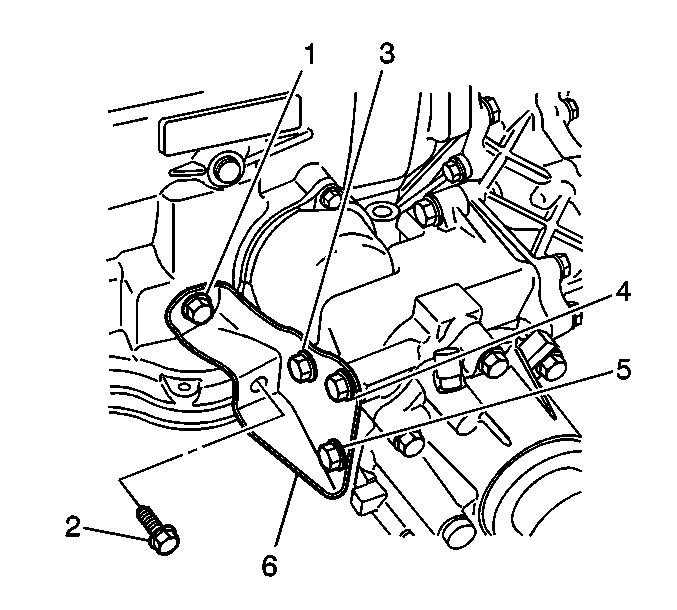
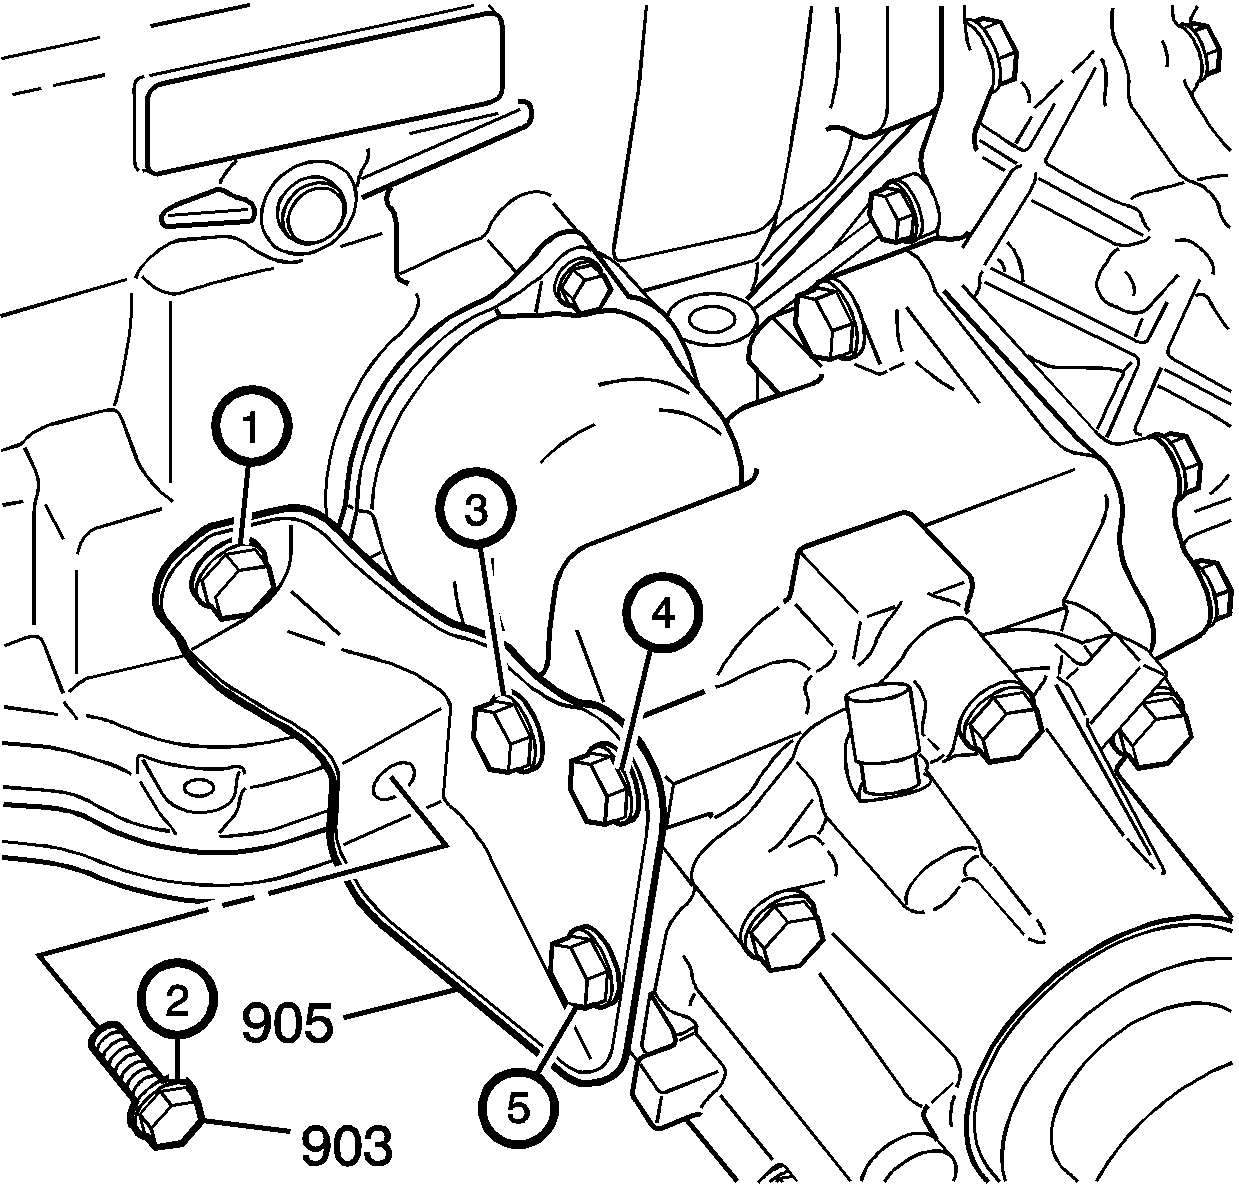
- Remove the transfer case side brace bolts (1-5), and the transfer case side brace (6).
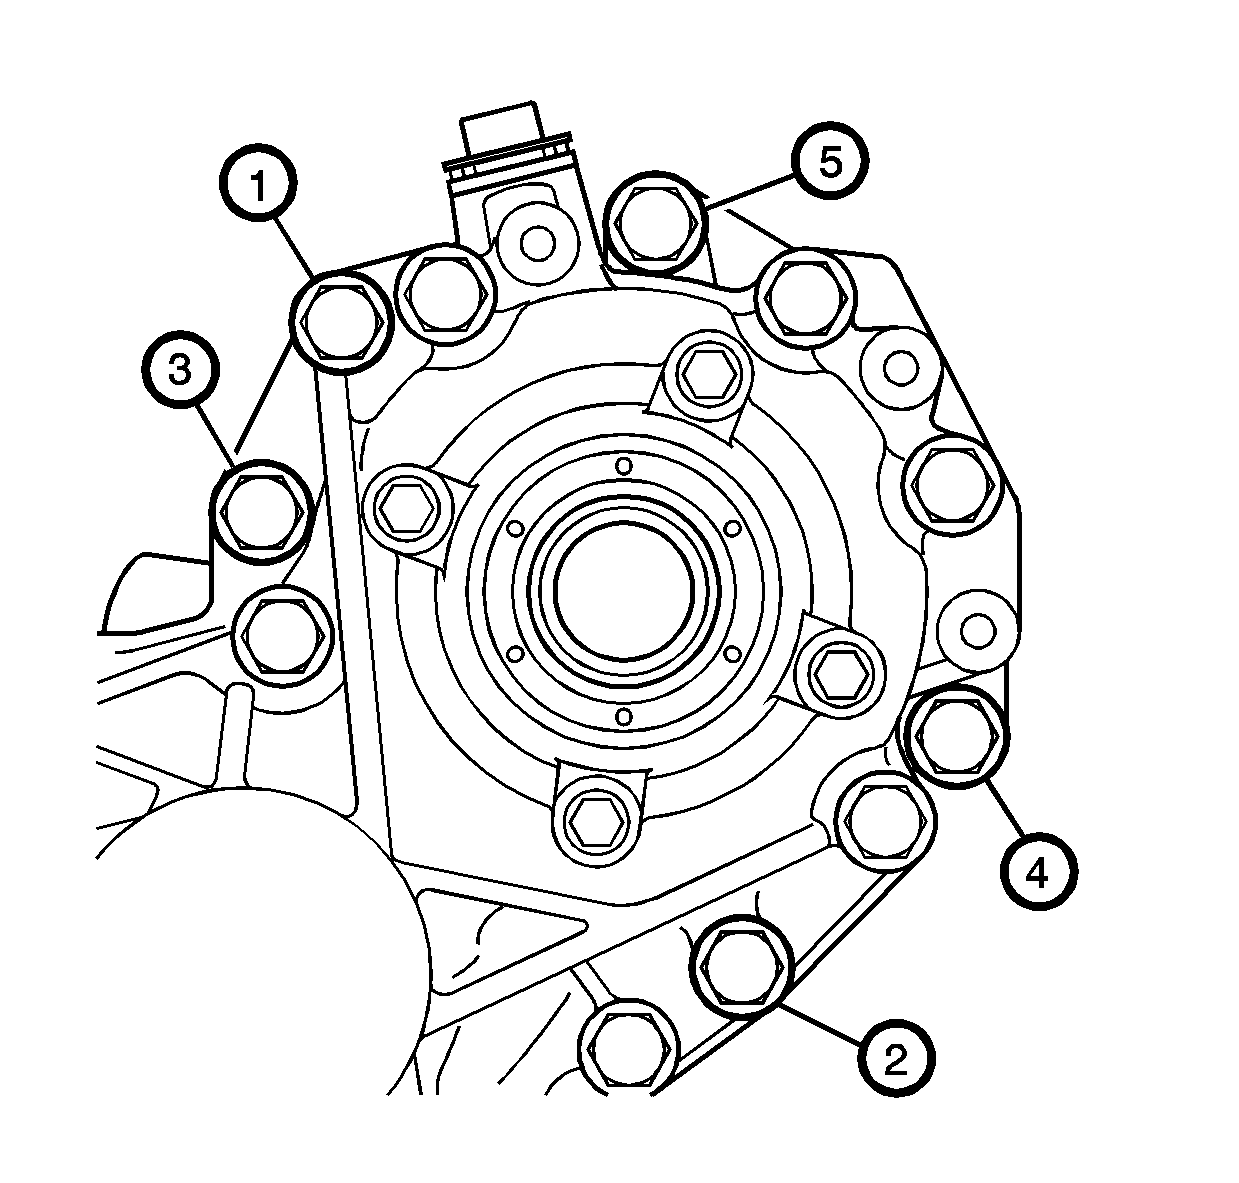
- Remove the transfer case bolts (1-5).
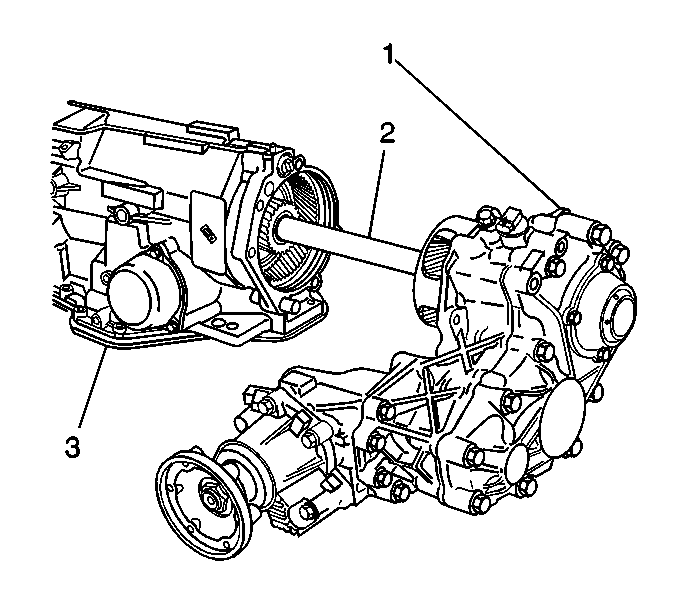
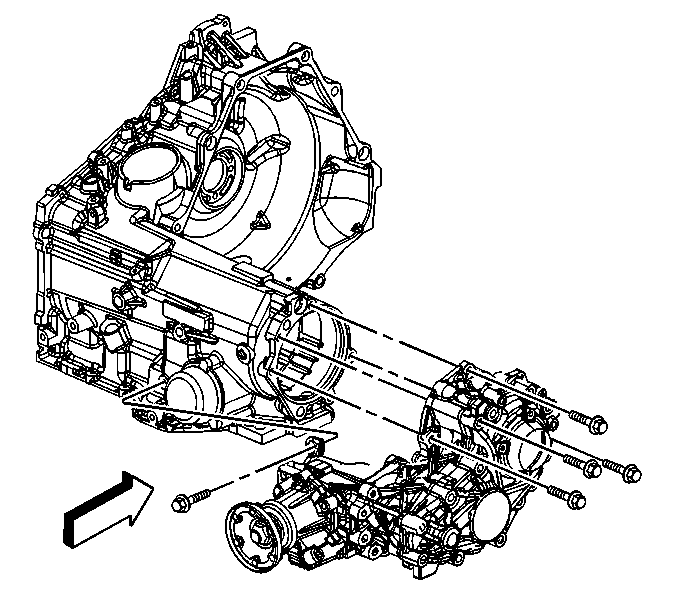
- Remove the transfer case (1) with the output shaft (2) from the transaxle (3).
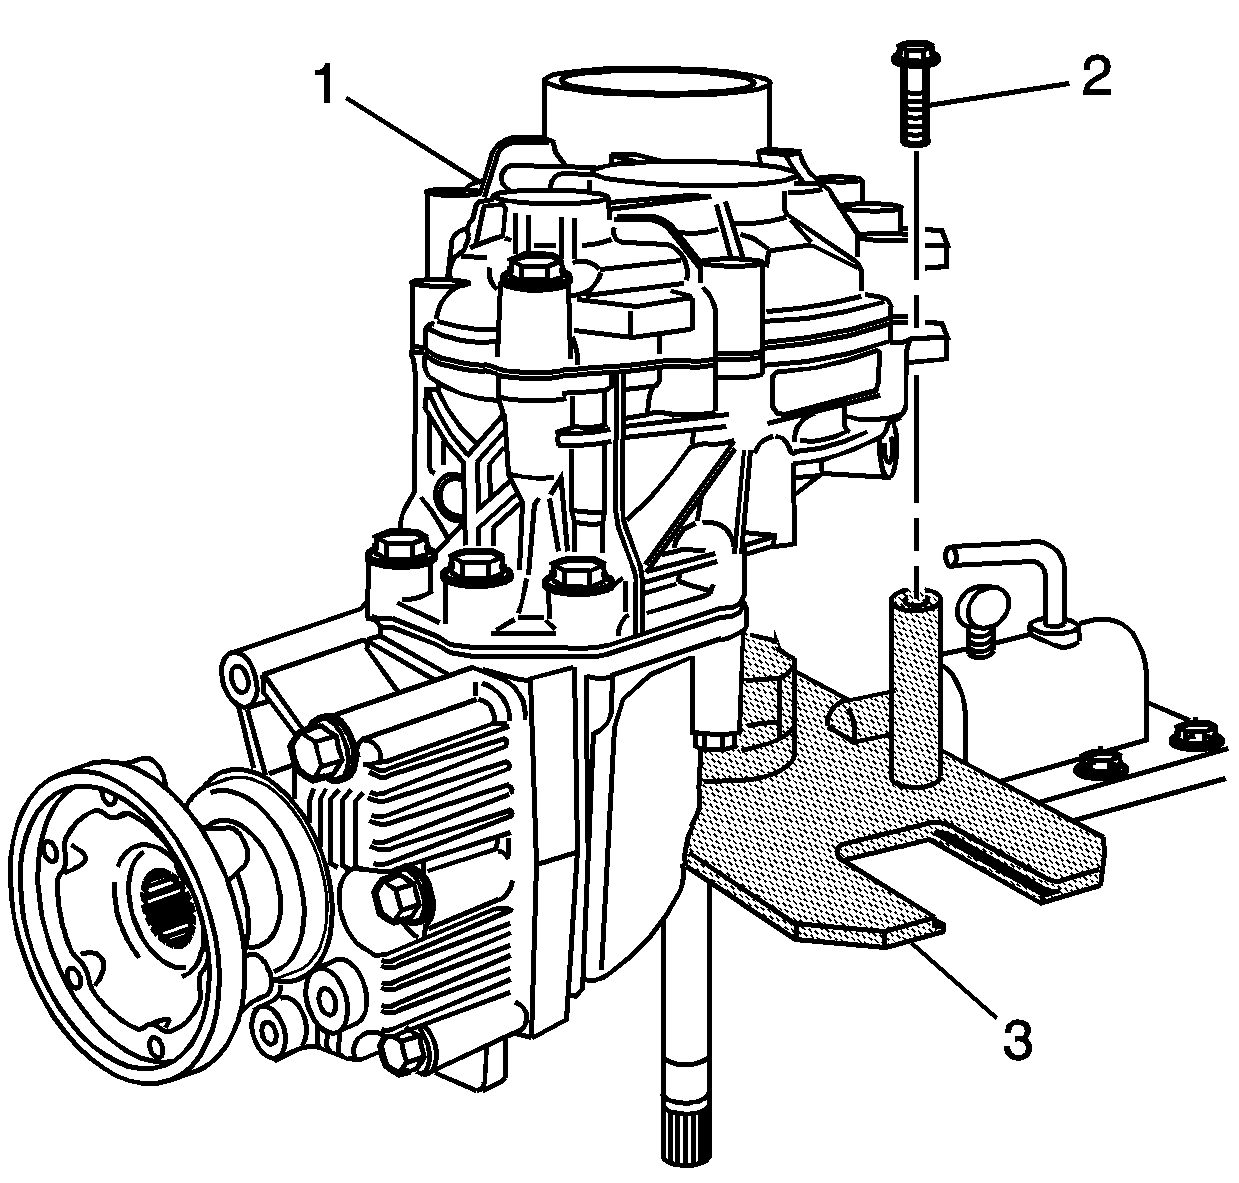
- Install the transfer case assembly (1) to the J 44755 .
- Install the retaining bolts (2).
- Attach the J 6125-1B to the J 44467 .
- Install the J 44467 into the snap ring groove on the output shaft (510) and tighten securely.
- Use the J 6125-1B and the J 44467 to remove the output shaft.
- Remove the output shaft from the transfer case. Perform the following steps.
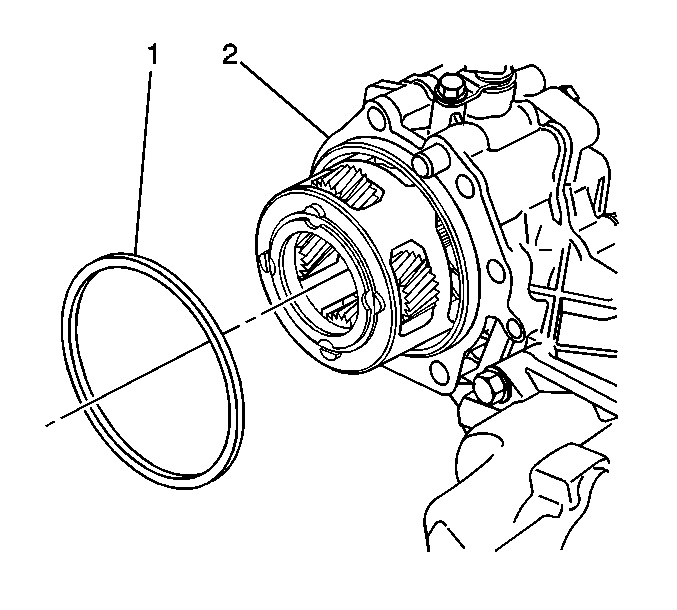
- Remove the transfer case seal (1) from the transfer case (2).
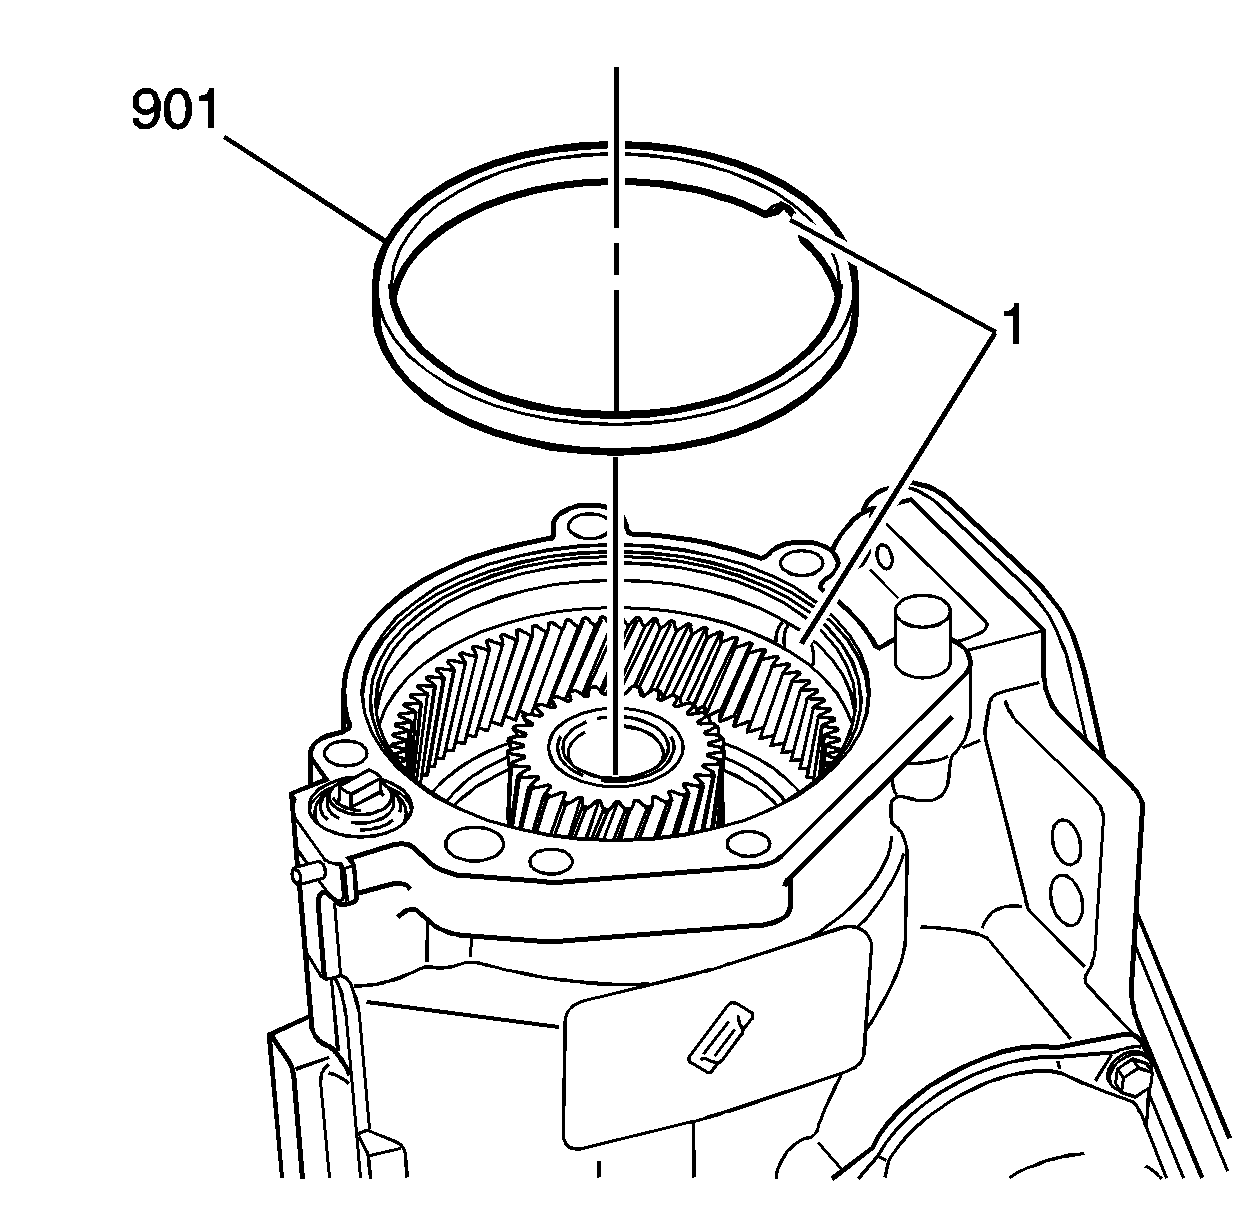
- Remove the oil dam (901) from the transaxle.
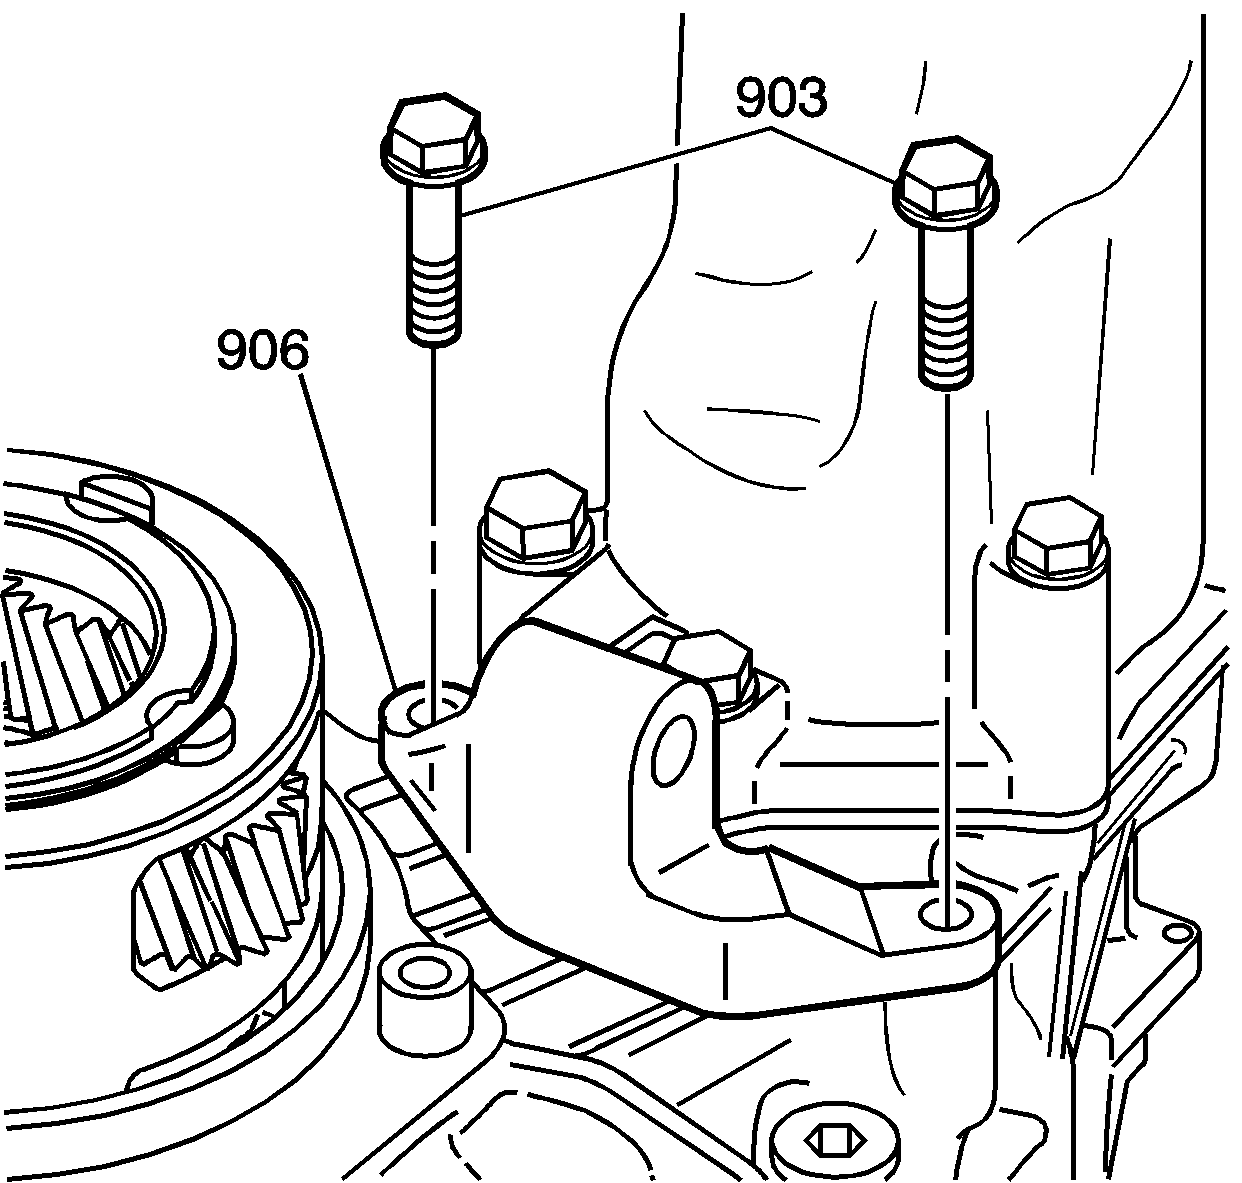
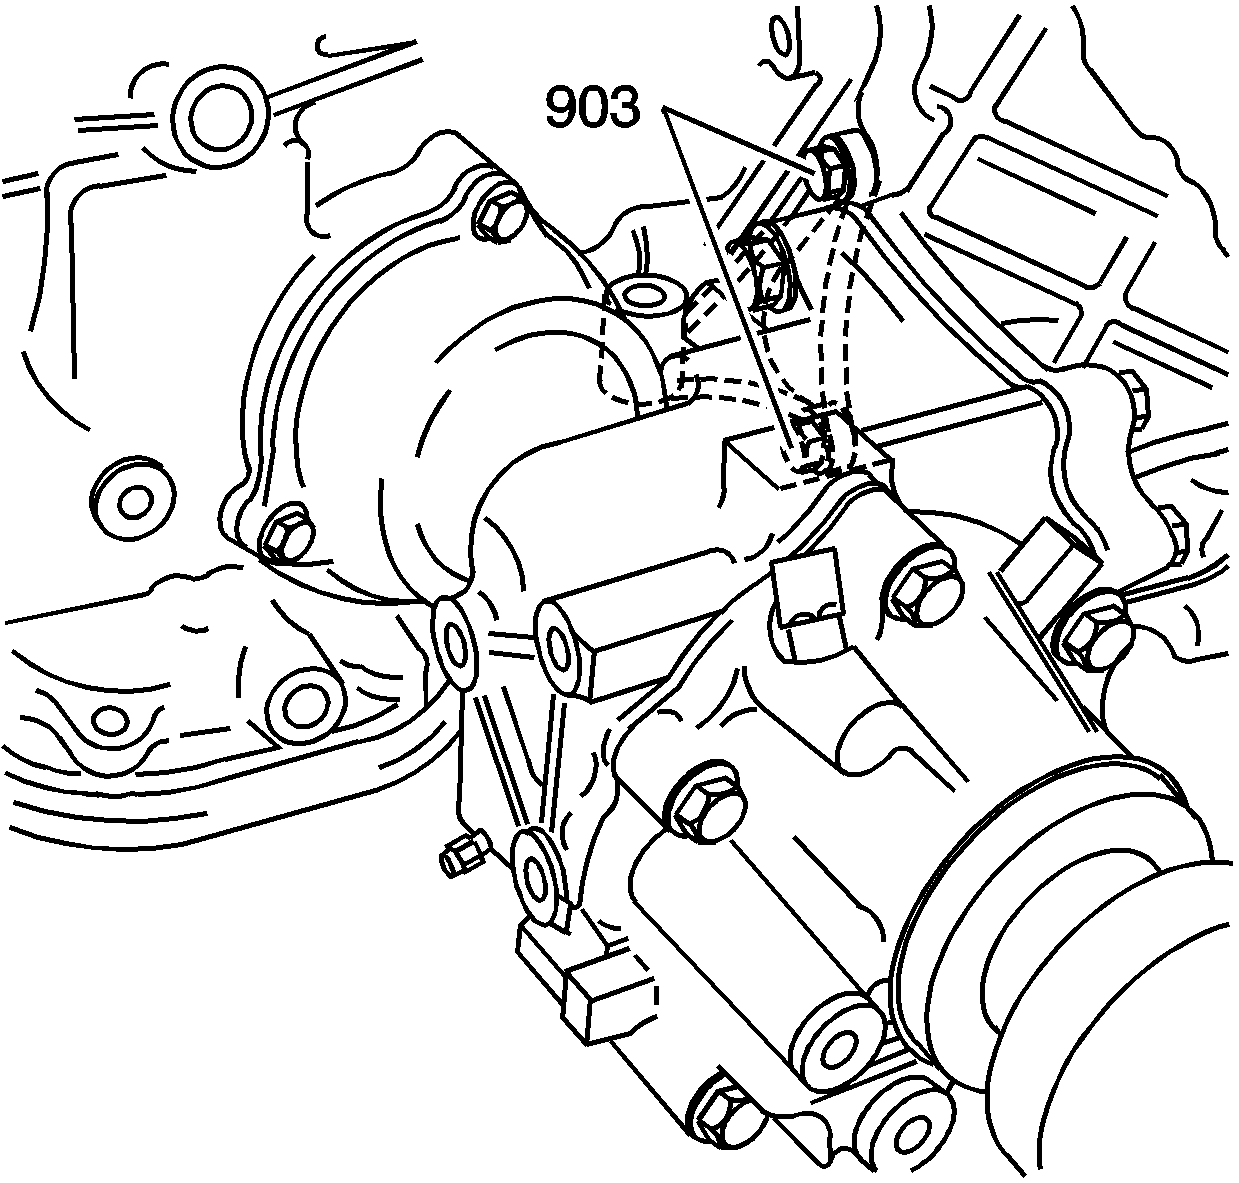
- If you are replacing the transfer case, remove the transfer case lower brace bolts (903) and the lower brace (906).
Notice: Removal and installation of the transfer case while the transmission is in vehicle may cause improper positioning of the park gear thrust bearing. If the transfer case fasteners are tightened while the park gear thrust bearing is out of position, the park gear thrust bearing, transmission, and/or the transfer case will be damaged.
Caution: This component weighs approximately 60 lbs. Personal injury may result if you lift the component improperly.
Notice: During removal of the transfer case/output shaft, do not use excessive force or damage to the bushings may occur.
Notice: Refer to Fastener Notice in the Preface section.
Tighten
Tighten the bolts to 50 N·m (37 lb ft).
Installation Procedure
Important: If you are replacing anything other than gaskets or seals, the transmission to transfer case end play check must be performed. Refer to Transmission to Transfer Case End Play Check for the 4T65-E transaxle in Unit Repair.
- If you are replacing the transfer case, install the transfer case lower brace (906) and the lower brace bolts (903). Do not tighten the bolts.
- Install a new seal transfer case seal (1).
- Install the oil dam (901) to the transaxle.
- Rotate the transaxle 90 degrees.
- Install the transfer case to the transaxle.
- Install the transfer case bolts (1) and (2).
- Tighten the bolts to 35 N·m (26 lb ft).
- Use the J 36660-A to rotate the bolts 160 degrees.
- Install the transfer case bolt (3).
- Tighten the bolt to 35 N·m (26 lb ft).
- Use the J 36660-A to rotate the bolts 70 degrees.
- Install the transfer case bolts (4) and (5).
- Install the transfer case side brace (905).
- Install and tighten the transfer case side brace bolts in the order shown.
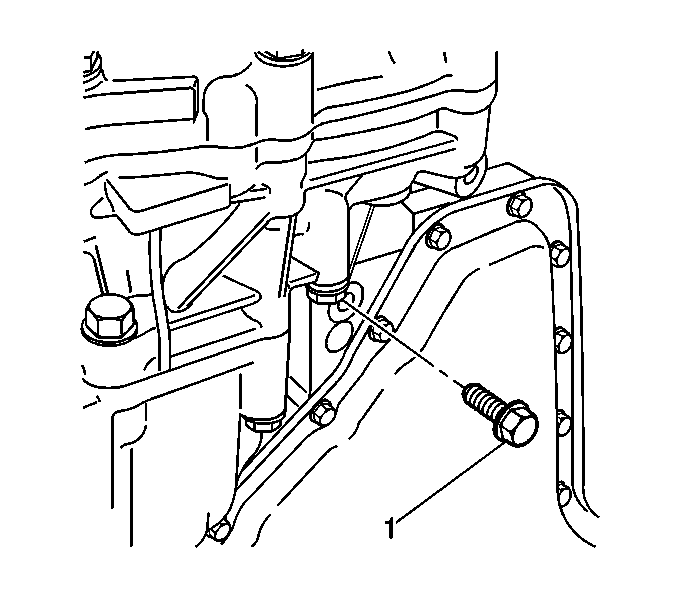
- Install the transfer case lower brace to transaxle bolt (1).
- Tighten the transfer case lower brace to transfer case bolts (903).
- Install the output shaft to the transmission. Refer to Output Shaft Assemble for the 4T65-E transaxle in Unit Repair.
- Install a new output shaft retaining ring (1).
- Install the transaxle with the transfer case. Refer to Transmission Replacement in Automatic Transaxle - 4T65-E.
- Install the vent hose (2) and the clamp (1) to the transfer case.
- Install the vehicle speed sensor electrical connector.
- Install the propeller shaft. Refer to Propeller Shaft Replacement in Propeller Shaft.
- Install the transfer case drain plug and fill the transfer case with the specified synthetic gear oil. Refer to Transfer Case Fluid Replacement .
- Install the drain plug (1) and gasket to the case.
- Install the transfer case lower brace. Refer to Support Brace Replacement .
- Lower the vehicle.
- Inspect and adjust the transmission fluid level. Refer to Transmission Fluid Check in Automatic Transaxle - 4T65-E.


Important: The oil dam (901) must be installed with the notch aligned to the oil passage in the transaxle case (1).
Caution: This component weighs approximately 60 lbs. Personal injury may result if you lift the component improperly.
Notice: Refer to Fastener Notice in the Preface section.

Tighten
Tighten
Tighten
Tighten the bolts to 40 N·m (30 lb ft).
Tighten
Tighten transfer case side brace bolts to 32 N·m (24 lb ft).
Tighten
Tighten the bolt to 56 N·m (42 lb ft).
Tighten
Tighten the bolts to 32 N·m (24 lb ft).


Tighten
Tighten the drain plug to 32 N·m (24 lb ft).
