For 1990-2009 cars only
Liftgate Latch Replacement for Chevrolet Venture 1999
Removal Procedure
- Open liftgate.
- Remove liftgate trim panel. Refer to Liftgate Trim Panel Replacement .
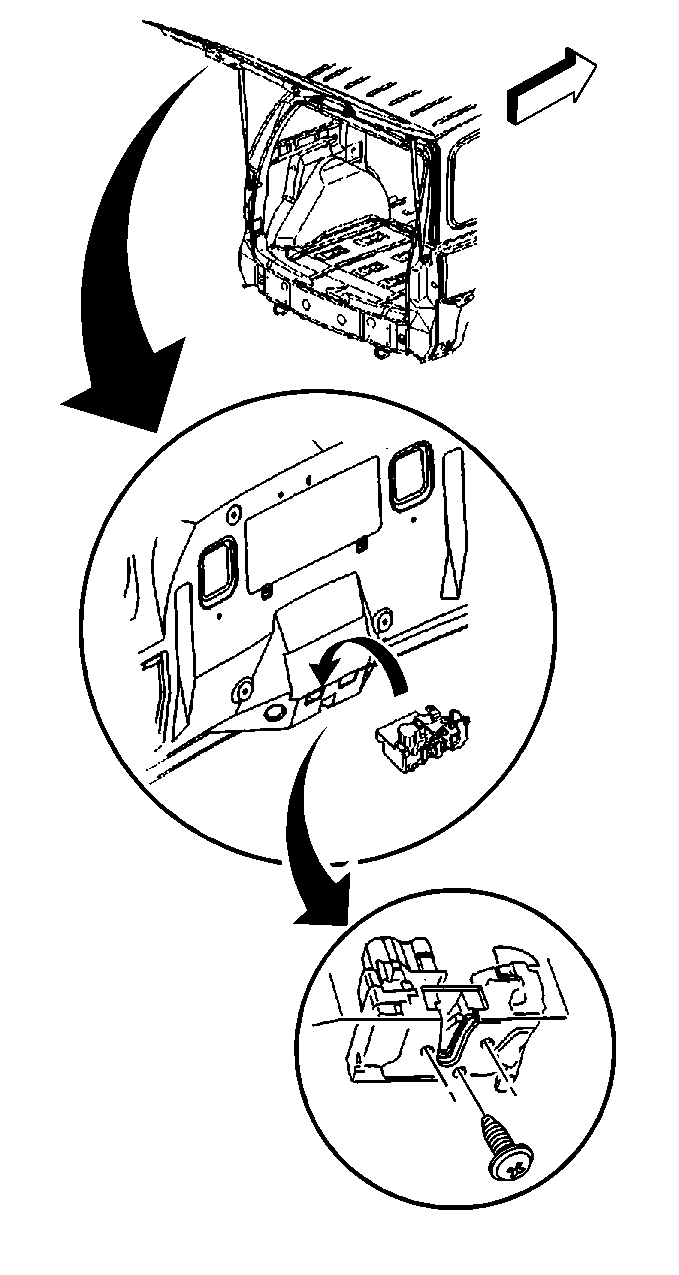
- Remove the liftgate latch retaining bolts.
- Disconnect the electrical connector from the liftgate latch.
- Remove the lock cylinder rod and latch cable from the liftgate latch.
- Remove the liftgate latch from the liftgate.
Installation Procedure
- Install the liftgate latch to the liftgate
- Install the lock cylinder rod and latch cable to the liftgate latch.
- Connect the electrical connector to the liftgate latch.
- Install the liftgate latch retainer bolts.
- Install the liftgate trim panel. Refer to Liftgate Trim Panel Replacement .
Notice: Use the correct fastener in the correct location. Replacement fasteners must be the correct part number for that application. Fasteners requiring replacement or fasteners requiring the use of thread locking compound or sealant are identified in the service procedure. Do not use paints, lubricants, or corrosion inhibitors on fasteners or fastener joint surfaces unless specified. These coatings affect fastener torque and joint clamping force and may damage the fastener. Use the correct tightening sequence and specifications when installing fasteners in order to avoid damage to parts and systems.
Tighten
Tighten the retaining bolts to 10 N·m (89 lb in).
