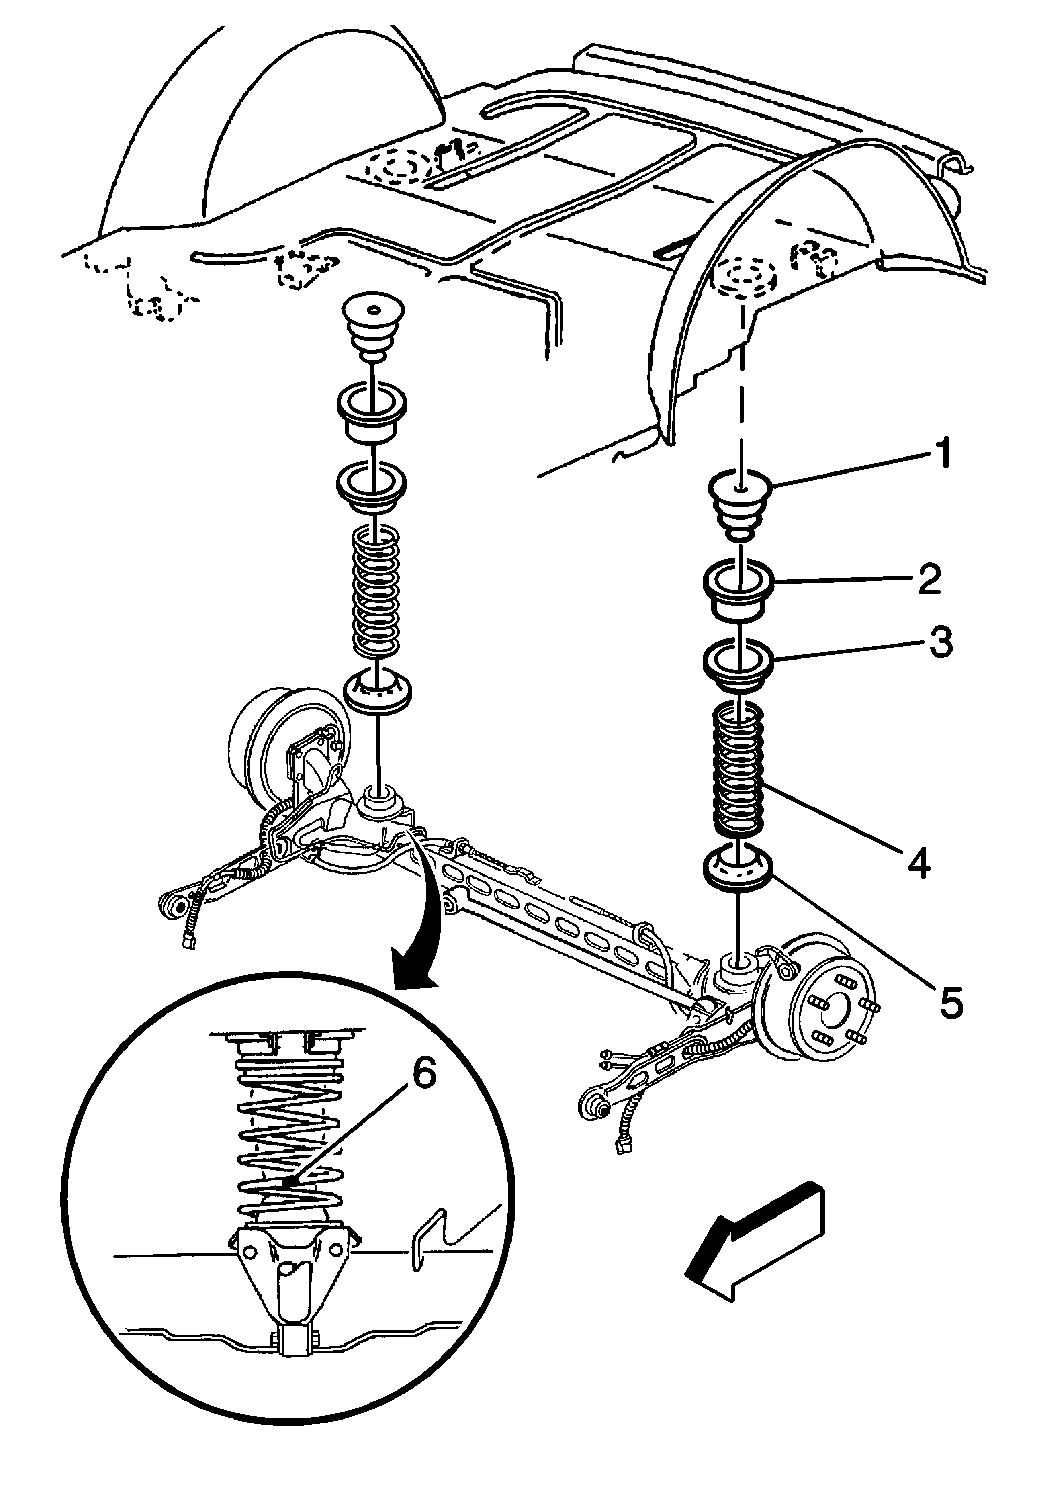
Removal Procedure
Caution: When removing the rear springs, do not use a twin-post type hoist. The swing arch tendency of the rear axle assembly when certain fasteners are removed may cause it to slip from the hoist which may cause personal injury.
- Raise and support the vehicle. Refer to Lifting and Jacking the Vehicle in General Information.
- Remove the brake hose bracket screw from the control arm. Refer to Brake Intermediate Hose Replacement in Hydraulic Brakes.
- Use the utility stand in order to support the center of the rear axle.
- Remove the shock absorber lower bolts and nuts. Refer to Shock Absorber Replacement .
- Remove the rear axle tie rod from the rear axle. Refer to Tie Rod Replacement .
- Use the utility stand in order to lower the rear axle.
- Remove the springs (4) and the insulators (5).

Notice: Do not suspend the rear axle by the brake hoses. Damage to the brake hoses may result.
Notice: Care should be taken to avoid chipping or scratching the spring coating when handling the rear suspension coil spring. Damage to the coating can cause premature failure.
Installation Procedure
- Install the springs (4) and the insulators (5) to the rear axle.
- Use the utility stand in order to raise the rear axle.
- Install the rear axle tie rod to the rear axle. Refer to Tie Rod Replacement .
- Install the shock absorbers to the rear axle. Refer to Shock Absorber Replacement .
- Install the brake hose bracket to the control arm. Refer to Brake Intermediate Hose Replacement in Hydraulic Brakes.
- Remove the utility stand.
- Lower the vehicle.

Notice: Care should be taken to avoid chipping or scratching the spring coating when handling the rear suspension coil spring. Damage to the coating can cause premature failure.
Important: Position the spring so that the paint stripe (6) is facing rearward and centered to the shock absorber.
