For 1990-2009 cars only
SMU - Revised Window Regulator Replacement - Front Door and Door Module Replacement - Front

| Subject: | Revised Window Regulator Replacement - Front Door and Door Module Replacement - Front |
| Models: | 2003-2004 Chevrolet Venture |
| 2003-2004 Oldsmobile Silhouette |
| 2003-2004 Pontiac Montana |
This bulletin is being issued to revise the Window Regulator Replacement - Front Door and Door Module Replacement - Front procedures in the Doors sub-section of the Service Manual. Please replace the current information in the Service Manual with the following information.
The following information has been updated within SI. If you are using a paper version of this Service Manual, please make a reference to this bulletin on the affected page.
Window Regulator Replacement - Front Door
Removal Procedure
- Remove the door trim panel. Refer to Trim Panel Replacement -- Side Front Door.
- Remove the water deflector. Refer to Water Deflector Replacement - Front Door.
- Disconnect the wiring harness connector from the regulator motor connector.
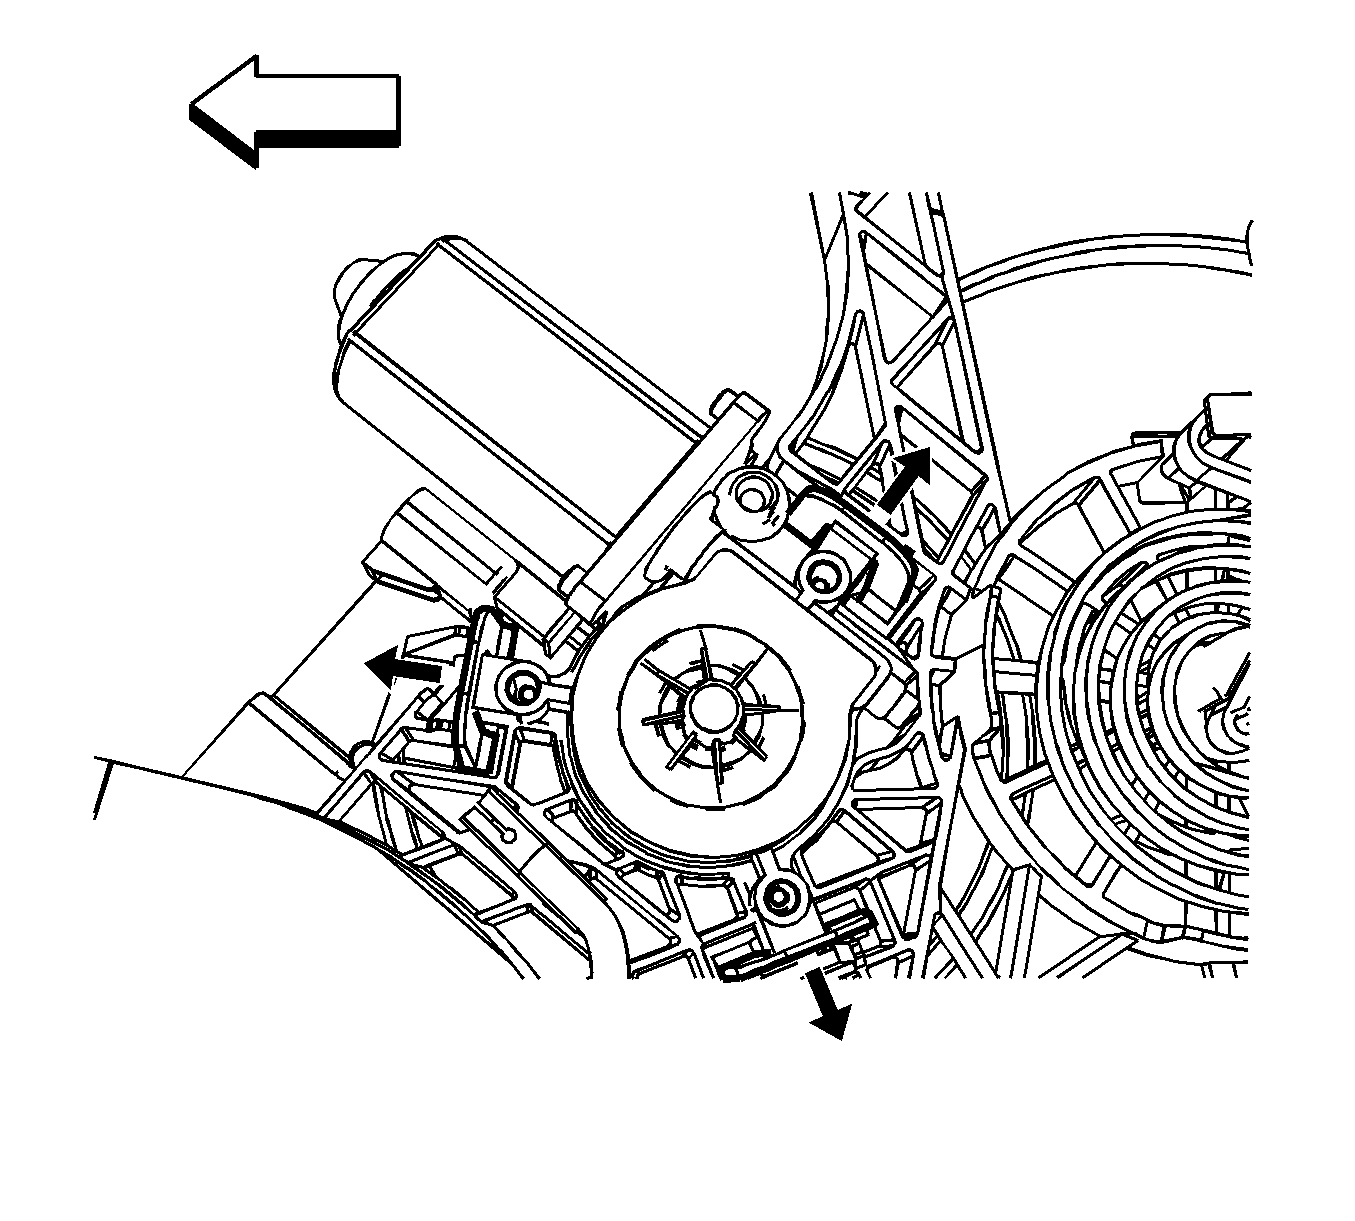
- Gently flex the 3 motor retaining tabs to release the motor from the door module.

Installation Procedure
- Lubricate the motor drive gear teeth.
- Position the power window module motor to the three window module retaining tabs. Press into place until fully seated.
- Connect the wiring harness connector to the regulator motor connector.
- Install the water deflector. Refer to Water Deflector Replacement -- Front Door.
- Install the trim panel. Refer to Trim Panel Replacement -- Side Front Door.

Important: The glass may need to be moved up or down in order to align the motor pinion teeth to the sector teeth.
Door Module Replacement - Front
Removal Procedure
- Remove the door trim panel. Refer to Trim Panel Replacement - Side Front Door.
- Remove the water deflector. Refer to Water Deflector Replacement -- Front Door.
- Remove the front door speaker. Refer to Speaker Replacement - Front in Entertainment.
- Disconnect the door wiring harness from the body harness.
- Disconnect the sash from the glass by squeezing the tabs on both of the glass attachment clips at the same time. With the tabs pressed down, slide the sash in the direction of the snap tabs until the sash clips clear the glass attachment clips.
- Slide the glass full up and tape in place.
- Remove the 3 latch screws.
- Remove the outside handle from the door, including the disconnecting rod. Refer to Door Handle Replacement - Front Outside.
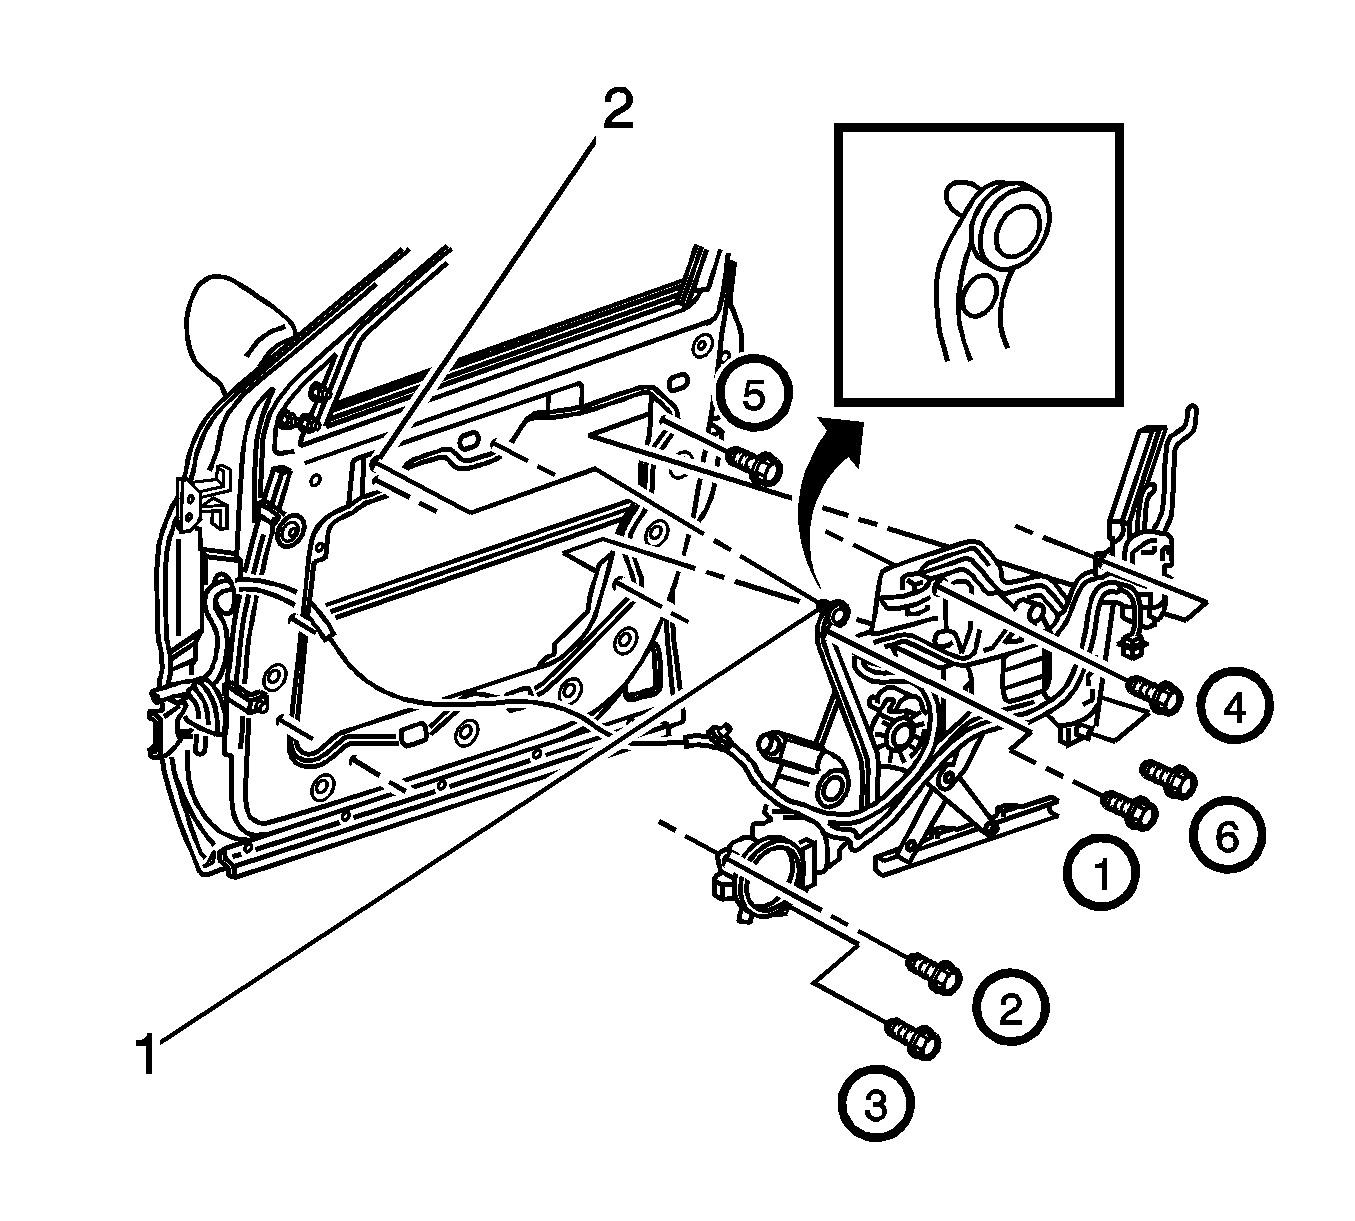
- Pull the door harness through hinge face into door cavity and remove the door module (6 screws total).

Installation Procedure
- Position the front door hardware module to the front door.
- Align the modular locator pin (1) into the 4-way locating hole (2).
- Install the front door module screws.
- Install the outside handle including the rod connect. . Refer to Door Handle Replacement - Front Outside.
- Remove the tape on the glass and install the glass to the door module sash.
- Load the door wiring harness through the hinge face and attach to the body harness.
- Install the front door water deflector. Refer to Water Deflector Replacement - Front Door.
- Install the front door speaker. Refer to Speaker Replacement - Front in Entertainment.
- Install the door trim panel. Refer to Trim Panel Replacement - Side Front Door.

Notice: Refer to Fastener Notice in Cautions and Notices.
Tighten
Tighten the screws, as shown, to 10 N·m
(89 lb in).
